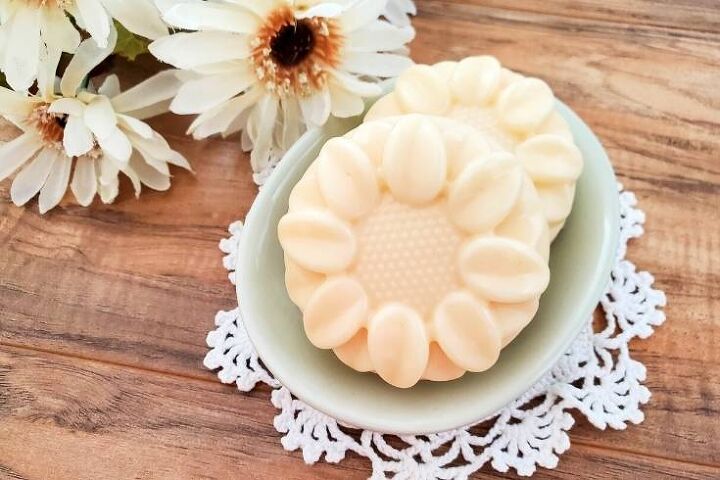
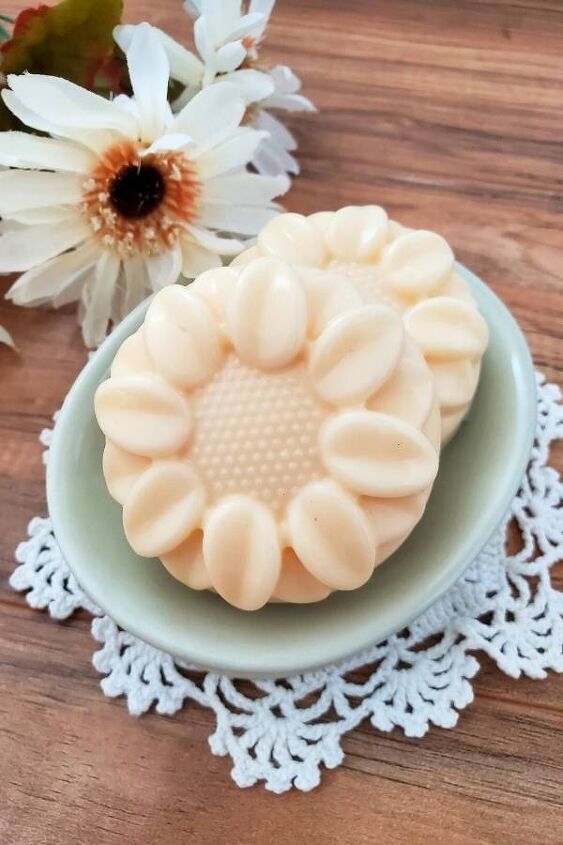
Easy Melt and Pour Soap Recipe: Plus How to Make Sunflower Soap
Discover how easy it is to make melt and pour soap at home! This sunflower soap recipe is perfect for beginners. Whether you’ve made soap previously, or you’re new to melt and pour soap making, this easy recipe will serve as a handy guide to making adorable, handcrafted soaps. This adorable soap can be used as a hand soap or for the body, and it makes a great gift for friends and family. Plus discover additional recipes perfect for beginning soap crafters.
How Do You Make Soap for Beginners?
Learning how to make melt and pour soap for beginners is an easy way to get started making your own bath and body recipes without a big investment. You only need to buy a few basic tools to make this sunflower soap recipe. In addition, there are only several ingredients that you need to purchase to complete this project.
I love making cold process soap recipes. In fact, I formulated, produced and sold my own handmade soaps for many, many years. While cold process soap is a lot of fun to make, it’s not an easy craft for beginners. Therefore, when I first got into making handmade soap, I started out making melt and pour soaps. To help you get started on your own soap making journey, I created an easy melt and pour soap recipe to help you get started. Not only is this a simple introduction on how to make soap, it’s also an affordable alternative to making lye soap from scratch.
My glycerin soap recipe for sunflower soap is a great way to get started making soap for the first time. This craft tutorial is a fun DIY project for older children, teens and adults. It’s also perfect for a craft night with friends! While melt and pour soap crafting is generally a family friendly craft, you do need to be careful pouring hot soap into the mold. Older children can also help choose the mold and additives to create their own soap.
Easy Melt and Pour Soap
Melt and pour soap making is an easy craft for beginners. All you need to get started is a premade glycerin soap base and a mold. While color and fragrance make a nice addition, you don’t necessarily need these ingredients to make your first bar. In addition, you can also save money by upcycling common household containers to use as soap molds.
By contrast, to make cold process soap, you will need quite a few more ingredients to get started making soap. This is because you are creating your soap based from scratch, and not use a pre-made glycerin soap base. Therefore, to make soap with lye. To make cold process soap you need water, fats (oils or butters) and lye. Colorants and fragrances can also be included. And, of course, you also need to use additional equipment, including a scale, to make your first batch of handmade soap.
This is why I recommend learning how to make melt and pour soap for beginners. Not only is it easier to make than cold process soap, it’s also less expensive to get started. Cold process soap does have its benefits. However, glycerin soap making is a great stepping stone when you are learning how to make homemade soap for the first time.
At the same time, it’s important not to dismiss melt and pour soap making as a craft for hobbyists. Glycerin soap making can also be a profitable small business. You can get really creative with molds, colors and additives to create beautiful soaps online on Etsy, in your own online shop or at farmers markets and craft fairs. As there are several kinds of melt and pour bases available, this gives you a wide range of options for homemade soaps you can make and sell.
What is Melt and Pour Soap Made Of?
Melt and pour soap is a premade glycerin soap base that can be cut into chunks and melted to create exciting soap designs. Some glycerin soap bases are made using synthetic detergent foaming agents, similar to what is found in many household shampoos and syndet shampoo bars. Glycerin is then added to the final product for its humectant and skin conditioning properties. Other types of bases are made using the same process as cold process soap.
The majority of the natural soap bases available on the market count as true soap. This means they are made using a combination of fats and an alkali (lye) as the primary components of the formulation. Glycerin and colorants, or other additives such as oatmeal, may also be included in the formulation. While true soap is made using lye, just like cold process soap, the glycerin soap base you buy has already gone through the saponification process. (The chemical process in which the lye is completely used up to convert the fats into soap.) The soaps are then it’s cured before being sold in their final form. (You can learn more about the soap making process here.)
Is Melt and Pour Soap Natural?
Not all melt and pour soap bases are natural. As previously mentioned, there are both synthetic and natural melt and pour bases.
Natural melt and pour soap bases are typically made using the traditional soap making method. This involves combining fats and an alkali. If you want to opt for a natural base for your easy melt and pour soap recipes, look for bases that include sodium hydroxide (lye) on the ingredient list. You want to avoid ingredients that are used as foaming agents, such as SLS.
Both types of bases also contain glycerin. Typically, synthetic bases add glycerin to the formulation so it doesn’t feel as drying. Whereas, soap made using fats and an alkali naturally produce glycerin as a by-product of the soap making method. Therefore, not all natural soap bases may include glycerin in the ingredient list. While it may be part of the glycerin soap base you purchase, if it’s not specifically added then it won’t be in the list of ingredients.
Some melt and pour manufacturers use synthetic foaming agents to make their soap bases in order to save money. While the type of soap you choose to make soap is dependent on your preference, I recommend that you carefully research brands before purchase if you are looking for a natural base to create your homemade soaps.
Does Melt and Pour Soap Have to Cure?
Cold process soap typically needs to cure for four to six weeks. Not only does this allow time for completion of the saponification process, it primarily helps create a better bar of soap. After curing, cold press soap is harder, produces a better lather and has a lower PH than fresh soap.
On the other hand, melt and pour soap is cured before it leaves the manufacturer and makes it way to the consumer. Therefore, you do not need to allow glycerin soap to cure after making this easy soap recipe. It comes ready to use right out of the packaging. As my sunflower soap recipe is made using a melt and pour soap base, it does not need to cure prior to use.
Some soap makers prefer to let their melt and pour soaps sit for a week or two before using it. In some instances, this can help the soap bars harden further, so that they last longer. A drawback to this, however, is that unwrapped glycerin soaps tend to attract water in high humidity. This can result in glycerin dew, or beads of liquid on your glycerin soap bars, caused by the soap essentially sweating. Therefore, I recommend wrapping and labeling your handcrafted soaps once they’ve fully hardened and been removed from the mold. You can either use them immediately, or store them for later use.
How Do You Make a Simple Melt and Pour Soap?
Learning how to make melt and pour soap for beginners is easy. To make an easy and simple melt and pour soap recipe, you will need a glycerin soap base of your choice and a soap mold. While fragrance and a colorant are optional, they are fun to work with and allow you to explore new designs and scents once you are familiar with the soap crafting process.
Once you have your materials and ingredients, follow these steps to create your first bars of handcrafted soap from a glycerin soap base:
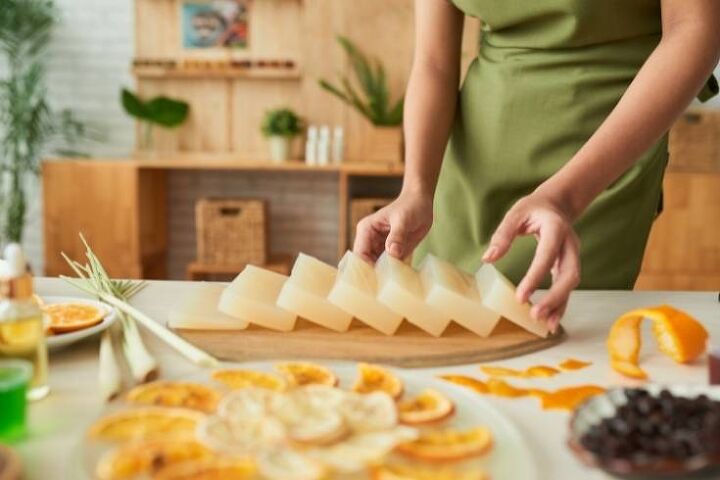
- Cut the soap into 1-inch cubes and combine in a heat safe container.
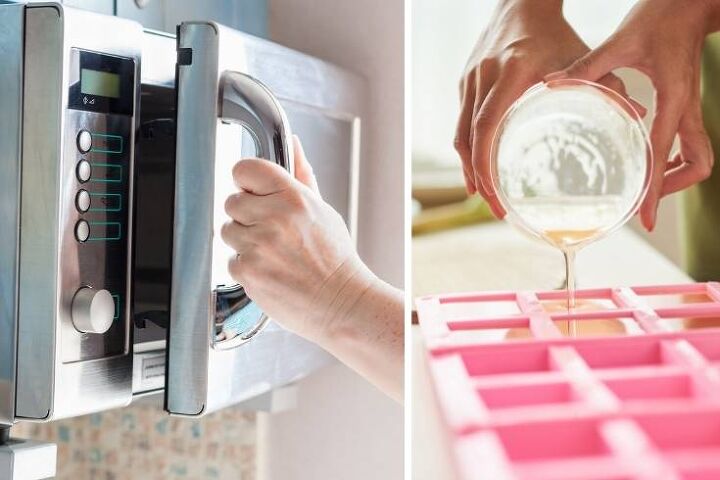
- Melt the soap base in a microwave in 20-30 second increments. Stir after each heating. (Alternatively you may also melt the soap in either a double boiler or crockpot.)
- Once the soap has melted, the color and fragrance . The stir to combine.
- Finally, pour the melted glycerin soap base into a mold. Allow to cool and fully harden.
- Then wrap and label your soaps for future use or to give as homemade gifts.
Be sure to check out my tutorial on how to make sunflower soap toward the end of this post for more detailed instructions along with my sunflower soap recipe.
What Can I Add to Melt and Pour Soap?
In addition to color and fragrance, there are also other ingredients you can add to melt and pour soap to create custom soap bars. I added a fragrance oil and mica powder as a colorant to my easy melt and pour soap sunflower recipe. However, you can also experiment with additional ingredients if desired to make my recipe your own.
Just keep in mind that you don’t want to add anything to your soap base that can be reconstituted with water. This is because some ingredients may mold in a glycerin soap base. While the PH of soap typically prevents bacterial growth and mold, there are exceptions, especially when your soaps begin to come into contact with water.
Following are some of the other additives your can add to to your handcrafted soap recipes.
Carrier Oils and Butters
You can add carrier oils and butters to your melt and pour soap recipe. However, if you add too much it can decrease the lather and make your homemade soap soft. When I first started out learning how to make melt and pour soap, I accidentally added too much cocoa butters to my bars. They were pretty and smelled amazing, however, they didn’t lather at all. I basically had scented paperweights.
Therefore, I recommend adding no more than 1 teaspoon of butter or oil per pound of soap. I would also suggest that you experiment with adding butters and oils to your soaps before creating a large batch of loaf. Begin with a small soap bar or recipe to avoid wasting time and materials.
Popular oils and butters to use in your handmade soaps are:
Colorants
There are several ways to color any melt and pour soap recipe. I don’t recommend using food coloring because it can bleed after the soap sits. It also fades in sunlight. If you selling your handmade soaps, you also need to ensure you only use FDA approved colorants. Food coloring is not among those. Further, it’s important you only purchase batch-certified colorants if you intend to sell your products.
You can use any of the following to color your homemade soap:
- Cosmetic mica powder
- Liquid soap colorant
- Color soap blocks
- Liquid or powder pigments
- Cosmetic clay
It’s important to keep in mind that when coloring soap, a white soap base will create pastel colors. Therefore, you may find you need additional colorant to get the shade you want in opaque bases. For soap with true or bolder colors, stick to a clear soap base. The general rule of thumb when coloring your glycerin soaps is 1/2 teaspoon of per pound of soap. If you use too much colorant, your soaps may bleed when they come in contact with water. In some instances, the colors may also stain skin if used in excess.
For details on natural colorants you can use to make your homemade soaps, I recommend Jan Berry’s book, Easy Homemade Melt & Pour Soaps, on Amazon here. You can also find my detailed review of this book here.
Fragrance and Essential Oils
You can also add a fragrance oil or essential oil to your easy melt and pour soap recipes. It’s personal preference which one you choose. I’ve used both of them to scent my handmade soap.
Fragrance oils are available in more scents, but they aren’t natural. Generally fragrance oils consist of synthetic fragrances or a combination of essential oils and synthetic scents. Essential oils, on the other hand, are natural. However the scent choices may be limiting if you aren’t accustomed to making your own essential oil blends.
Fragrance oils also typically last longer in homemade soap. So keep that in mind if you plan to sell your soaps.
The amount of fragrance or essential oil you can use is determined by a number of factors. You can obtain safe usage guidelines for each of these ingredients from the manufacturer.
Exfoliants
Exfoliants are another great ingredient to add to any easy melt and pour soap recipe. These ingredients naturally exfoliate your skin when you use them in the bath. If you make a hand soap with exfoliants, they also help to scrub away dirt and grease.
I recommend adding no more than 1 tablespoon of an exfoliant per pound of soap. However, if you’re making a specialty soap, such as a gardener’s soap or foot soap, you can play around and experiment with the amount you use in your recipes.
Here are some popular exfoliants you can add one to your homemade melt and pour soap recipes:
- Ground steel cut oats or colloidal oatmeal
- Coffee grounds
- Ground almonds
- Fine ground pumice
- Ground walnut shells
- Shredded or ground loofah
- Cosmetic clay
- Activated charcoal powder
Botanicals
There are only two decorative botanicals that you can add to your homemade soap: calendula and cornflower. All other floral botanicals will start to brown and can grow mold as they rot in your soap.
The biggest mistake that I see when people learn how to make melt and pour soap is that they add lavender buds or rose petals to their soap. They look beautiful, but they will rot. Lavender buds in particular closely resemble mouse droppings as they change color. Therefore, stick to using only calendula or cornflower if you’d like to add dried flowers to your soaps.
Is Melt and Pour Soap Considered Homemade?
Whether melt and pour soap is considered homemade is hotly debated in the soap making world. However, I believe that melt and pour soap making is definitely homemade. Yes, the base is premade, however, you have creative freedom in choosing the base and the additives. You can also use different molds and incorporate advanced techniques, such as layering or swirling, to create beautiful handcrafted soap.
What is the Best Soap Base for Melt and Pour?
The best soap base for melt and pour soap making depends on your needs. You might want to use clear soap to color it a bright color. Alternately, you may choose a base with an additive, such as oatmeal or shea butter, for its skin benefits. The choice between a natural or synthetic soap base, I believe, is also a personal choice.
As far as the best brands of glycerin soap, I recommend those produced by Crafter’s Choice® or Stephenson. There are also hobby brands that you can purchase from your local craft store such as Life of the Party and Soap Espressions. However, I don’t recommend these bases as they aren’t professional quality. They can also be difficult to work with as you move into more advanced soap making techniques. While they are adequate bases for beginners and the occasional hobbyist, if you want to become serious about your new craft, you’ll likely be disappointed with the results.
It is important to note, that while Crafter’s Choice® and Stephenson’s are quality melt and pour soap bases, they do behave and perform differently. I’ve found that I choose the best soap base for my projects depending on the application. Crafter’s Choice® tends to melt quickly and harden more slowly. While Stephenson’s melts slowly and hardens faster. Sometimes I like to combine several different bases for varying effects. While I almost always use Stephenson soap bases if I want to swirl my soap.
There are many varieties and brands of glycerin soap you can buy. However, many of the bases you find on sites, such as Etsy and Amazon, are actually privately labeled and produced by Stephenson. This occurs with several other brands as well.
Where Can I Buy Melt and Pour Soap Base?
You can find hobby melt and pour soap bases at most craft stores. You can also buy professional bases online from Amazon or Etsy. I recommend buying your bases from a reputable company. This ensures that you receive a quality product.
The best places to buy your glycerin soap for soap making are soap making suppliers or companies that specifically cater to the craft. In some instances, you may sacrifice faster shipping. However, these companies tend to have better prices and added value.
Several soap specific suppliers you can buy melt and pour soap bases include:
- Brambleberry
- Bulk Apothecary
- Nature’s Garden Candles
- Soaper’s Choice
- Wholesale Supplies Plus
Part of the fun in learning how to make melt and pour soap for beginners is using your soap! So don’t be afraid to experiment with different brands and types to find what works best for your finished product.
Why Is My Melt and Pour Soap Rubbery?
When you learn how to make melt and pour soap, it’s important not to overheat it. If the soap boils or gets too hot, it can cause the soap to get rubbery when you use it. Adding too many oils, butters or other additives can also cause your homemade soap to get rubbery.
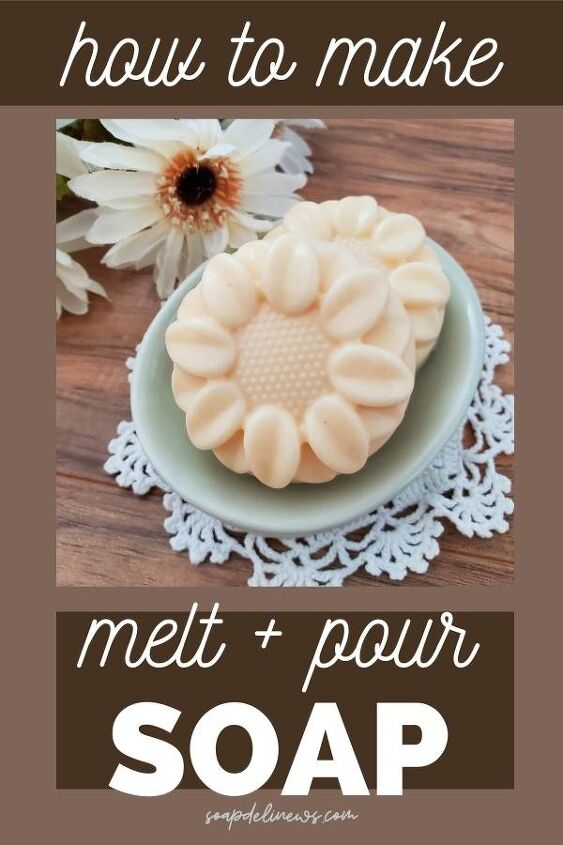
Easy Melt and Pour Sunflower Soap Ingredients
Now that you have an overview of how to make soap, you can make my easy sunflower soap recipe. To make this melt and pour sunflower soap, you will need the following ingredients:
- Goat’s milk melt and pour soap base: 1/2 lb. or 8 oz.
- Sunflower fragrance oil: 25 drops
- Cosmetic mica powder: 3/5 teaspoon (I used 1/4 tsp Yellow mica powder and 1/2 tsp Golden mica powder)
Supplies Needed to Make Easy Melt and Pour Soap
To make my sunflower melt and pour soap recipe, you will also need need these tools and supplies:
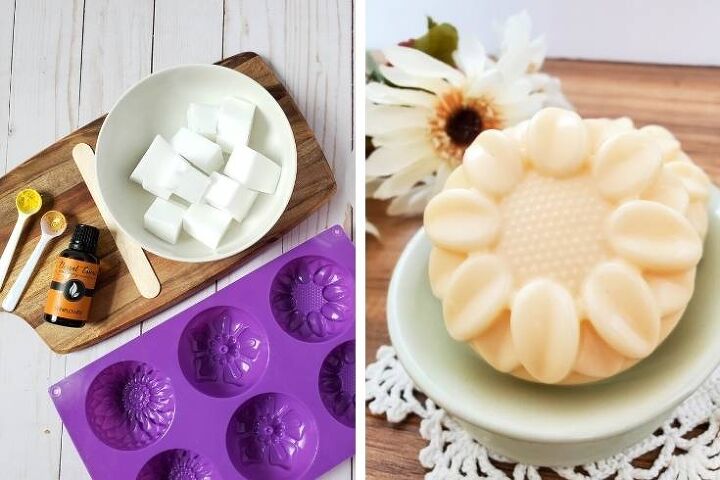
- Sunflower silicone soap mold
- Large heat safe measuring cup
- Microwave
- Wood craft stick or utensil for stirring
- Measuring spoons
- Digital scale, optional
- Sharp knife
- Dropper or graduated transfer pipette
- Spray bottle with rubbing alcohol, optional
How to Make Sunflower Melt and Pour Soap
My easy sunflower soap recipe was developed to use as few tools as possible. While you don’t need a digital scale to make this melt and pour soap, I do recommend you purchase one if you’d like to continue your exploration of soap making. A scale will allow you to follow more advanced recipes, as well as accurately scale batches. In addition, as different fragrances and essential oils have varying usage rates, a scale is an accurate way to determine the percentage of fragrance you need to scent your soaps.
Ready to get started? Follow these steps to make this easy melt and pour soap recipe in cute, sunflower shapes:
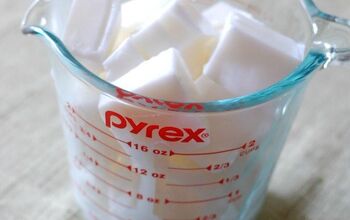
Start by weighing out the amount of glycerin soap base called for in the recipe. If you don’t have a digital scale, you can cut a two-pound block of soap into equal quarters to determine the amount of soap you need for this recipe. Otherwise, 1 lb. of base can simply be cut in half.
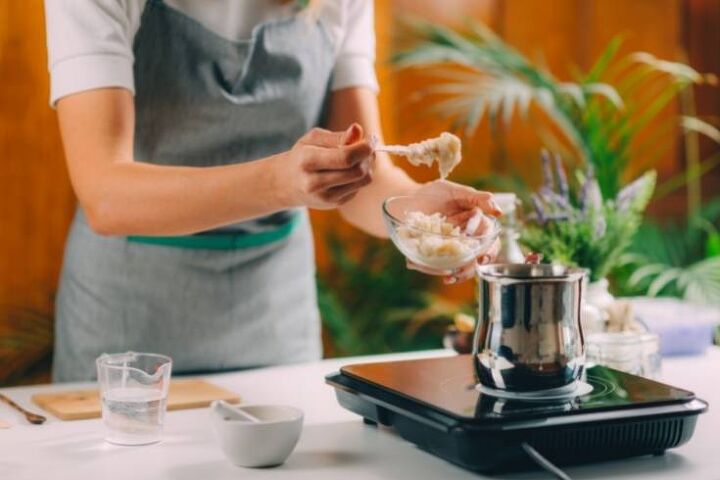
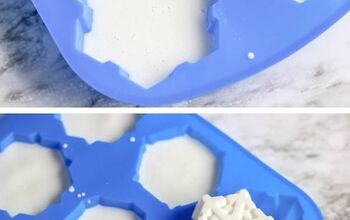
1. Use a sharp knife, such as a Chef’s knife, to cut the soap into approximately 1-inch cubes. This makes it easier to melt.
2. Once you’ve cut the soap into chunk, place the soap cubes in a microwave safe container. I recommend that you use a heat safe measuring cup for this step, so that the melted soap is easy to pour.
3. Now heat the soap in the microwave for 30 seconds. After this time, remove the base from the microwave, then stir. Repeat this process of heating the base for 30 seconds, then stirring at each interval, until the soap has melted.
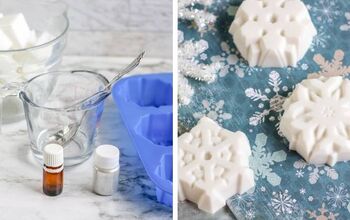
4. Once melted, use measuring spoons to measure out each color of the mica powder. Then stir the colorant into the melted soap until combined. To prevent clumping, you can mix the mica with 99% isopropyl alcohol (rubbing alcohol) first.
5. Now add sunflower fragrance oil to the melted base. You can do this by using either a dropper or graduated transfer pipette to count out the drops. Alternately, you can add 1 mL of fragrance oil plus 5 drops of the scent. (20 drops equals approximately 1 mL.) Stir well to incorporate the fragrance into the base.
6. Pour the sunflower soap into the sunflower shaped silicone mold. If there are air bubbles, you can easily remove them by spraying the tops of your soap with rubbing alcohol as soon as it’s poured. You can also try gently tapping the mold on the counter. Although this tends to work better with cold process soap, than it does with melt and pour soap.
7. After you pour the soap, let it cool for two to three hours. After the sunflower soaps have fully hardened, remove them from the mold.
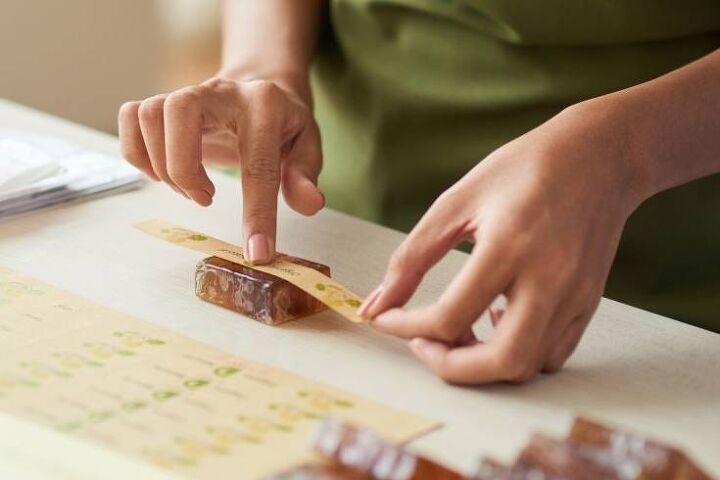
Package Your Homemade Glycerin Soaps
Once you’ve unmolded your sunflower soaps, you need to store them properly. I recommend that you wrap your soaps tightly in foodservice film to protect them from humidity. (You can also store your soaps in an airtight container until ready for use.)
If you need ideas for wrapping and labeling your homemade soaps to sell or to give as gifts, then be sure to check out my post on creative ways to package soap along with these soap packaging ideas.
More Easy Melt and Pour Soap Recipes
Once you’ve mastered your first batch of easy melt and pour soap, be sure to try these other melt and pour soap recipes for beginners:
- Dandelion Soap Recipe
- Orange Spice Soap Recipe
- Easy Fall Soap Ideas
- DIY Snowflake Soap
- Melt and Pour Polar Bear Soap
- DIY Loofah Soap
Melt and Pour Soap Making Books
If you’d like to explore more soap crafting methods, tutorials and recipes, I’m including links to some books I recommend on how to make melt and pour soap. These books contain easy melt and pour soap recipes, along with additional information on how to get started making homemade soap:
- Easy Homemade Melt and Pour Soaps
- Easy Soap Making
- The Complete Guide to Natural Soap Making
- Soap Queen Melt & Pour Soap
If you like my recipe and ideas for making easy melt and pour soaps, then be sure to explore more of my homemade soap recipes. Simply follow Soap Deli News on Facebook, Twitter, Pinterest, and Instagram for more easy DIY’s. Or subscribe to my newsletter.
The author may collect a small share of sales from the links on this page.


Comments
Join the conversation