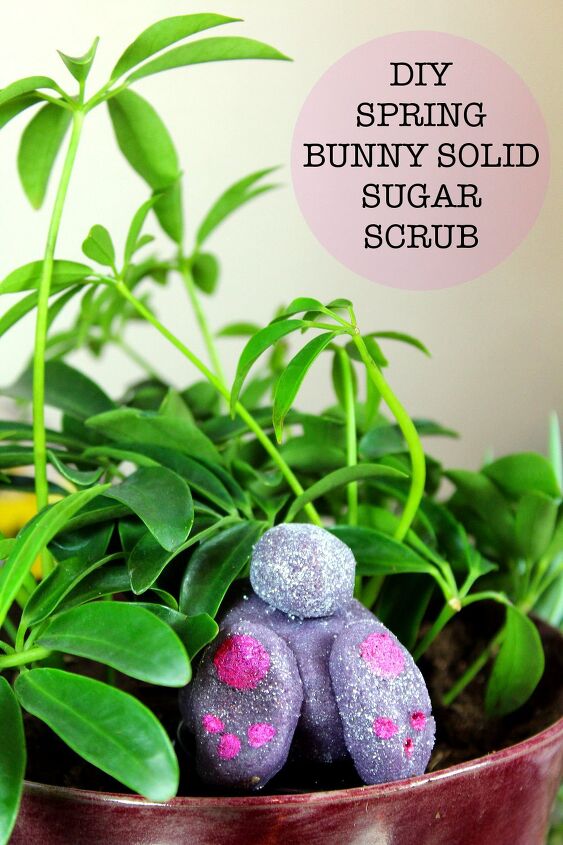
Fun DIY Spring Sugar Scrubs in Bunny & Chick Shapes for Easter
Looking for a fun Easter project? This sugar scrub tutorial is a creative way to celebrate this spring holiday. My moldable spring sugar scrubs make a sweet addition to your bath time routine. They also look adorable tucked inside an Easter basket as a non-edible treat for tweens and teens.
Learn how to make your own fun DIY spring sugar scrubs in bunny and chick shapes for Easter! Made from my own original moldable semi-solid sugar scrub recipe, these spring sugar scrubs are fun both in and out of the tub! Plus a combination of mostly natural ingredients makes them suitable for kids to enjoy as often as they want.
Crafted using the exact same recipe as my rainbow colored moldable sugar scrub, both my bunny and chick spring sugar scrubs can be made using the same batch of my moldable semi-solid sugar scrub “dough.” Simply make a batch, then divide it as needed for the number of colors you want.
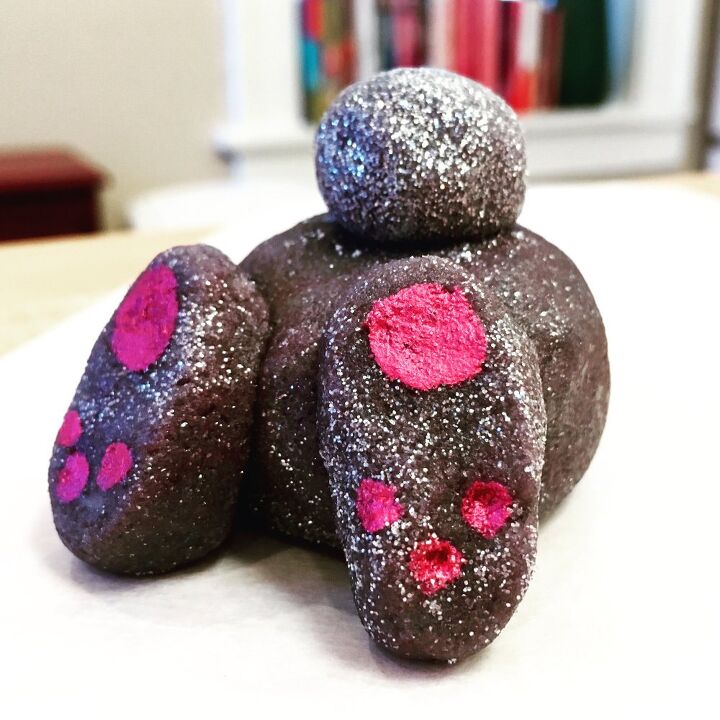
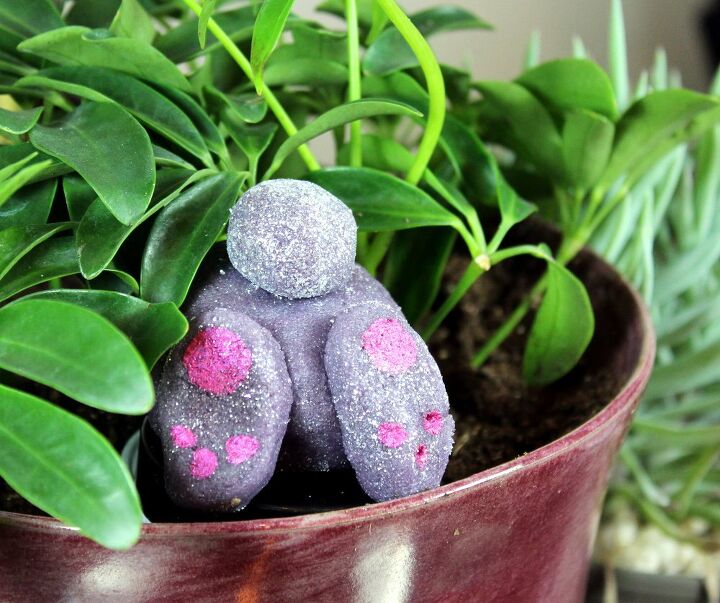
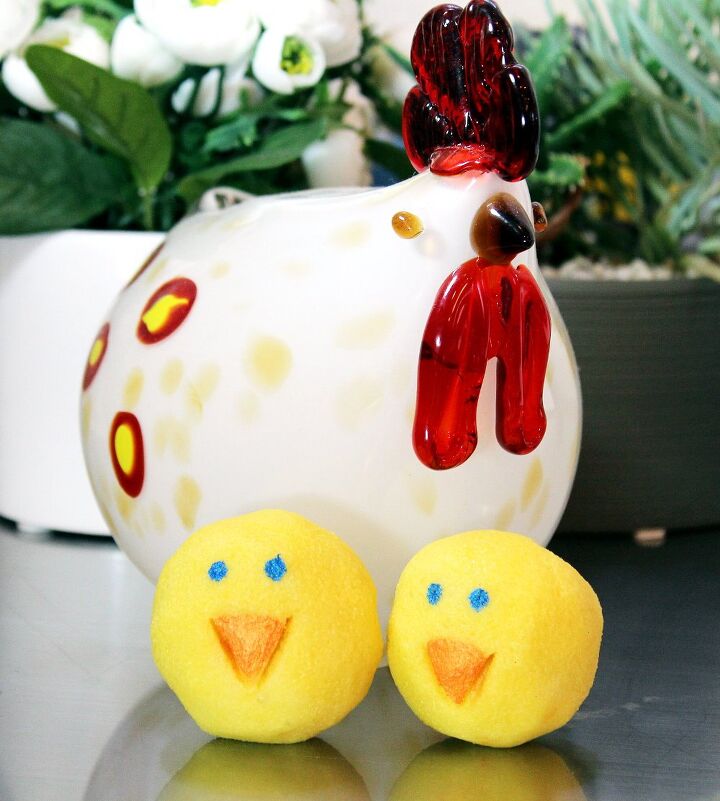
In my case, I used a combo of colors for a purple-gray for my bunny butts and yellow for my Easter chicks. The simple details are then painted on using micas and isopropyl (rubbing) alcohol.
You can pre-make the “dough” base for these spring sugar scrubs then create the shapes and paint on the details with your kids or grandkids for a craft afternoon filled with fun!
DIY Spring Sugar Scrubs
© Rebecca D. Dillon
Ingredients:
.75 oz. refined cocoa butter
6 oz. ultra refined shea butter
1 oz. extra virgin chia seed oil
.75 oz. emulsifying wax
.5 oz. xanthan gum powder
.15 oz. castor oil
.35 oz. vegetable glycerin
.75 oz. Stephenson’s Natural SLS Free Melt and Pour Soap Base
.05 oz. kaolin clay (white cosmetic clay)
16 oz. granulated white sugar
.25 oz. essential oil or .4 oz. fragrance oil, of choice
liquid melt & pour soap colors and/or skin safe mica powders, to suit
Instructions:
You will need a digital scale to weigh the ingredients for my DIY spring sugar scrubs. I recommend this Baker’s Math Scale if you plan to make a lot of bath, body or soap recipes.
Begin by weighing out the cocoa butter, shea butter and emulsifying wax into a large glass Pyrex measuring cup or similar. Heat at 50% power in a microwave until melted. (Alternately you may also use a double boiler.)
Weigh out the melt and pour soap base and cut into small chunks. Stir into the melted butters and wax until melted. You can reheat if necessary to continue melting the soap base.
While these ingredients are still hot, weigh out the xanthan gum powder and whisk into the melted ingredients until it has dissolved.
Next, you’ll weigh out the remaining oils and glycerin. Combine the chia seed oil, castor oil, essential or fragrance oil and vegetable glycerin in the bowl with the previously melted ingredients and stir well.
In a separate container, weigh out the kaolin clay and sugar. Mix to combine.
Now pour the clay and sugar mixture into the liquid ingredients and mix well.
Set the mixture aside until it starts to thicken then remix with a spoon or spatula.
Now mix the sugar scrub mixture using a KitchenAid stand mixer as it continues to thicken.
You can place the sugar scrub mixture in the refrigerator to speed up the cooling process if desired.
Once the mixture begins to look white and a little fluffy – kind of like marshmallow fluff – remove the mixing bowl from the stand mixer base and place it briefly in the fridge.
When sugar scrub starts to feel as if it’s hardening, remove it from the refrigerator.
Remix the sugar scrub mixture with your hands. Your body heat will make the sugar scrub pliable sort of like Play-doh.
You’re now ready to create your bunny and chick spring sugar scrubs!
You’ll start by dividing the sugar scrub “dough” into the number of colors you’d like to use. Working with one ball of sugar scrub “dough” at a time, add the colorant(s) to the first sugar scrub “dough” a little at a time. Knead well to incorporate the color in between adding the colorant. Once you’ve reached the color you want, repeat with any additional sugar scrub “dough” and colorants.
In this instance I colored half of my sugar scrub “dough” yellow for the little chick spring sugar scrubs and a combination of colors for the bunny butts to create a purplish-gray.

Now divide the yellow colored sugar scrub “dough” into palm sized or smaller chunks and roll them into balls.
Do the same for the bunny butts, but leave some left over scrub off to the side. Once you’ve rolled out the balls for the bunny butts, roll out several smaller balls for the bunny tails and two more small balls for each of the bunny butts.
Roll the balls for the bunny feet on a flat surface until they are slightly oblong, then gently press flat.
Press the bunny feet onto the bottom of the large balls you created as your bunny butts. If you’re worried about the feet sticking during transport or if you’re gifting your spring sugar scrubs, simply dip the bottoms of the bunny feet into a small amount of melted natural melt and pour soap base and use it to adhere the components of your bunny together.
Now dip each sphere you created for the bunny tails into skin safe glitter or mica. I used Super Sparkles mica powder for my bunny tails. Then adhere the tails to your bunny butts as photographed above the bunny feet.
Set both the chick and the bunny spring sugar scrubs aside to harden back up. You can of course speed up this process by placing them in the fridge.
Once your bunny and chick sugar scrubs are nice and firm you’re ready to paint on the designs! This is done in basically the same way I painted on the micas for my DIY mermaid soaps!
You will use micas to paint the details your spring sugar scrubs. Grab a small container for each color you want to use to paint your scrubs.
Add a small amount of mica to each container followed by a small amount of isopropyl alcohol. As you want bold colors, use as little alcohol as possible to dampen the mica just enough that you can smoothly spread it with a small paintbrush.
To paint on the bunny feet simply paint one large circle in a contrasting color to your bunny’s color at the top of the bottoms of all the bunny feet. Then also paint three small circles on the bottoms of all the feet. Let them dry and your spring bunny sugar scrubs are done!
To make your chick sugar scrubs it’s pretty much the same deal and also super easy. Paint two small circles for eyes – or use candy eyes like I did for my DIY poop emoji bubble bars – and then paint on triangles for each of their beaks! Let them dry and now your spring chick sugar scrubs are complete!
Now all you need to do is package your spring sugar scrubs in large 16 oz. clear PET (BPA free) jars or wrap tightly in food service film and label as desired.
To use simply scoop or tear off desired amount from a chick or bunny and massage onto wet skin as you would a solid sugar scrub cube.
If you’d like to sell these chick and bunny spring sugar scrubs for Easter, be sure to follow FDA guidelines for labeling your product. If you’re unsure about the rules and regulations regarding labeling cosmetics, I highly recommend the book, Soap and Cosmetic Labeling: How to Follow the Rules and Regs Explained in Plain English, by Marie Gale.
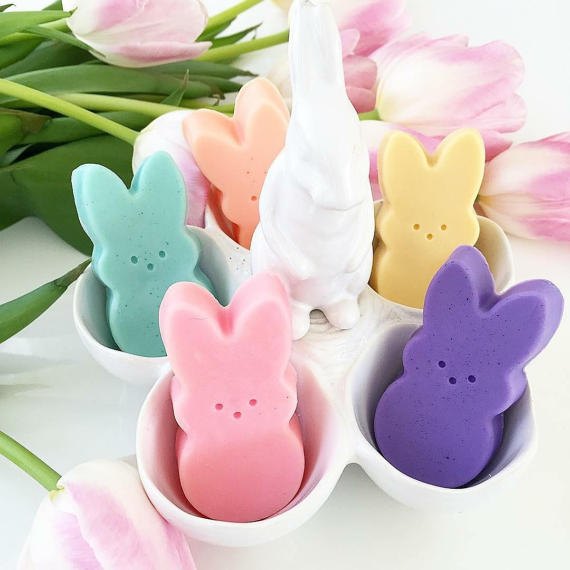
Don’t have the time to make your Easter basket stuffers or spring inspired gifts? Then be sure to check these awesome Peep inspired Easter Bunny Soaps from Sunbasilgarden Soap (pictured above) along with a lot of other wonderful, handmade spring inspired soaps and scrubs on Etsy here.
If you’re looking for more great Easter or spring projects to make either to sell or for friends and family, then be sure to check out my collection of crafts, recipes and ideas on my DIY Homemade Easter Crafts & Treats Pinterest board here. Or follow my DIY Bath and Body Pinterest board for more homemade sugar scrub and other bath and body recipes.
You can also find and follow me on Facebook, Twitter, Blog Lovin’, and Instagram for behind the scene sneak peeks. Or sign up to receive new posts to your email via FeedBurner so you never miss a post.
The author may collect a small share of sales from the links on this page.


Comments
Join the conversation