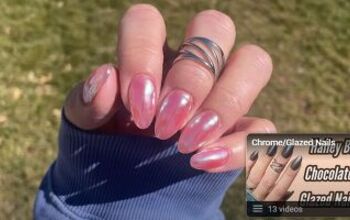
At-home Hailey Bieber Glazed Donut Nails Tutorial

Today, I'm going to show you how to achieve these Hailey Bieber glazed donut nails.
This glazed donut nail look is very on trend at the moment, though it isn’t actually a new technique. It's something we've been doing in the industry for many years, though I'm not surprised this super cute look has become popular again.
Without further ado, let’s jump into this tutorial!
Tools and materials:
- Gel polish
- Top coat
- Glaze/chrome powder
1. Preparing the nails
I'm going to breeze through the process of applying the BIAB, known as builder-in-a-bottle, as I already have in-depth tutorials on how to apply BIAB gel.
The brand I'm going to be using is NKK and the shade I'm using is called delicate. I've dehydrated my nail beds but I haven’t fully removed my previous gel as I like to just work on top of it.
2. Applying BIAB to nails
I go ahead and thinly apply one layer of this product to all of my nails and cure them for a full two minutes.
Then, working on one nail at a time, I apply a slip layer first, which again is a nice thin layer, and I don't cure this. Instead, you should think of this as a blueprint for where the next bead is going to go.
I always have a very fine liner brush on hand to be able to manipulate where I want the gel to sit.
I want to make sure it's nice and even all down the side walls. Allow each nail to cure for at least 40 seconds.
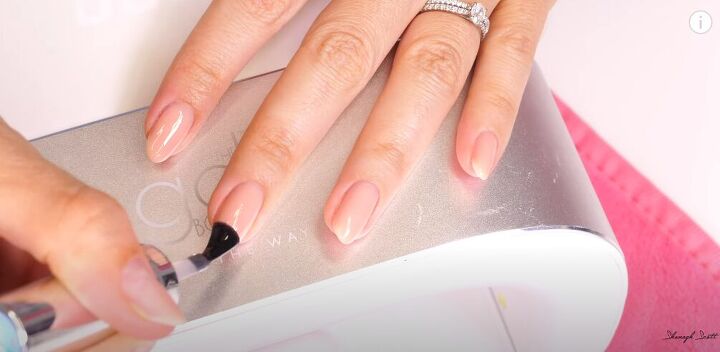
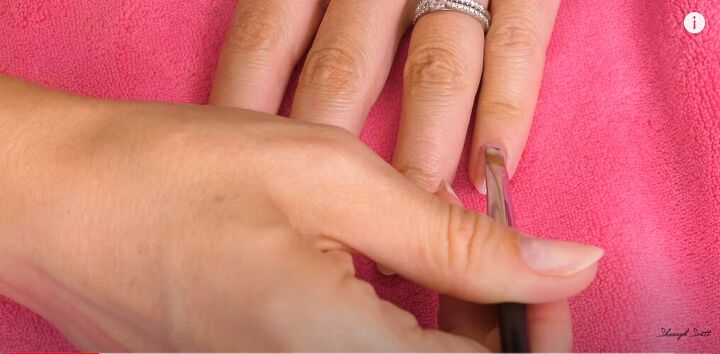
3. Adding the top coat
I do all the nails, do a full 2-minute cure, then I add a topcoat. You are basically doing a regular gel polish from start to finish.
You want to make sure you get this all the way around the cuticle as close to the side walls as possible. Make sure that you just cap the free edge because we want the glaze to go over the entire nail bed. Then, I give this a full two-minute cure.
Note: This top coat doesn't have a sticky layer once it cures so I haven't used any acetone.
However, if you're using a top coat that is sticky, you'll need to remove that layer with acetone or IPA first before you go in with this powder.
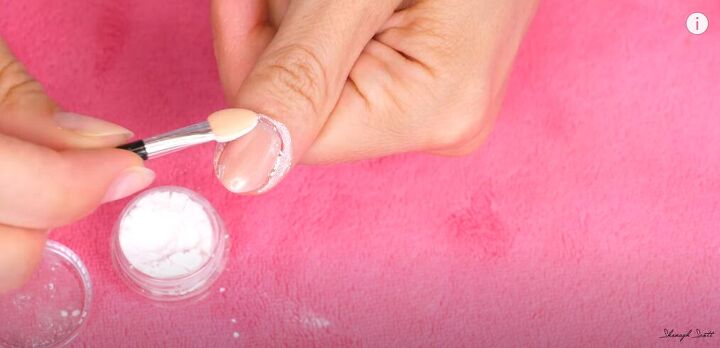
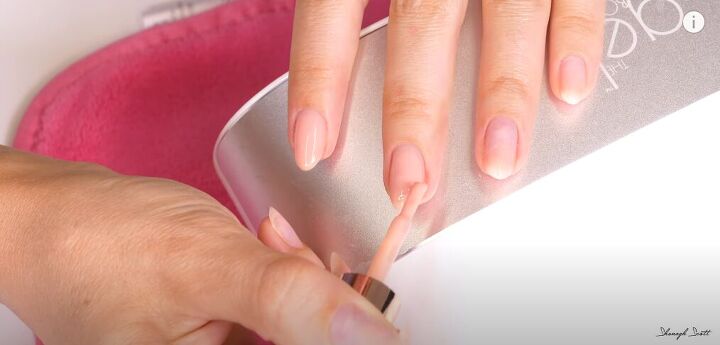
4. Applying the glaze
Now, it’s time to go in with the glaze (also known as nail chrome
powder).
The one I’m using is a microfine powder and it comes with an applicator. I dip the applicator into the powder and buff it into the cured topcoat.
Make sure that you really rub it into the side walls and around that cuticle area. You don't want to miss any areas as this will be noticeable when the nail catches the light.
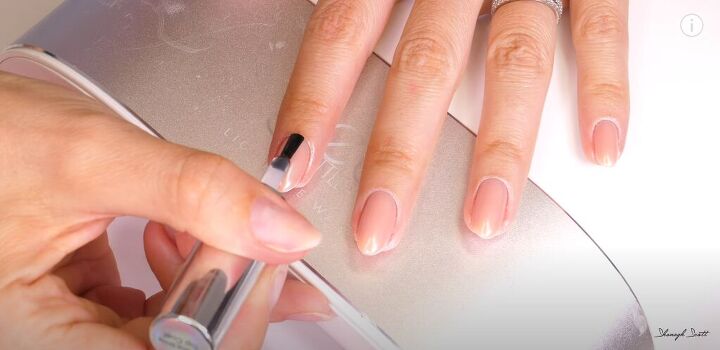
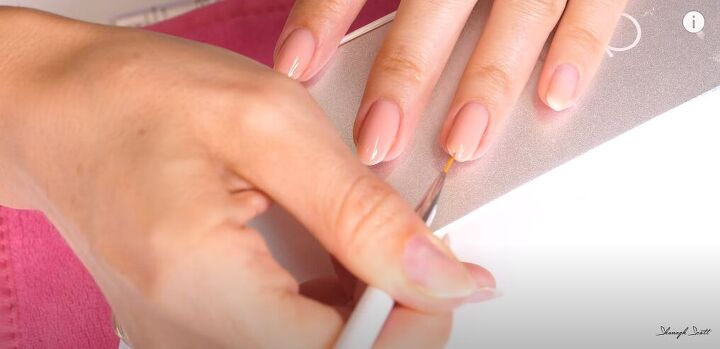
5. Applying top coat
Next, I apply the top coat. You want to apply a big enough bead of product so you can just float the brush over the nail because you don't want to drag it. Be as light-handed here as possible.
Without flooding the cuticle area or your sidewalls, make sure you cover the entire nail with the top coat. Otherwise, any missed areas will come away when you wash your hands, making your nails look patchy.
Again, give this a full two-minute cure and then that’s all completed!
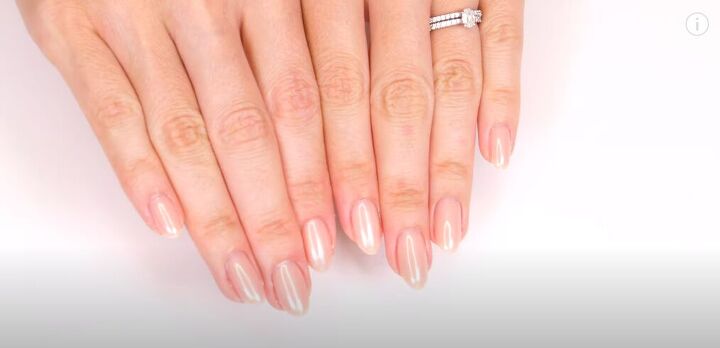
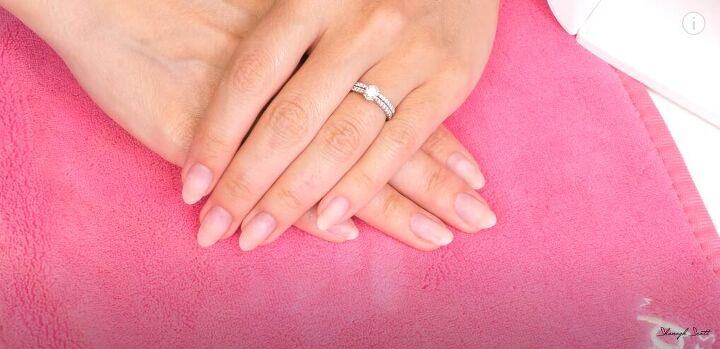
Hailey Bieber glazed donut nails
I hope you guys enjoyed learning how to create these cute Hailey Bieber nails at home. Glazed donut nails are so popular at the moment, and I can totally see why. I’d love to know how you get on with this look in the comments down below.
Products used:
- NailzKatKat Rubber Coat Gel Polish - Delicate: https://bit.ly/3BpJQZC
- The Gel Bottle Extreme Shine Top Coat: https://bit.ly/3jFiOlB
- White Pearl Nail Mirror Pearlescent Chrome Powder: https://bit.ly/3x8tIsV
The author may collect a small share of sales from the links on this page.


Comments
Join the conversation
How do u get it off
I’ve never had a gel manicure. However in looking at others, their nails are exquisite.
I’m afraid to try it because I used to have acrylics. Those chemicals gave me fungus and infections, pain, etc. I now worry about the chemicals used in the gel formulas. What are your thoughts on this?