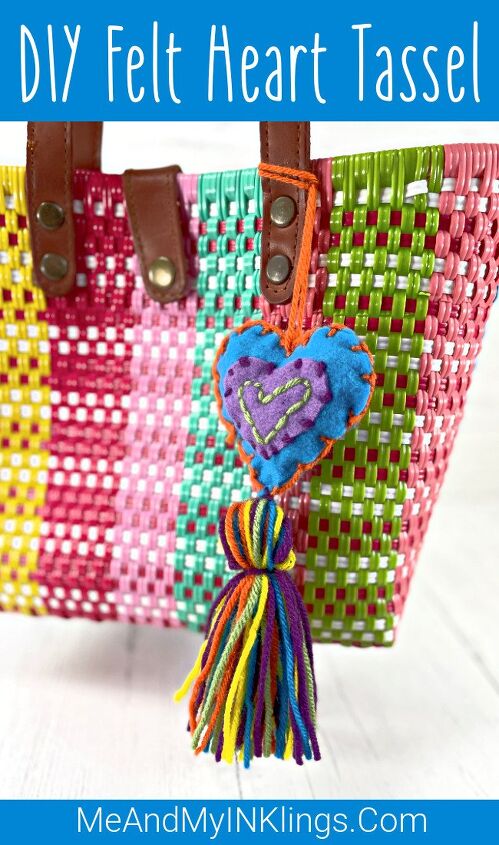
DIY Felt Heart Tassel
Create an adorable accent to add to any purse, bag or satchel in a few simple steps.
Kunin felt is such a great material to work with when creating fashion accessories. The ability to sew through it with yarn using a super sharp needle makes it even more fun. There is such a wide variety of colors in the Kunin Classic Felt line that the possibilities of combinations are endless. I can’t wait to share how to make a darling DIY felt heart tassel. Let’s get started on making what is more commonly known as a Mexican heart tassel.

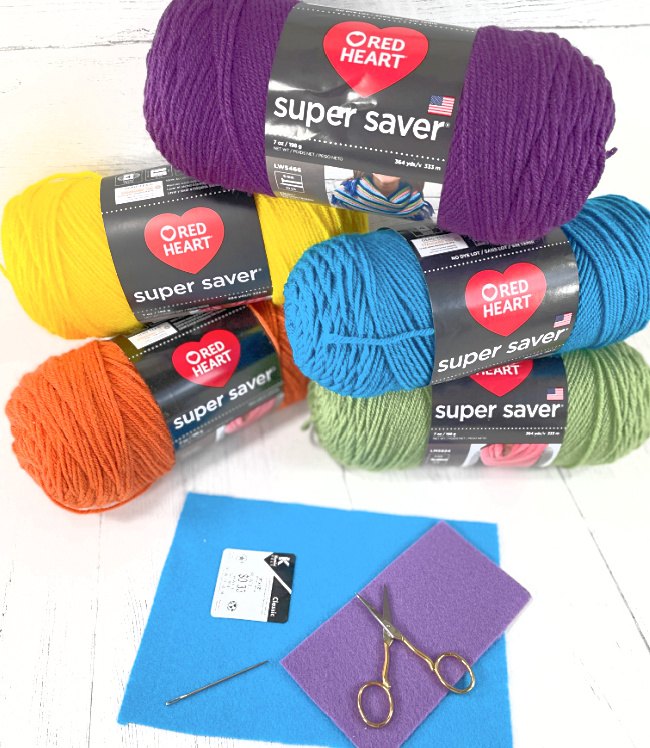
Materials and Supplies Needed
The required materials and supplies for this diy fashion project are some of the easiest to find in any craft store. Did you know that Red Heart Super Saver Yarn comes in 110 colors? That pretty much means you can create any color pallet your heart desires.
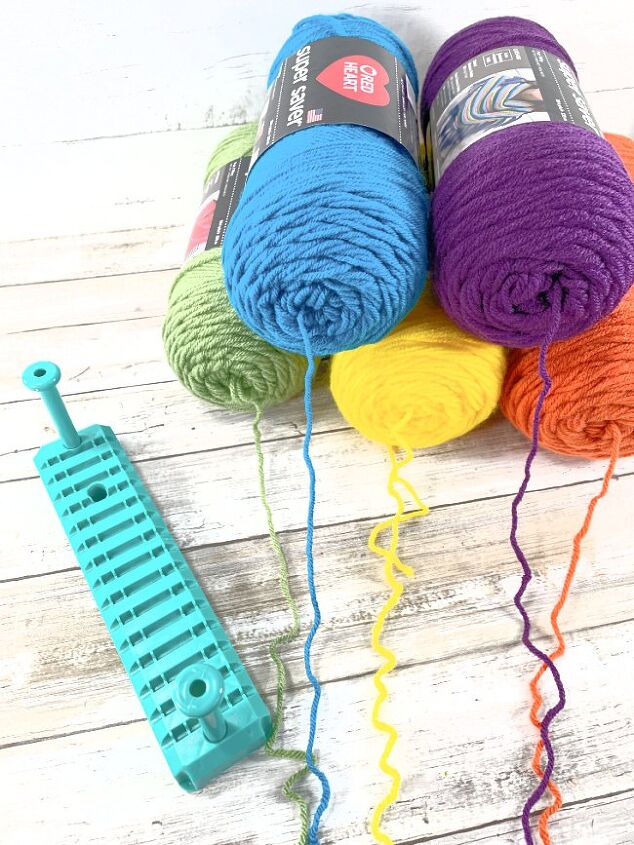
- Red Heart Yarn in Variety of Colors
- Large Eye Needle
- Red Heart Yarn Pom and Tassel Maker
- Kunin Basic Felt in Variety of Colors
- Scissors
- Poly-Fil Stuffing
Directions
The first step is to choose your colors. They can either be colors that blend together or totally contrast. This is the opportunity to access your creativity and put together a color scheme that will either go with a purse you currently have or the one of your dreams. Having just purchased a darling woven summer satchel, I created my heart tassel to go with it.
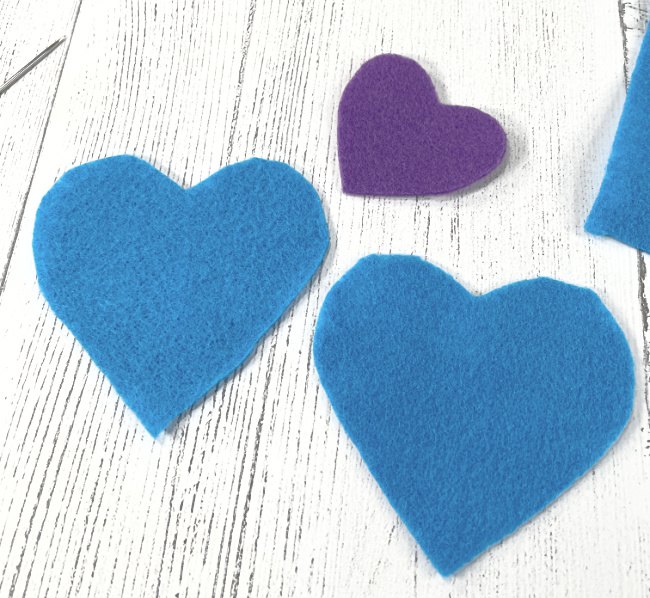
Step One – Cutting the Heart
Cut out two matching hearts in the size you want for your final piece. Because the stitching will all be done on the outside without any flipping, the hearts will not shrink in the making process.
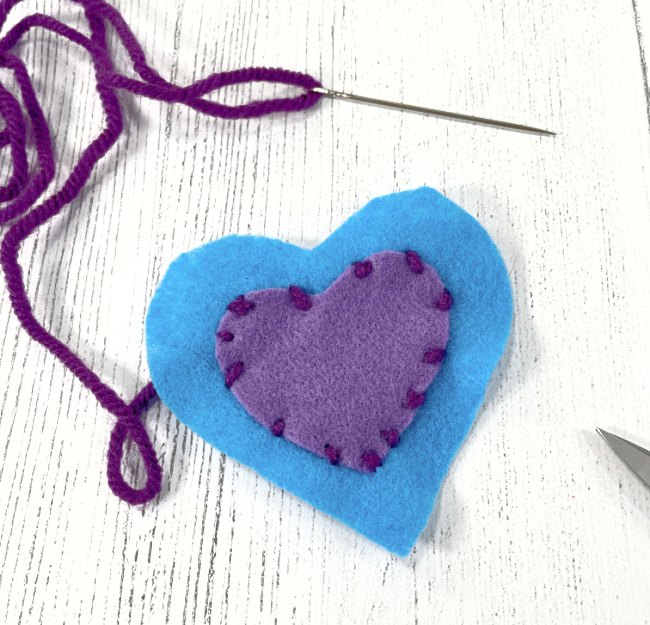
Step Two – Designing the Heart
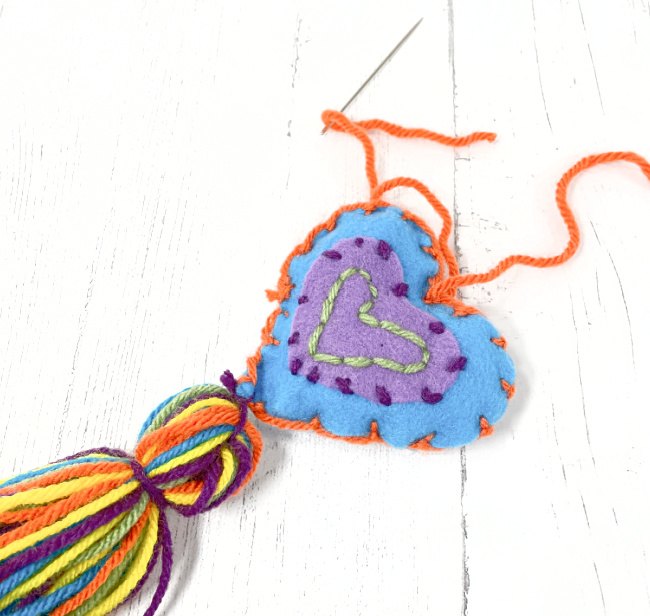
Next, Stitch on one of the hearts using colors of the Red Heart Yarn. It is important to use an wide eye needle with a sharp point when stitching with yarn and felt. That sharp point will make the crafting of this accessory far more fun than trying to work with something dull.
Create a design to your liking. This could be done using any of your favorite stitches. It is extra fun to add layers of felt colors and stitch them to this top piece, adding dimension and personality.
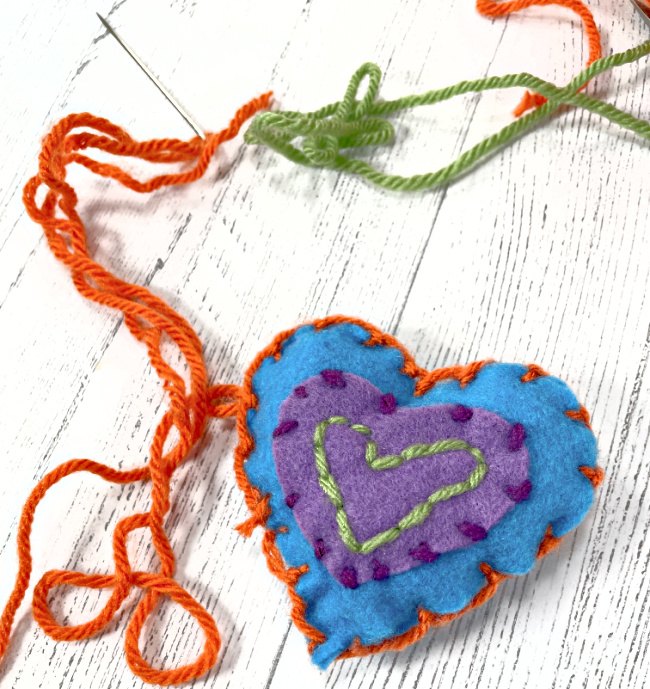
Step Three – Stuffing the Heart
Once you have your felt layers/stitched design complete – Sew the two hearts pieces together around the edges using the blanket stitch and leaving and opening to stuff. Keep the needle and yarn attached so you have what you need ready to sew it closed when the time comes.
Stuff the heart then finish stitching closed.
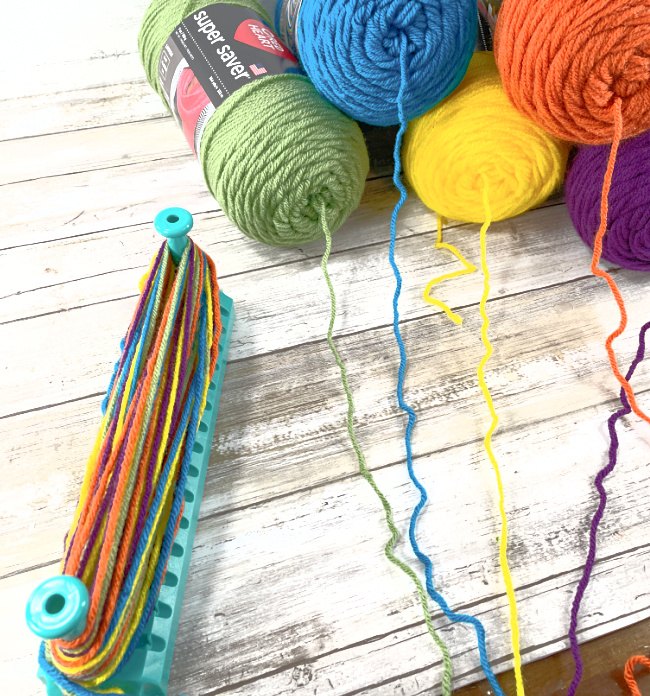
Step Four – Making the Tassel
Start by choosing the colors of Super Saver Red Heart Yarn to use.
Wrap the yarn around the pegs at the desired lengths on the Red Heart
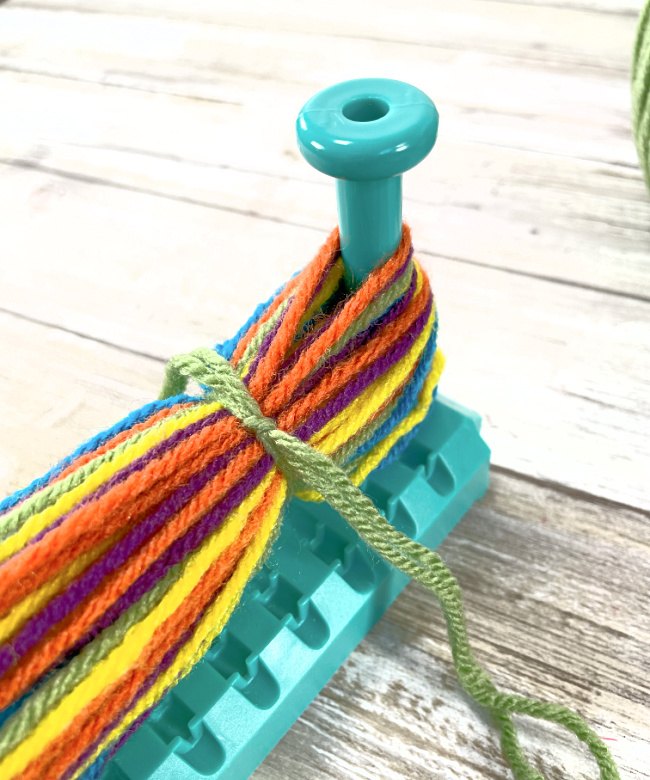
Tie off the top of the tassel on one of the ends, leaving enough of a loop to be able to feed yarn through and create a way to hang the tassel once removed from the tool.
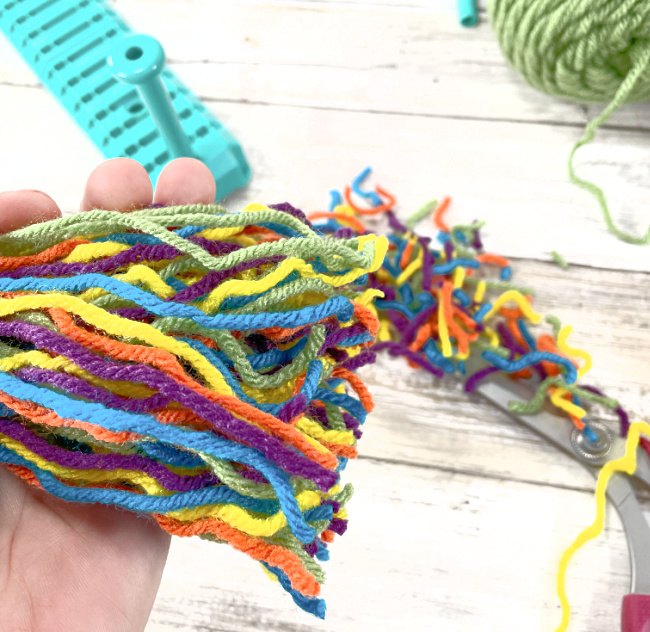
Remove the tassel from the tool and trim the ends.
Tie a long piece of yarn THROUGH the loop that can be sewn to to the bottom of the heart to complete your DIY Mexican Felt Heart Tassel. Sew it using the needle to the tip of the bottom of the heart. With that same yarn, stitch a piece through the top center of the heart too, creating a way to tie it to the purse or bag.
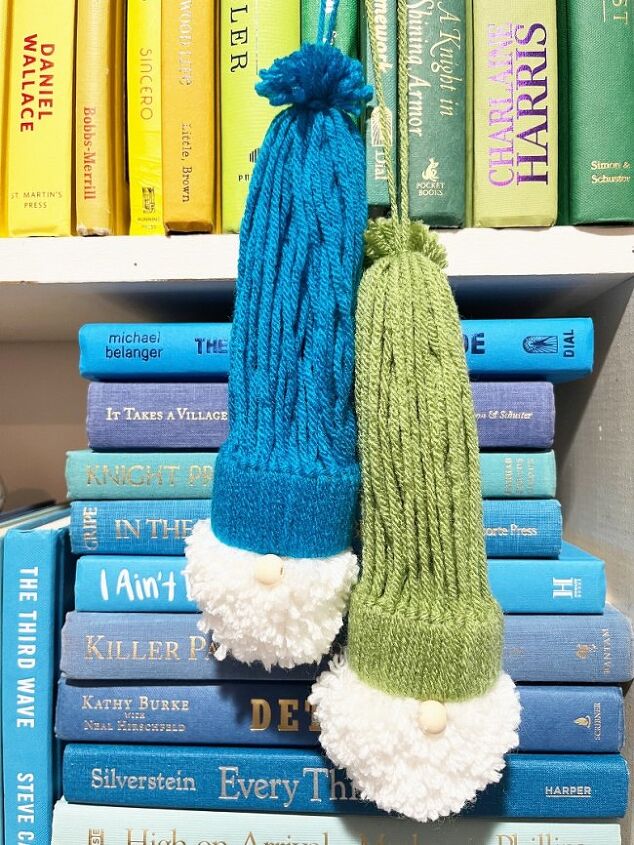
Another Awesome Yarn Craft
Beth made the most darling gnomes with Red Heart Yarn. Grab the directions over on Creatively Beth!
These would be darling tied to a bag during the holiday I am thinking!
Sharing is Caring! Too busy to make this right away?! Pin it for later! Pin this project to your favorite craft board on Pinterest and it’ll be waiting for you when you’re ready.
I would really love to hear what you think about this fun yarn accessory idea! If you try it out, I would sure like to see it! Share on Instagram, Facebook, or leave a comment/photo on the project pin on Pinterest!
This post contains affiliate links. If you make a purchase, it is no extra cost to you but supports me and my small business.
XO,
Laura
The author may collect a small share of sales from the links on this page.


Comments
Join the conversation