How to Make a Bag From T-Shirts That is Cute & Truly Unique

If you have old t-shirts laying around and you want to upcycle them, then this DIY t-shirt purse might be the answer you’re looking for. Follow along to learn how to make a bag out of t-shirts. It’s really quite easy and you likely already have everything you need to make it.
Tools and materials:
- 2 old t-shirts
- Ruler
- Scissors
- Sewing needle and thread
- Bias tape
- 2 snap closures
- Sewing machine
1. Cut up 2 t-shirts
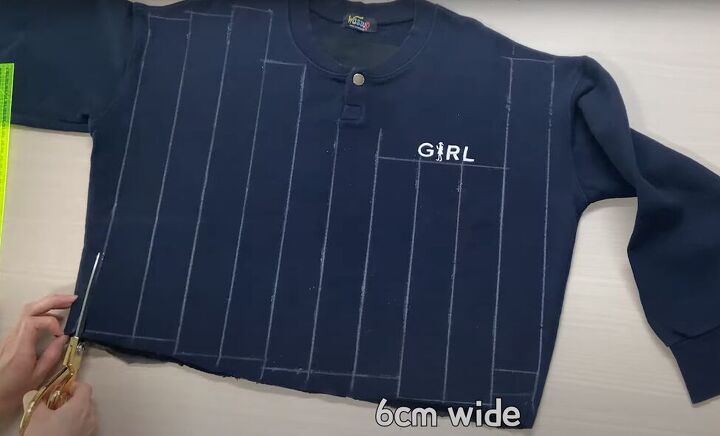
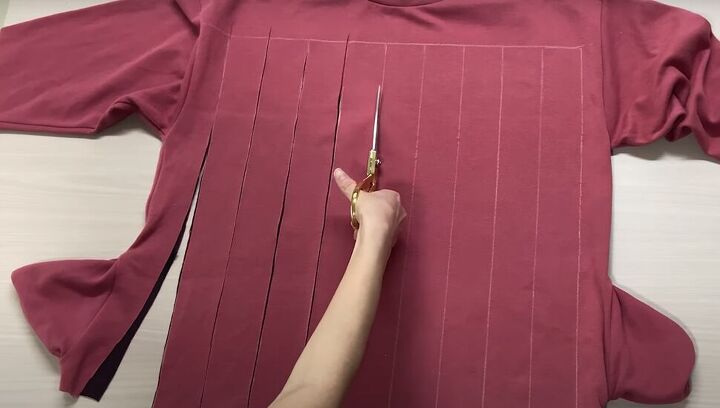
Start with a long-sleeved t-shirt, and if it has a waistband, cut the waistband off.
Chalk vertical lines down the whole body of the t-shirt, 6 centimeters (2.4 inches) apart. If there is a logo or decorative feature on the t-shirt, then go around it.
Draw tops and bottoms on your grid line, aiming for strips that are 30 centimeters (11.8 inches) long.
Cut out all of the strips from your t-shirt.
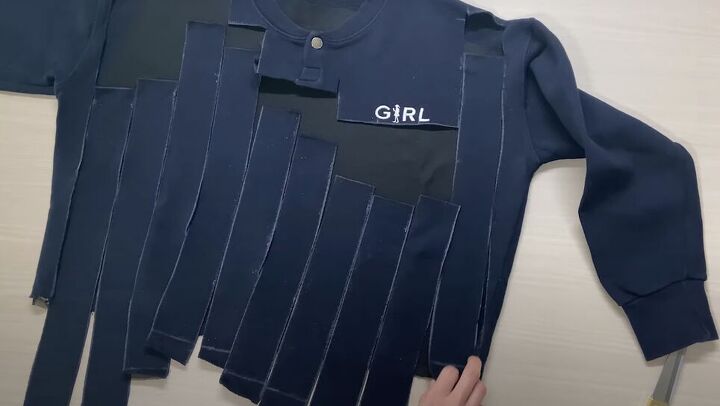
Flip over your t-shirt and do the same on the back. Adjust the position of your lines as necessary to ensure they are all the same size.
The horizontal lines in the above image were just a way of me marking off the top cut line for each of my strips.
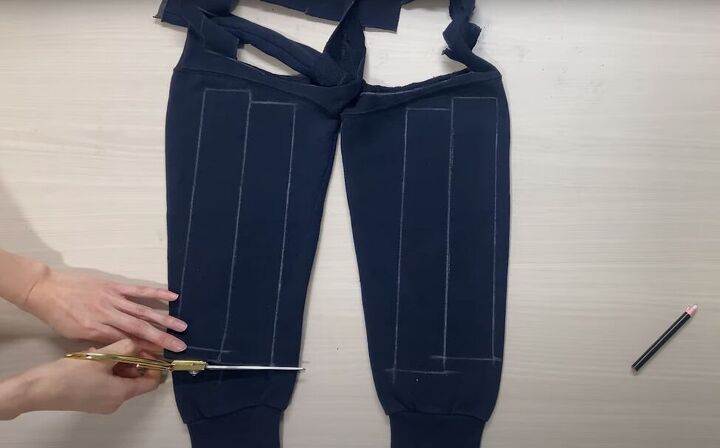
Cut the same size strips one more time from the sleeves of your t-shirt.
In total, you want to get 20 to 25 strips from this old t-shirt.
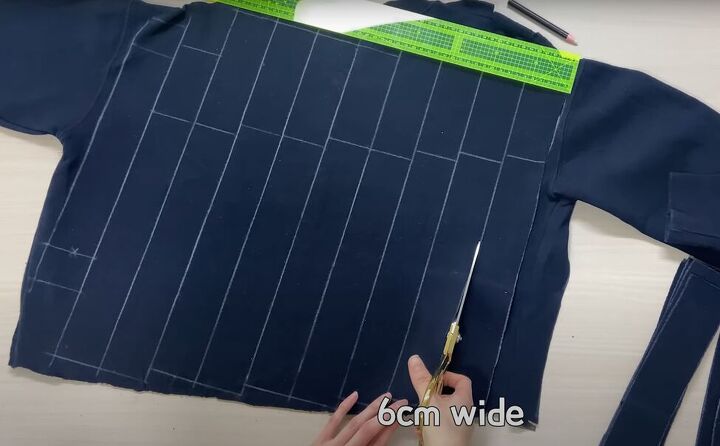
Do it all again with another old long-sleeved t-shirt! This time aim for strips that are 65 centimeters (25.6 inches) long and try to get 6 strips.
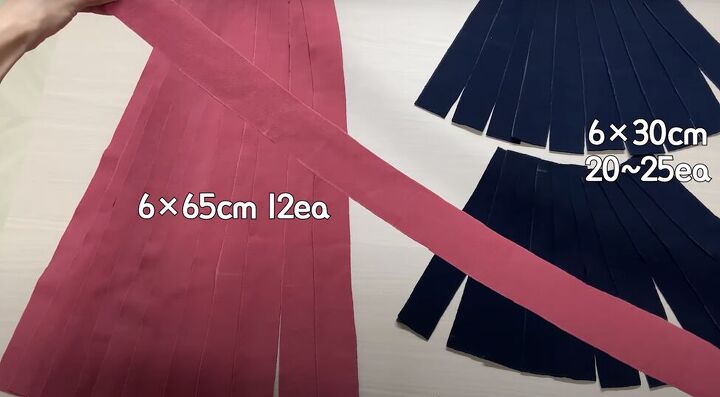
To recap, you should end up with 20 to 25 strips measuring 6 x 30 centimeters (2.4 x 1.8 inches) from one t-shirt, and 6 strips measuring 6 z 65 centimeters (2.4 x 25.6 inches) from a second t-shirt.
2. Create strips for weaving
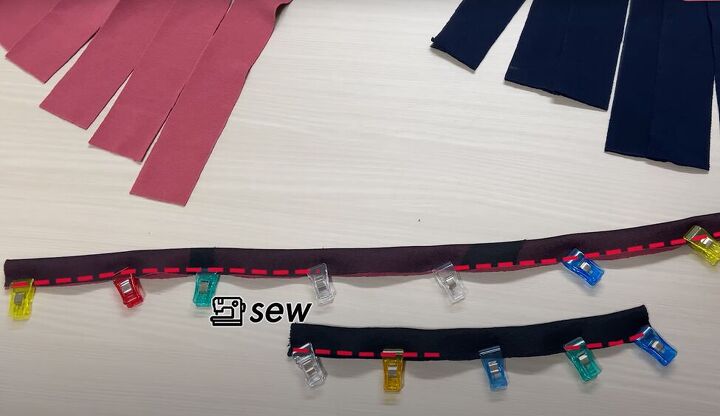
For all of your strips, fold and pin them in half vertically, with the right side facing in. Then, sew the long open edge of each strip, leaving a gap in the middle, as shown above.
Turn all of your strips right-side out by pulling them through the open gap.
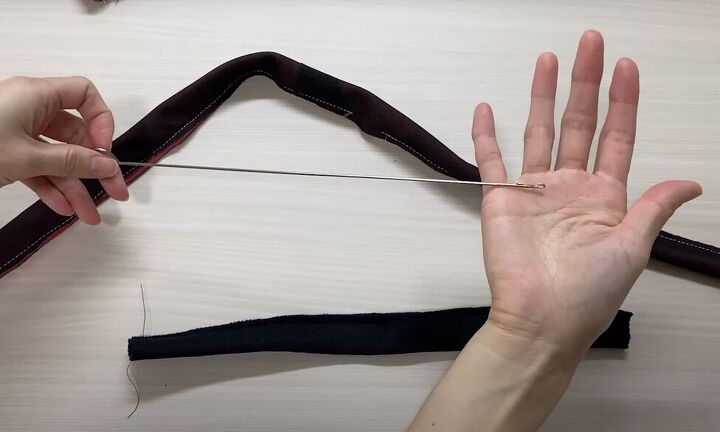
Tip: Check out the life-changing sewing hook I have for just this purpose! They are inexpensive and will save you time and frustration.
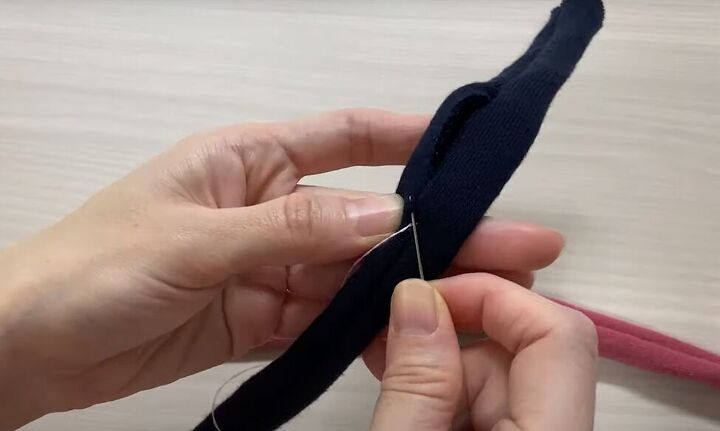
Hand-sew all of the gaps closed, using an invisible stitch. Watch how I do the invisible stitch in the video from 4:20 to 4:42.
3. Weave your bag
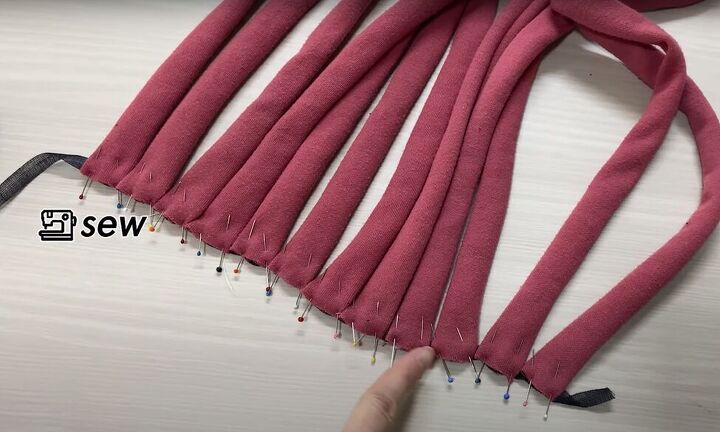
Uncoil about 100 centimeters (40 inches) of bias tape and pin one end of all 12 of your long strips along the strip. Be careful to not leave any gaps between the strips. Then sew on the right side to attach the strips to the strapping and snip of any excess bias tape.
Repeat with the other end of the strips.
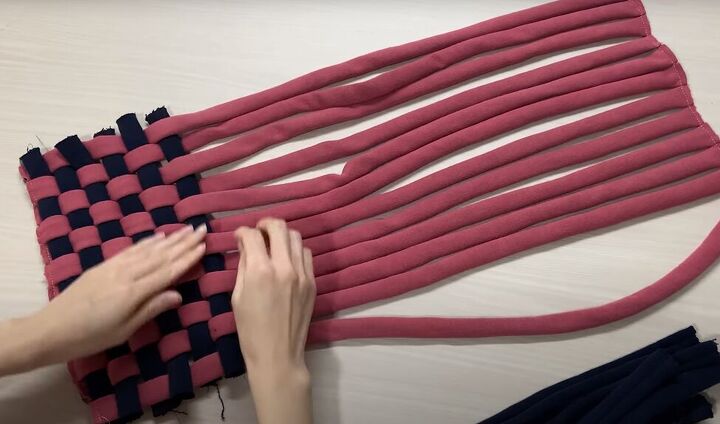
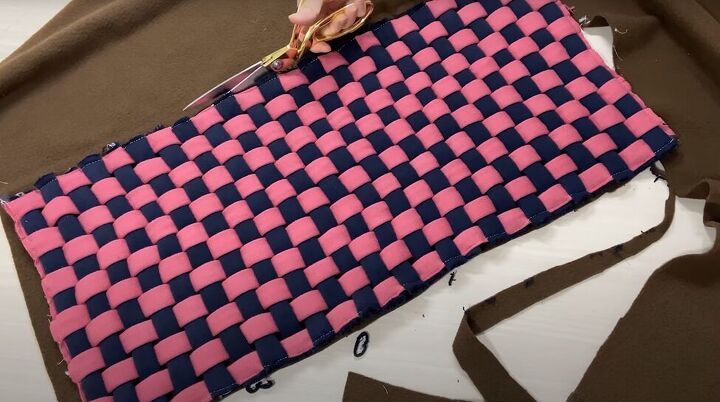
Weave all of your short strips through the long strips, making sure there are no gaps between the short strips.
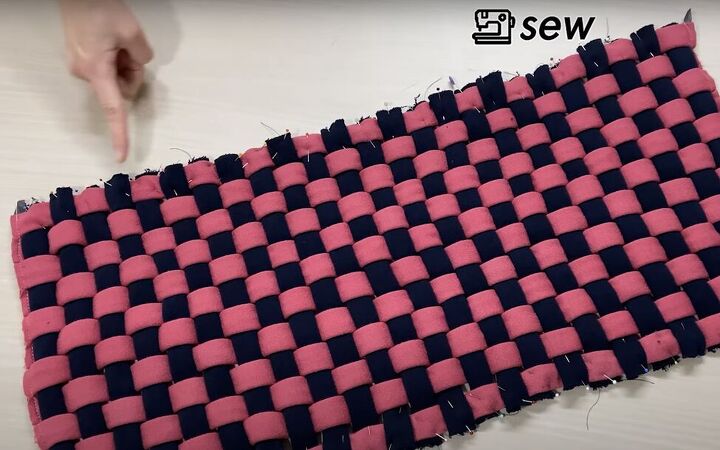
Pin the strips in place and then sew along the long edges on the right side.
4. Line and edge your bag
Cut a piece of scrap fabric to the size of your woven piece.
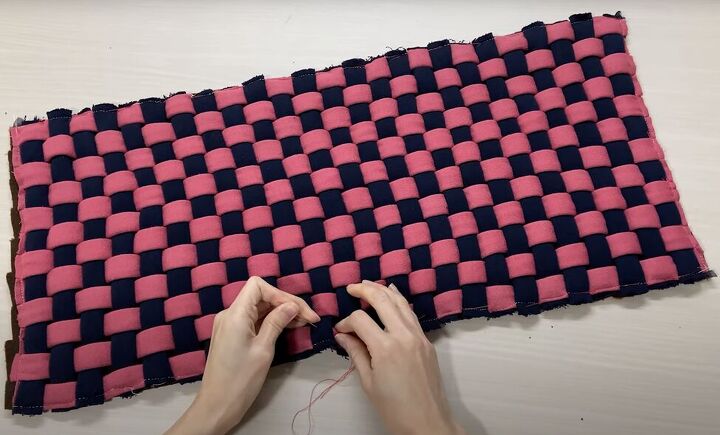
Hand-sew a basting stitch around all four sides.
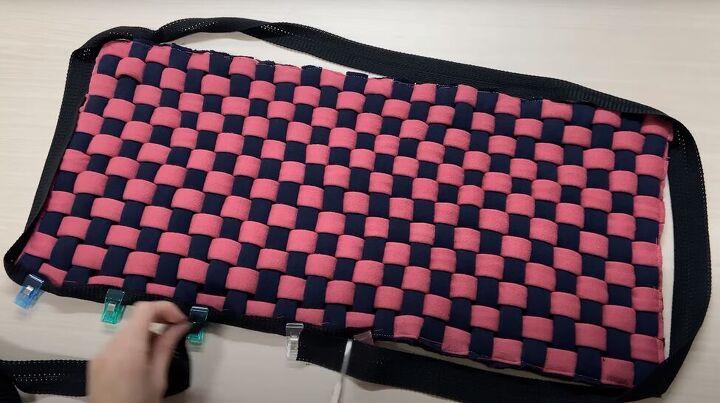
Wrap bias tape around all four edges so that the tape encloses the front and back of your fabric. Pin the bias tape to keep it in place.
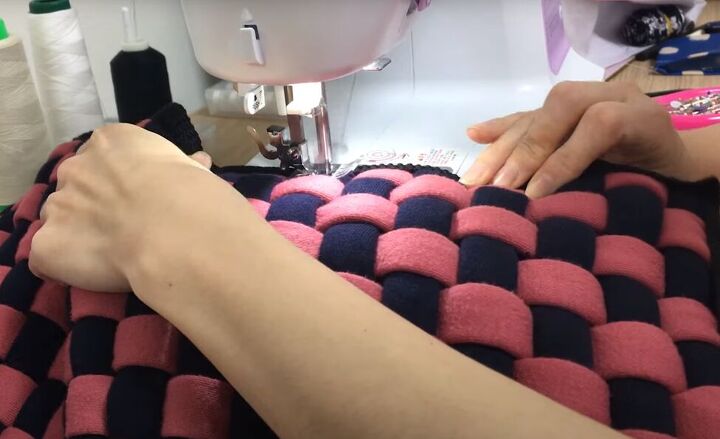
Sew the bias tape to the fabric through all layers to make a nice clean edge.
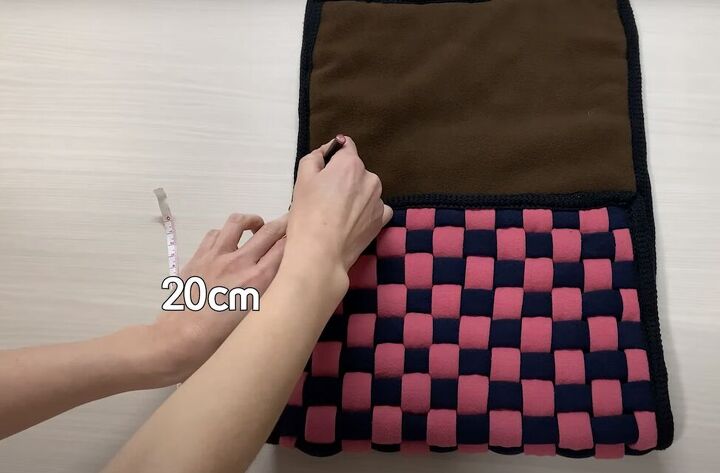
5. Assemble the purse
With the fabric upside-down, fold up one end of the fabric to 20 centimeters (7.9 inches) and mark that point on the wrong side.
Hand-sew both side edges of the folder part of the fabric, sewing on the bias tape.
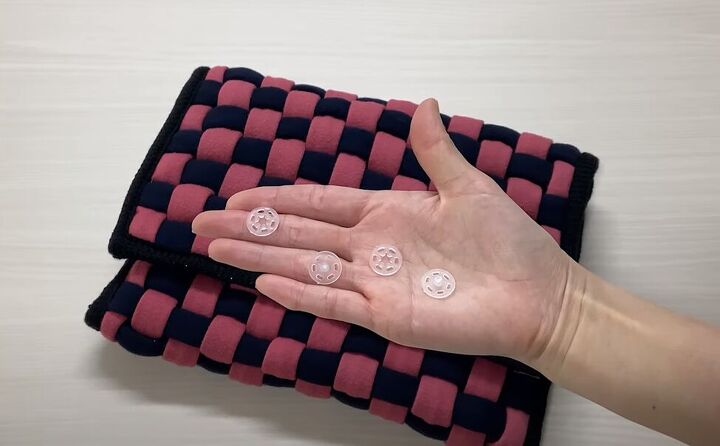
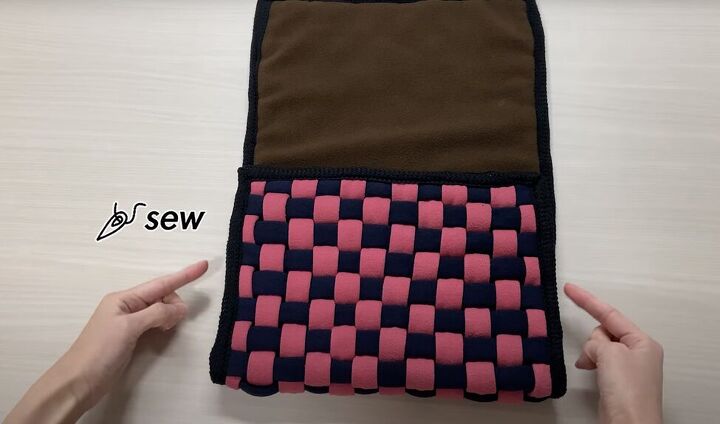
6. Add the closures
Fold down the top of the bag to where you want it, and mark on the inside of the flap and the outside of the bag where you will position two snap closures.
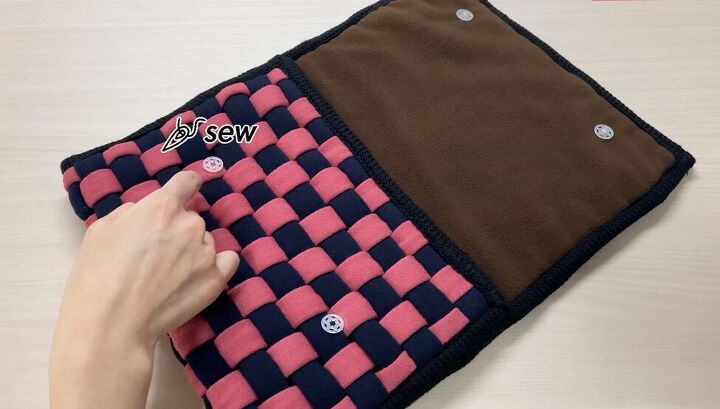
Hand-sew the snap closures to the bag and the flap.
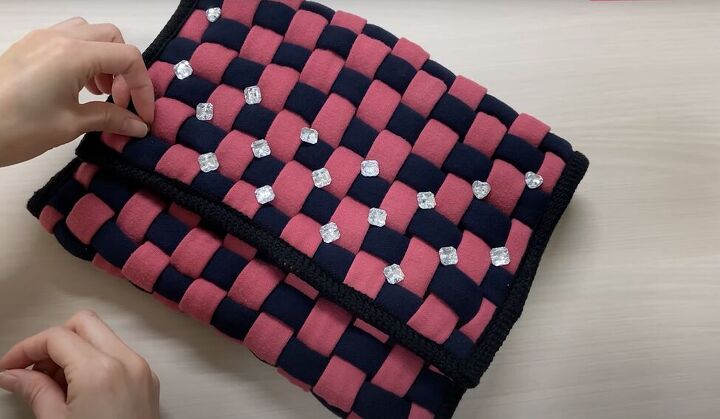
7. Decorate (optional)
Hand-sew on any decorative elements you’d like to add to your bag.

How to make a bag from t-shirts
Fill your bag with essentials and head out the door. This DIY bag you have made from old t-shirts will be as unique as you are!
Give it a try and leave a comment to let me know how you liked this tutorial, and what your friends are saying about your new bag.
The author may collect a small share of sales from the links on this page.


Comments
Join the conversation
Yes, absolutely