A Fun and Simple Tutorial to Customize Old Shoes and a Thrifted Bag

Hey, guys. In this tutorial, we will be customizing a pair of Adidas sneakers and learning how to paint a leather bag with a fun thrift piece I picked up. Let’s get started!
Tools and materials:
- Shoe or leather paint
- Top coat
- Paint brushes
- Isopropyl alcohol
DIY shoe design
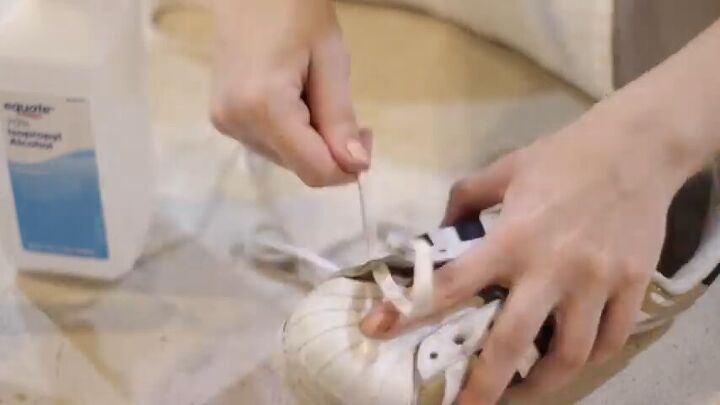
1. Remove shoelaces
Before you start painting, you’ll need to remove your shoelaces. I also went over the shoes with some isopropyl alcohol to clean and remove a previous design I already had on them.
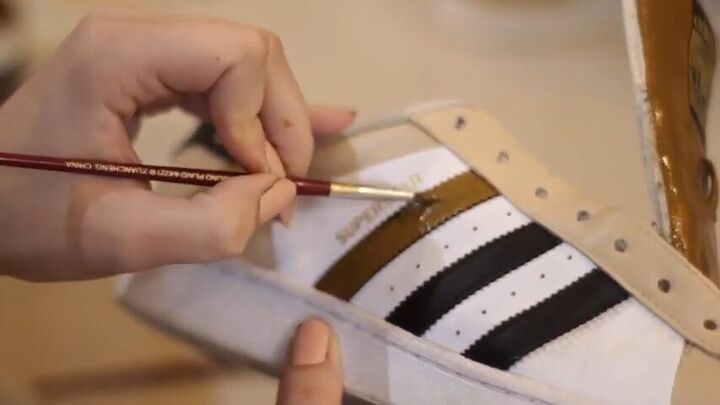
2. Customize with paint
If you are wondering what paint to use to customize sneakers, I use leather shoe paint that doubles as a primer and paint. For this pair of shoes, I’m using brown and tan paint to mimic the style I see all over Pinterest. Instead of spending a hundred dollars on a brand new pair, I decided to do this customization. When painting, make sure to use paint that can come off just in case you don’t like the colors or design you choose.
3. Let them dry
Let the sneakers fully dry overnight and we'll come back to them in the morning!
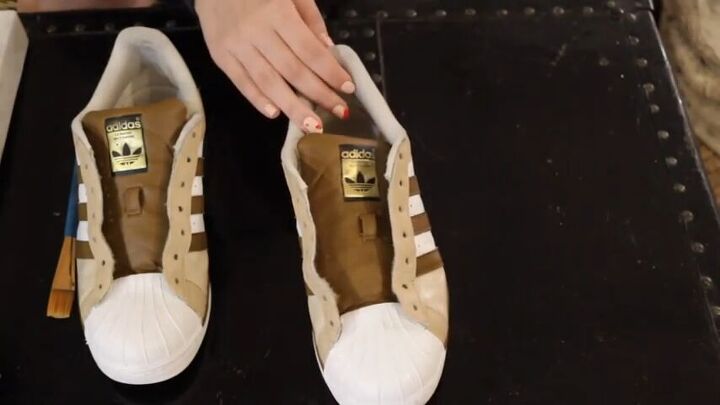
4. Add a top coat
Now, use a regular brush and go over the shoes with a top coat for a smooth finish. I used a glossy top coat. You can use a matte top coat, but in my experience, matte top coats tend to degrade a lot faster than glossy ones. If you don’t like the glossy top coat, you can do a final coat of the colored paints.

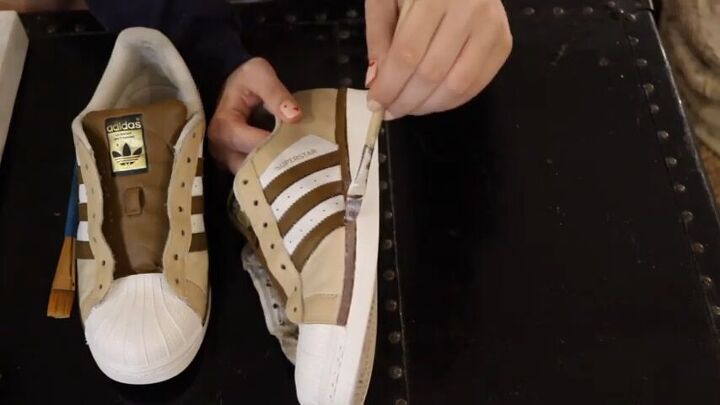
5. Relace
Relace your shoes—and you’re done!

Here are the finished hand-painted shoes. They look like vintage 70s bowling shoes, but I think they’re still cute and satisfy my niche need for a beige sneaker. What do you guys think about this DIY shoe design?
Now let's learn how to paint a leather bag!
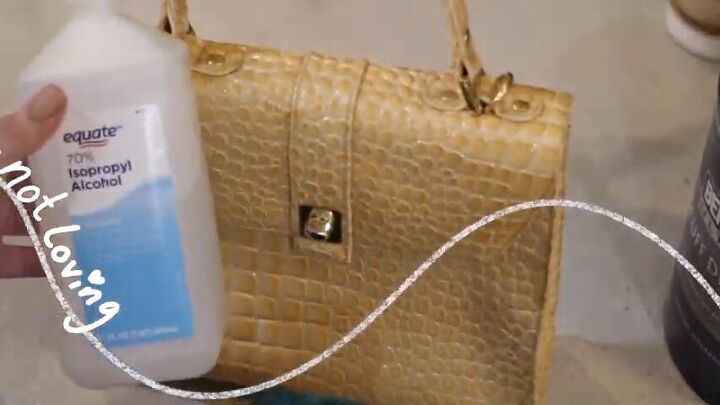
1. Clean with isopropyl alcohol
Go over the handbag with isopropyl alcohol and some acetone. This will remove any oils and debris that could be on the surface or inside the bag. It will also make sure the bag is clean and sanitized.
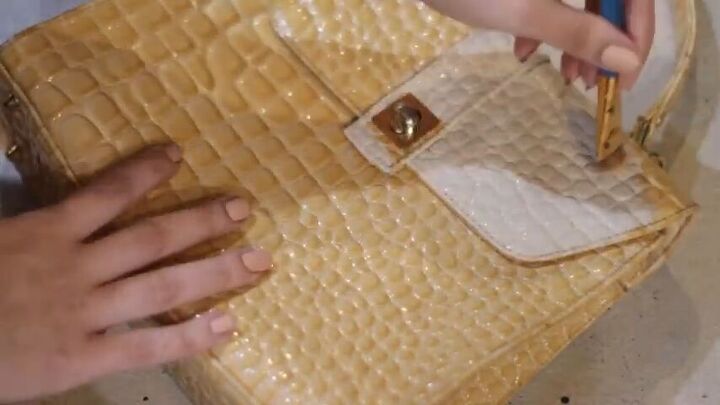
2. Paint
Next, just go in with the paint. I used a smaller brush when painting the latch for precision but switched to a pretty big brush for the body to make sure I got all of the coverage I needed. I also used multiple, really thin coats ensuring I got a nice layering since I want it to last quite a long time. Make sure to take your time and do many, many coats of very sheer paint. You don’t want to have to repaint the bag if it gets scuffed, so this is a great technique to make this DIY long-lasting.
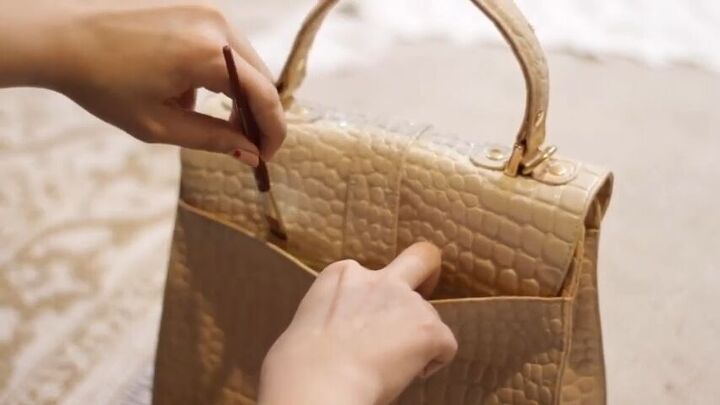
Make sure to paint inside any pockets or hidden areas as well as all of the seam work. I’m not doing as thick a layer but I still added it so the bag is one unified shade even when I open it up.
3. Add a top coat
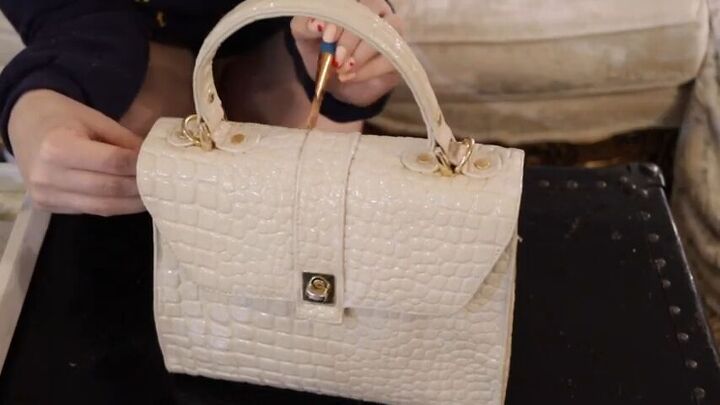
This one’s a bit hard to see in the pictures, but for this material, I went with a very thick and glossy top coat and I did about four coats of gloss in total. Let each coat dry before you add another one. This can take a couple of days. I did two coats per day—one in the morning and one in the evening. It’ll turn out really well and last a long time.
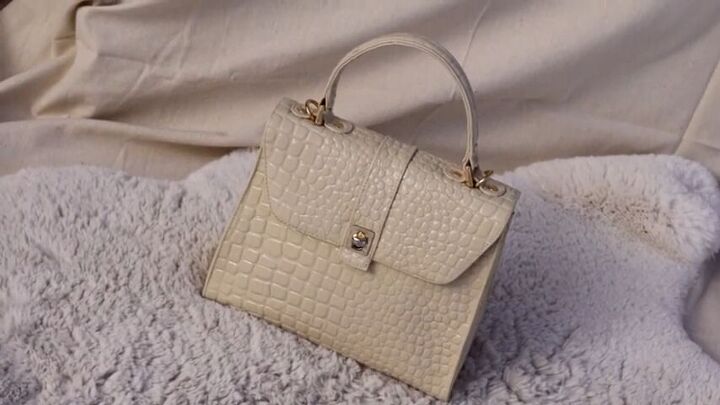
Here’s the finished bag! I’m so happy and proud of how this came out. I bought it for $3 and now it looks like a bag I could buy for $100.
A fun and simple tutorial to customize old shoes and a thrifted bag
That’s it for our tutorial on how to paint a leather bag and DIY shoe makeover. Let me know what you think of these thrift flips down below.
The author may collect a small share of sales from the links on this page.


Comments
Join the conversation
Loved the effects you came up with. What product did you use for the top coat?