2-in-1 Bag Transformable Into a Tablecloth
If you ask me, the best sewing projects are those that give you two products for the workload of just one. Here’s a great example of such a project.
This DIY transformable bag may seem like a normal bag at first sight, but it can easily transform into a big tablecloth that’s ideal for meals in nature.
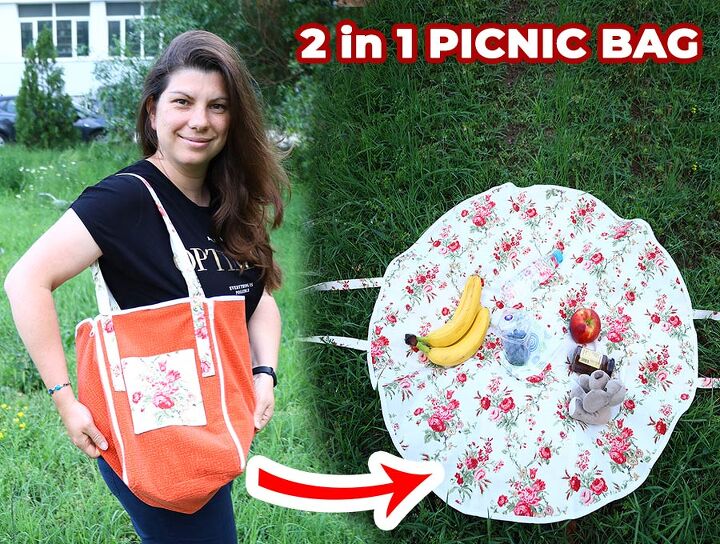
No matter if you’re under a beautiful tree on a meadow or at the beach on a sunny day, any kind of picnic will be that much better with this thing at your disposal.
Fire up that creative sewing mind of yours and get ready to make this two-in-one transformable bag because here come the instructions on how to do it.
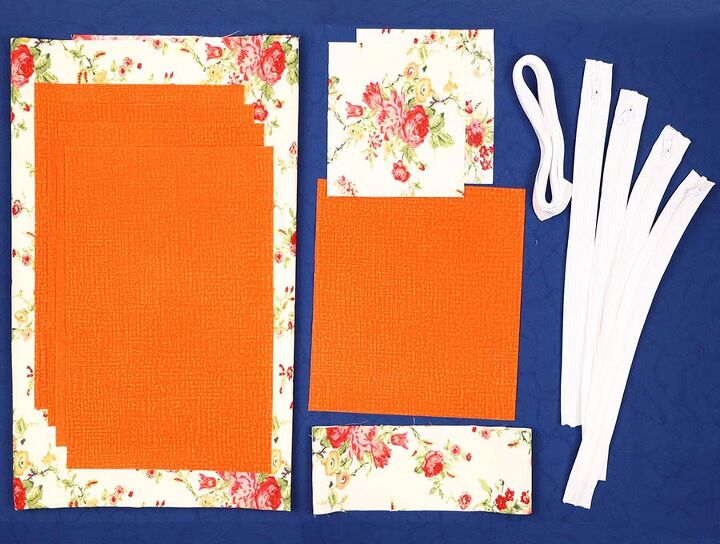
Cut the fabric
You will do a lot of cutting here so be prepared.
Cut the main fabric into:
- one 40 inches square
- two 6-inch squares
- a 38 x 4 inches fabric strip
From the secondary fabric, cut:
- four 14 x 10 inches rectangles
- one 10-inch square
You will also need four 16 inches long zippers.
Head over to HelloSewing.com to get the printable cutting list
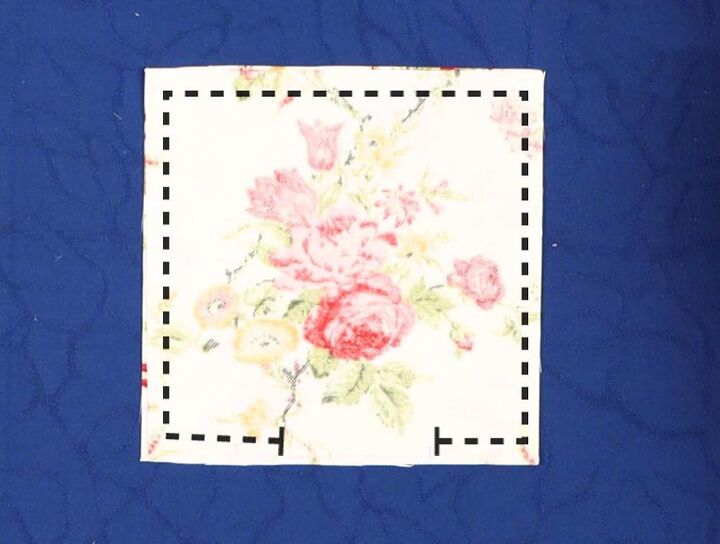
Stitch the pocket piece
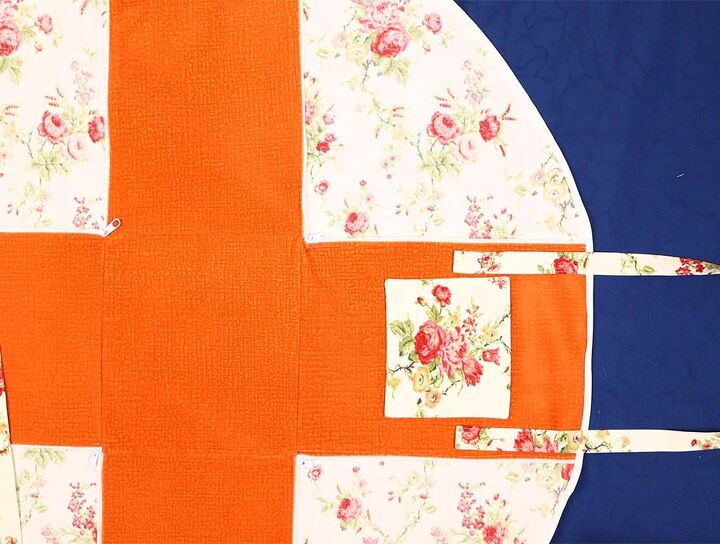
Stack the two squares of the main fabric with their right sides in and stitch all around them, but leave a gap for turning. Clip the corners and turn the fabric. Topstitch one edge of the square piece.
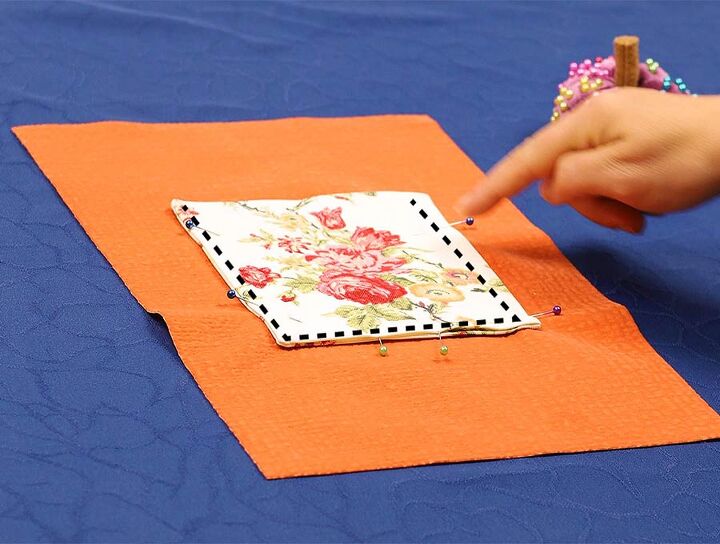
Place the square onto the right side of the 14 x 10 inches rectangle. Set it 4 inches (10cm) below one short edge and center it. Make sure the topstitched edge is up.
Stitch the side and the bottom edges of the square.
Fold the long edges of all 14 x 10 inches (35 x 25cm) rectangles towards the wrong side and press them flat.

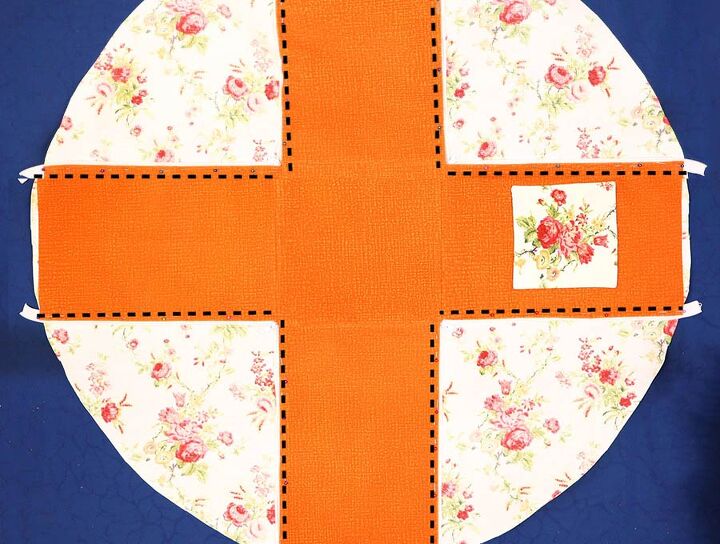
Align a short edge of one of the rectangles with one edge of the secondary fabric square with their right sides in. Stitch them together, but don’t go over the folded edges. Repeat with the other pieces until you get a plus shape piece of secondary fabric. Press the seams on the plus shape open.
Making the bag body
Fold the secondary fabric piece in half vertically, then horizontally to get an L-letter-shaped piece. Make sure the right side is facing up.
Fold the large fabric piece in half twice in the same manner. Set the L shape piece onto it so it aligns with its bottom-left corner. Draw a curved line between the secondary fabric corners on the main fabric. Cut through all layers along the line. Unfold everything.
Center the plus shape piece on the round piece. Keep their wrong sides facing each other.
Attach the zippers
Unzip the zippers so one-quarter of their length stays closed. Spread one to form an L shape and pin it to the 90-degree edges of the plus shape fabric piece. Do so with all the zippers on all of the 90-degree edges. Stitch them together and trim the excess zipper.
Sew a bias binding tape all around the main fabric circle.
Make the handles
Fold the short edges of one of the last two fabric pieces 3/8 of an inch to the wrong side and press flat. Fold the entire piece in half so the long edges meet and the wrong side is in. Unfold, then fold each long edge to the crease and press. Fold in half like you did the first time again and stitch the long raw edge. Topstitch the handle along its entire length.
Repeat with the last fabric piece.
Take one of those thin strips and pin its end to the center of one prong of the plus shape, half an inch away from the edge. Pin the other end of the strip in the same manner, half an inch away from the parallel edge of the same prong. Stitch in place.
Attach the second handle in the same way, to the prong opposite this one.
All that remains now is to decide which treats and food you are going to bring to your picnic with this new transformable bag. When you come back and rest up, check out our other tutorials, there are many fun projects like this one waiting for you!
Make sure to subscribe for more useful sewing projects like this. Follow us on Youtube (and click the bell to be notified when we post a new video).
The author may collect a small share of sales from the links on this page.


Comments
Join the conversation
Thus tutorial is fabulous! I saved this one! 🤩
Unbelievably clever. Thank you for sharing!