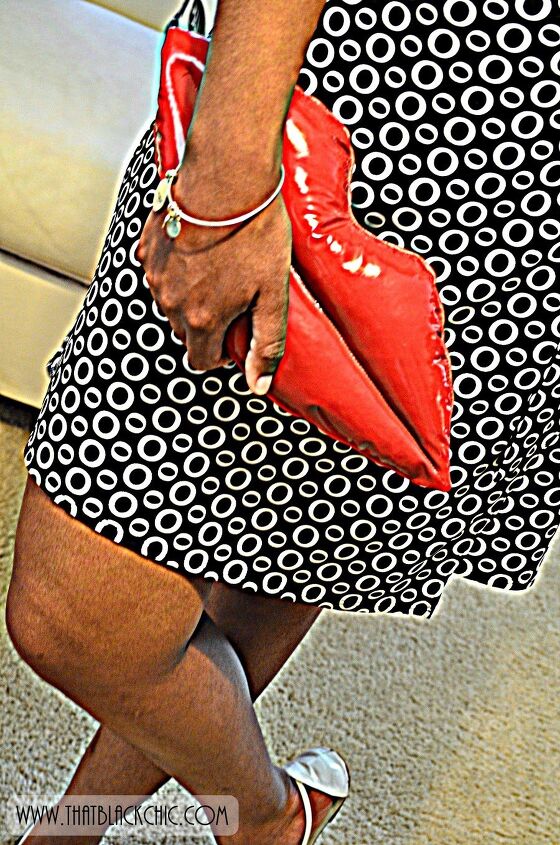
DIY 3-D Red Lips Clutch Tutorial: It's All About the Lips!


Steps:
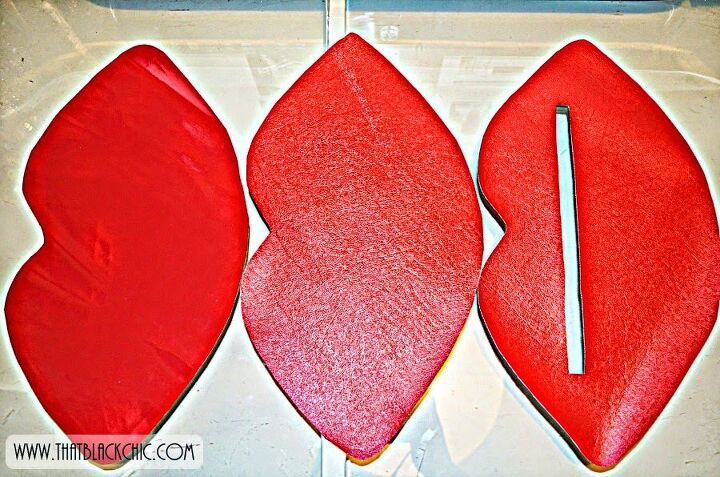
1. Cut your
fabric using your template: (three pieces shaped like lips)
Ø 1 piece of a
light weight fabric for the clutch front
Ø 1 piece this
will be the front lining (sturdy fabric such as faux leather or denim)
Ø 1 piece for
the clutch back with a 9 X ½ slit for the zipper
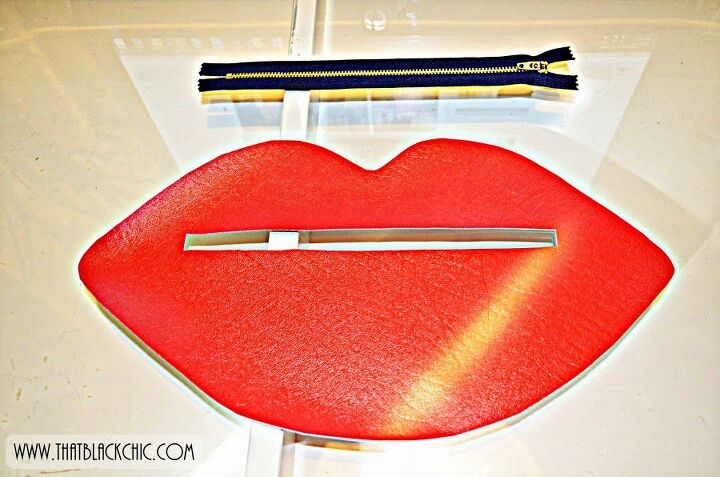
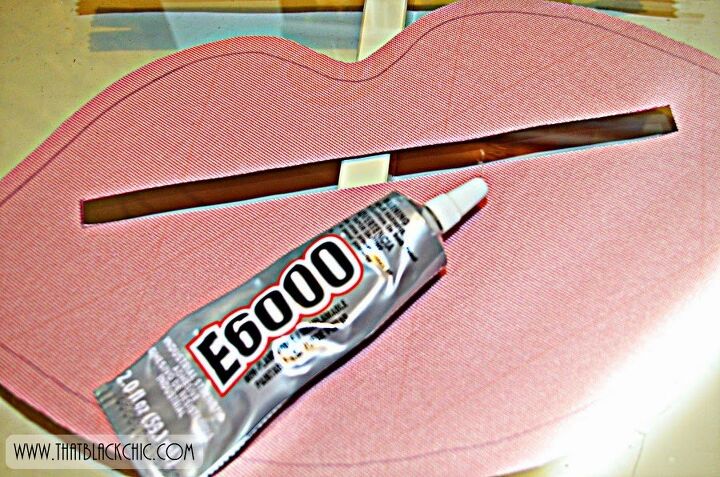
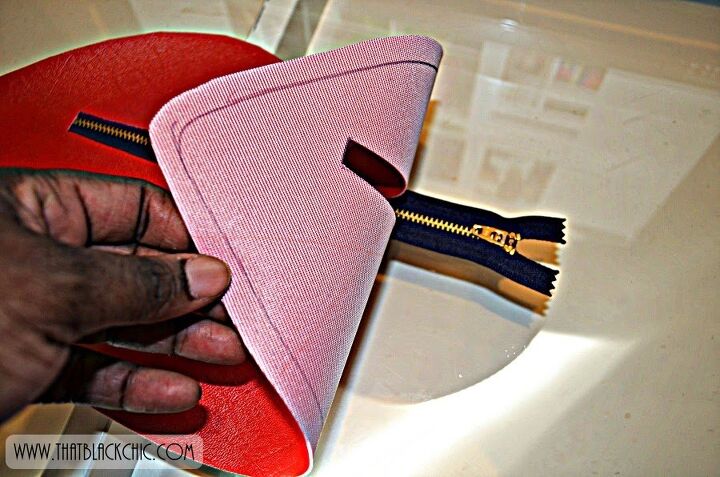
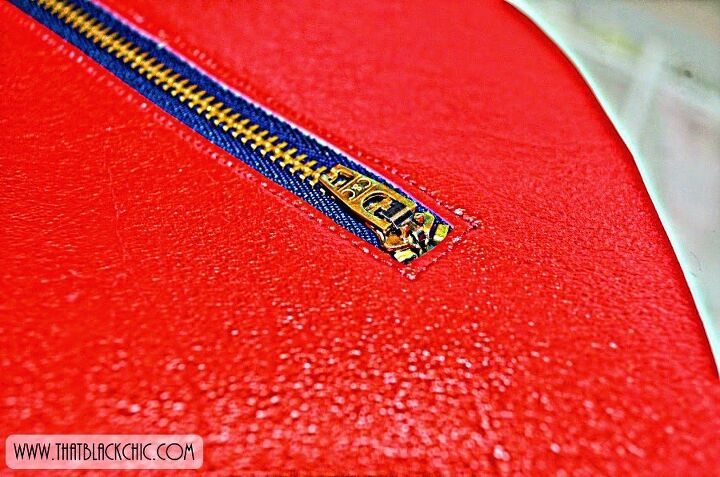
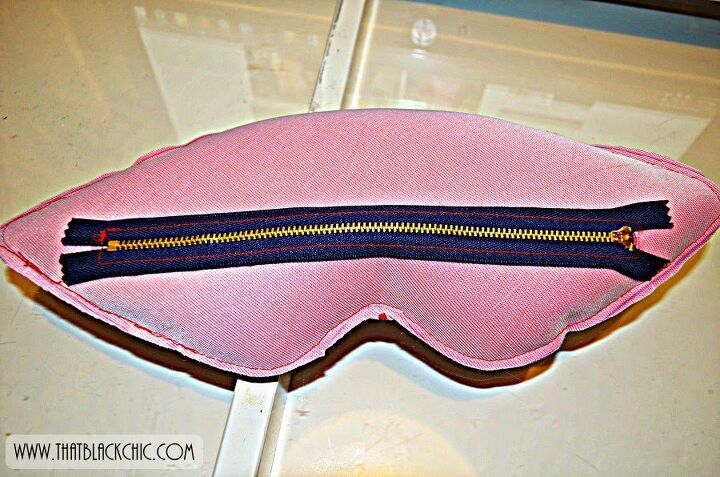
2. Glue the zipper
to the back piece. Add the glue all around the edges of the zipper slit that
you cut out on the back piece. Now put in on top of the zipper making sure it’s
lined up in the middle. This will secure the zipper in place for sewing. Now
let this sit while we take care of the other parts of the clutch.
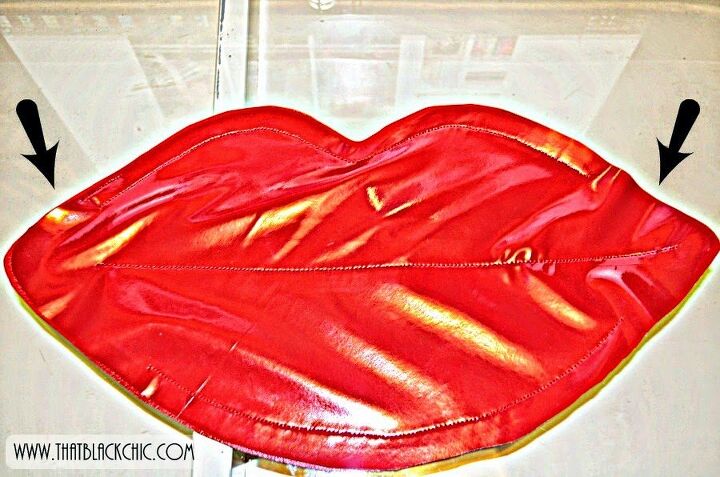
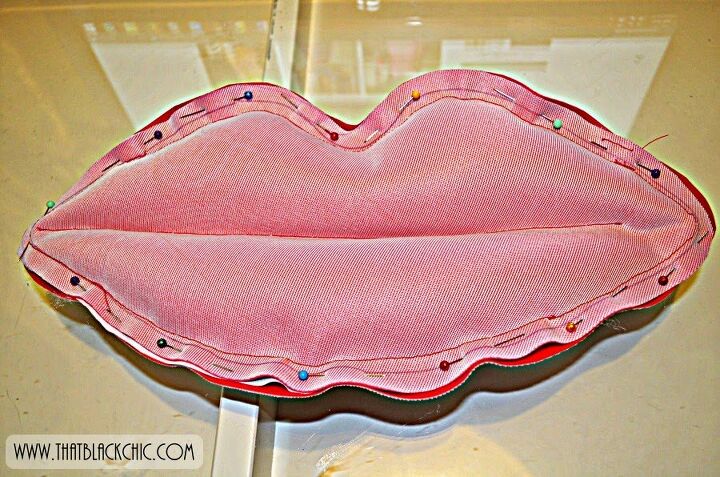
3. Sew the
front piece on top of the front lining piece, leaving an opening at each end.
Sew a straight stitch across the middle all the way across the lips.

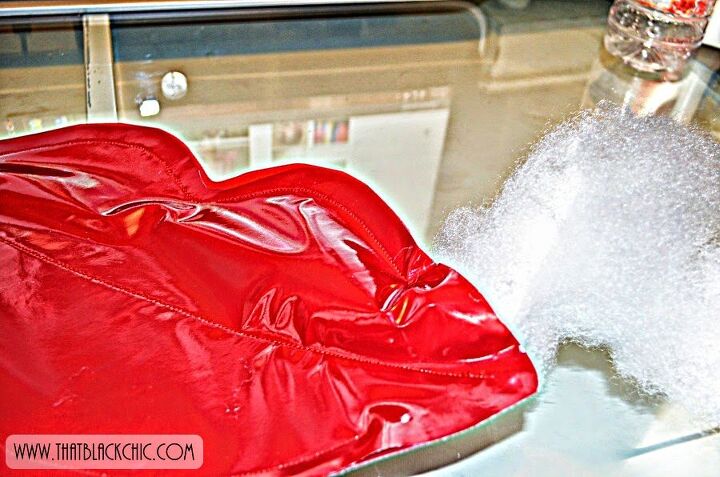
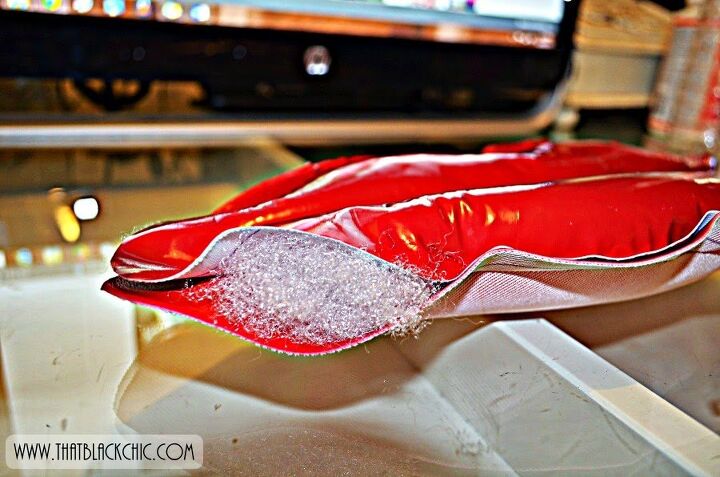
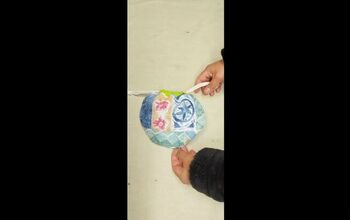
4. Now add the poly
fill for the 3-D effect. Once front is filled sew the open edges closed.


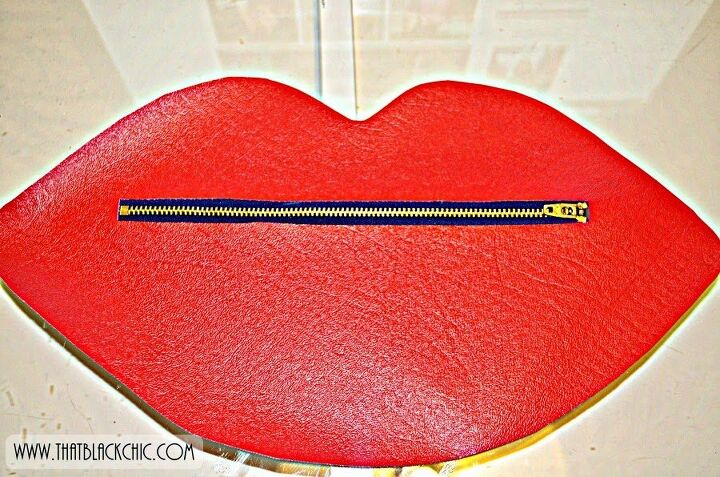
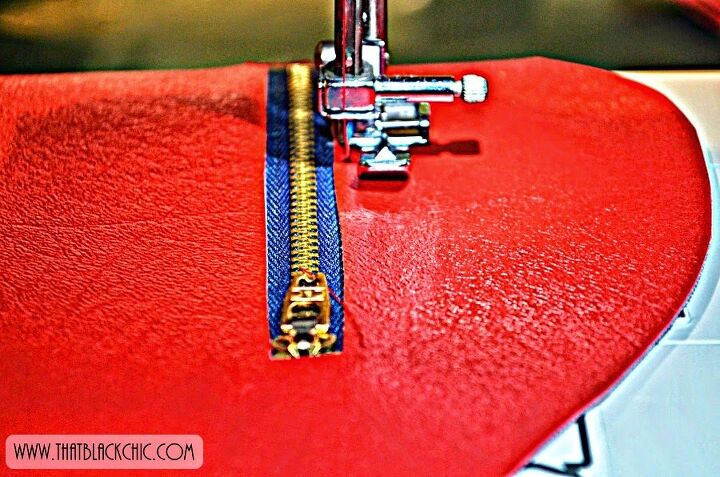
5. We are now
going to stitch the zipper to the back, just stitch close to the edge of your
slit. Make sure your stitching is as straight as you can get it. I used a zipper foot.
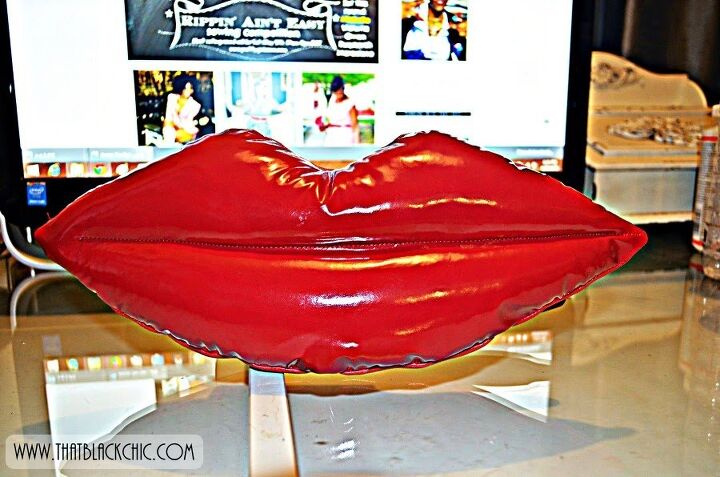
6. OK, we are
almost done now. Now we are going to put the front and back right sides
together to sew the clutch. Pin the pieces together and sew all the way around
the clutch. (Make sure you open the zipper so you can turn the clutch onto the
right side when done)
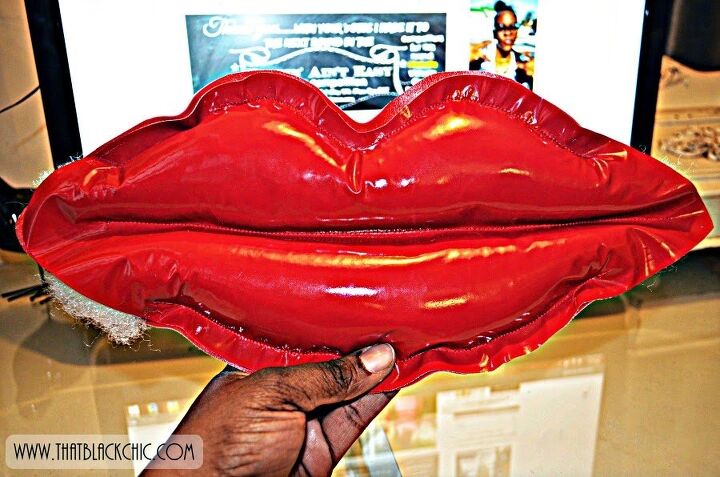
7. Trim your
seams down as much as possible and turn over the right side. Use something to
make sure your corners are poked out as much as possible and you are done!!

(See below I forgot to open my zipper before sewing the clutch
together. I had to remove a few stitches to get it down.)


The author may collect a small share of sales from the links on this page.


Comments
Join the conversation