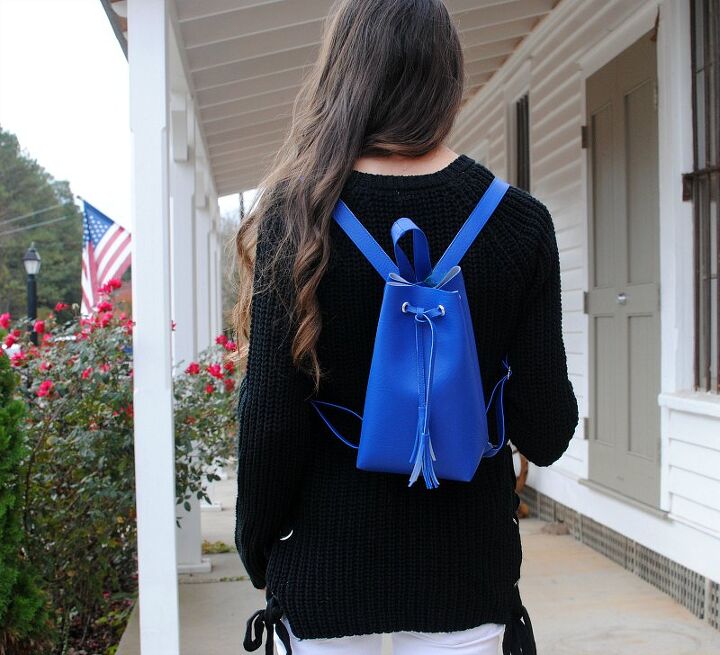
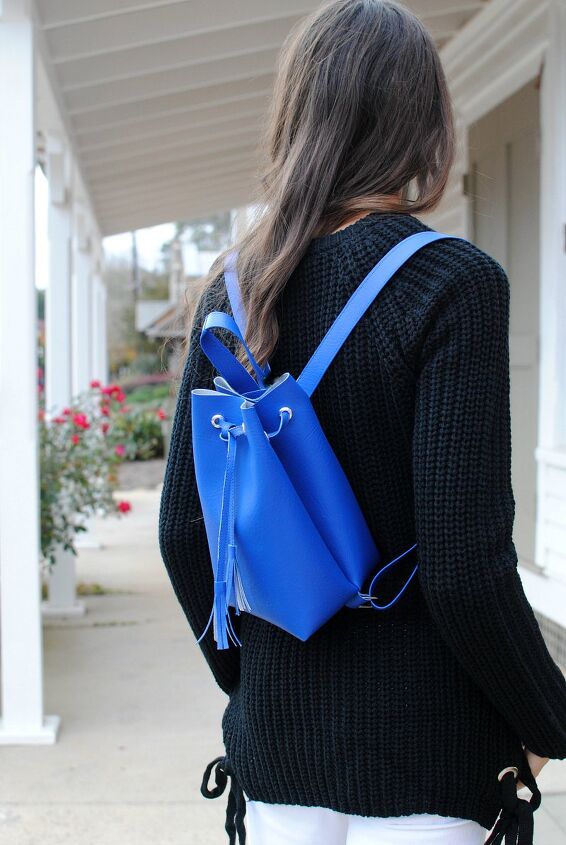
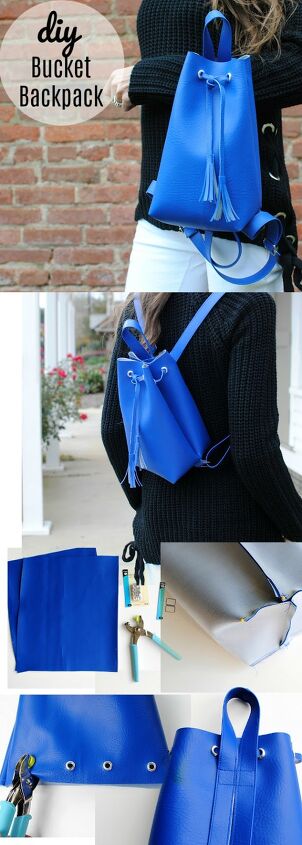
DIY Bucket Backpack
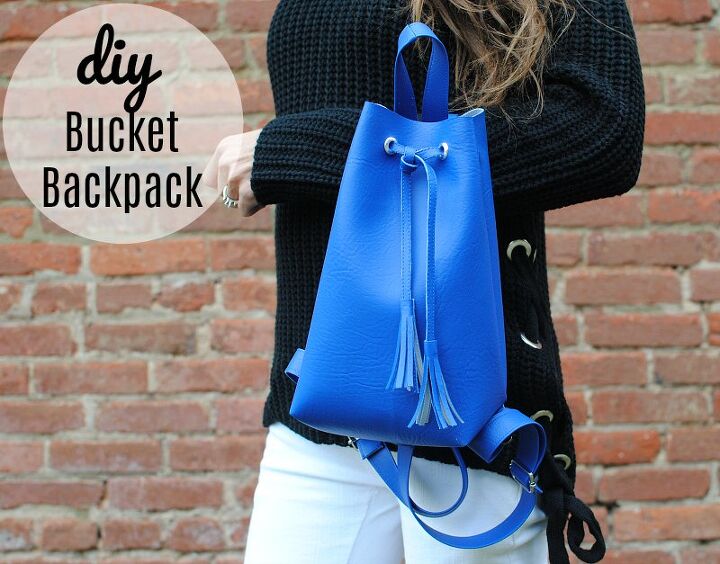
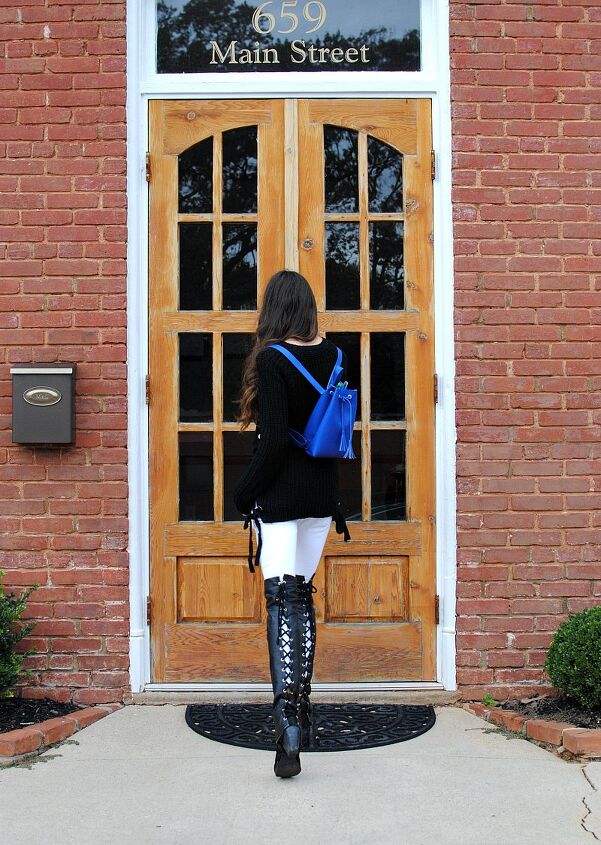
I've always been a backpack person. Maybe, because I'm a mom of 3 boys and need my hands free. It's my go to when I'm headed out with the kids to a museum, park, shopping, etc. The problem is most backpacks are too large or not visually appealing. I've been looking for something smaller that can carry the essentials (phone, keys, wallet) but with a modern look. With no luck I decided it was time to create my kind of backpack and Dritz products make this easy to do. Get the details below on how to make your own bucket backpack with a draw string closure and adjustable straps.
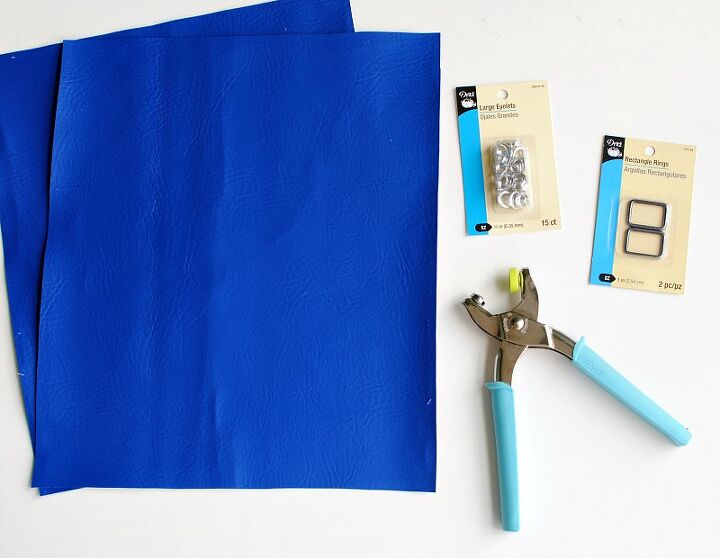
Supplies:
- Dritz 1/4" Large Eyelets
- Eyelet Pliers
- Rectangle Rings
- Adjustable Slide Buckles
- Tassle cap (optional)
- Getta Grip Sewing Clips
- 1/2 yard vinyl fabric
- Jeans Needle
DIY Instructions:
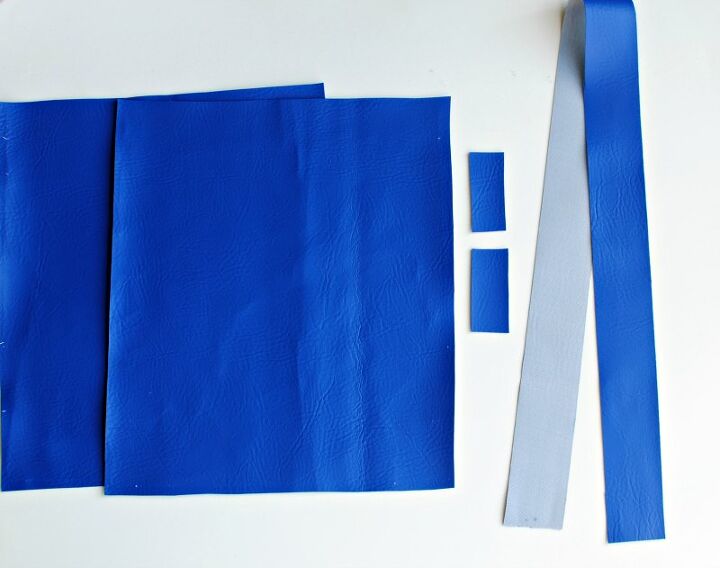
Cutting:
All pieces are cut from the vinyl. I even made my own strap and drawstring strap to match everything.
- 2 main pieces: 12" x 12"
- 2 bottom tabs: 2" x 1"
- 1 strap: 28" x 2"
- 1 drawstring: 12"x 1/4"
- 2 tassels: 2"x2"
* 1/4" seam allowance unless stated otherwise.
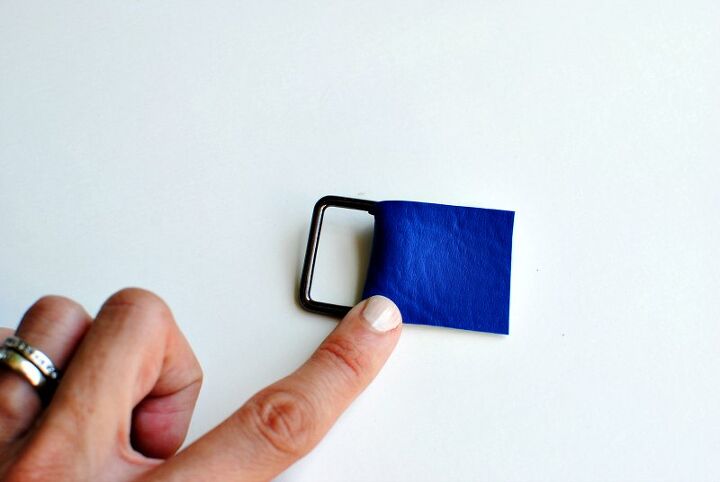
Fold the tab pieces over the rectangle rings.
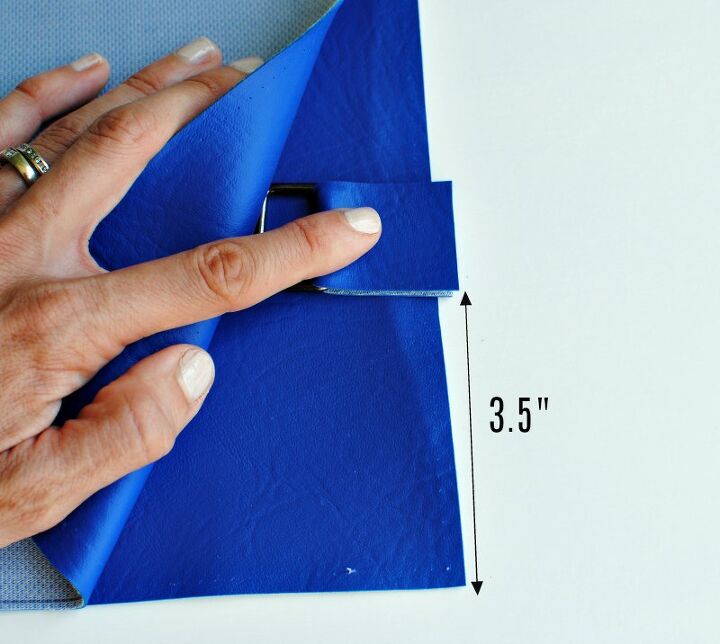
Place them 3.5" up from the bottom of the main piece on both sides.
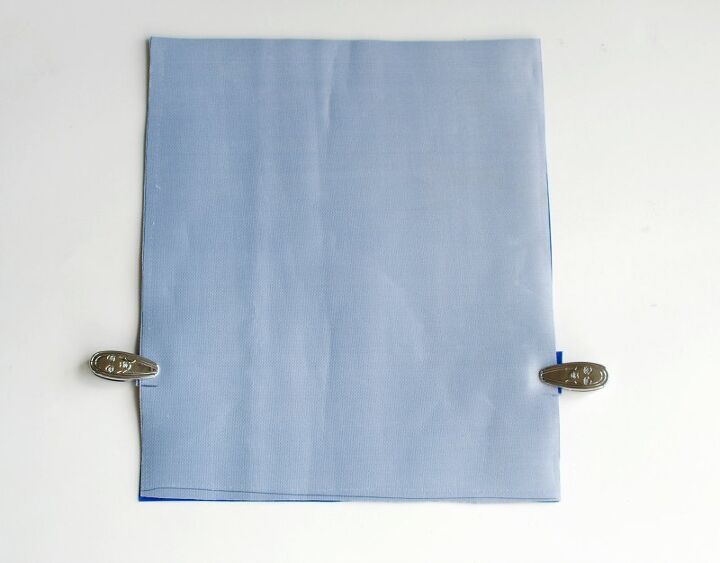
You can baste stitch the tabs into place so they don't slide. Use Getta Grip Sewing Clips to hold them into place. These clips are great for heavy materials like vinyl. Pins are not strong enough and it won't make little holes in the fabric. Start at the top and sew the bottom of the square leaving the top open.
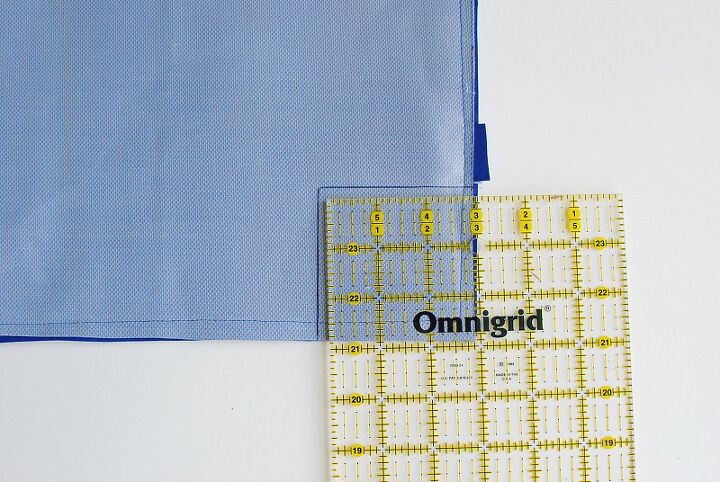
Use a grid ruler and mark a 3" square off at each bottom corner.
Cut the squares out. Their should be a good 1/2" between the tabs and the edge.
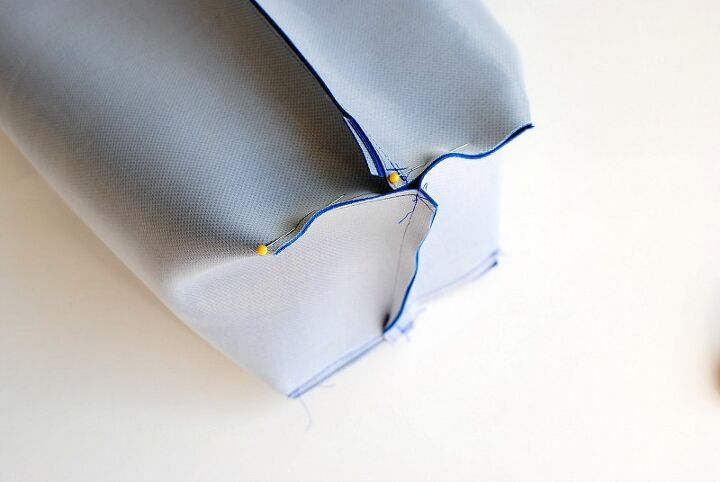
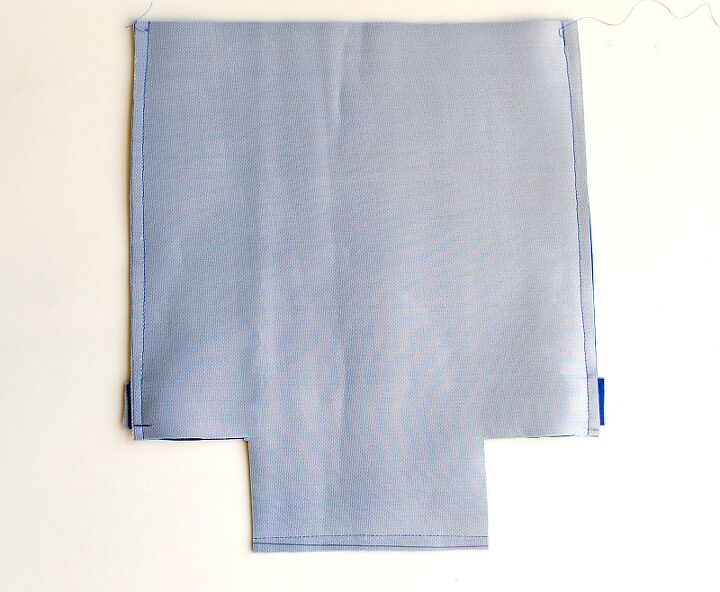
Fold the square so the seams match and clip or pin into place. I am pinning them just so you can see better in the photo.
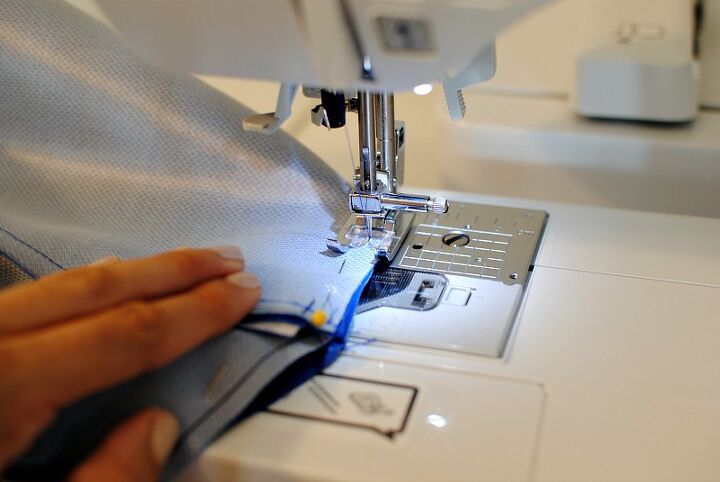
Sew into place nesting the seam allowance so they're going in opposite directions.
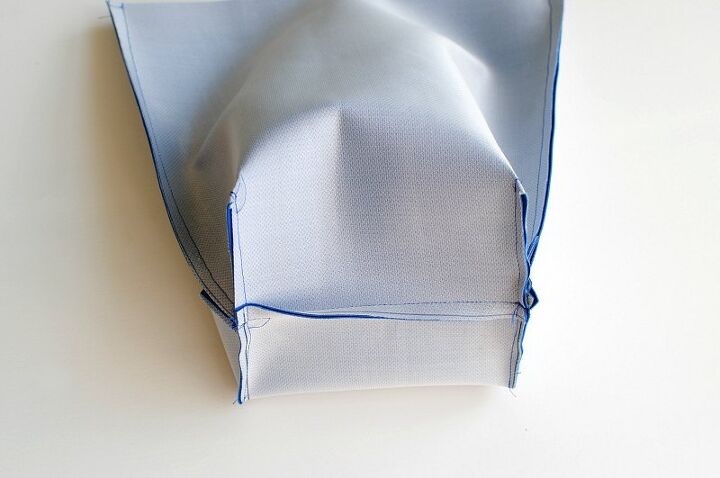
Repeat for both sides.
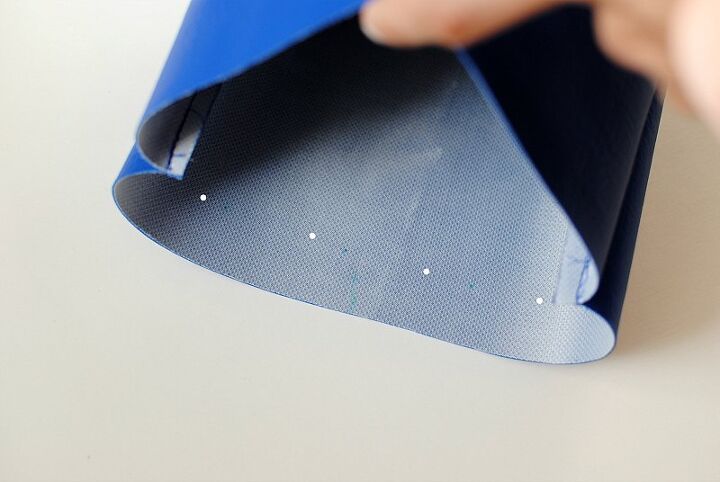
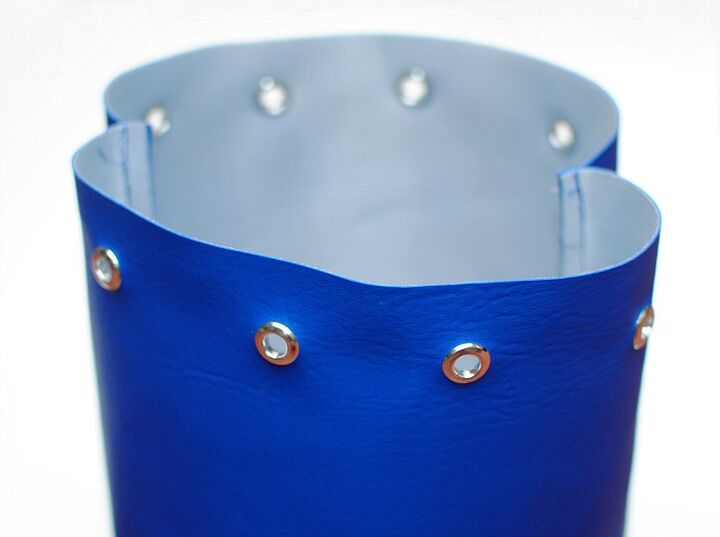
Now for the eyelets. Mark 1" down from the top raw edge where you want your eyelets. I wanted 4 on both front and back so about a 2" spread between each other.
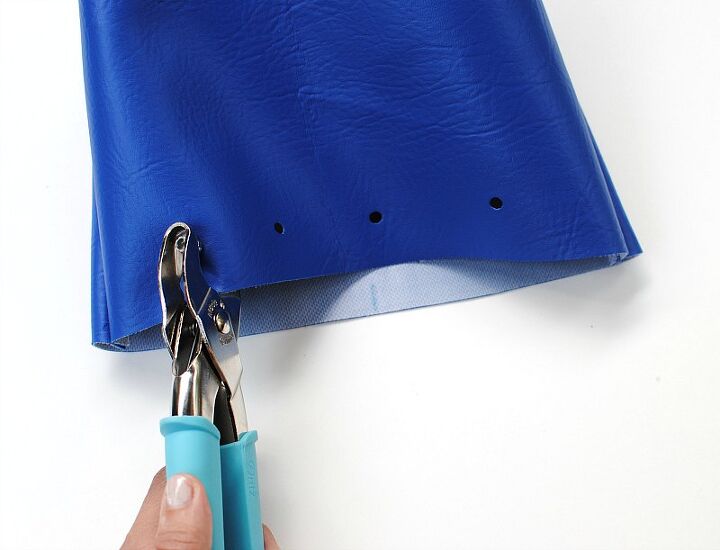
Use Dritz Eyelet pliers and cut 1/4" holes over the marks.
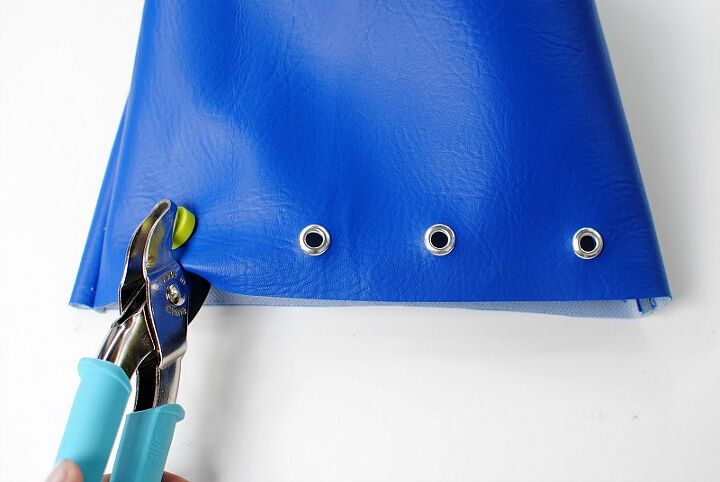
Then replace the set with the 1/4" attachments and secure the Large Eyelets into place.
Create straps by folding over the strip and top stitch along each edge.
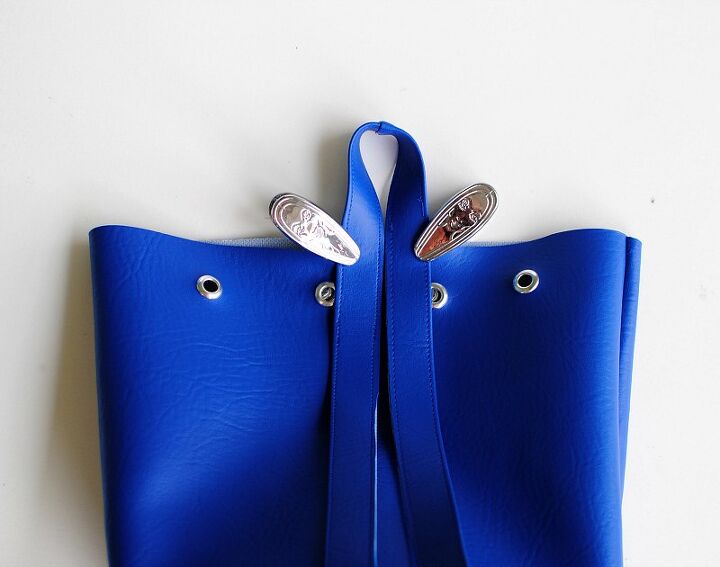
Fold the straps in half to find the midpoint and use that point as the top of the flap for the back pack. Create a loop 2" above the backpack edge and clip into place.
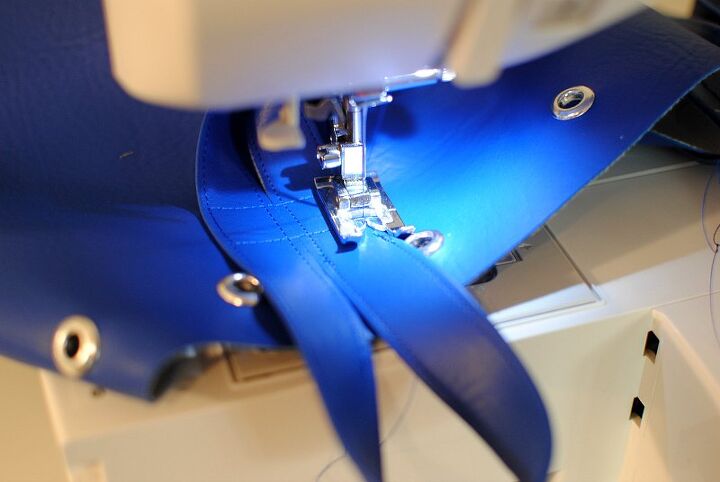
Sew a rectangle to secure the straps about 1/2" down from the grommet eyelets.
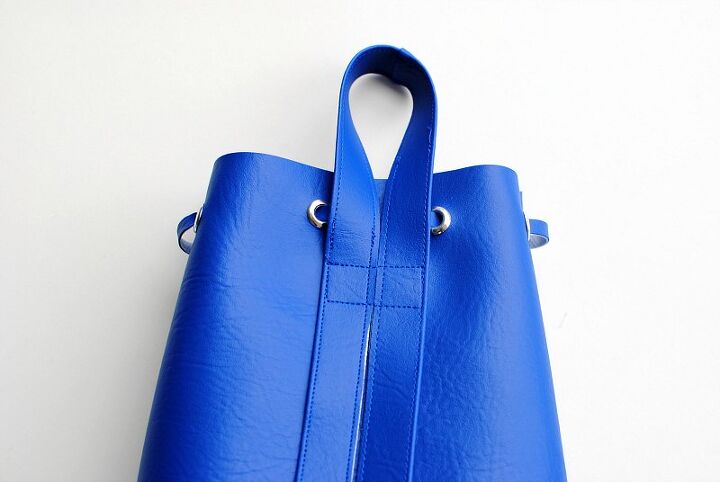
It should look something like this.
Now create the drawstring strap by folding a 1/2" strip and top stitch the folded and raw edges into place. Weave in and out of the eyelet openings.
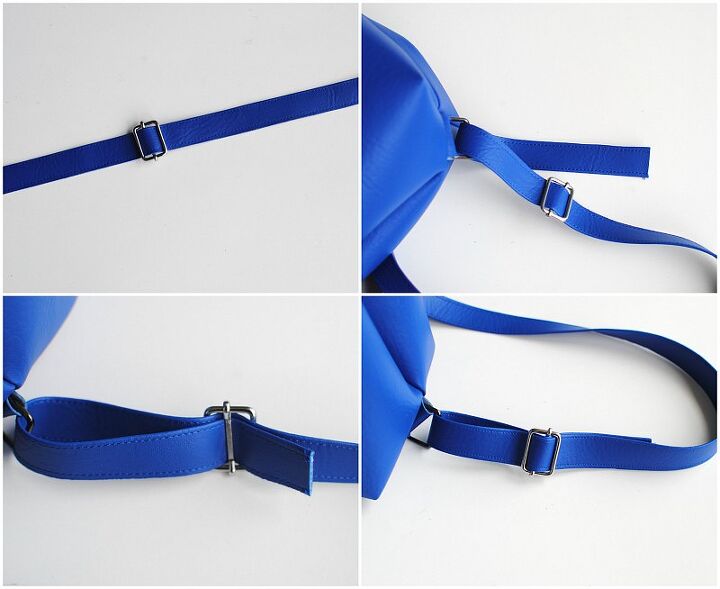
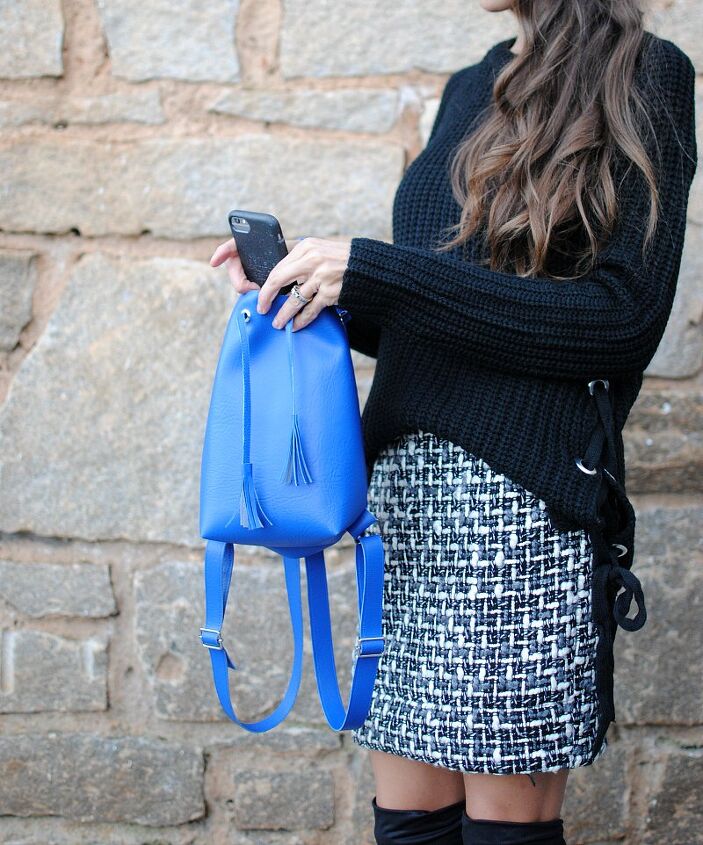
Place the straps through the adjustable slide buckles then through the rectangle rings. Secure them by going back through the buckles.
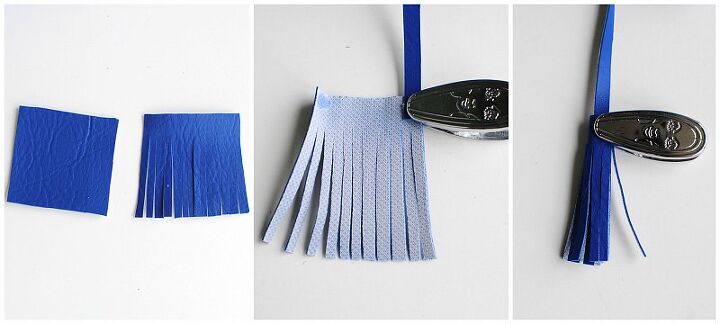
For the tassels I cut a square that measured 2" x 2" and cut little strips leaving a 1/4" border at the top. Then use a glue gun and wrap it around the end of the drawstring straps glueing as you go. You will want to do this after you have placed the straps in the eyelet openings. You can also use Dritz Tassle Caps which I plan to do next.
This is one of my favorite accessory projects to date. So far I've used it everyday since I made it last week. Try your own and let us know what you think.
*In collaboration with Dritz.
I received compensation from Dritz®, and some of the materials featured here or used in this project were provided free of charge by Dritz®. All opinions are my own.
Pinterest Collage for you!
SaveSave
The author may collect a small share of sales from the links on this page.


Comments
Join the conversation