DIY Small Crossbody Bag - Perfect for Your Phone and Keys
Summer equals light clothing in one layer, and that could be a problem for us modern people. Such clothes usually have too few, or no pockets.
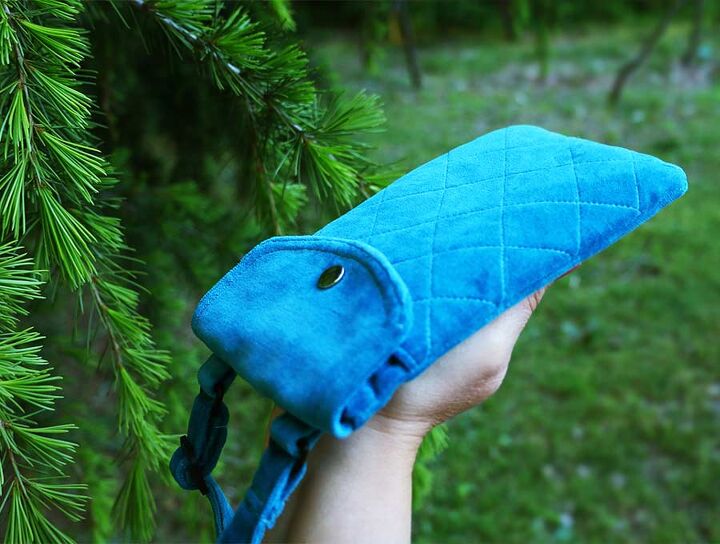
No pockets mean no room for our phones, and by the Gods, we shan’t have that! You have to have your phone with you, so you need a place to store it on you. Enter, the crossbody phone pouch!
It’s stylish, practical, and super easy to sew! Just take a look at these instructions and you’ll be making your new phone Bag in no time!
Prepare the fabric
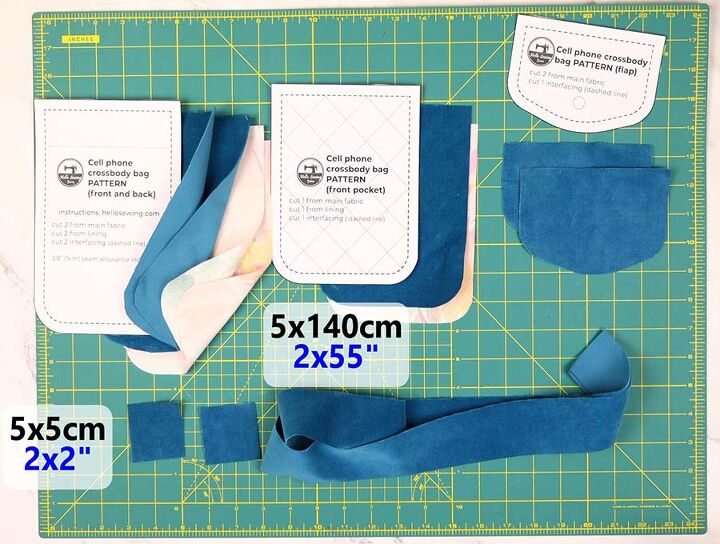
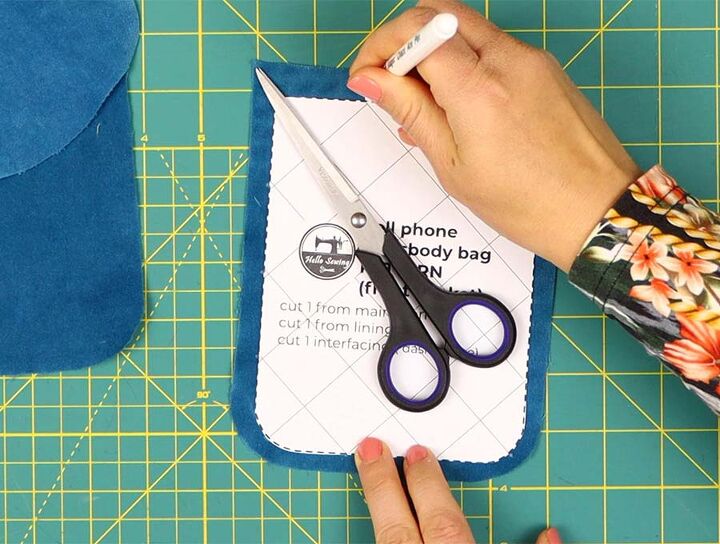
Download and print the FREE crossbody bag pattern. Cut out the parts and use them as a guide to cut the fabric.
Use the largest part to cut two main fabric pieces and two lining pieces.
Use the slightly smaller part to cut out one main and one lining piece.
The smallest part will help you cut two main fabric pieces.
Cut the pattern parts down to the marked size and use them to cut the interfacing. Cut two pieces using the large part, and one piece each with the remaining two parts.
You will also need to cut two square pieces 2 inches big from the main fabric, and a strap measuring 2 x 55 inches big.
Start sewing the bag
Fuse the interfacing to the corresponding main fabric pieces’ wrong sides.
Transfer the checkered design from the pattern onto the right side of the medium fabric piece. Stitch the design in a quilting manner.
Set the corresponding lining piece over the quilted piece with their right sides in and stitch them together at their short edges with an eighth-inch allowance. Flip the lining to the other side and topstitch it along the unstitched edges.
Assemble the bag
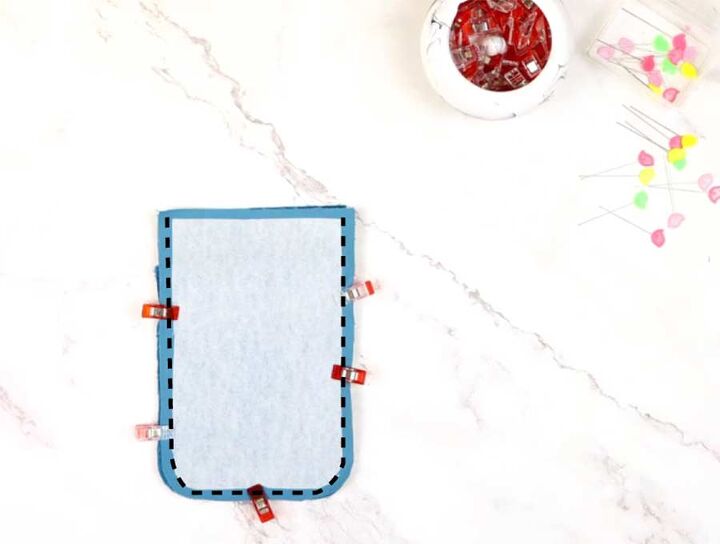
Place the quilted piece onto the right side of the large piece with its wrong side down. Align the curved edges and pin the two.
Place the other large piece over the fabric sandwich with its right side down. Align the edges and stitch all around, leaving the short straight edge unstitched.
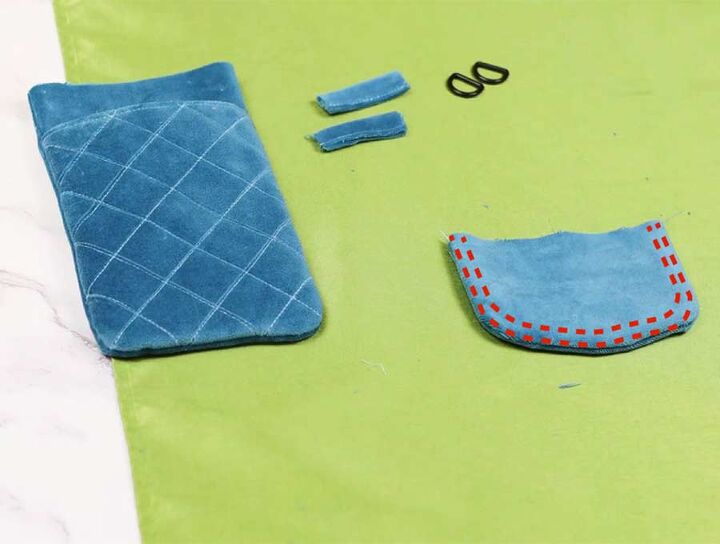
Fold the tiny square pieces to the middle twice as if you’re making bias binding and stitch each one along the raw long edge.
Stack the two small fabric pieces with their right sides in and stitch them all around. Leave a gap for turning.
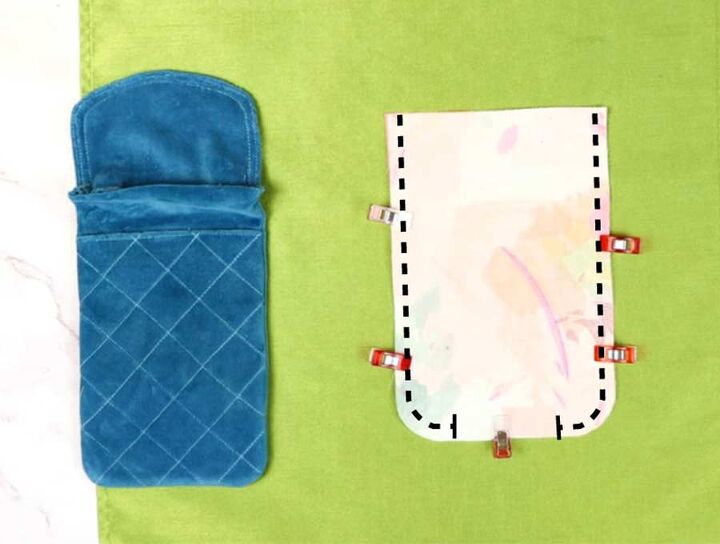
Stack the two remaining lining pieces and sew them together, leaving the short edge, as well as a small gap on the curved edge unstitched.
Trim the allowance on all pieces and notch the curves before you turn them. Don’t turn the lining pocket.
Pull the two tiny straps over the strap rings and stitch them onto the bag back.
Stitch the flap to the bag opening.
Finish the bag
Insert the bag into the lining pocket and align the edges. Stitch them together around the bag opening. Turn the bag through the unstitched gap on the lining.
Sew the gap on the lining shut and stuff the whole thing into the bag.
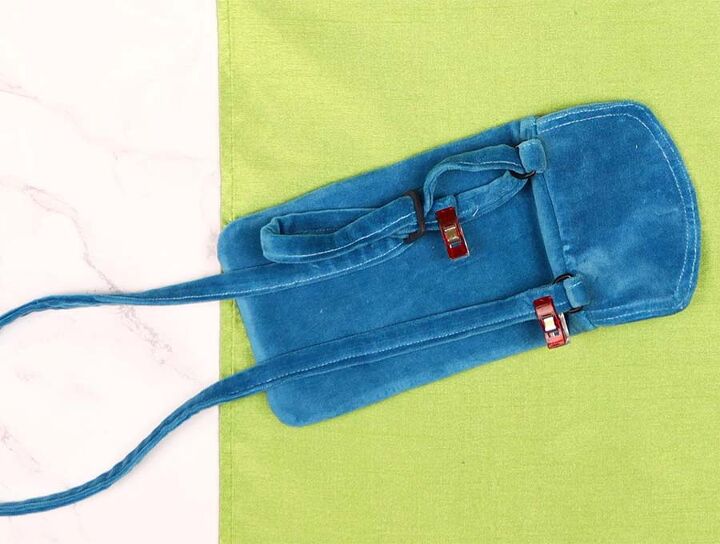
Fold the strap to the center twice, like a bias binding, and stitch it. Pull it through the slider and the rings on the bag, and stitch them in place.
Add studs or snaps to the flap and the bag and your new phone holder will be complete!
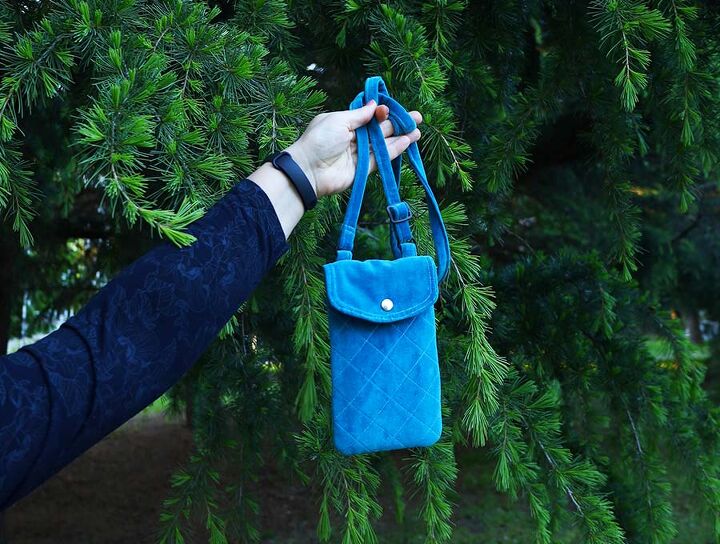
Your cute new crossbody bag isn’t just for your phone, you can hold your cards, some cash, earphones, chapstick, or something of similar size, much like a small purse. Handy, isn’t it? We hope you had fun working on this project! See you on a different, creative tutorial soon!
The author may collect a small share of sales from the links on this page.


Comments
Join the conversation
Lovely bag and well done. Thank you for the pattern and sharing your process. LOL when I first saw the ad for your tutorial I thought the bag was made from pot holders, which might also work :)
How much to buy the blue bag ? I do not sew. Lots of people will want to buy one!!