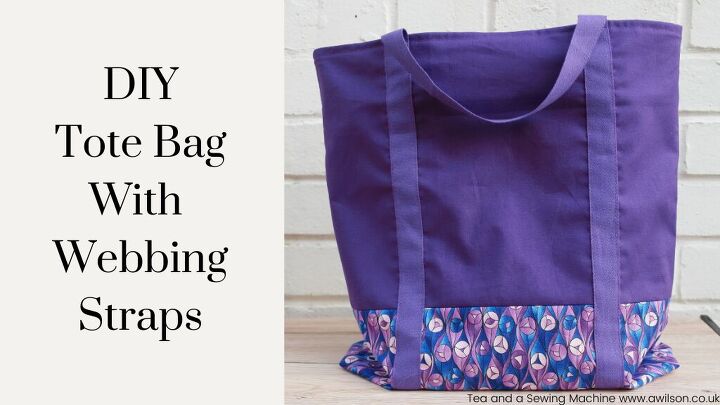
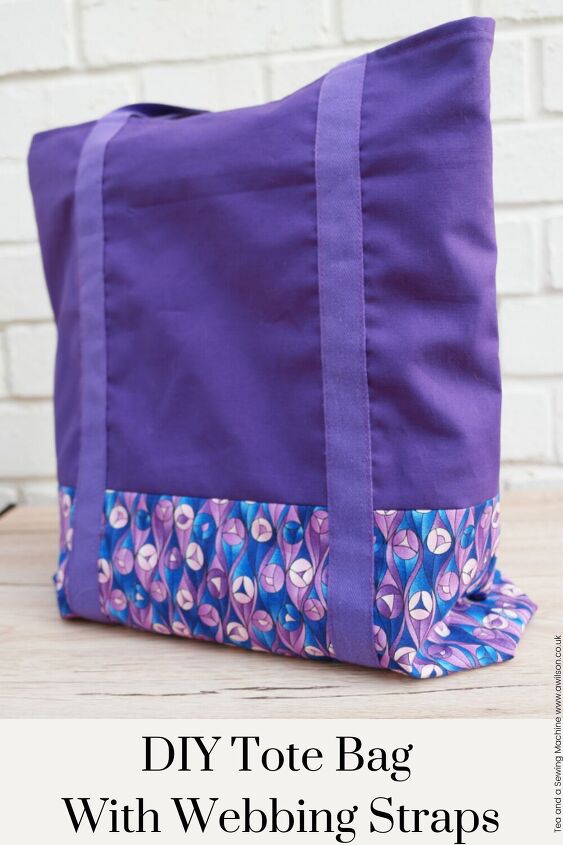
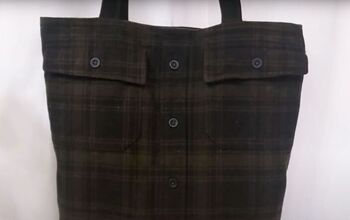
DIY Tote Bag With Webbing Straps
A DIY tote bag is always useful, and over the years I’ve made a lot!
It’s often handy to have a spare bag, and even if you don’t need one for shopping, you can use them for storing things in. I have a tote bag with wrapping paper in it behind the dresser in the kitchen, and several with unfinished crochet projects in them!
If you need your DIY tote bag to be a bit stronger, perhaps for carrying heavy shopping, books or large folders, there are a number of ways in which you can make them stronger.
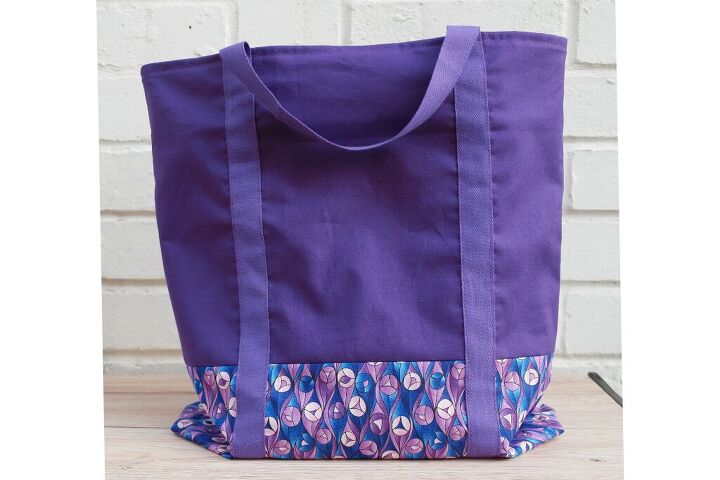
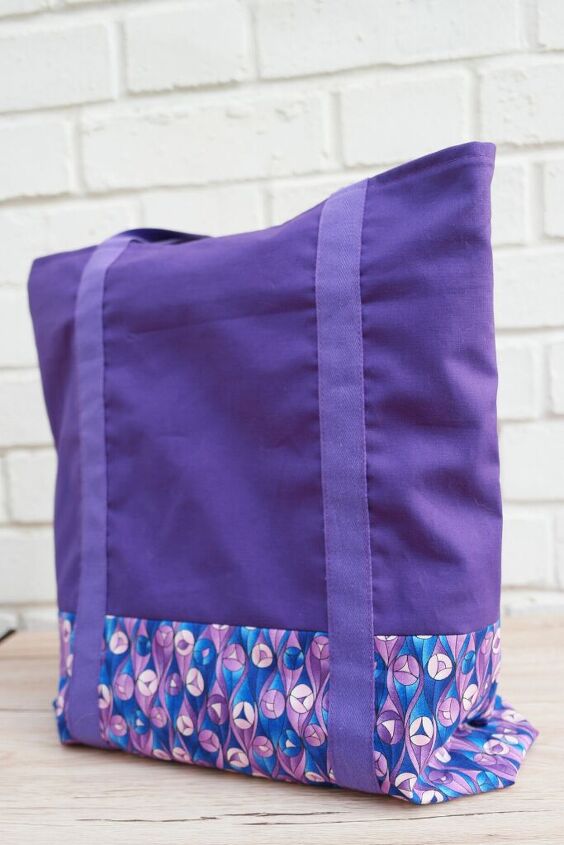
One way is to use webbing straps that go under the bag and up the sides before becoming the handles.
Webbing is super strong, and the chances are it’s stronger than the seams on your bag! With the straps going underneath the tote bag, it’s the webbing the takes the strain of the contents, not your sewing or your pretty fabric!
I bought the fabric from Eclectic Maker. This isn’t an affiliate link, I just want to do what I can to support small businesses. Whenever I buy anything from there it always arrives very quickly.
Tote bags also make nice Christmas presents, especially if you want to give someone a handmade gift but you’re stuck for ideas and you don’t have much time.
The finished DIY tote bag measures approximately 38 cm x 40 cm (15 inches by 16 inches). It also has boxed corners to give it a nicer shape.
The measurements include a 1 cm seam allowance, and 2 cm at the top for hemming.
You Will Need
Fabric for the bag. I used a print and a plain for the outer, and a different plain for the lining. You could skip lining it if you use a medium or heavy weight cotton.
The measurements are below. If you are using fabric sold by the fat quarter, you would need 1 fq of the print for the outer, 2 fq for the plain, and 2 fq for the lining.
2 m Webbing. I used cotton webbing, but acrylic webbing would also work.
Usual sewing supplies
Cutting Out
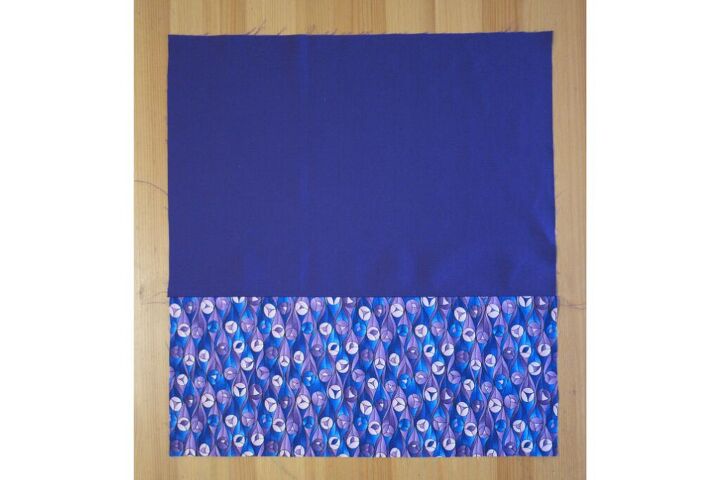
For the outer, cut 2 pieces from the print fabric measuring 40 cm x 17 cm, and 2 pieces from the plain fabric 40 cm x 28 cm.
For the lining, cut 1 piece 40 cm x 84. If your fabric arrived pre cut in fat quarters, you’ll need to cut 2 pieces 40 cm x 41 cm and sew them together.
Sewing the Outer
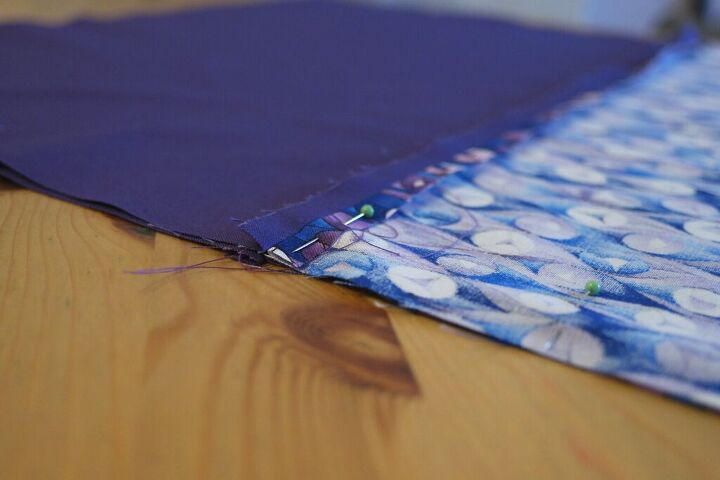
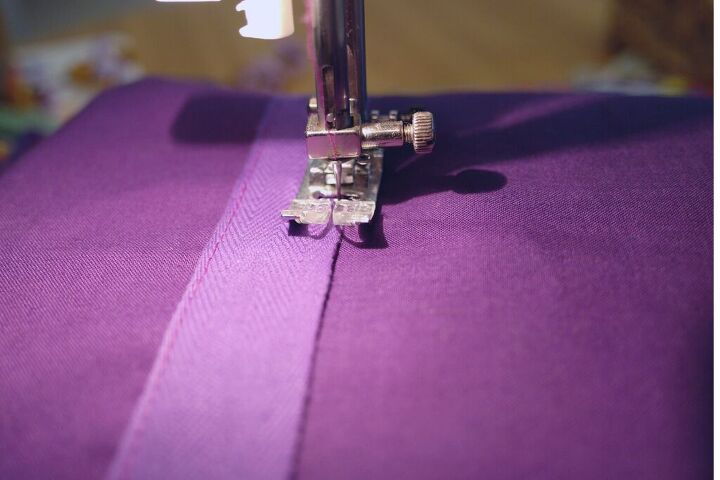
Take one of the patterned outer piece and one of the plain ones. With the right sides together, pin along one of the long edges. Sew, then press the seams open.
Do the same with the other outer pieces so that you now have a front and a back. outer.
With the right sides together, pin the bag front and back along the bottom edge. Check that the seams where the patterned fabric joins the plain match. Nothing screams home made like seams that don’t match!
Sew the bottom seam and press the seam open.

Attaching the Webbing
If you are using acrylic webbing, it’s an idea to gently melt the ends over a candle to prevent fraying. Don’t put it in the flame, just hold it in the heat for a few seconds.
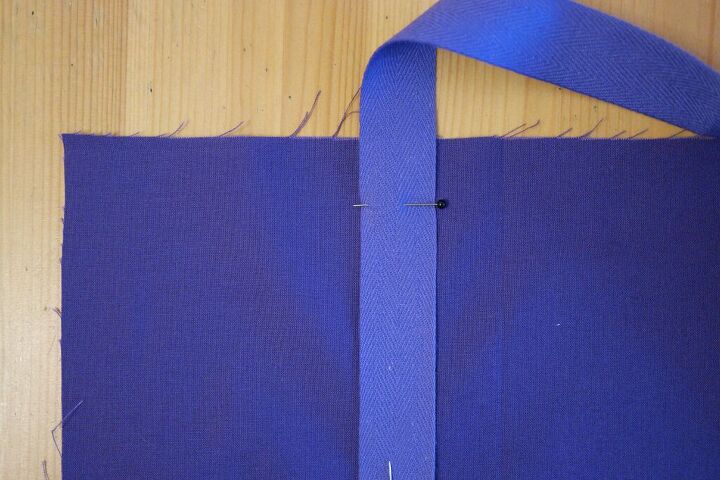
Take one end of the webbing and pin it to the bottom of the bag. The outer edge of the webbing needs to be 10 cm (4 inches) from the side of the bag. Pin the webbing up one side of the bag.
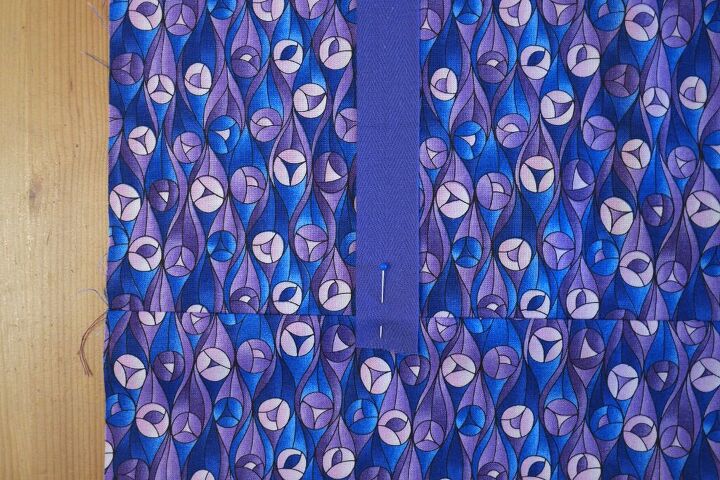
When you get to the top, measure 20 cm (8 inches) of the webbing to allow for the handle, then begin pinning the webbing down the other side of the bag, 10 cm (4 inches) away from the other edge.
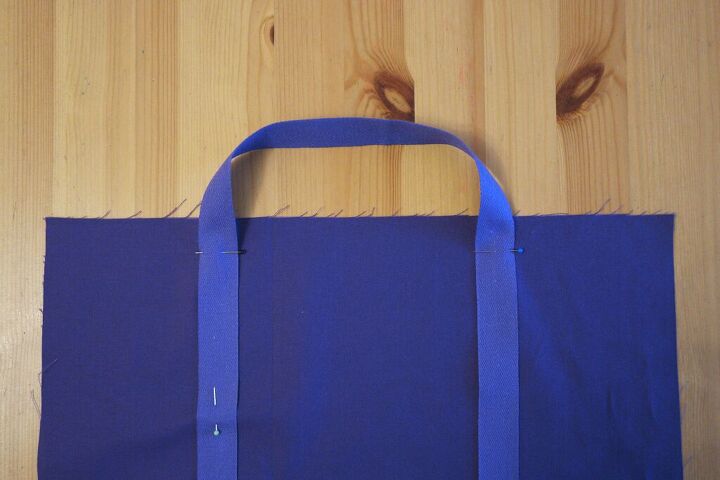
Keep going until you get to the other end. Allow another 20 cm (8 inches) for the handle, then pin it along the first side until you get back to where you started.
Sew the webbing to the bag by sewing along one side of the webbing, then the other.
When you get to the handles, stop 2 cm before the edge. It’s important to do this or you won’t be able to hem the top of the bag!
Sewing the Lining
Put your bag outer to one side.
Take the lining piece and fold it in half. Pin, then sew along the sides. Press the seams open as far as you can.
While you are doing that, press the fold along the bottom as well. This will make the next step easier!
Making the Boxed Corners
Take one of the corners of the lining. Squash it flat so that the side seam is next to the bottom.
From the corner (the stitches, not the seam allowance), measure up 3 cm and mark it with a pin.
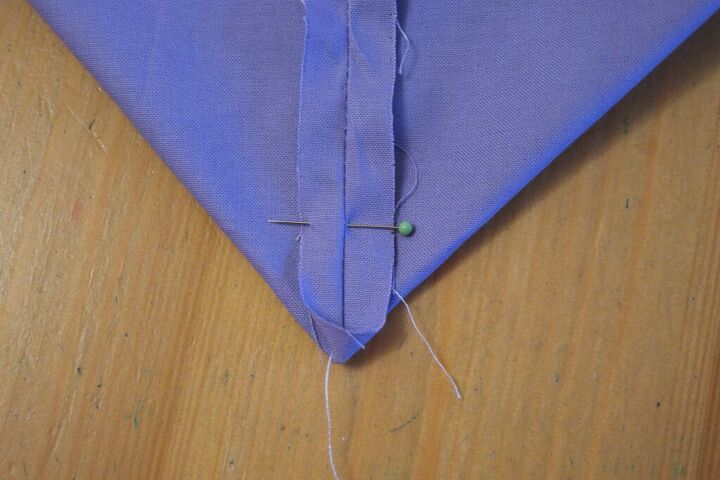
Sew across the seam. Cut the corner off. Do the same with the other corner.
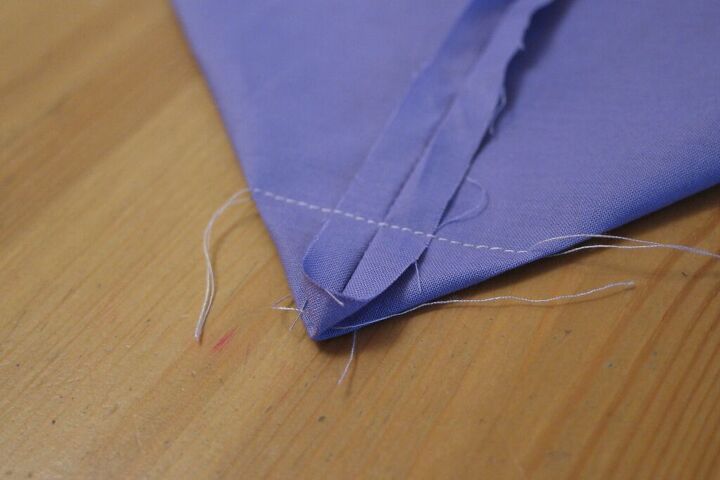
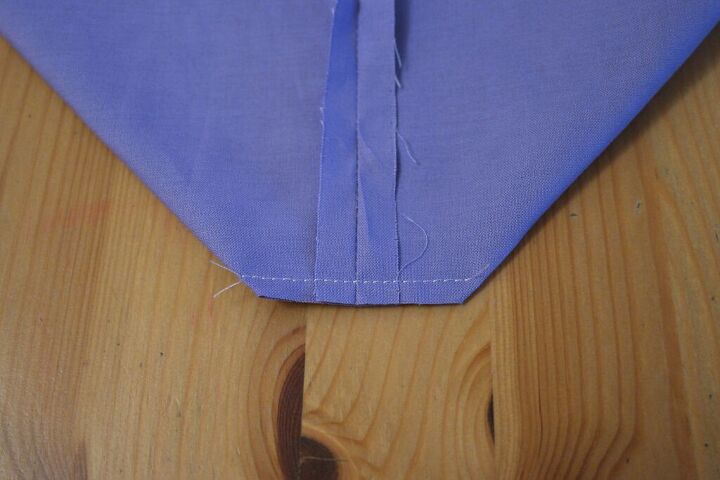
Now grab your bag outer. Sew up the side seams and press them. Make the boxed corners in the same way.
Assembling the Bag
It’s worth taking a little bit of time over this so that you get a neat finish.
The bag outer needs to be the right way out and the lining the wrong way out.
Pop the lining inside the outer. Push the corners of the lining into the lining of the outer. Check that the side seams match. You might find it useful to have a few pins handy to keep the lining attached to the outer when you’ve matched up the corners and the side seams.
The next step will be easier if you pin the lining and the outer together about 5 cm (2 inches) down from the top.
Fold the raw edge of the top of the bag outer inwards by 2 cm and pin.
Do the same with the lining. You might want to fold the lining down an extra millimetre or two so that it definitely won’t be visible when the bag is finished.
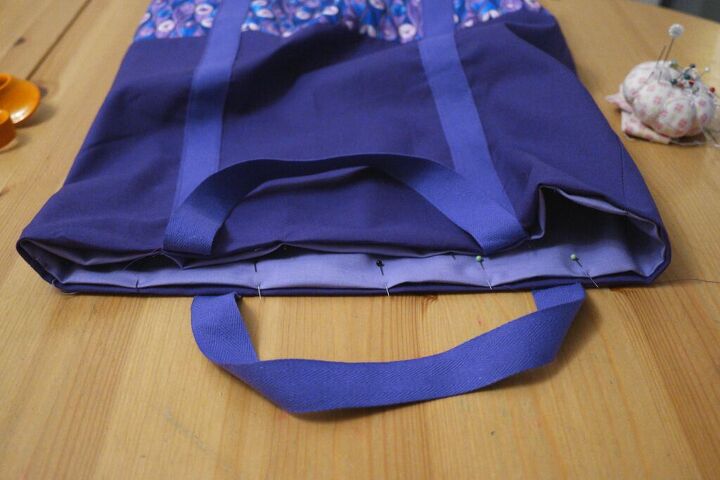
Top stitch around the top of the bag. Don’t worry about the webbing, just sew over it.
Cosmo has declared that we will be using our DIY tote bag for collecting things on nature walks!
The author may collect a small share of sales from the links on this page.


Comments
Join the conversation