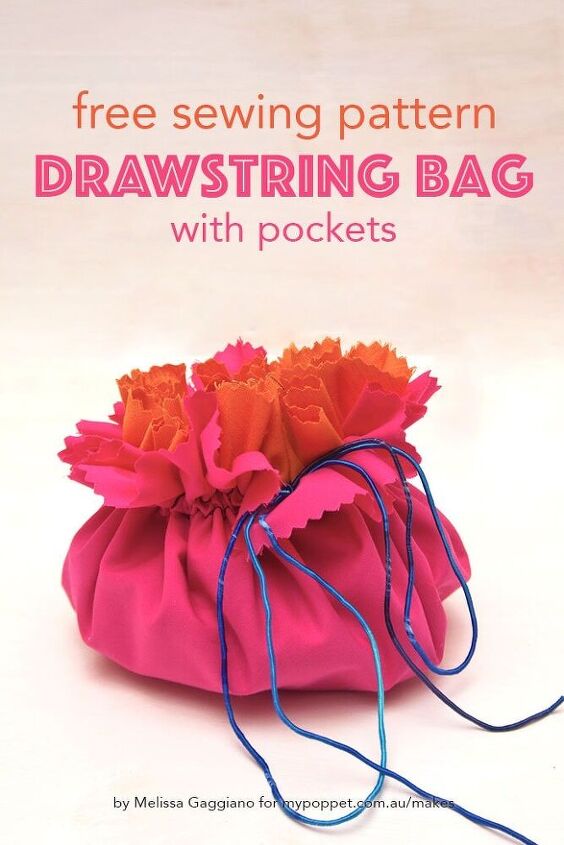
Round Drawstring Bag Sewing Pattern – With Pockets!
This post contains affiliate links
The one thing more useful than a drawstring bag is a drawstring bag with lots of pockets inside!
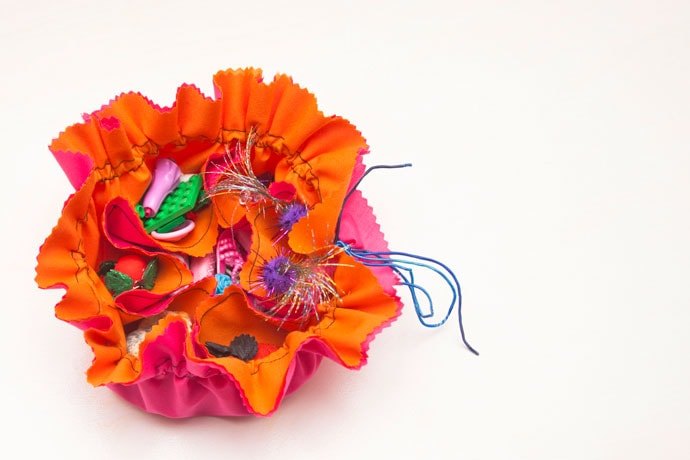
Everyone has little things laying around their home that can be easily sucked up into vacuum cleaners, and lost into the void. Now with this little drawstring pouch, you can coral all those those tiny little bits and bobs like jewelry, dolls accessories, hair clips or small treasures, keep them safe and more importantly, organised!
This easy-to-sew fabric drawstring pouch requires only minimal skills on the sewing machine. If you’ve been a bit intimidated to try complicated sewing projects that involve pressing and hemming, this little bag pattern may be a good one to start with.
The fabric edges are trimmed with pinking shears which not only looks pretty, it saves on fiddly hemming.
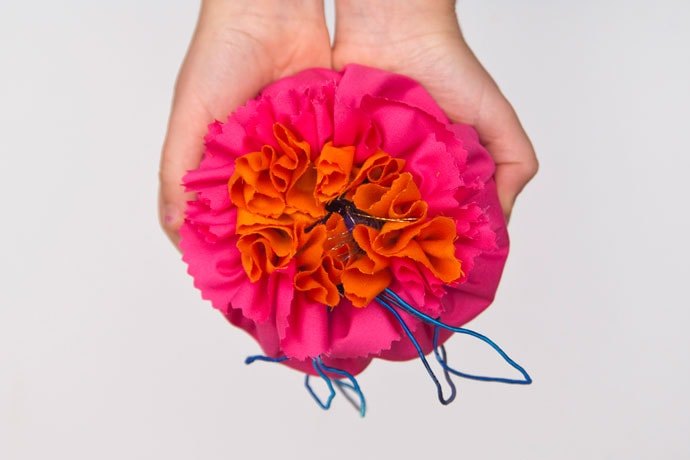
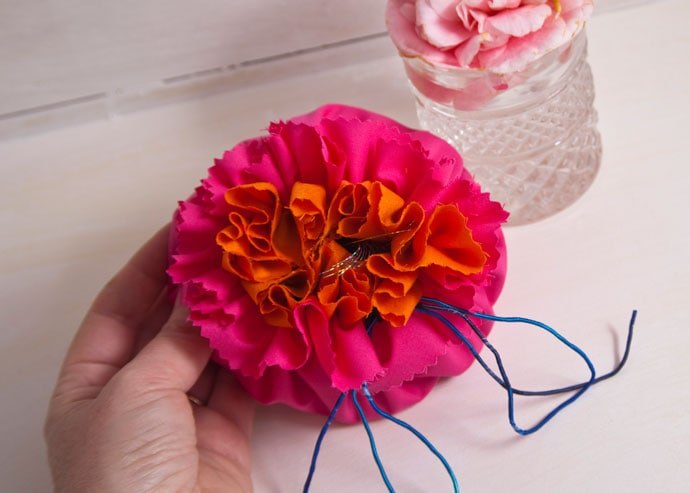
I love how the edges of the bag ruffle up like a flower when you pull on the drawstring. This little fabric bag looks like a carnation or camellia bloom.
This drawstring bag would make lovely reusable gift wrapping for a special gift. You can make it without the internal pockets if you are pressed for time and want to keep things simple.
Any light to mid-weight cotton (non-stretch) fabric would work well for this project. If you are using printed fabric, note the extra instructions to ensure the printed side of the fabric is facing the correct way when you sew everything together.
Use whatever cord, yarn or ribbon you have on hand to make the drawstring.
Due to the long length of cord, do not give this to small children to play with as the cord may be a strangulation hazard.
You will need:
- 35cm cotton poplin, 114cm width – pink (or colour of your choice)
- 35cm cotton poplin, 114cm width – orange (or colour of your choice)
- Thread (match or contrast with fabric)
- 100cm length of cord (or yarn)
- Adhesive tape
- Dressmakers pins
- Scissors: paper, dressmakers, pinking shears
- Erasable Fabric pen/chalk (or pen/pencil)
- Sewing machine
Note:
Sewing machine setting – 2mm straight stitch
Fabric Selection – Any non-stretch, light to mid-weight cotton or cotton blend woven fabric is suitable for this project. This would be a great use for random quilting fabric Fat Quarters you may have laying about.
How to:
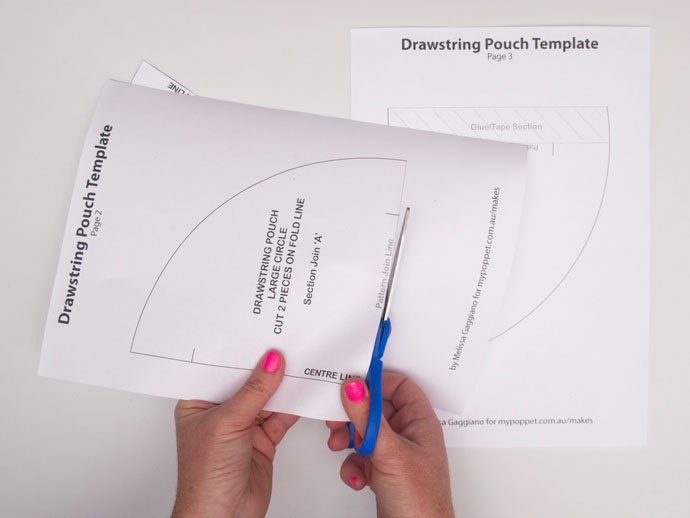
1. Print the template at 100%. (3 pages total)
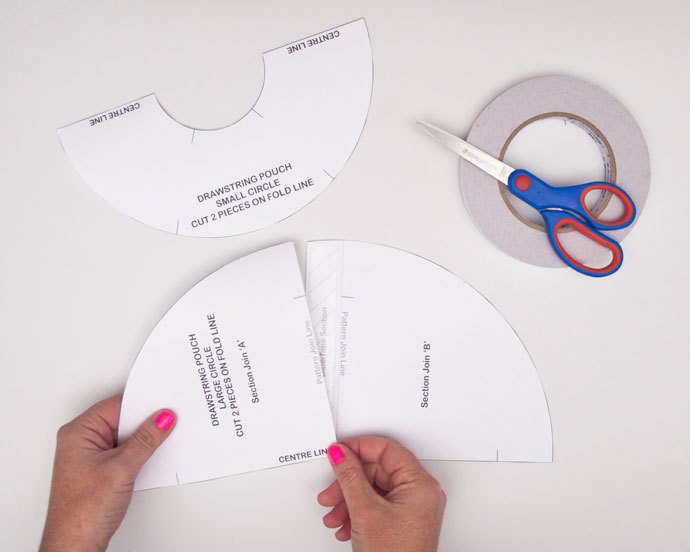
2. Cut out the pattern pieces with paper scissors. Using tape attach Section Joins ‘A’ and ‘B’ of the Large Circle piece.
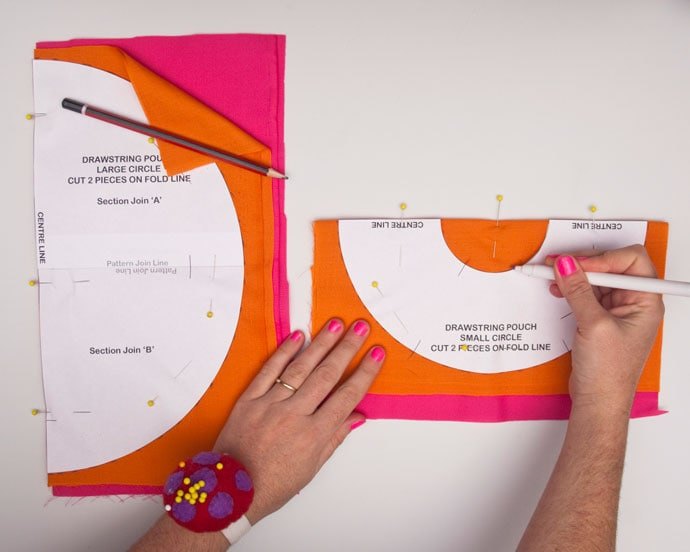
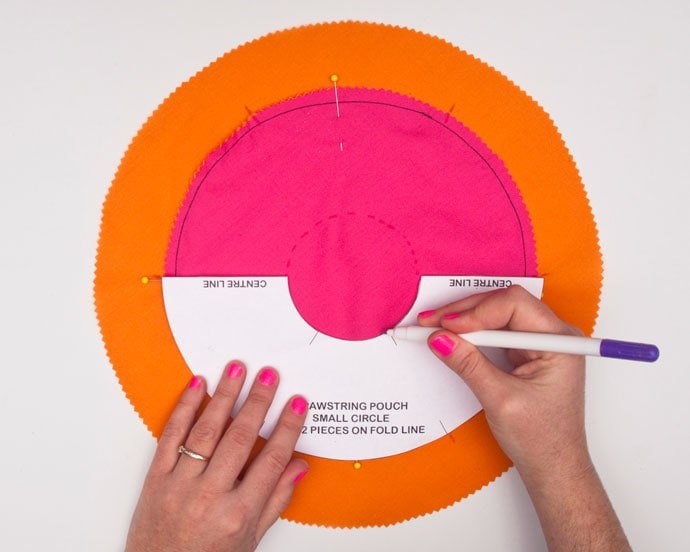
3. Stack the contrasting fabric and fold the fabric. Pin pattern pieces onto folded fabric lining up the pattern centre lines with the fabric fold. Trace outline of Small Circle piece, and Large Circle piece onto the fabric. With a fabric pen draw the inner circle and the reference markers that appear on the Small Circle pattern piece.
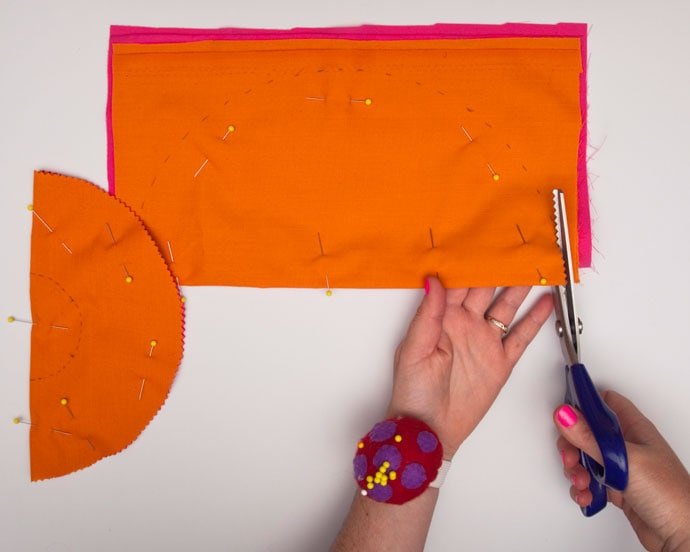
4. Remove paper patterns from fabric layers (but keep pins in place). Cut out the semi-circles using pinking shears. Important note: Do not cut the small semi-circle in the small circle pattern piece.
Open the shapes out, you should now have 2 small fabric circles and 2 large fabric circles.
5. Pin the Small Circle pieces together. If you’re using a printed fabric, make sure the right sides of the print are facing outward. Using the sewing machine, stitch the Small Circle pieces together, 1cm (1/2″) from the edge.
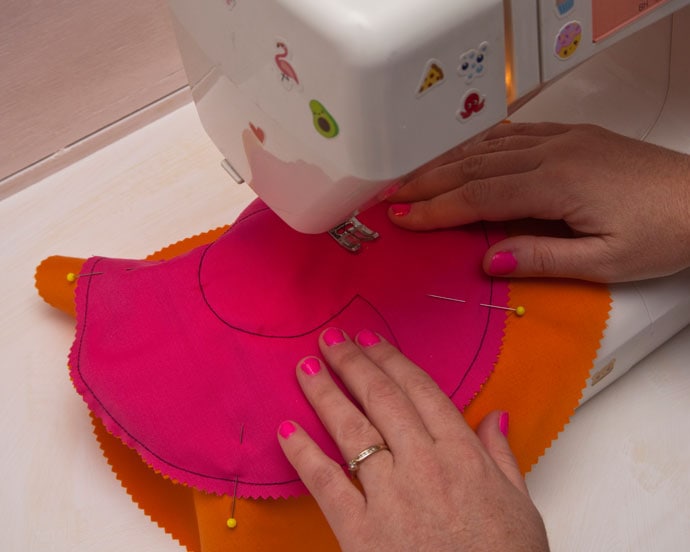
6. Layer and pin together the Small Circles over one Large Circle (with right sides exposed if using a printed fabric). This will be the inside of the bag. To ensure the middle of each circle is lined up, check by measuring a 4cm (about 1.5″) rim between the edges of the Small and Large Circle pieces. Overlay the small circle pattern and draw the inner circle and reference markers.
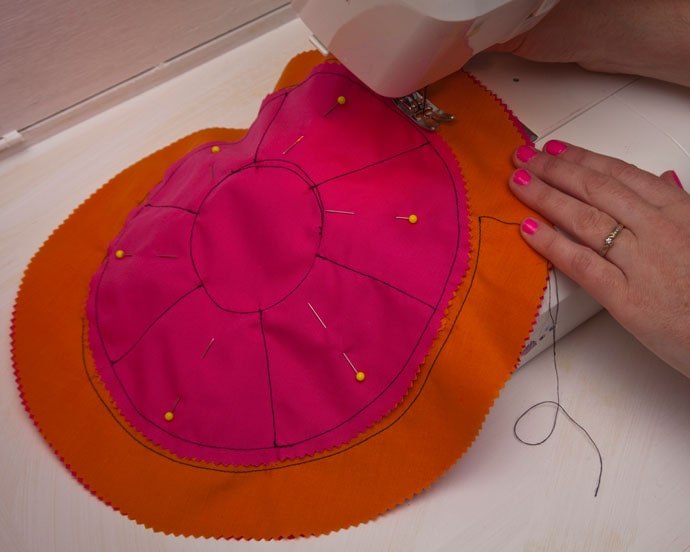
7. Sew the Small and Large Circle pieces together along the drawn inner circle line.
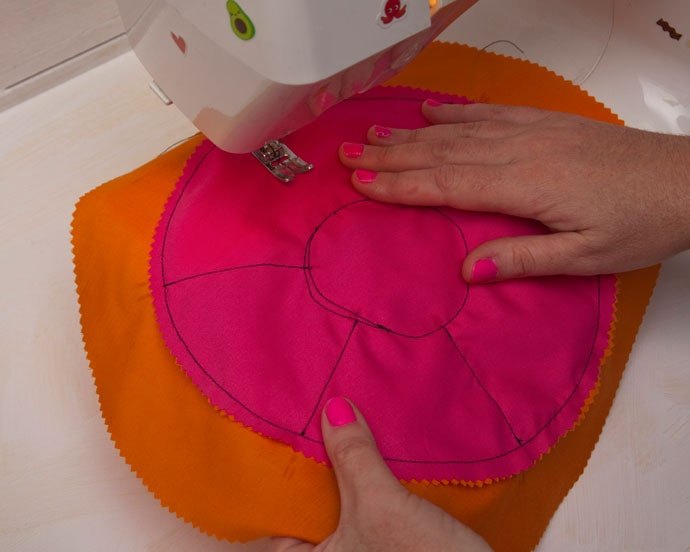
8. Sew straight lines from the inner circle stitching to the outer edge of the Small Circle piece where indicated by pattern markings. Altogether there are six lines to stitch. This will form the inside pockets.
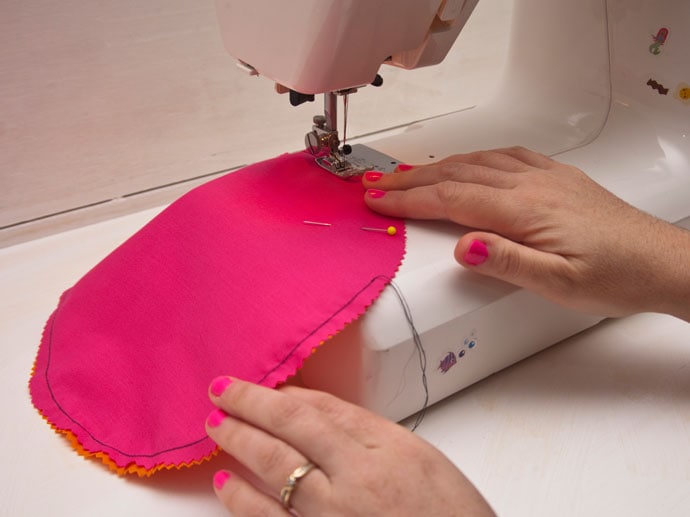
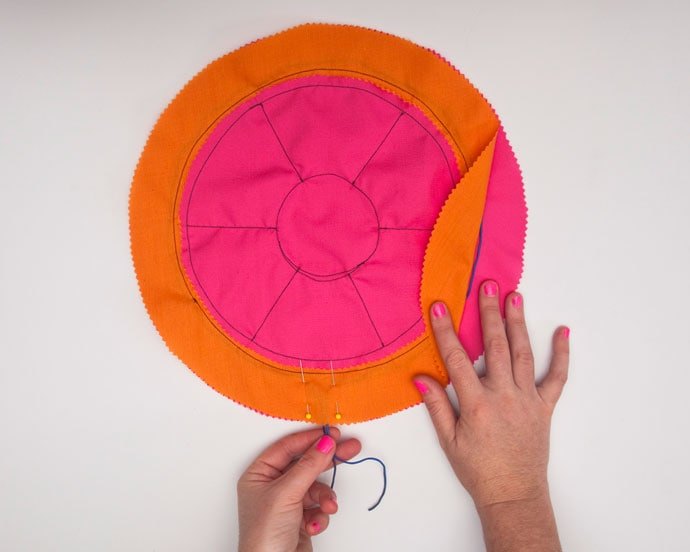
9. Layer and pin the remaining Large Circle piece under the the first one (with right sides outward if using a printed fabric). Sew the Large Circle pieces together in a circle, 1cm (1/2″) away from the Small Circle edge. Then remove the pins.
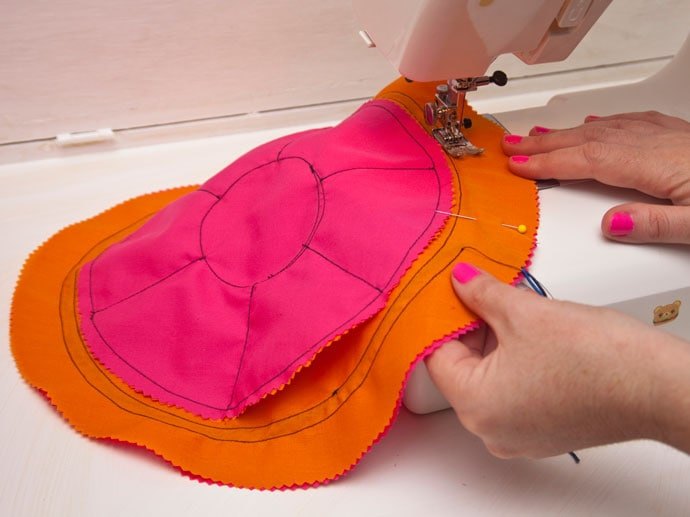
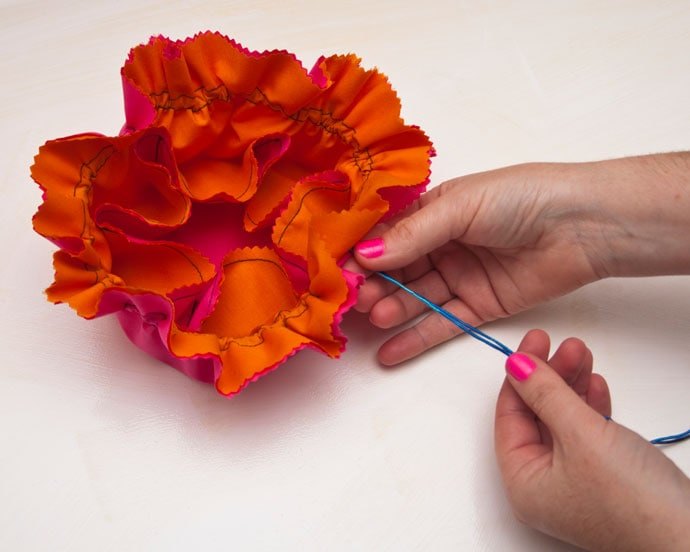
10. Feed the cord around the just sewn seam, between the 2 Large Circle pieces. Make sure the end lengths of the cord poke out, and are visible in the same location. Use pins to mark a 2.5cm (1″) gap around the cord ends.
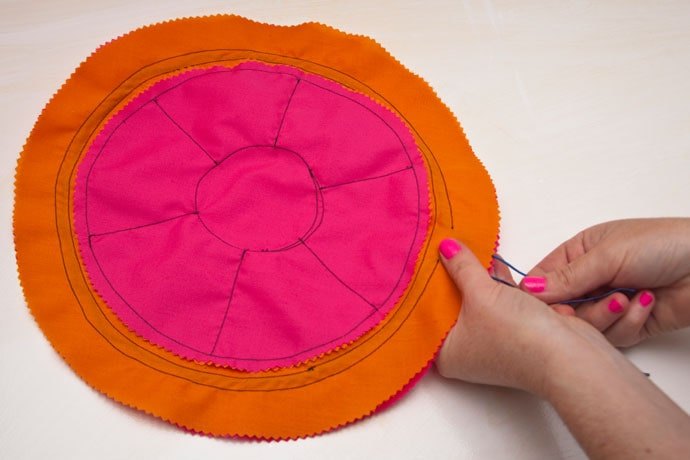
11. Sew a channel encasing the cord with a seam about 1cm (1/2″) out from the Step 9 stitching. Take care not to sew over the cord. Remove remaining pins.
All done!
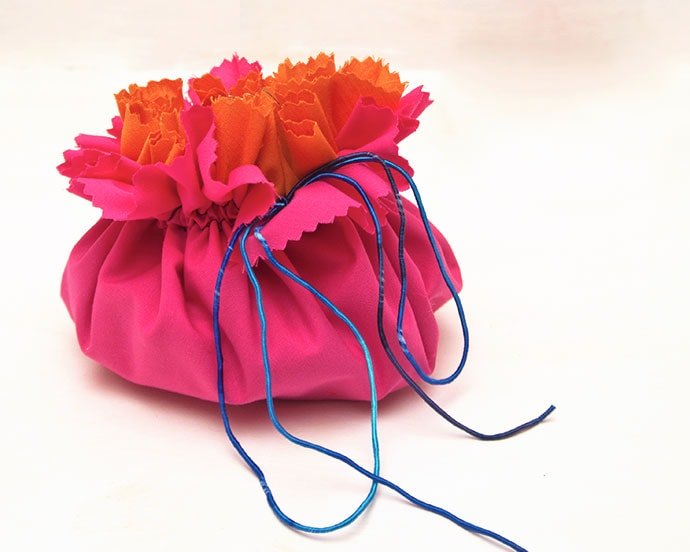
To use, pull on the cord ends, gathering the circles into a drawstring bag. Tie a bow to secure.
Fill the inside pockets with little bits and bobs, including jewelry, make up, small toys or craft supplies.
You can leave the pouch slightly open for easy access to its contents, or pulled completely closed for travel, or hidden storage.
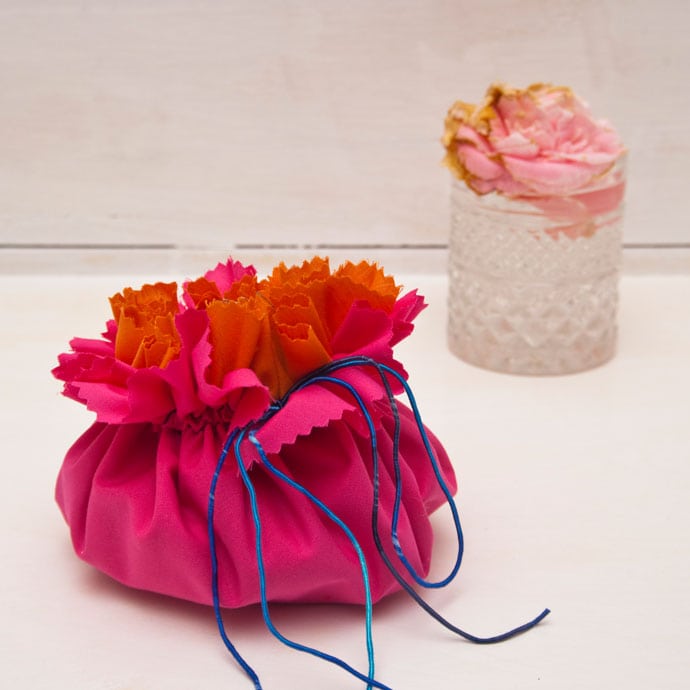
Gathered up the ruffly edges look like a carnation!

The author may collect a small share of sales from the links on this page.


Comments
Join the conversation