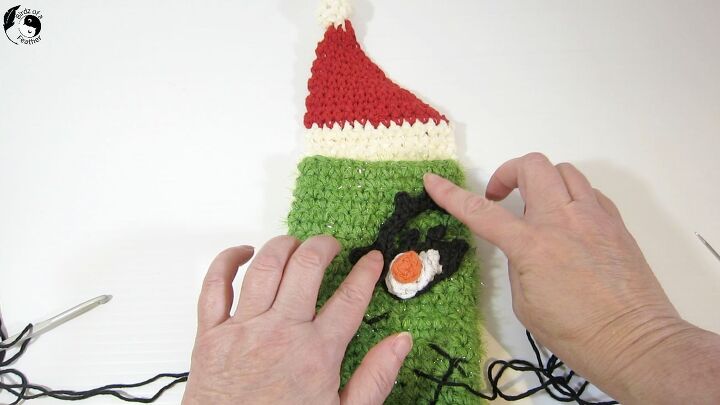
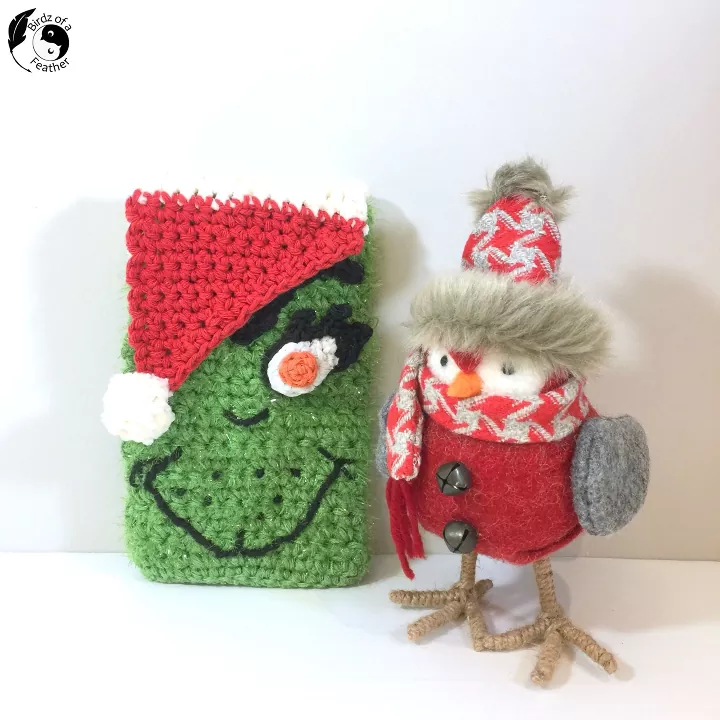
How to Crochet a Mr. Grinch Phone Case
Around the holidays when we gather with family, my biggest pet peeve is having someone pull out their cell phone instead of being present with people that are actually there! Our solution may be a little unconventional but it's a fun one. Make these cell phone covers for everyone attending (you can coordinate this ahead of time). Then have everyone slip their phone into the cover and leave them on display with your Christmas decor. They become part of your Christmas decor for the duration of the party, then everyone can have their phone back when they leave. Be sure to crochet a different one for each person so they can easily identify which one is theirs!
Our Grinch phone case is the second in our series of Christmas phone cases! How the Grinch That Stole Christmas is such a heartwarming story, so that’s the character that inspired our second holiday crochet phone case. The happier, friendlier guy who hadn’t stopped Christmas from coming. The fellow who realizes “maybe Christmas doesn’t come from a store. Maybe Christmas … perhaps … means a little bit more!”
Our Mr. Grinch isn’t a mean one, no siree!
Watch the Grinch Phone Case Video
Watch this tutorial to follow right along and see the crochet steps in action.
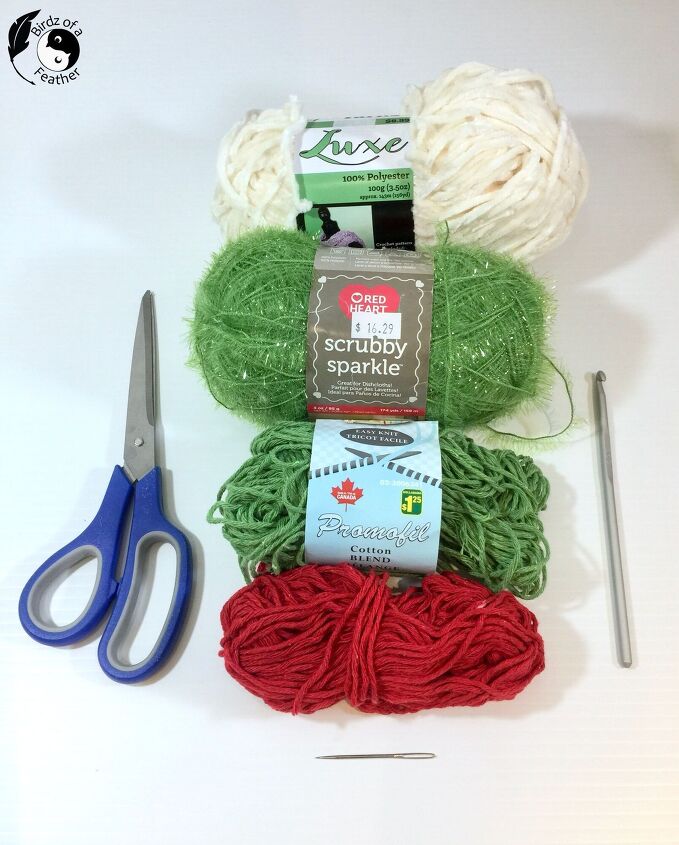
For this design, all you need is worsted weight yarn in red, green, orange, white and black, velour yarn in a creamy white, scrubby sparkly in a matching green colour and a 5 mm crochet hook.
Abbreviations:
- ch = chain
- st = stitch
- sc = single crochet
- sl st = slip stitch
- (..) = repeat the instructions in between brackets the given number of times
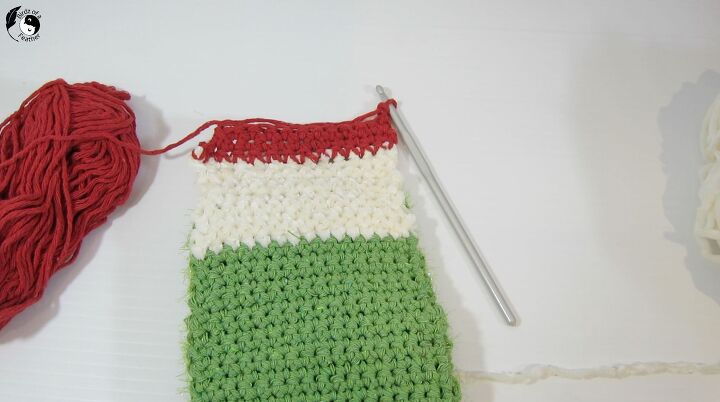
To start, crochet with worsted weight green. Start with a slip knot.
Using a 5.0 hook, chain enough to reach from side to side. The number of chains will depend on your gauge and size of phone. When you measure the chain, don’t stretch it. I did about 14 chains to start, but yours could be different. Be sure to measure against your cell phone before continuing (note that we’ll be adding more stitches in next steps).
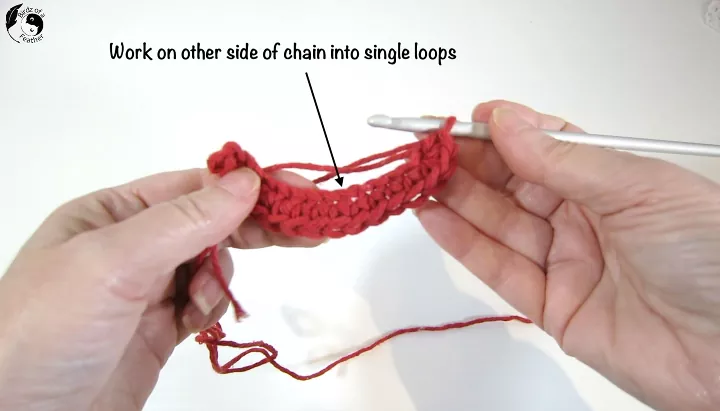
Single crochet into each chain st (ignore that the picture below shows red). When you reach the last ch st, sc 3 times into the st. Continue onto other side of chain, working through the single loops, and make your way back on the other side of the chain until you reach the last st. SC 3 times in last st.
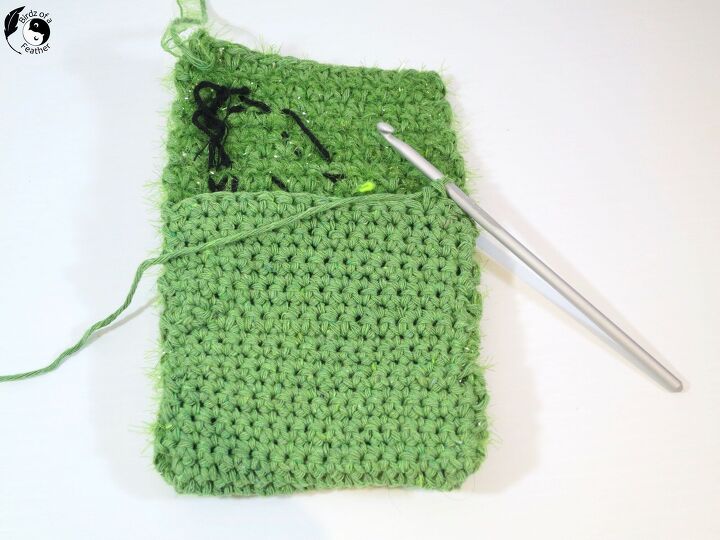
Now, add in the Scrubby yarn along with the green. Continue to single crochet with both yarns until the number of rows reaches the top of your own particular cell phone.
Cut both yarns, knot and hide the tail ends using a darning needle or crochet hook on the wrong side of work.
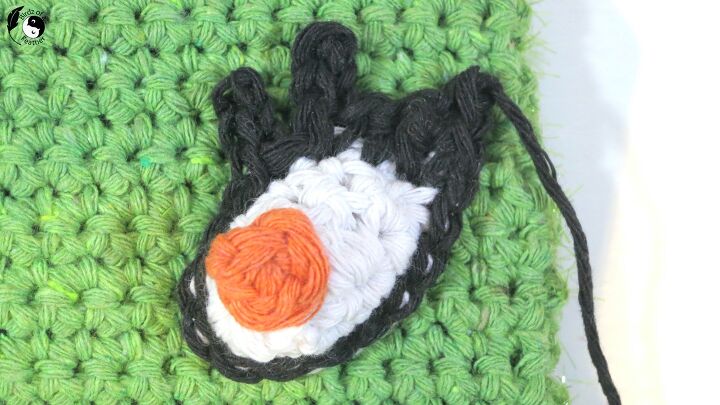
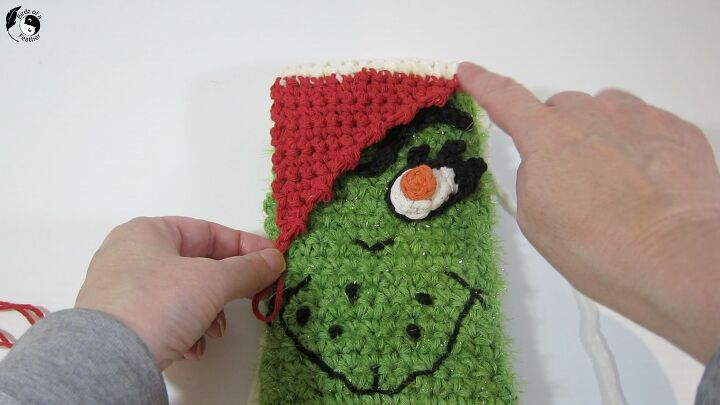
Face
Before continuing with the back, stitch on the elements of the face. It’s much easier to do it now, while you still have open access to the back. I free formed it using a combination of embroidery and crochet to make the face.
Use a running stitch initially for the mouth and nose. Go back to whip stitch around the stitches to thicken up the line.
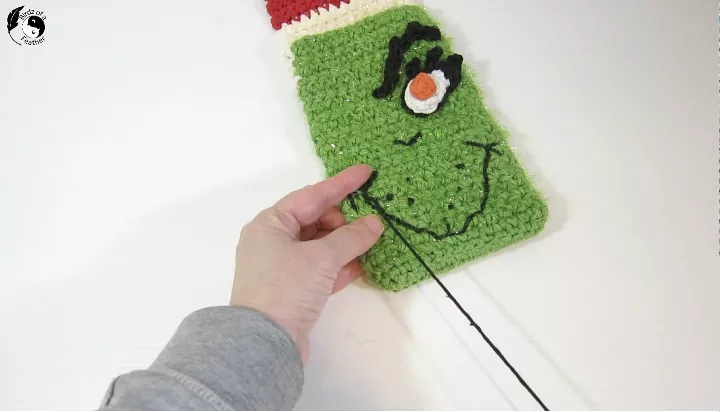
Instead, if you prefer, you can also cut felt and sew it on. Be as creative as you like. In my case, I only did one eye and eyebrow. That’s because the hat, which acts as a flap to close the case, covers the left half of the face. Like my friend Michelle says, it’s very Picasso like when the flap is up!
For the beard stubble, simply make knots in the yarn.
Eye and Eyebrow
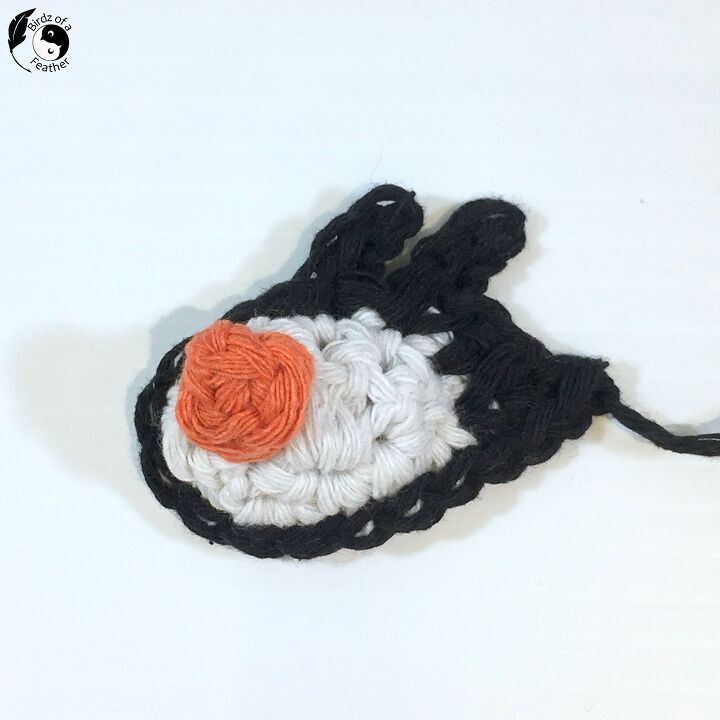
Iris
Using orange, MC, sc 4, join and fasten off. Make eye then sew the iris onto the white of the eye.
Eye
Using white MC and ch 1. sc 5 times in centre. Tighten MC and join.
R1. sc, half dc, dc, dc.
R2. ch 1, turn. sc in next 4 sts. sc 2 into next three sts. sc into next 3 sts. Ch 1, and join.
Join black. leaving a long tail and tighten up white. Be sure to work in the tail ends of the white and black as you go, dropping the black (we’ll be pulling the black end in a step ahead).
dc into next st, hdc into next st, sc into next st.
ch 3, sl st back to beginning. (3 sl sts), sl st into next st, ch 3, sl st back to beginning (3 sl sts). This completes the eyelashes.
Sl st all the way around.
When back to beginning, as you approach the corner, sc into the base of the black st, followed by another sc right beside it. Then sc into the next black st. Ch 1, cut yarn, leaving a long tail to stitch the eye on and sl knot.
Pull on the black tail end to encourage the eye to curve. Sew on the pupil. Then stuff the back with all the tail ends, or weave them in.
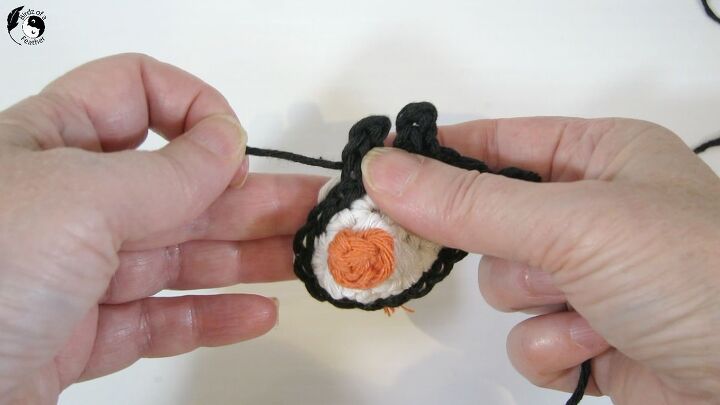
Position eye onto front with the eye slanting upward. Then sew onto face through black chain sts.
Eyebrow
ch 12. sl st into the next three sts.
ch 2. Sl st into next st. Sl st into original st. Sl st into next two sts.
Ch 2. Sl st into next st. Sl st into original st and continue sl st to end, which should be 5 sl st.
Then Ch 4. Sl st into next 3 st back along chain to where your tail end is and join with a sl st.
Cut yarn leaving a long tail, knot and sew onto face. Ignore that the hat is complete in this picture (that comes later).
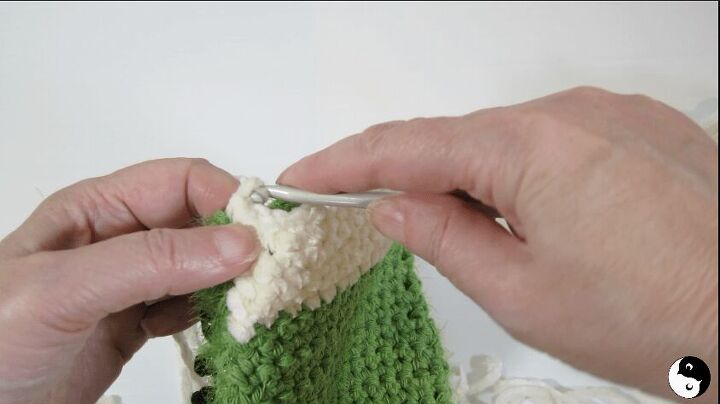
Back
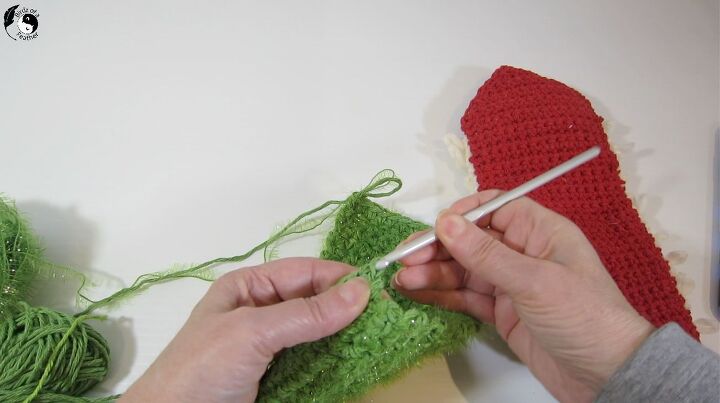
Now, reattach only the green worsted weight yarn at the bottom.
Continue across with sc. When you reach the side, sl st into two loops on the side, turn around and continue with sc back the other way. Again, sl st into two loops on the side. Turn around and work your way back.
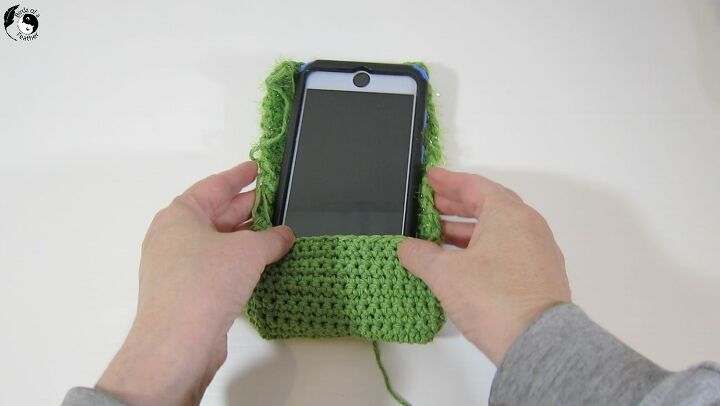
Check the fit of the phone as you go.
By capturing the yarn on the side, it will close up the phone case!
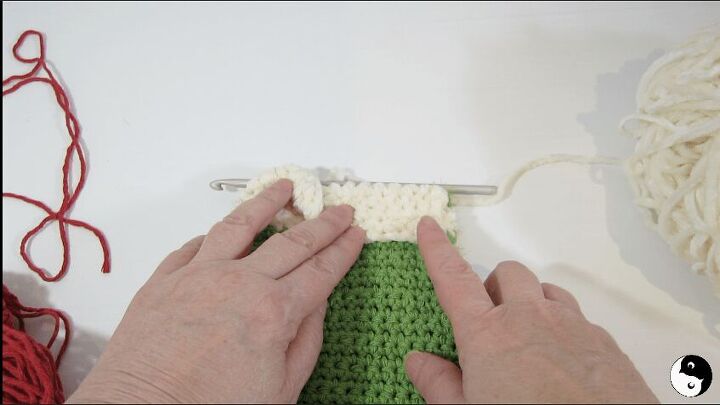
Continue on in that manner until the green is a few rows short from fully enclosing the back.
Brim
A few rows from the top, join the cream colour.
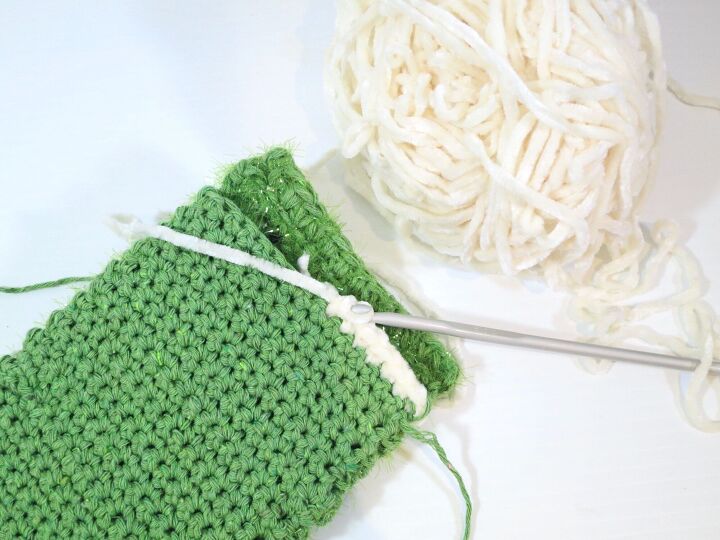
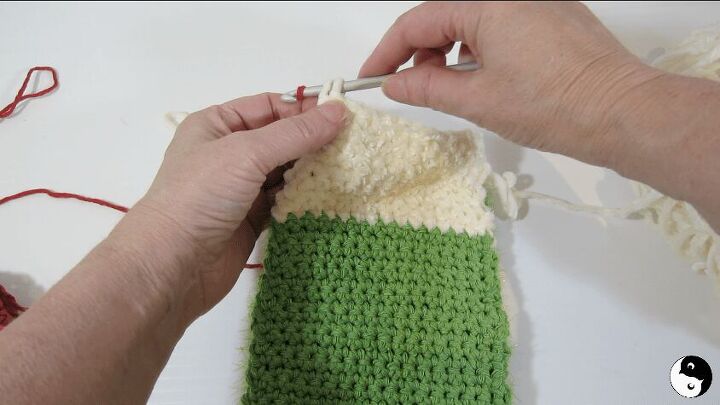
Continue sc and incorporating sts at side until you reach the top. Ch 1 and turn.
Then go as many rows beyond the top as you just did with the cream colour on the back to form the band of the hat. On the last sc, you should end with the back facing you on the left side.

To check, when you fold back, you should be even with the white rows you completed on the back.
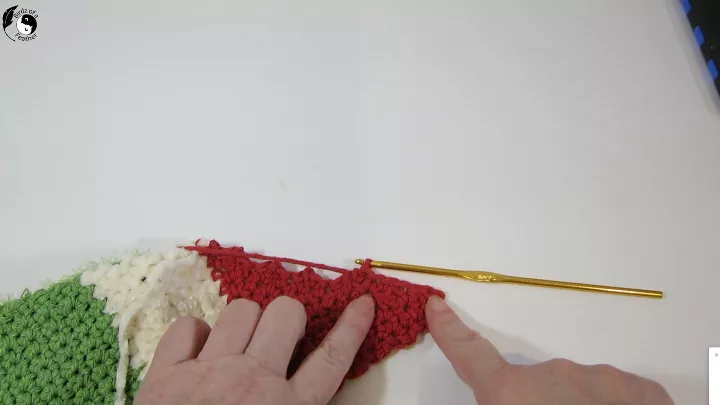
Now, before you complete the last sc on the back left hand side, change colour to red by bringing it through the two loops on the hook.
Ch 1 and turn.
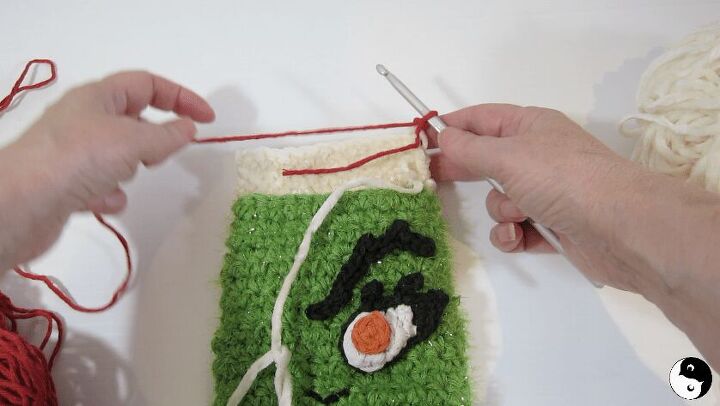
Hide the red tail end and proceed as follows:
(1. sc across the row, ch 1 and turn.
2. sc across row. Stop short of last st, turn.)
By repeating the above two rows, you’ll be decreasing on one side and not the other.
Continue these two rows until eventually you decrease down to one st as you see below.
Once decreases are done, you might find it easier to change to a smaller crochet hook to finish the side.
Ch 1 and sc down the edge to neaten it. Be sure you’re capturing two loops on the side as you crochet into the sts on the edge of the hat. Cut yarn and knot, weave in to hide end.
Pom Pom
Watch the video for instructions on crocheting the pom pom.
R 1. Make a magic circle and ch 1. sc 8 and join.
R 2. ch 1, sc 8 and join
R 3. inv decr sc, sc, inv decr sc, sc, inv decr sc, join
Stuff the pom pom using same yarn or fibre fill, hiding the yarn end.
Cut a long tail. Using a tapestry needle weave in and out of the top sts and pull tight to close the opening.
Attach the pom pom to the end of the hat, knot and hide the end.
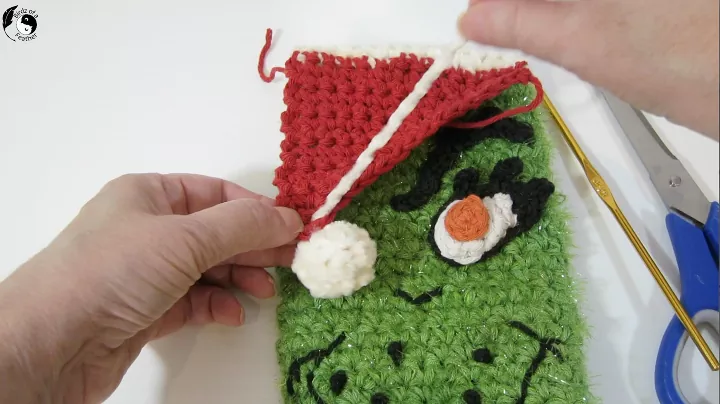
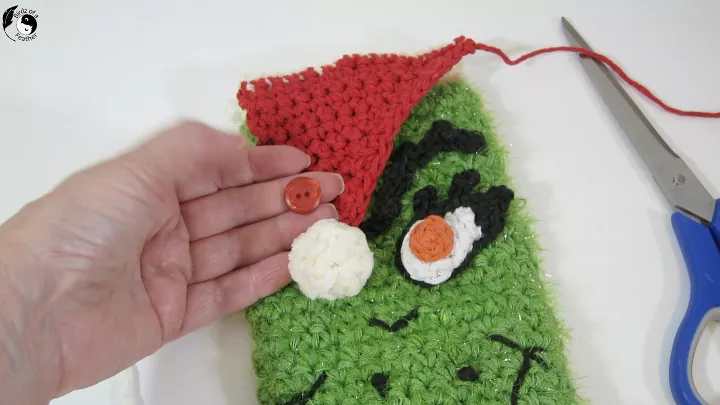
Add a red button to close the flap/hat, if desired, choosing one small enough to go through the stitches.
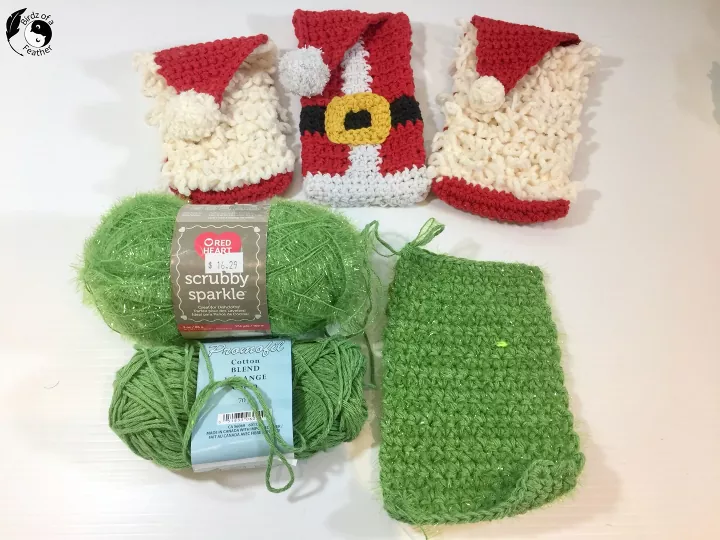
And with that, our second holiday cell phone case is done! For more pictures of this project, head to our blog at the link below where you see our log
Below is our full holiday phone cover collection:

If you'd like all these patterns, you can purchase our very first Crochet for a Cure eBook, with proceeds going to our Alzheimer's fund drive!

Subscribe for more creative DIYs. Also follow us on social media (copy & paste in browser – or use the direct links at the top of this post):
Pinterest: http://bit.ly/BirdzPIN
YouTube: http://bit.ly/BirdzYT
Facebook: http://bit.ly/BirdzFB
Instagram: http://bit.ly/BirdzIG
The author may collect a small share of sales from the links on this page.


Comments
Join the conversation