How to Make an Apron Step by Step
Let’s make a new apron out of your old jeans, it is super easy – no paper pattern required! This perfect beginner sewing project makes a thoughtful gift, although I have to admit to being very tempted to keep the apron for myself!
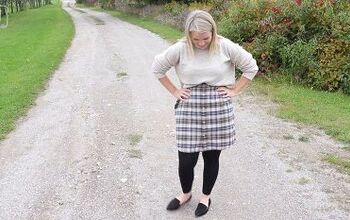
Bib aprons are fabulous at keeping your clothes clean whatever you are up to, crafting, painting, cleaning, cooking – they can be styled in so many ways, and who doesn’t love a pocket!
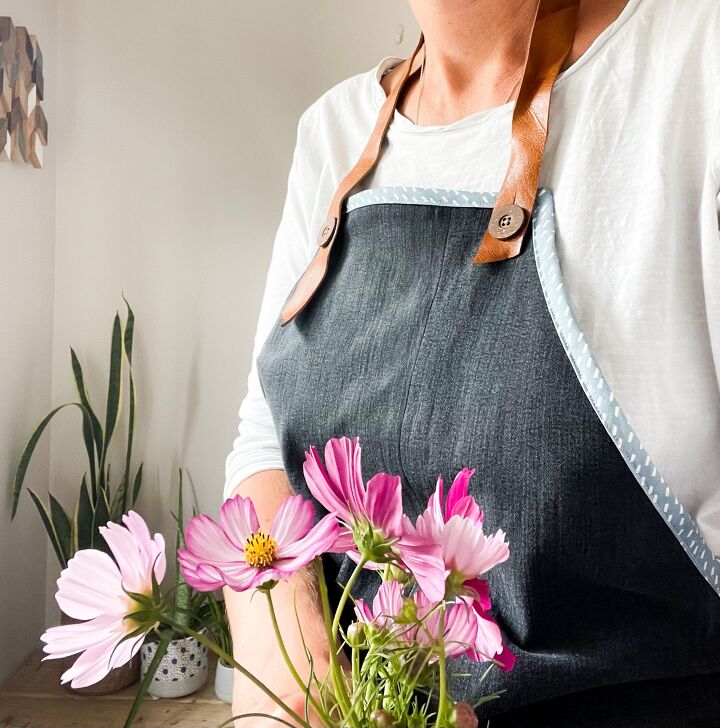
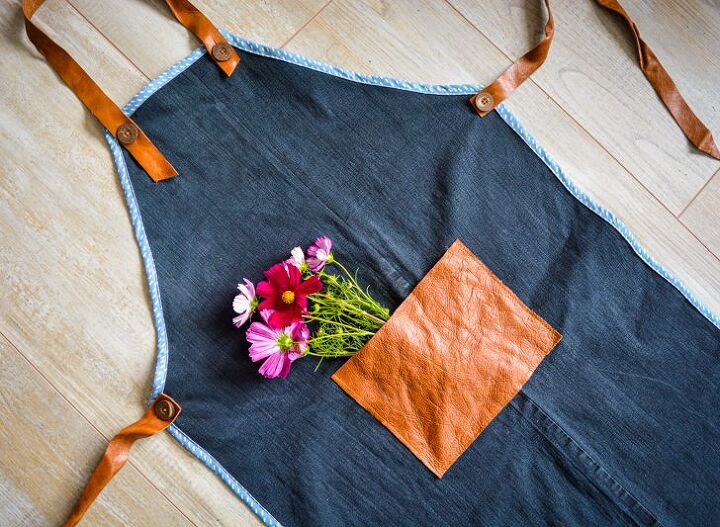
This sewing project is for a full-length apron. I will show you step by step how to draft your own pattern, bind the edges of your fabric and add waist ties and a neck strap, along with a useful pocket. The bias binding is a great way to add a pop of color to your finished edge. You only need basic sewing skills for this DIY apron with pockets.
If buying fabric as opposed to upcycling your old jeans you will need a meter or a yard of fabric. This is for an adult-sized apron. If using jeans you need a wide-legged pair.
I am going to show you how to make an apron sewing pattern for an apron which measures with step-by-step detailed instructions. It is super easy, a perfect beginner sewer project. The basic shape is a rectangle of fabric measuring 21 by 34″. This is based on a shop-bought apron that suits most body shapes and sizes but you can easily adjust it to suit you.
Do check out my other free apron patterns:
In this sewing tutorial, I am working with an old pair of jeans but there are plenty of suitable alternative fabrics you could use. The purpose of the apron is to stop spills going through to your clothes so don’t choose anything too thin. Cotton canvas is a great choice as is a heavy weight cotton or beautiful linen, when choosing your fabric think about the weight of fabrics in shop-bought aprons and pick a fabric of similar weight – you can’t go far wrong!
Materials:-
- One pair of wide legged jeans, or 1 yard/1 meter of suitable fabric
- 3m of 2.5cm wide bias binding 3 1/4 yard by 1″
- 2 apron ties of soft leather 2.5cm wide by long 63cm (1″ by 25″)
- Leather neck strap 99cm long and 2.5cm wide (39″ by 1″)
- One pocket piece of leather 17 ½ by 20cm (6 1/2 by 8″)
- 4 buttons
Additional tools which are helpful:
- Long ruler,
- Taylors chalk
- Fabric glue suitable for fabric and leather such as Fabric Tac
- Craft knife
- Needle and thread
- Sewing machine
- Leather needle
Let’s start by making the flat piece of fabric for the body of the apron. Cut your jeans down the inside leg, along the crutch line and across the top by the back pocket.
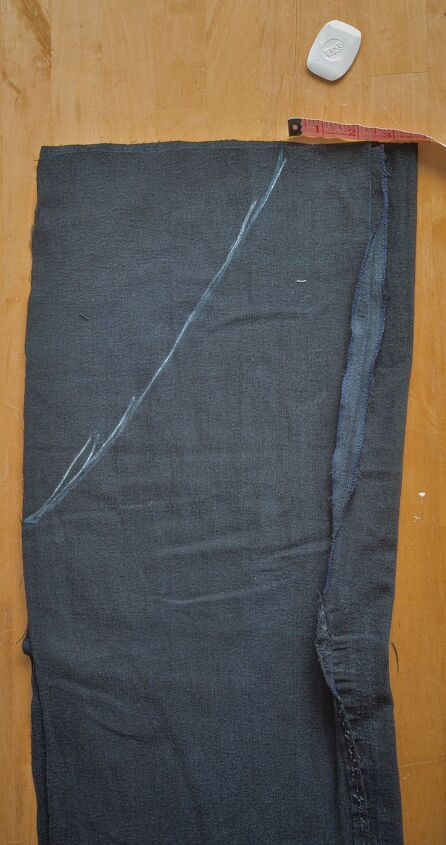
Open out your cut denim, you will have one seam running down the fabric. If the fabric doesn’t lie flat this seam is curved, like mine, you will need to straighten the seam.
Don’t worry this is super easy. Fold your fabric so the wrong sides are facing you, along the curved seam. Using a ruler and taylor’s chalk mark a straight line where the seam starts to curve, following the straight edge of the seam.
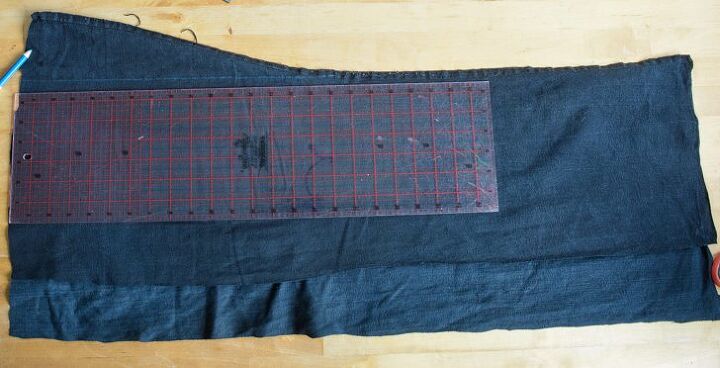
Stitch the marked line, then trim the seam allowance and finish the raw edges with a zig zag stitch. Open out your denim and measure the width – is this wide enough for your apron? Too wide? Adjust accordingly – if needed add another strip of denim from your other trouser leg. My apron fabric piece is 87 by 54 cm (21 by 34″).
To create the side curve of the apron using Taylor’s chalk mark 10cm (4″) from the folded edge along the apron top edge. Measure and mark 28cm (11″) down from top edge along the side, then join these two marks with a free hand-drawn curved line. This is the curved edge of your apron.
Cut your marked line through the two layers of fabric. Now open out your fabric, you have your base apron ready.
The next step is to add your leather front pocket. Place the leather piece centrally, 38 cm (15″) down from the top of the apron. Using your fabric glue adhere the sides and bottom edges and allow to dry. Do not pin as this will create permanent holes in the leather.
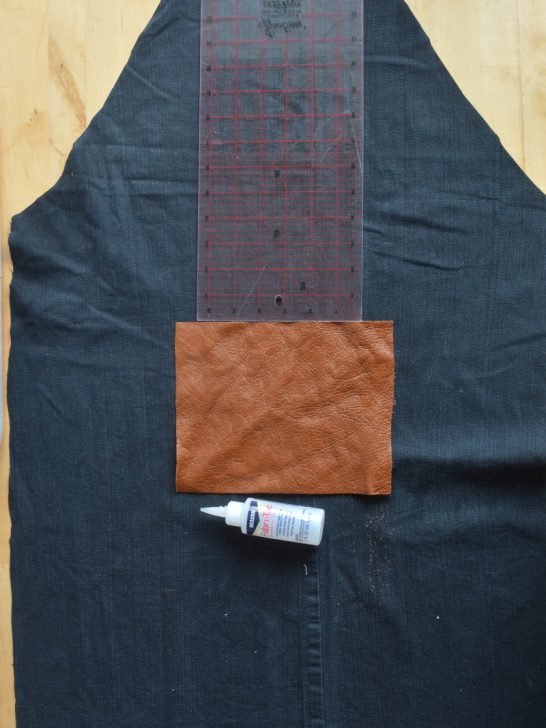
Top stitch the leather pocket in place, using a leather needle and a denim thread. I suggest testing the stitching on a scrap of leftover fabric and leather first to check the tension. If your sewing machine really doesn’t like it don’t worry your pocket is already secure with the glue.
Fold the bias tape in half over the raw edge and pin in place, folding at the corners. Work your way all around the apron and machine stitch to secure with a straight stitch.
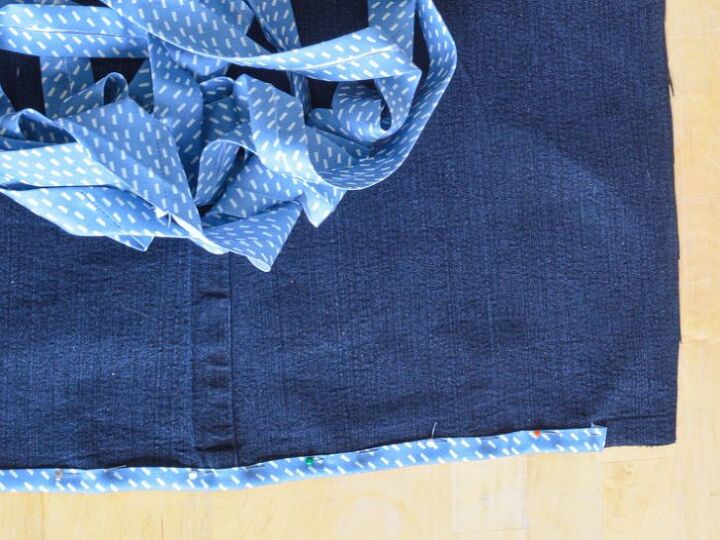
I like to tack this in place with large running stitches just to make sure it doesn’t slip when machine stitching, working from the right sides.
Top Tip – if the denim of your blue jeans is super stretchy add a very fine line of iron on interfacing (about ½ cm (1/4″) wide on the back of the pinafore apron next to the raw edge first, this will stop your denim stretching and causing issues when you stitch.
Would you like to make your own bias tape? It is super easy – how to make bias binding.
Let’s sew some buttons on and add the apron ties and neck strap.
Sew two buttons at the top corners of the apron, and a button either side at the top edge of the sides (just before the fabric curves inwards).
Cut a slit in your apron waist straps the width of your button, in effect a very simple button hole and attach.
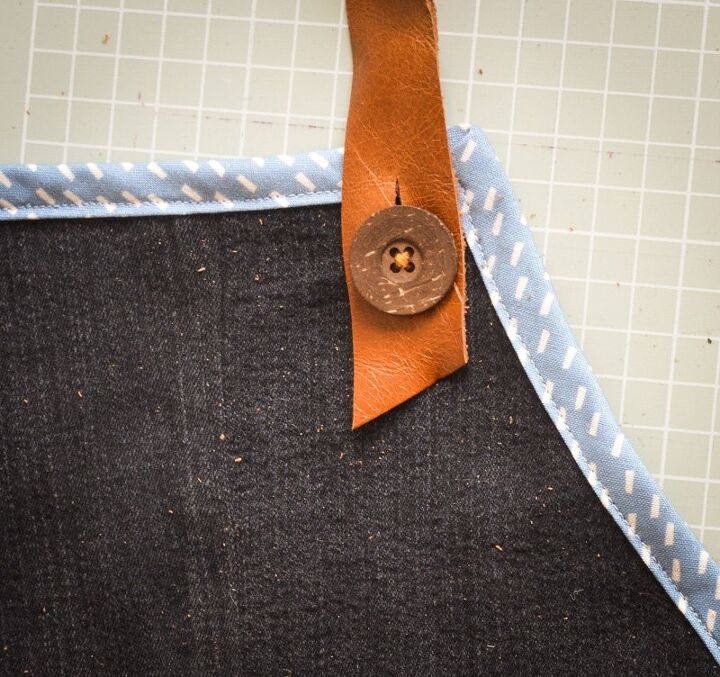
Finally for the adjustable next strap cut your leather strap with a diagonal edge each end. Add one cut in the leather one end of the strap for the button hole, and two the other end, thus making the neck strap adjustable (we don’t call come with the same size head!). The last thing is to attach the strap, ta da!!! One finished upcycled denim apron.


Yes !! You could use a vegan leather or go for something completely different. How about using webbing for the neck and back ties – instead of using buttons fold in the raw edge and sew onto the back of the apron fabric. The front pocket can be made out of a nice contrasting fabric of a good weight such as canvas or why not reuse the denim pocket from the jeans.
-
One pair of wide legged jeans, or 1 yard/1 meter of suitable fabric -
3m of 2.5cm wide bias binding -
2 apron ties of soft leather 2.5cm wide by long 63cm -
Leather neck strap 99cm long and 2.5cm wide -
One pocket piece of leather 17 ½ by 20cm -
4 buttons
-
Long ruler, -
Taylors chalk -
Fabric glue suitable for fabric and leather -
Craft knife -
Needle and thread -
Sewing machine -
Leather needle
- Cut your jeans down the inside leg, along the crutch line and
across the top by the back pocket. Open out your cut denim, you will have one seam running down the
fabric. If this is curved straighten the seam.Open out your denim and measure the width, my apron fabric is 87 by 54 cm. - Fold your fabric so the long edges align and you have a central
fold. Mark 10cm (4") from the central fold along the top edge. Mark 28cm (11") down from
top edge along the side, and join these two marks with a free-hand drawn line, creating the curved underarm shape of an apron. Cut your marked line. - For the pocket place it 38 cm down from the top of the apron.
Using fabric glue adhere the side and bottom. Top stitch the leather pocket in place. - Finish the raw edges of the apron with bias binding.
- Sew two buttons at the top corners of the apron, and a button
either side at the top edge of the straight sides. - Cut a slit in each of your apron ties the width of your button, in
effect a very simple button hole and attach. - Cut one button one end of adjustable neck and two the other.
Attach the strap.
Top Tip if sewing stretchy denim add a thin strip of fusible interfacing all around the edge of the apron on the wrong side, before adding your bias bunding, This should stop your denim stretching as you sew.
Love working with old jeans? Check out my many different denim projects and tutorials, be ready to be inspired.
The author may collect a small share of sales from the links on this page.


Comments
Join the conversation