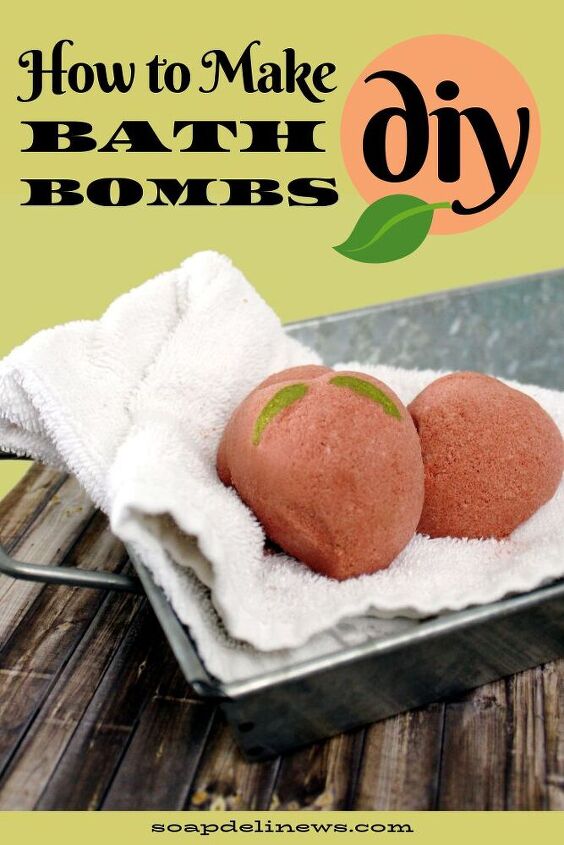
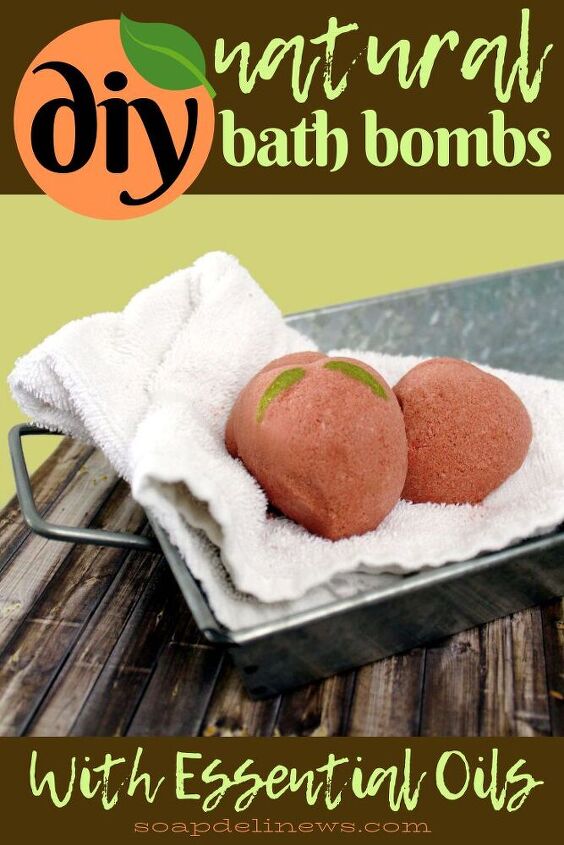
How to Make Bath Bombs Plus Natural Bath Bomb Recipe With Shea Butter
Have you ever wondered how to make bath bombs? Considering how easy it is to get hooked on using bath bombs, it’s not a surprise that you’d want to learn how to make your own. Keep reading to discover how to make DIY bath bombs with an easy, natural bath bomb recipe with shea butter.
It’s not hard to get hooked on bath bombs. Especially if you love taking baths. However, if you’ve tried a lot of bath bombs, then you’ve likely noticed that there’s a big difference between cheap commercial bath bombs and ones that are handmade. As someone with extremely sensitive skin, I can’t indulge in bath bombs made with cheap fillers and synthetic ingredients. They not only cause skin irritation and rashes, but sometimes I’ll itch for days afterwards.
The same is true for soap fragrances. While the soap recipe might be perfect for my skin, the wrong fragrance can totally leave me itching for weeks. So much in fact, that I’ll wake up in the middle of the night scratching. Sometimes pinning down the ingredient that caused an allergic skin reaction can be a challenge. Therefore, I try to stick to natural colorants, scents and ingredients when I make my own homemade soap and skin care products. This is even more important when making bath bombs. Because unlike soap, which causes a reaction even after its been rinsed off, I’m soaking in a tub with that bath bomb for quite some time
Let’s Learn How to Make Bath Bombs
My natural bath bomb recipe is perfect for anyone who suffers from skin sensitivities and allergies. Not only is it made with natural colorants for bath bombs – in this case pink kaolin clay and orange peel powder – it also contains hydrating shea butter and an uplifting essential oil blend. Are you ready to to learn how to make bath bombs? Keep reading to learn no just how to make my natural bath bomb recipe, but also about the skin care benefits of the bath bomb ingredients I used.
What Makes Bath Bombs Fizz?
There are two key ingredients that give bath bombs their fizz. They are citric acid and baking soda. When combine, the chemical reaction between these two ingredients creates carbon dioxide. This in turn makes the bath bombs fizz. Some bath bombs, such as the bath bombs made popular by Lush, also contain synthetic foaming agents such sodium lauryl sulfate (SLS), Sodium Lauryl Sulfoacetate (SLSA) or sodium coco-sulfate (SCI.) The addition of these ingredients gives bath bombs amazing bubbles in addition to the fizz.
Tips on How to Make Bath Bombs
When learning how to make bath bombs, I recommend starting with a simple basic bath bomb recipe. This will give you a feel as to how bath bombs are made and familiarize you with the process. The basic idea behind how to make bath bombs isn’t difficult. However, there are tips and tricks you need to know when them. Otherwise, you may end up with bath bombs that fizz prematurely. Or, in the process of making round bath bombs with a two-piece mold, you may find that your two halves don’t stick together.
Beginners mistakes, however, are easy to make. In fact, I’ve made them myself in the past. Luckily, with a little research first on how to make bath bombs, you can minimize or even prevent making these mistakes entirely.
Formulating Your Own Bath Bomb Recipes
Once you get the hang of how to make bath bombs, you can begin formulating your own bath bomb recipes. There are some basic rules that can help you either create your own bath bomb recipes from scratch or customize and existing recipe.
Tip #1: I recommend using ingredient weights when formulating your bath bomb recipes, rather than unit measurements. Not only is this a more accurate way to create a bath bomb recipe, it also makes it easier to determine the amount of fragrances or other ingredients needed for your recipe as recommended usage rates are provided as a percentage. This will also make it easier to scale your bath bomb recipe up or down at a later date. As such, you will need a digital scale to weigh out the ingredients when you make your bath bombs.
Tip #2: When using baking soda and citric acid as the base for your bath bombs, the recommended ratio is to use two parts baking soda to one part citric acid. If you’d like to use a foaming agent, such as SLSA or even sodium cocoyl isethionate, it should account for anywhere between 15%-25% of your recipe.
You can make bath bombs without citric acid. However, a combination of baking soda and citric acid produces the best fizz. Using lemon juice as a substitute can set off your fizz prematurely. And it can be a challenge in high humidity. While using cream of tartar, reduces the fizz reaction even further. Therefore, if you want to make the best bath bomb recipe, I recommend using citric acid.
Tip #3: Additional dry ingredients are typically added to a bath bomb recipe to prevent premature fizzing. Dry ingredients such as arrowroot powder, cream of tartar, cornstarch and clay can be use based on your preference. I like to choose my own dry ingredients for bath bombs based on the desired result and skin care benefits of those ingredients. These dry ingredients can be added to your bath bomb formulation with or without a foaming agent such as SLSA. When adding dry ingredients, it’s important that they don’t comprise of more than one half of the amount of citric acid in your recipe. Otherwise the fizzing performance of your bath bombs may be affected.
Tip #4: It’s not recommended that you add Epsom salt or Dead Sea Salt to your bath bomb formulations. This is because the magnesium in these ingredients draws moisture from the air into your bath bombs. This in turn can cause premature fizzing. However, I’ve made a number of bath bomb recipes using salt with success. (These bath bomb recipes include my Epsom salt bath bomb recipe for chronic pain as well as my rose essential oil bath bomb recipe. I also have a hidden color bath bomb recipe with magnesium flakes.) By adding a hard butter to your recipe, I’ve found that it does prevent premature fizzing. Just be sure to wrap your creations tightly once they’ve dried.
Tip #5: Rather than using a liquid for making bath bombs, such as witch hazel, I instead use a combination of carrier oils and/or body butters. As I live in a humid area, I’ve found that these ingredients work better at preventing your bath bombs from exploding early due to high humidity. If you prefer to use a liquid rather than oils or butters in your bath bombs, then stick with 90% or higher isopropyl alcohol. It evaporates more quickly than witch hazel, thereby making it more suitable for humid climates.
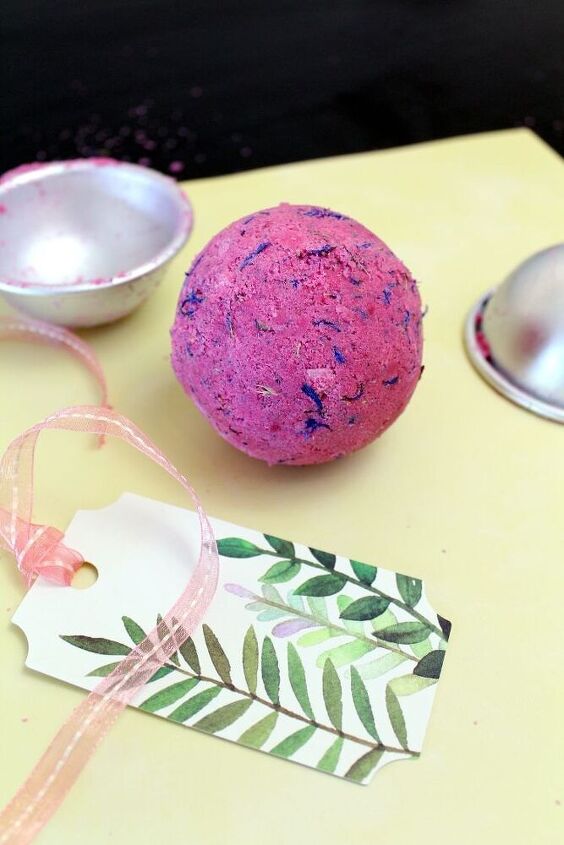
Tip #6: There are a number of options when it comes to choosing colorants for your bath bombs. You’ll learn more about different colorants and how they react in bath bombs – and ultimately bath water – as you experiment more and learn how to make your own recipes. Natural colorants, such as colored clays or botanical powders are one option. While lake dyes and micas are another. If you love a show in your bathtub, like the ones you get from hidden rainbow colored bath bombs, then lake dyes or dyes formulated specifically for bath bombs are the way to go. They will give the biggest color show and won’t leave a colored ring around your tub once the bathwater drains out. Lake dyes typically account for 28-34% of the total weight of a bath bomb recipe.
Tip #7: You should not use food coloring in your bath bomb recipes. Not only can food coloring stain both your skin and the tub, it’s simply bad practice especially if you’re formulating recipes to sell or give as gifts. In addition, it’s also important to note that not all colorants are approved for use in bath bombs. Some green colorants, for example, including green chromium oxide, are not approved by the FDA for use in bath bombs. Therefore you should do your research on colorants before deciding which ones to use. While some colorants can be used in wash off products such as soaps or body wash, it’s not always true for things like lotions or bath bombs where there is a longer exposure time.
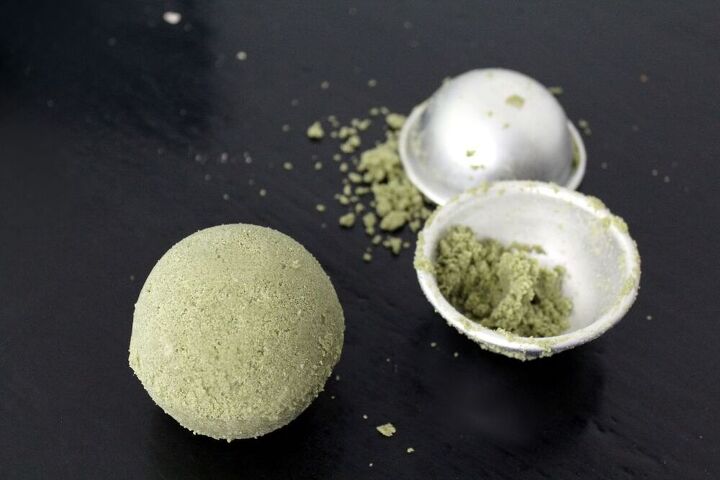
On the other hand, for little to no color show, you can use natural colorants or mica powders. Natural colorants, such as the spinach powder and French green clay I used in my natural mango butter bath bombs, are an easy way to create a green color. Alternately, mica powder can be used in significantly smaller quantities than both natural colorants for bath bombs or lake dyes. They’ll give your bath bombs bright colors before they go into the tub, but very muted tones once diluted in bathwater.
Tip #8: If you choose to use skin safe cosmetic micas, then you will need to also use polysorbate 80. Polysorbate 80 works as an emulsifier when used in bath bomb bombs. Soluble in water and alcohol, it binds with the colorants and oils used to make your bath bombs and helps disperse them evenly throughout your bathwater. This keeps any oils or fragrances you used in your recipe from floating on top of your bathwater. It also prevents the colorants used from sticking to both your skin and the tub and it helps glitter disperse more evenly. As such, if you don’t mind using non-natural ingredients to make your bath bombs, polysorbate 80 makes a wonderful addition to your bath bomb recipes whether you use mica or not. The suggested usage rater for mica is 1-2% of your recipe.
Skin Care Benefits of Natural Bath Bomb Ingredients
Now that you know how to make bath bombs, let’s move on to my natural bath bomb recipe and why I chose to use the ingredients I did.
Having sensitive skin can make it challenge to find the perfect skin care products. From anti-aging skin care to anti-acne treatments, there’s a whole world of potential skin reactions waiting to happen. Therefore, I chose each of the ingredients used in my bath bomb recipe for their specific skin care benefits. These ingredients include orange peel powder, shea butter, pink kaolin clay and an easy, aromatherapeutic essential oil blend.
Vitamin C is the new anti-aging skin care treatment. However, daily doses of vitamin C serums or creams, while practical for our faces, isn’t quite so practical for our bodies. By adding orange peel powder to your natural bath bombs, you can give your entire body a boost of Vitamin C’s antioxidant benefits. Not only does Vitamin C help stimulate collagen production, it can also help repair damage from free radicals, brighten skin and fade dark spots caused by hyperpigmentation.
In addition, orange peel powder can also help unclog pores, tone skin, diminish the appearance of scars and reduce inflammation. It’s also an effective treatment for body acne. So if you struggle with back acne – or even acne anywhere on your body – adding orange peel powder to your bath can prevent acne breakouts and promote healing.
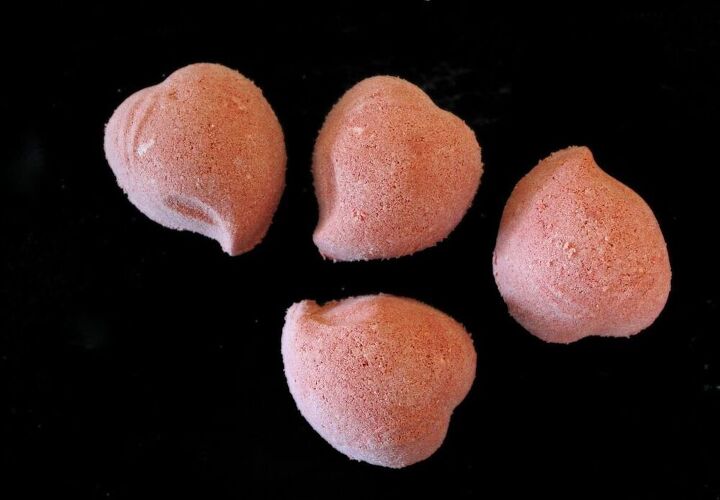
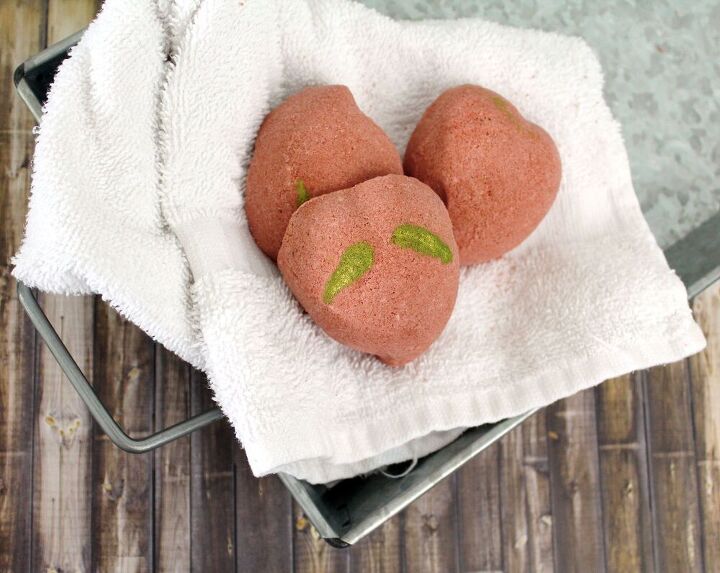
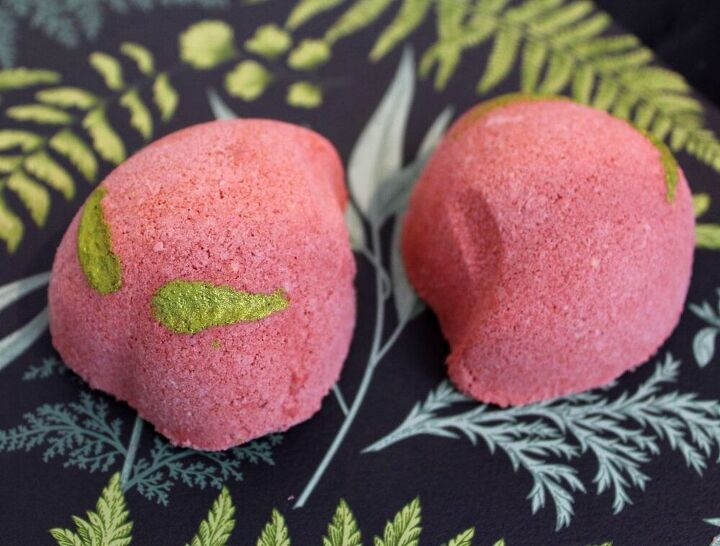
Pink kaolin clay is a naturally occurring cosmetic clay. Its color comes from combination of both white and red kaolin clays. Suitable for sensitive skin, this natural rose colored clay helps balance out skin and absorb excess oils, while also gently cleansing skin. It also lends my natural bath bomb recipe a pink color. Combined with the orange powder, these two natural bath bomb colorants give the resulting bath bombs a peach-like color.
Shea butter is hydrating body butter that’s naturally rich in vitamins A and E. Rich in essential fatty acids as well as other vitamins and minerals, shea butter offers a number of skin supporting properties. Commonly used as a natural moisturizer, shea butter is also used as a component in skin care formulations that target acne. I used refined shea butter, which has been deodorized, for my natural bath bomb recipe in order to allow the fragrance of my essential oil blend to shine through.
Essential oils offer a number of aromatherapeutic and skin care benefits. For my natural bath bomb recipe, I created an essential oil blend containing grapefruit essential oil, sweet orange essential oil and cardamom essential oil for their uplifting and re-energizing properties.
Grapefruit essential oil, specifically, is often used in aromatherapy to combat acne, reduce stress, stimulate circulation, increase energy, enhance mood and improve digestion.
Tips on How to Make No Fail Bath Bombs
Now that you’ve learned about the ingredients that went into my natural bath bomb recipe, here are some easy tips for success when you’re ready to get started.
Tip #1: As you are working with fine powders such as SLSA or even citric acid, it’s recommended that you wear a face mask respirator or dust mask. This keeps small particles from being inhaled when mixing your bath bomb ingredients together. In addition, nitrile gloves are also recommend. Not only will this prevent colorants from staining your hands, it will also keep the citric acid from burning any open cuts or scratches.
Tip #2: Some ingredients, such as orange peel powder as well as certain essential oils, can cause photosensitivity. Therefore you should take extra care to use sunscreen and wear protective clothing if you plan to spend time in the sun. (You can learn which essential oils are phototoxic along with safe usage instructions for phototoxic essential oils here.)
Tip #3: When using a two part bath bomb mold, it’s important not to pack each side before pressing the two sides of the mold together. Otherwise, the two sides won’t stick together resulting in two half spheres rather than a single solid one. Instead, you should pile each side of the mold loosely with your bath bomb mixture. Lightly compact each side, then pile more of the bath bomb mixture into each side of the mold. Finally, firmly press both sides of your bath bomb mold together. (It’s important not to twist the two sides of mold together when using a round bath bomb mold.) Then gently tap around the edges of the mold with a spoon to release your bath bomb.
For one piece bath bomb molds, use the same process. However, instead of pressing the mold against another half, firmly pack the remaining bath bomb mixture into the mold with your hands. Tap the mold with a spoon to help release the bath bomb if necessary. I suggest you set the molds onto a cutting board, then tap until the bath bomb slides out when the mold is lifted off.
Tip #4: Your bath bomb mixture, once mixed, should be the consistency of wet sand. When picking up a clump of the mixture with your hands, it should hold together when squeezed then dropped back into the container. This is important. If your bath bombs are too dry they may crumble and not hold together. On the other hand, if they are too wet, you may get a premature fizz in addition to having difficulty releasing the bath bombs from the mold.
Natural Bath Bomb Recipe with Shea Butter
My natural bath bomb recipe is made using the peach bath bomb mold from this set. However, you’re welcome to use any bath bomb mold of your choosing when making my shea butter bath bombs. Likewise, you can always substitute the essential oil blend I used for my natural bath bomb recipe with a peach fragrance oil at the manufacturer’s suggested usage rate.
Bath Bomb Ingredients:
These are the ingredients you need to make natural bath bombs:
- 8 oz. baking soda
- 4.5 oz. citric acid
- 2 oz. refined shea butter
- .5 oz. orange peel powder
- .25 oz. pink kaolin clay
- .25 oz. arrowroot powder
- 2.5 mL grapefruit essential oil
- 1 mL sweet orange essential oil
- .5 mL cardamom essential oil
- carrier oil of choice, as needed
How to Make Bath Bombs
Here is how to make natural bath bombs with shea butter:
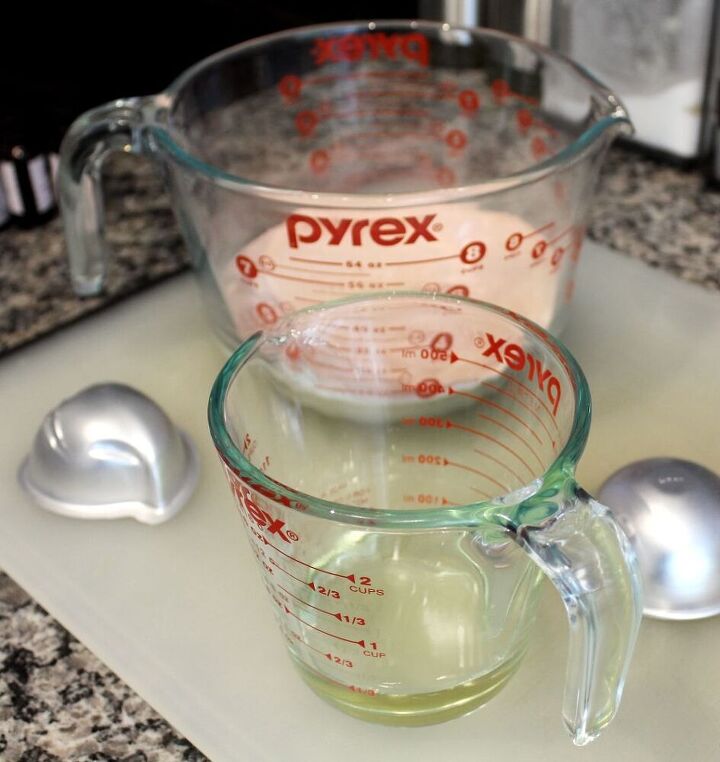
- Begin by weighing out refined shea butter using a digital scale. Place the shea butter into a heat safe container. Heat at 30% power in the microwave until melted. Alternately, you may also use the double boiler method. Once the shea butter has melted, remove from heat.
- Next, measure out the essential oils using a fresh graduated plastic transfer pipette for each essential oil. Then add to the melted shea butter. Mix to combine. Then set aside.
- Next, weigh out the baking soda, citric acid, arrowroot powder, orange peel powder and pink kaolin clay into a in a separate container. Mix the dry ingredients until thoroughly combined.
- Now add the melted shea butter with the essential oils to the dry ingredients mixing as you go. Mix until the entire concoction is the consistency of wet sand. If it’s too dry, stir in a small amount of a carrier oil of your choice, a little at a time, until it reaches the proper consistency.
- To this recipe, pile the mixture into the peach shaped bath bomb mold. Lightly compact the bath bomb mixture into the mold, then repeat the step. Follow by firmly pressing the bath bomb mixture into the mold. Then unmold. Repeat for each shea butter bath bomb until you’ve used up all of your natural bath bomb mixture.
- Once your shea butter bath bombs have hardened, wrap or package as desired for personal use or gifting.
More Natural Bath Bomb Recipes
Once you’d tried my shea butter bath bomb recipe, be sure to give one of these other natural bath bomb recipes:
- Spinach & French Green Clay Bath Bombs with Natural Colorants
- Epsom Salt Bath Bombs for Natural Pain Relief
- Lavender & Chamomile Bath Bombs with Natural Botanicals
- Homemade Holiday Peppermint Bath Bombs with Essential Oil
- Lavender Essential Oil Bath Bombs with Shea Butter
- Lemongrass & Sage Bath Bomb Minis
- Natural Cola Bath Bombs with Essential Oils
- Rose Petal Vanilla Bath Bombs with Natural Colorants
Colorful Recipes for Making Bath Bombs
If you love colors and other fun ingredients that aren’t technically naturally, then try these colorful homemade bath bomb recipes:
- Fizzing Shamrock Bath Truffles
- Cranberry Fig Fizzing Bath Truffles for the Holidays
- Moisturizing Bath Fizzy Powder Recipe
- Halloween Pumpkin Bath Bomb Recipe
- DIY Easter Egg Bath Bombs with Glitter
- DIY Mermaid Bath Bombs with Moisturizing Cocoa Butter Shells
- Hidden Rainbow Bath Bomb Embed Bars
- Hidden Color Pineapple Bath Bombs for Summer Self Care
- Rose Essential Oil Bath Bomb Recipe
- Homemade Milk & Honey Bath Bombs
- Moisturizing Strawberry Milkshake Bath Bomb Recipe
Once you’ve gotten comfortable creating your own homemade bath products, invite your friends to join in the fun! Learn how to throw a bath bomb party for a girls night in to create self care treats. Or get together to craft homemade holiday gifts for friends and family.
I’m so excited that you’ve chosen to start your natural skin care journey! I hope you’ll stick with me as I continue to share new recipes for natural bath bombs, homemade soaps and fabulous skin care products! You can keep up with my new recipes and healthy lifestyle posts by following me across your favorite social media platforms. Follow me now via Pinterest, facebook, twitter and instagram. Or sign up to receive my newsletter to stay in the loop.
The author may collect a small share of sales from the links on this page.


Comments
Join the conversation