How to Use Fusible Interfacing + How Block Fusing Will Keep You Sane
Today we’re talking about how to use fusible interfacing and the benefits of block fusing.
For a long time I really really hated applying fusible interfacing.
Interfacing is slippery, it can get your iron gunky. Worst of all, it seems that no matter how accurately you seem to cut it, you always need to trim away extra.
Who has time to cut out interfacing twice? Not I said the fly.
What I’m sharing with you today are my tips for working with interfacing that’ll save you some annoyance. Also, I’ll show you my streamlined process for how to use fusible interfacing. It’ll save you time, (shoot, there’s one of my favorite time hacks below) and it will not fail you.
So pull out a beautiful collared shirt to cut and let’s get some interfacing on it pronto.
Table of Contents
2 Quick tips for interfacing
Before we get into talking about interfacing, here are two quick tips before you pull out your iron.
Know your interfacing
There’s so many interfacing choices out there. It can be really confusing to get your head around the manufacturers and the particular number of a certain type. Why is this interfacing better than that one? Etc. Etc.
Here are two posts that’ll give you everything you need to know about interfacing.
Everything you need to know about interfacing fabric
Answers to burning questions about interfacing: What is it, where do you use it, where to buy it and more.
13 types of interfacing that’ll make all your sewing better
My personal favorite interfacing choices for every sewing project.
Make a test swatch
Before you start adding hair canvas to the collar in your next jean jacket, stop a second. I’m going to ask you to make a test swatch. This is a really quick way to check whether your interfacing choice works with your fabric. Once in a while it won’t, and if you’ve already fused your project, it’ll be near impossible to fix.
Take a piece of your fabric and sandwich it with a piece of your interfacing of choice. No need to fuse it in place unless you want to.
Does it hold it’s shape like you want? If yes, go on to fusing.
Does the fabric drape like you want it to or does it feel a little cardboardy? If yes, go on, if no, test with a different interfacing.
Sew a buttonhole in your swatch. Do the stitches look even? If yes, move on to fusing.
This page contains affiliate links. As an Amazon affiliate, I earn on qualifying purchases. If you purchase a product through one of them, I will receive a commission (at no additional cost to you). I only ever promote products that I use and love and I think you will love too. Thanks for supporting this blog!
How to use interfacing: supplies
- steam iron
- spray bottle
- press cloth ( silk organza, cotton muslin or other thin cotton)
- sewing shears/rotary cutter
Block fusing vs. fusing individual pieces
Everybody has preferences for how they like to work.
Once upon a time, I used to cut out all of my fabric for a project. Next, I’d cut out my interfacing pieces. After that, I’d fuse the pieces that needed interfacing.
The problem with this method is that interfacing is very slippery. Almost no matter what you do, it will shift out of place on you. Add this to the fact that some fibers will shrink as you’re applying interfacing a teeny bit and you’re left with hang off interfacing you need to trim away.
It’s super annoying to have to wrestle this slippery stuff AND end up cutting it out multiple times.
After a long time of wasting my own time, I now use a modified block fusing for my interfacing.
What is block fusing?
Block fusing is something the garment industry does when fusing interfacing. This process saves time and allows for any shrinkage that might happen.
First, trace around your pattern pieces that need interfacing on a chunk of fabric large enough to accommodate them. Fuse interfacing to the wrong side of the fabric. Finish up by cutting out your fabric and interfacing in one step.

If I’m making a wool jacket, I always use this method.
I like this method because you save time cutting out the pattern piece and interfacing in one step.
The reason I often choose what I’m going to show you is that I don’t like to waste excess interfacing. I use that stuff to stabilize shoulder seams, apply to hems and a million other small things. That’s why I usually apply interfacing how I’m going to show you.
If you want speed in applying interfacing, block fusing is what you should do.
But if you can’t stand wasting interfacing, keep reading…
How to use fusible interfacing
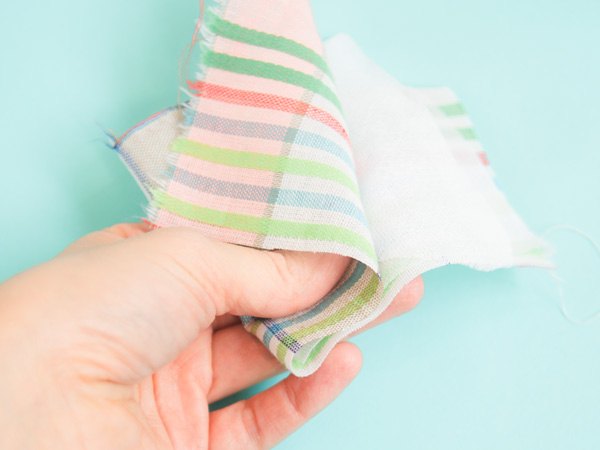
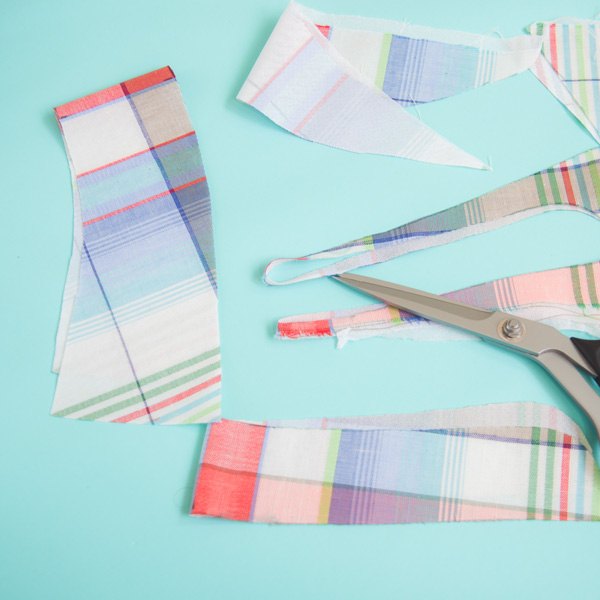
Instead of fusing an entire chunk of fabric, first cut out my pieces needing interfacing.
From there, place the pieces on top of the wrong side of the interfacing. The wrong side of the interfacing is the side with the glue. It will feel rough to your hand. Place the wrong side of your fabric piece to the wrong side of the interfacing.
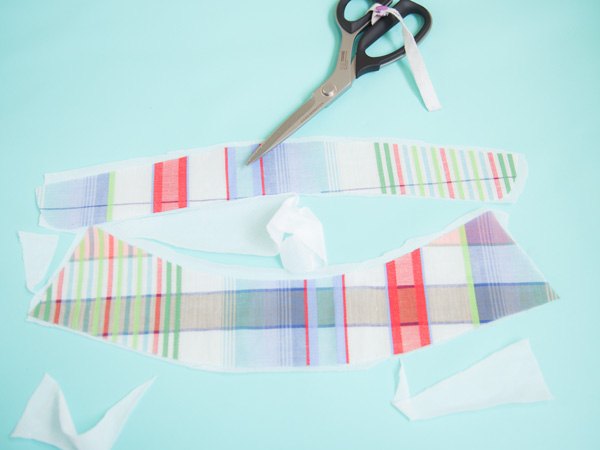
Rough cut around the interfacing so there’s not too much excess around your pieces.
Save the scraps for interfacing pockets, stabilizing shoulder seams and other small pieces that need interfacing like belt loops.
Use a press cloth
You really need to use a press cloth when you apply interfacing.
A press cloth is simply another piece of fabric you lay over the top of fabric you need to press. It prevents scorch marks, and in this case, it’ll protect your iron from getting interfacing gunk on it.
Silk organza makes an excellent press cloth. It has a high heat tolerance, and best of all, you can see through it. This makes it really easy to see what you’re doing.
Other good choices for a press cloth besides silk organza include a large square of 100% cotton muslin, cotton gauze or even a simple cotton handkerchief.
It’s important that you use a heat tolerant fabric here. Polyester will melt on you, so make sure that whatever cotton you’re using it’s 100% cotton.
Use steam and water
Where fusible interfacing is concerned, steam is your best friend.

Heat up your iron to the temperature setting for the fabric you’re fusing. Make sure your steam is also on.
Lay your press cloth over your prepped interfacing pieces. Spray the press cloth with water.
Press and lift, do not glide the iron when you interface
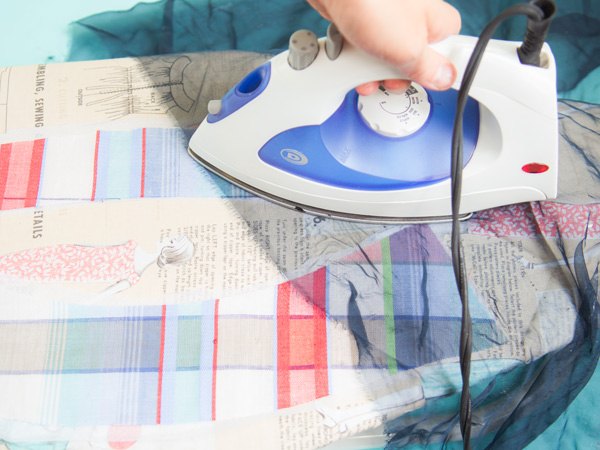
Want to know how to use fusible interfacing and mess up the process? Glide your iron around like you’re ironing sheets.
Fusing interfacing is NOT ironing. If you fuss your iron around continually while you’re fusing, prepare yourself for weird results.
Instead, press the iron in one spot for 10-15 seconds. Lift the iron, then move it to another unfused spot. Press for another 10-15 seconds. Continue this process until you’ve gone over the whole piece with pressing.
Press the other side to finish off the fusing process
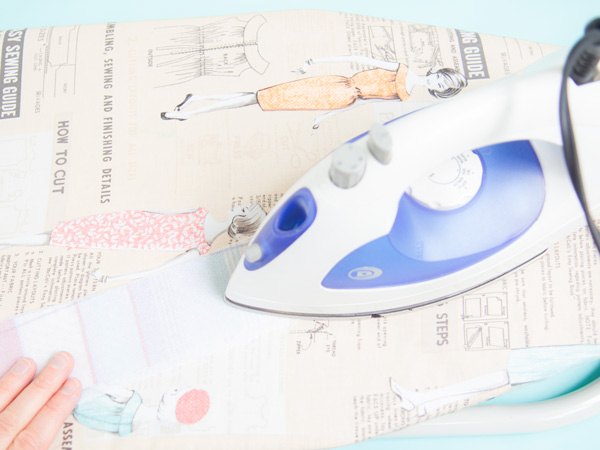
Flip your work to the other side. You’ll see the soft side of the interfacing face up now.
Press and lift all over the surface of your piece just as you did on the opposite side.
Sometimes the glue doesn’t activate fully when you only hit it with heat and steam from one side. Pressing on the opposite side of your work ensures that the fusing process will work out much better for you.
Set aside the piece to cool for a couple minutes.
Trim away the extra (+ my favorite time hack)
The last part of the process in how to use fusible interfacing is trimming.
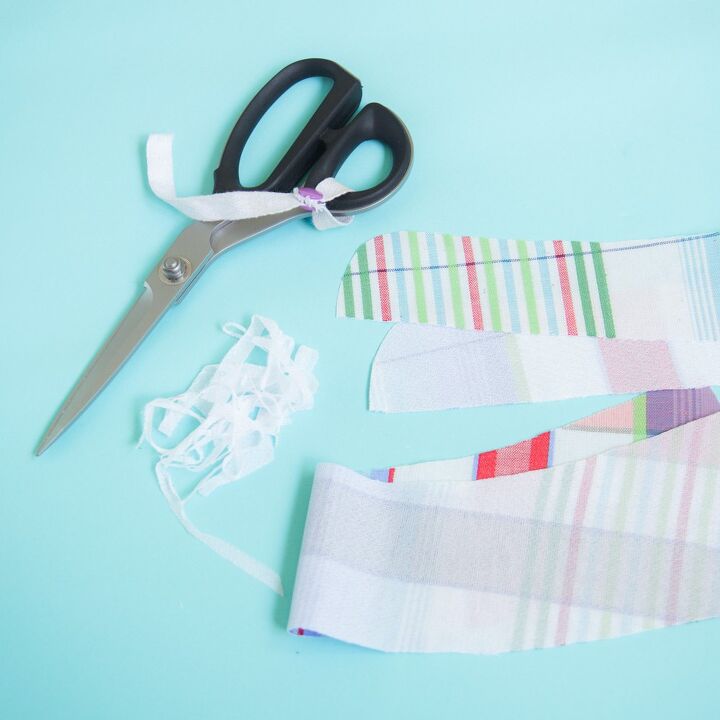
Trim away your excess interfacing around your pieces.
I actually set aside my pieces in a bag with my favorite Kai 7230 shears. It’s rare that I trim away interfacing straight away. Very often, those pieces with interfacing aren’t the first ones you sew together. I’ve found that trimming away my interfacing while I’m watching TV, at baseball or some other place where I don’t have to pay attention 100% is a simple way to get the rather boring job of trimming interfacing done while I’m not using up my precious sewing time where I want to be engaged and having fun sewing. It’s a simple time hack, but one of my favorites!
For more sewing time hacks like this, check out Sewing Efficiently: your ultimate guide.
Conclusion
To sum up how to use fusible interfacing:
- Know your interfacing.
- Make a test swatch.
- Know if you want to block fuse or fuse all your pieces on interfacing at one time.
- Use a press cloth.
- Use steam and water.
- Press, don’t glide on the right side and the wrong side of your interfaced pieces.
- Trim away all the extra interfacing at your leisure.
Elizabeth Farr is the writer behind the Elizabeth Made This blog where she shares helpful sewing tips, step by step sewing tutorials and videos to help you explore your creativity through sewing. She has written sewing Eguides and patterns, been a featured teacher at Rebecca Page’s Sewing Summit and Jennifer Maker’s Holiday Maker Fest and her work has appeared in Seamwork and Altered Couture magazines. She also created a line of refashioned garments for SEWN Denver. When her sewing machine isn’t humming, she’s playing and teaching violin, and hanging around a good strategic board game with her husband and 4 kids.
The author may collect a small share of sales from the links on this page.


Comments
Join the conversation
yes, I will give blocking a try. I don't do much sewing anymore but I did buy a new sewing machine recently & made my man friend a couple of pullover shirts. The pattern has a pullover with a placket front & collar. Thank you for this info.
thank you for this tutorial ! :)