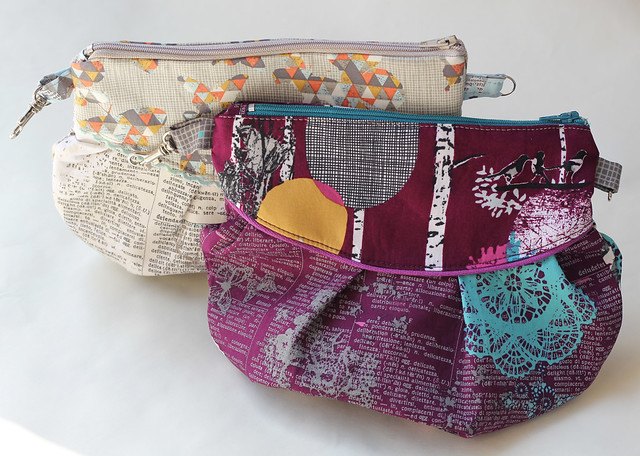
Indelible Pleated Zipper Clutch Bag Tutorial - Pattern
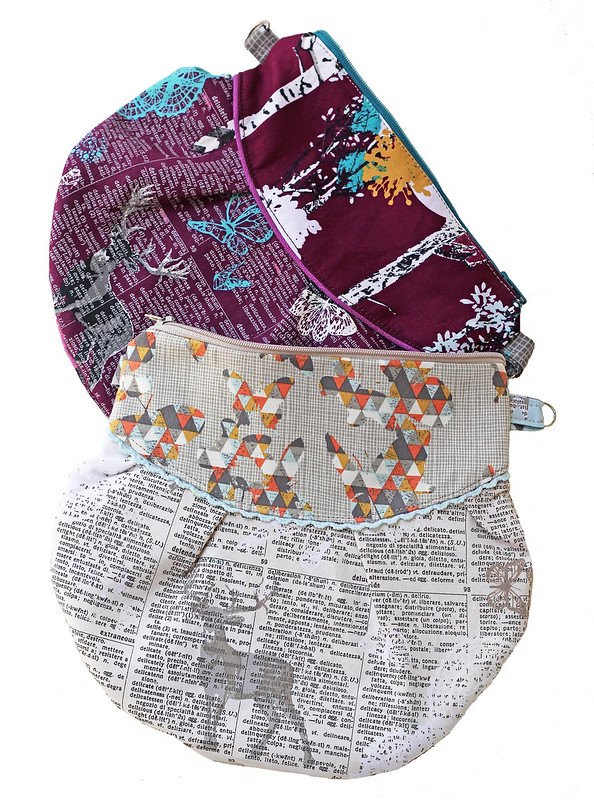
It's time for my first free Indelible tutorial.
Clutch zipper bags are so easy to make and once you learn how, you will be addicted!!! You can decide if you want to add the handles or not, but they may be useful;)
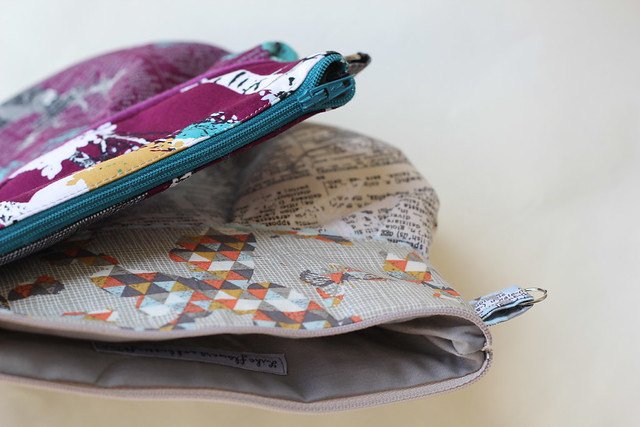
This tutorial is scrap friendly, so you can combine 2 different fabrics for the main sides, just like I did.
Needed supplies:
1. fabric: 1 fat quarter of the fabric for the main sides ( or 2 different fabrics) + 1 fat quarter for the lining + 1/8 fabric for the handle (optional)
I used my Indelible fabrics: IDL-2223 Doiland Gloss Silver + IDL-2227 Flutter Folds Spark for the lighter one and IDL-1229 Stamped Grove Nightfall + IDL-1223 Doiland Gloss Plum
2. medium weight fusible interfacing (to obtain the more durable bag)
3. 8" long (20 cm) zipper
4. 1/2 yard of the decorative trim or ribbon
5. sewing machine, thread (for the best results - use Aurifil), scissors, pins, iron, zipper foot (optional, but preferable)
6. 2 metal rings and 2 Swivel clasp snap clips
So, let's get started!
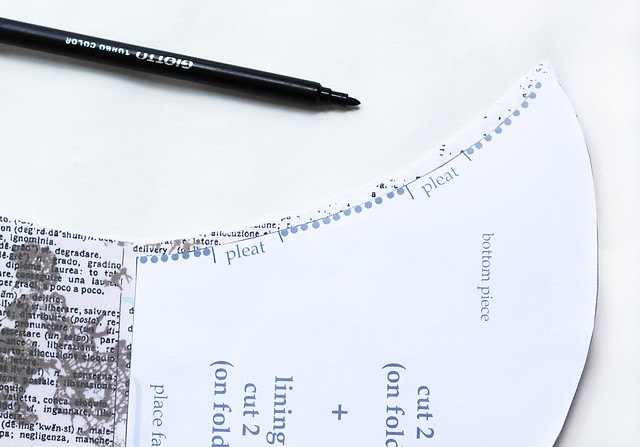
Print the template .
If you want to make the bag in this dimension, like mine, be sure to
print it at 100% scale, but you can also print this sheet much bigger
and make a bigger bag (in that case just be sure to choose the zipper in appropriate size)
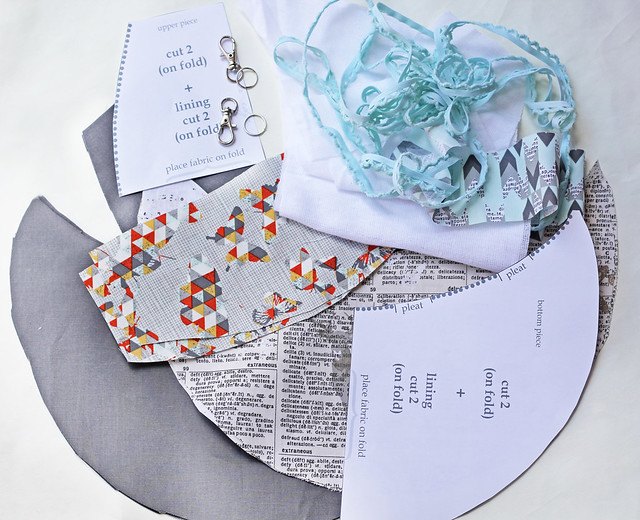
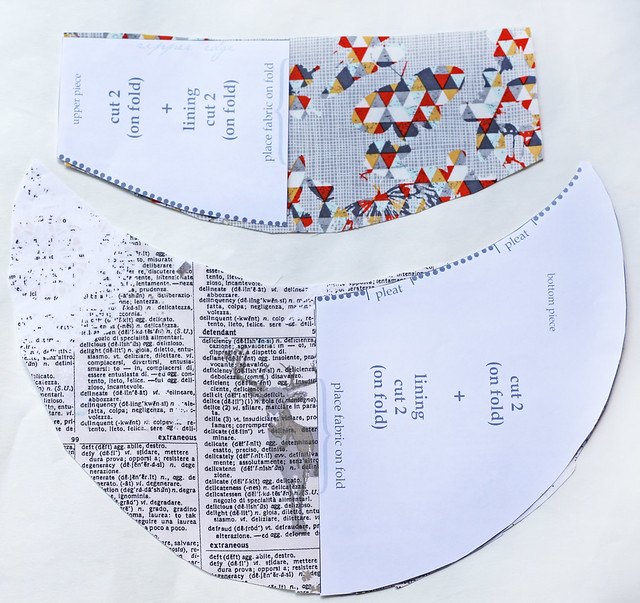
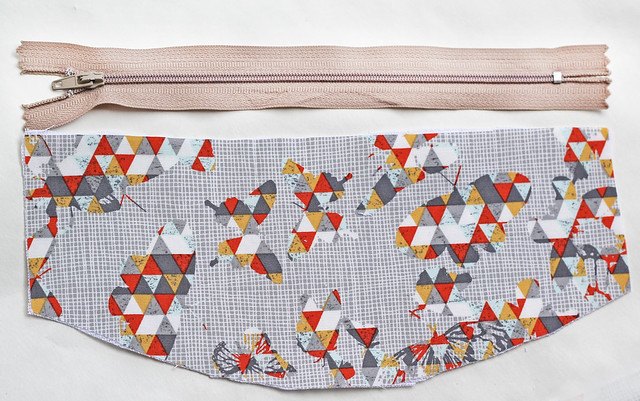
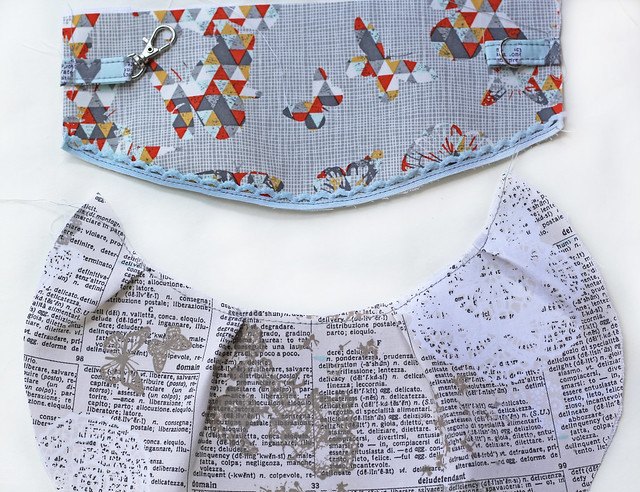
The template sheet includes the upper - smaller piece and bigger - bottom piece.
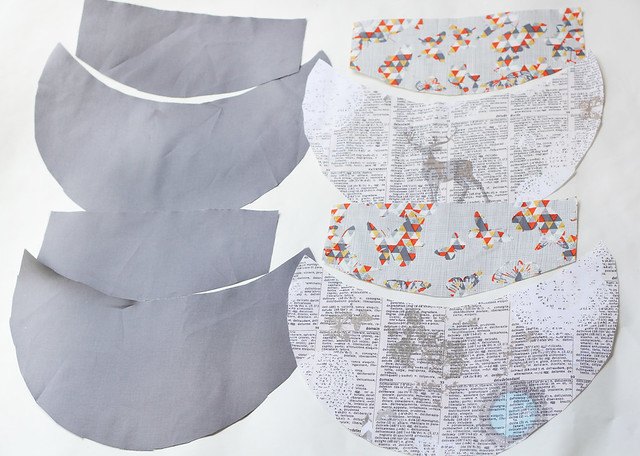
So, using this template, you need to cut on fold (to obtain the entire, doubled pieces):
2 pieces of the upper main fabric, 2 pieces of the bottom main fabric,
2 lining bottom pieces, 2 lining upper pieces,
2 interfacing bottom pieces, 2 interfacing upper pieces
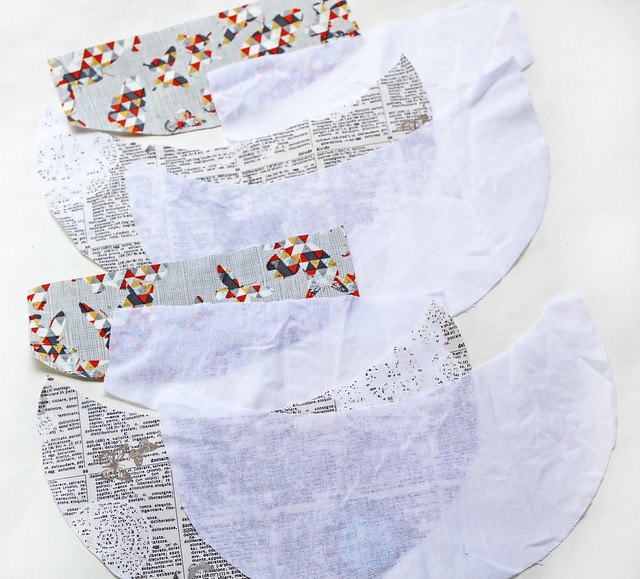
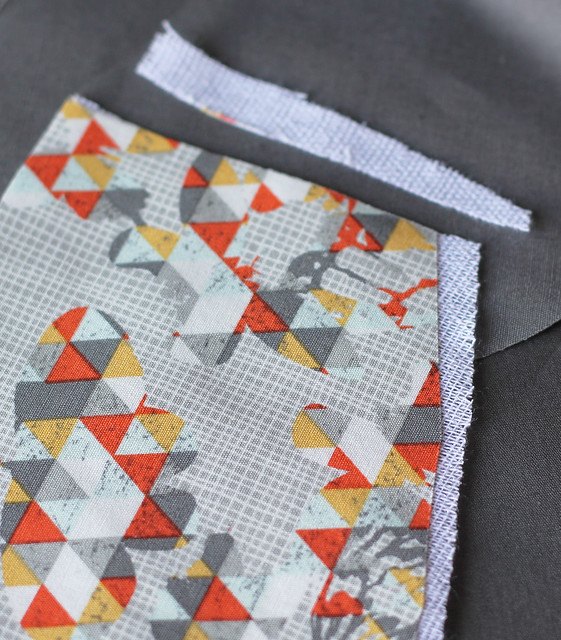
Iron the fusible interfacing on the back (wrong) sides of the main fabrics.
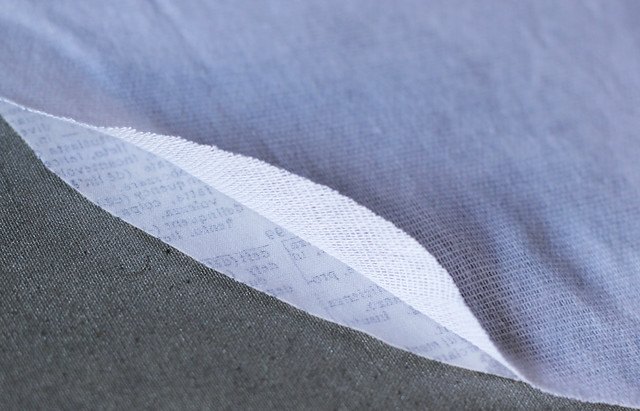
Trim the eventual interfacing excess.
So, this is what you will have:
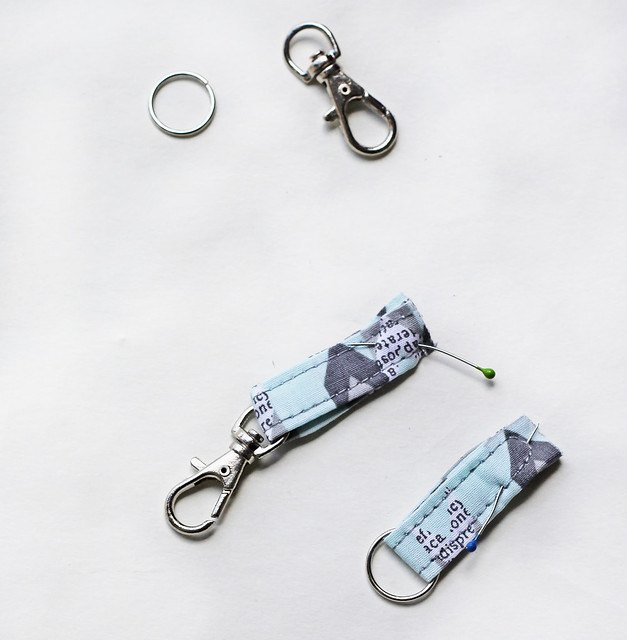
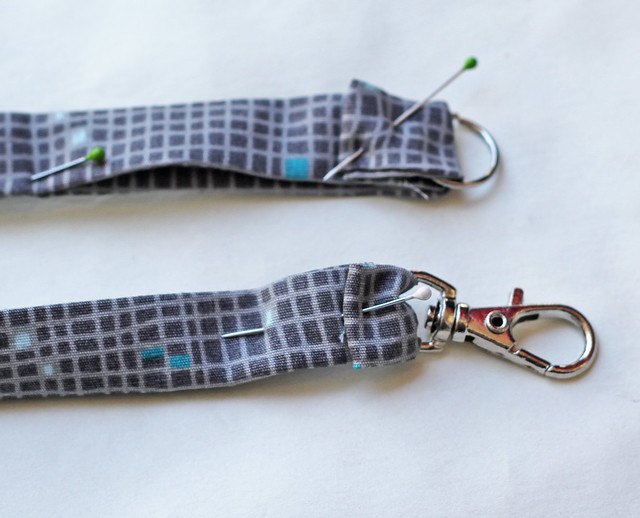
Let's prepare the loops with ring and swivel clasp first. Cut an approximate 6 x 2" strip of some fabric leftover.
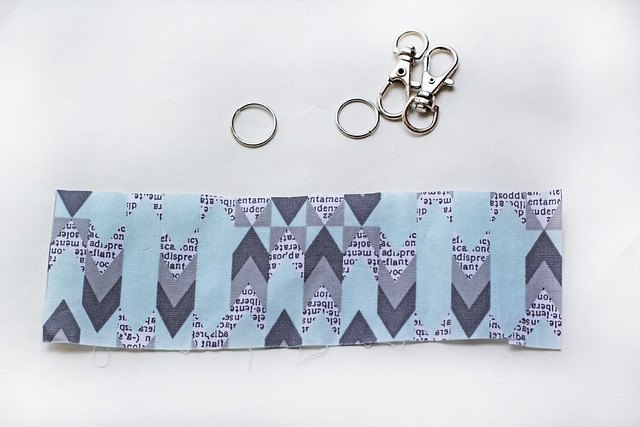
Fold it in half lengthwise and iron it, then
open and press both sides toward the center crease, press center crease close again and topstitch.
Cut it in two.
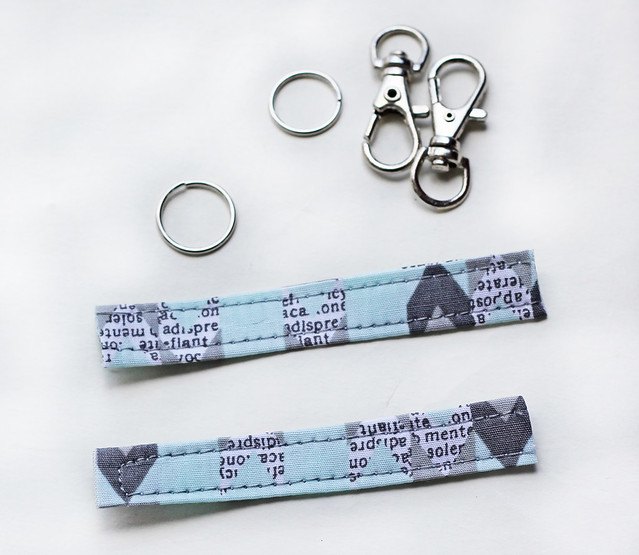
Pull the swivel through one end and the ring through the other. Loops are ready to be pinned to one of the upper fabric pieces. The
second ring and swivel will have to be placed on the strap's ends.
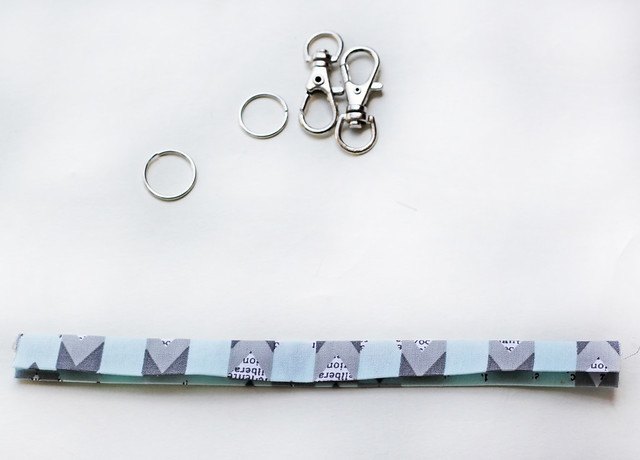
Let's prepare the zipper now by covering it's ends with some fabric leftovers.
Cut an approximate 6 x 3" strip of any fabric leftover. Fold it in half lengthwise and iron it, then
open and press both sides toward the center crease and press center crease.
This way, you are making some kind of the tabs or covers for the zipper ends. Cut the strip in two, so that you can cover both zipper ends.
Place the zipper's ends into a sandwich of this fabric tabs. If you want, you can even cover the small metal piece at the end, than just make a bit larger the fabric tab-strip.
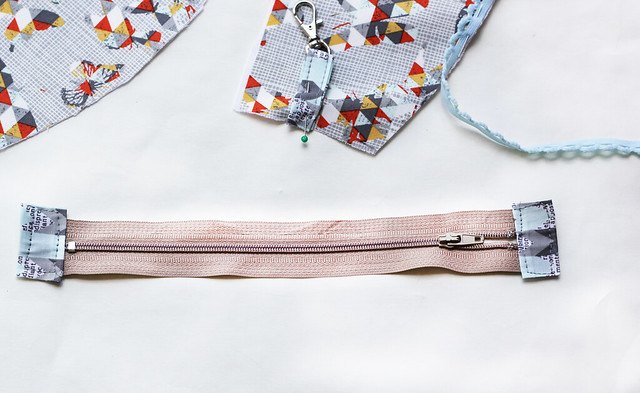
Topstitch it.

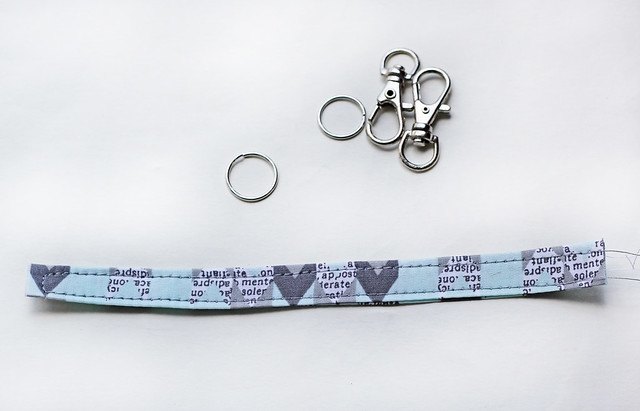
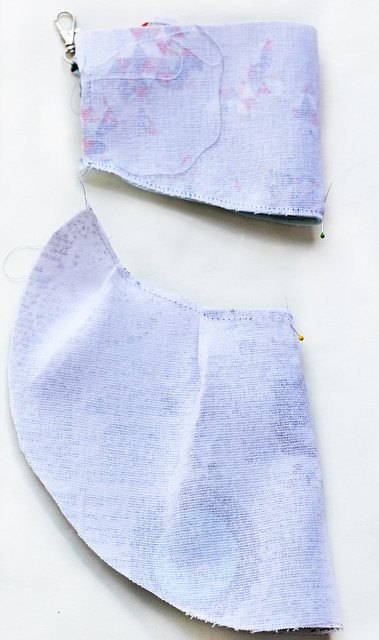
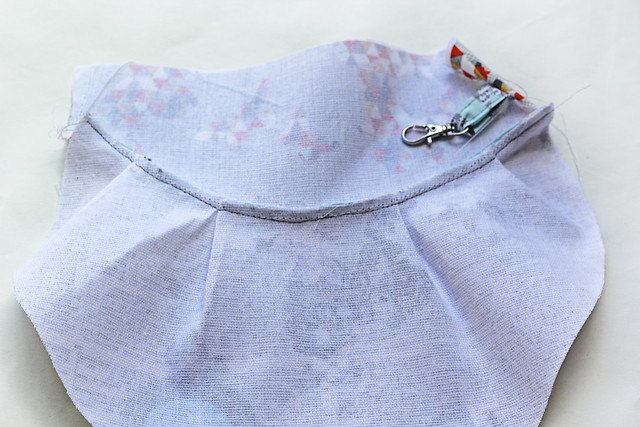
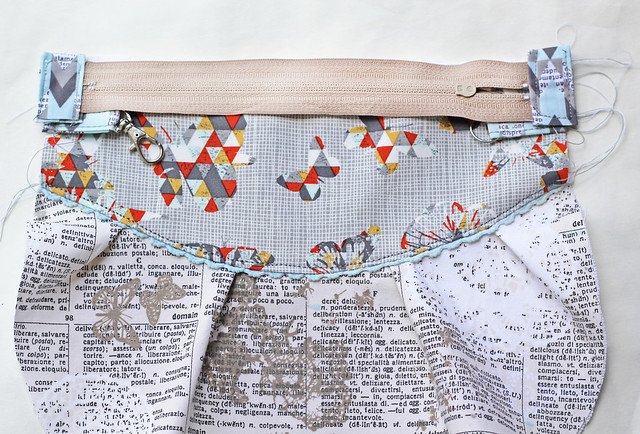
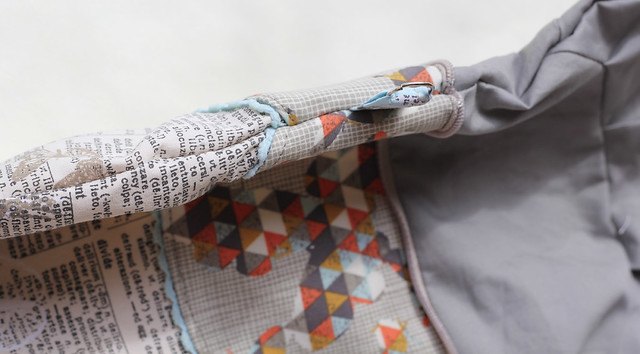
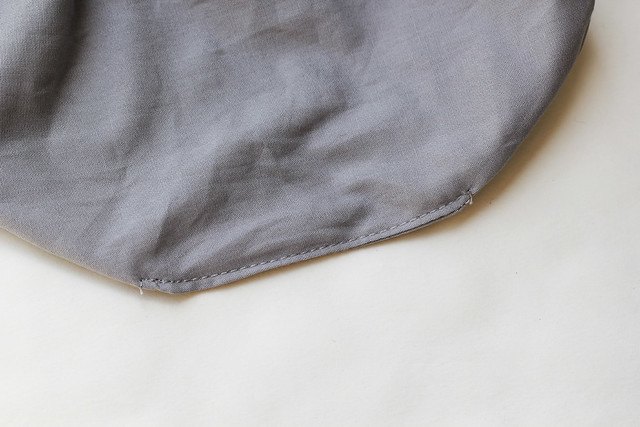
Pin the fabric loops with metal ring and swivel on both sides of one of the upper main pieces, approx. 1" from the upper, zipper edge.
Pin nice decorative trim onto the bottom edges of both upper main pieces and sew it.
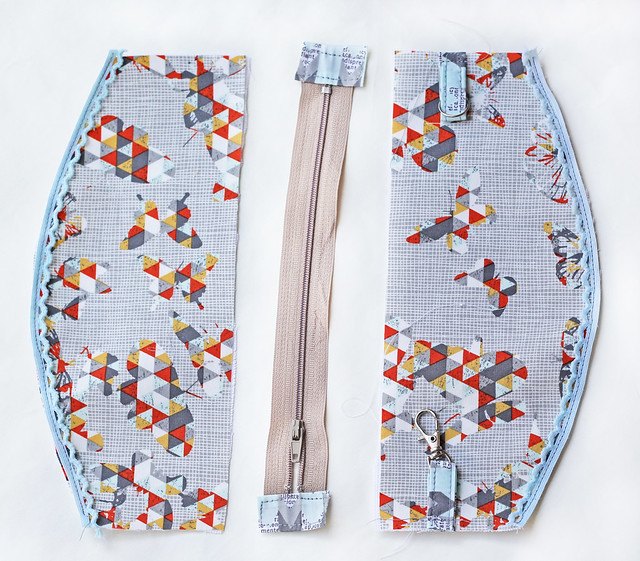
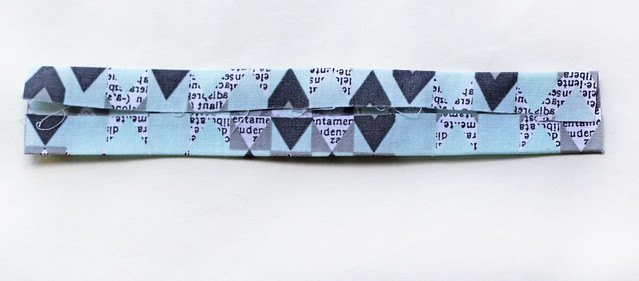
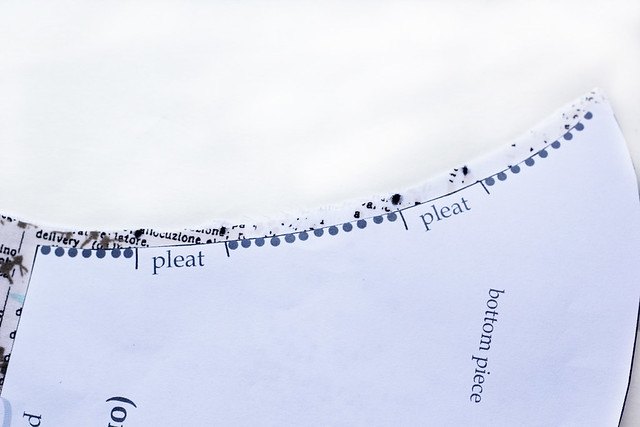
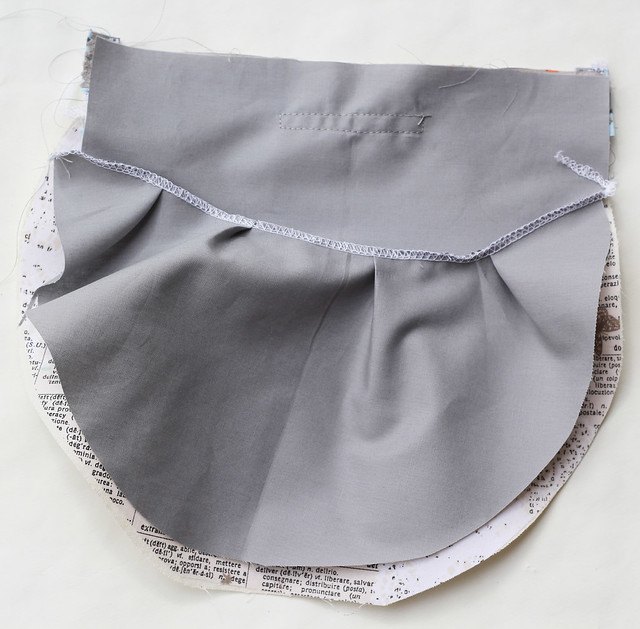
Now lets prepare the bottom pieces, creating the pleats on them.
With any kind of the pencil or marker ( it will not be visible), mark the pleats on the right sides of the fabric, both main and lining pieces.
Fold the fabric into a concertina to make the pleats: fold them going toward the center.
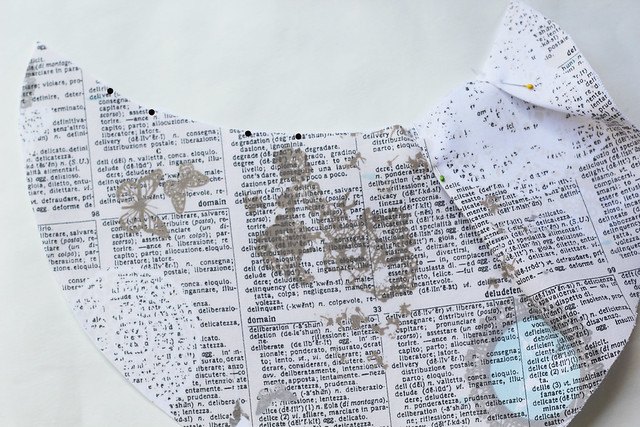
Place pins into the pleats.
Stitch over that edge.
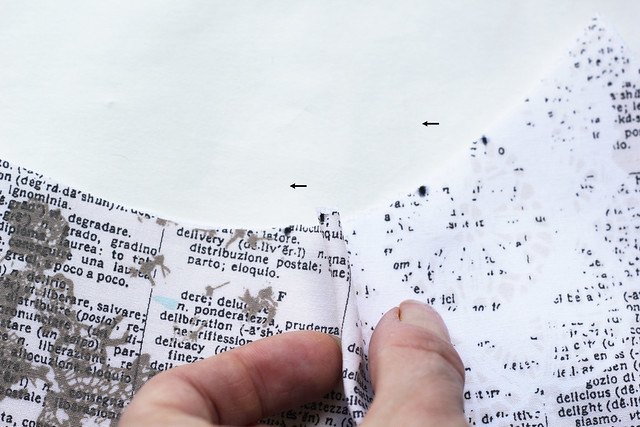
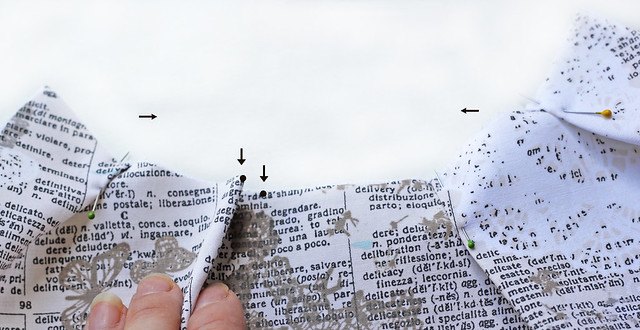
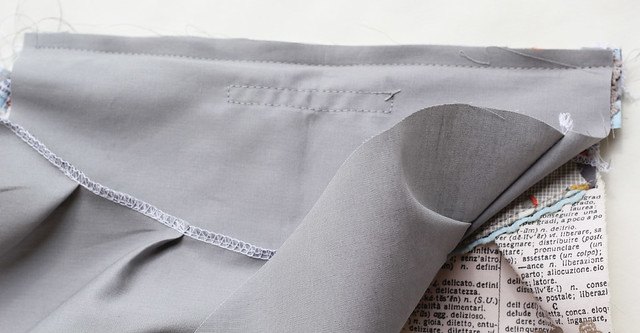
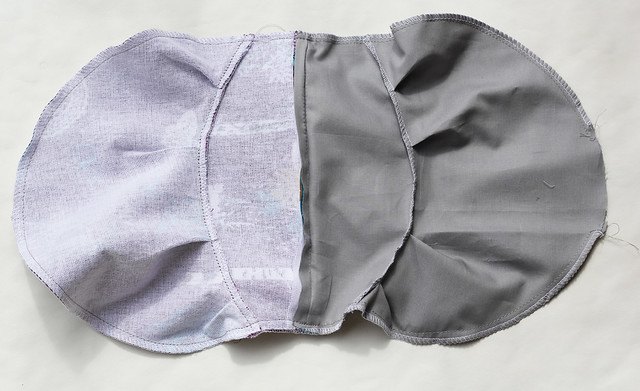
Now we need to join this two pieces together. Find the centers by folding both pieces and marking the centers with pins.
Right sides together, match the centers and pin them together.
Continue pinning along the edges and sew these two parts together.
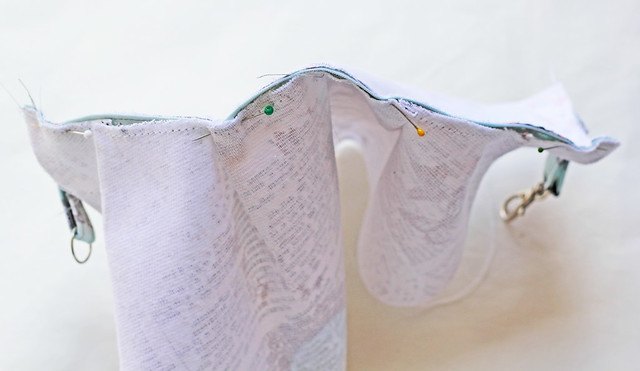
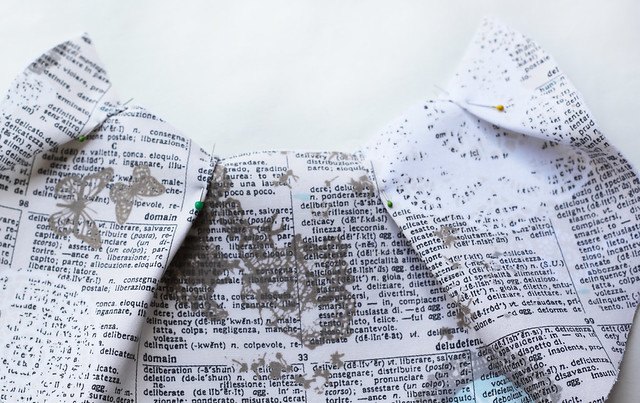
Turn to the right side and top stitch that edges.
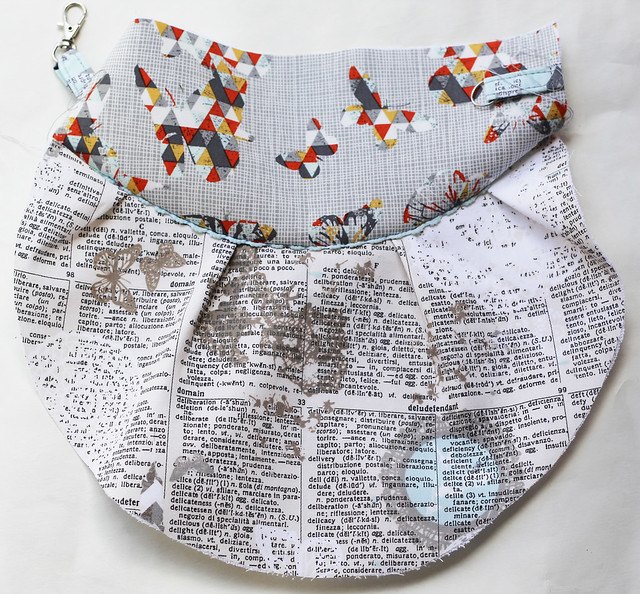
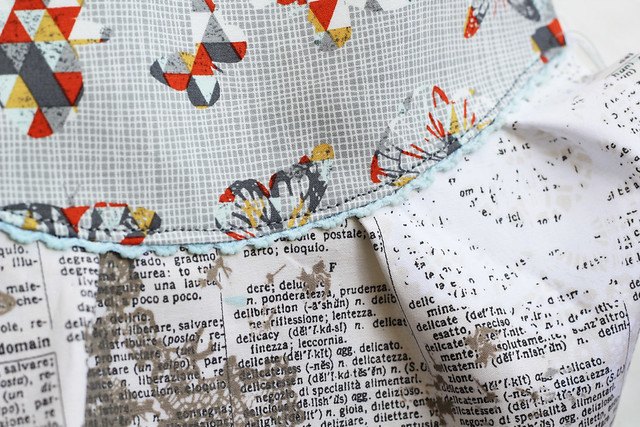
Repeat this on the other side and on the lining pieces.
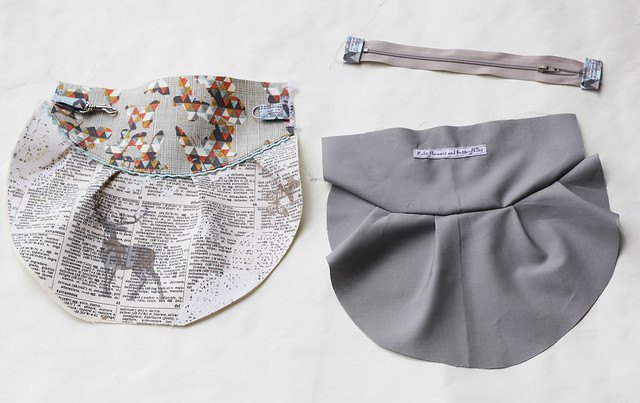
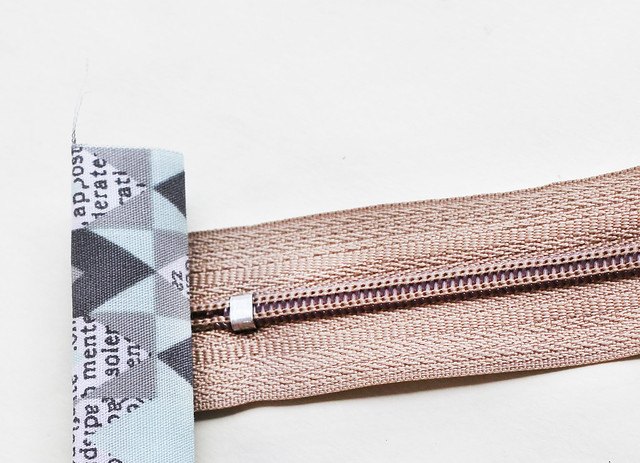
Now let's sew the zipper in a sandwich between the main piece and lining (right sides together), facing the right side of the zipper with the right side of the main fabric.
Using your zipper foot
(if you don’t have a zipper foot, don’t worry as this can be done with a regular presser foot as long as you go slowly and move the slider to avoid jamming), sew them together using the 1/4" (6 mm) seam allowance.
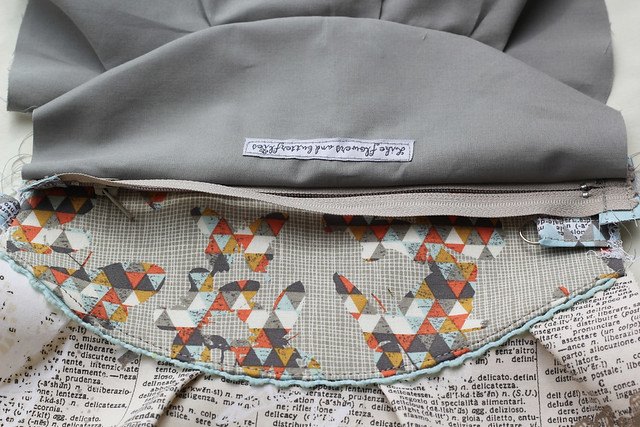
Repeat the same on the other side of the zipper.
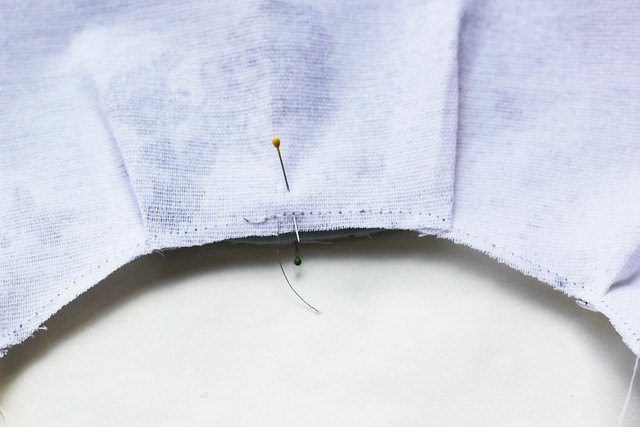
I suggest either pressing (on low heat setting) the both sides at this point or top-stitching.

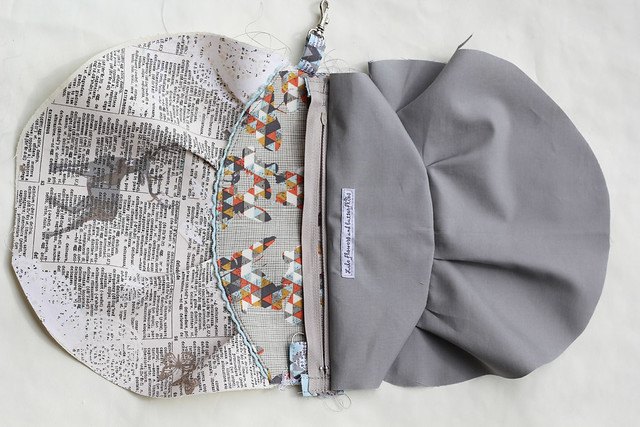
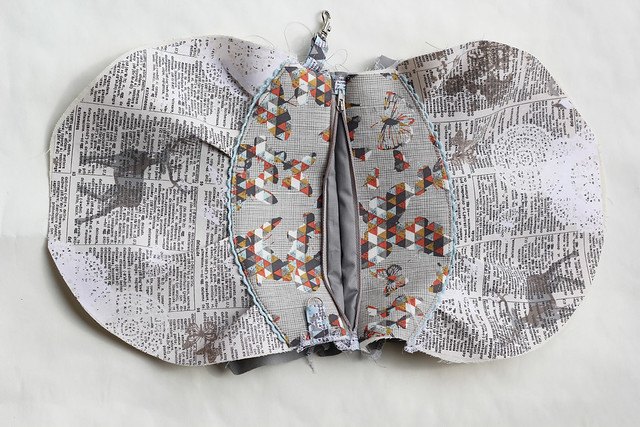
Place right sides of the main fabric together and lining right sides together. Make sure to unzip the zipper so that is in the middle of the pouch (as you will need to turn the pouch through that gap).
Starting from the lining part, sew all around (be careful when sewing over the zipper) using the 1/4 seam allowance (6 cm). Stop sewing approx. 3-4" (7-10 cm) from the starting point, as you need this gap for turning the bag inside out.
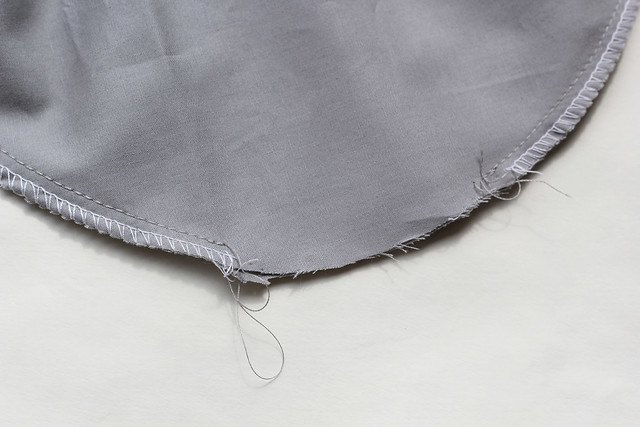
Through that gap, turn the bag inside out.
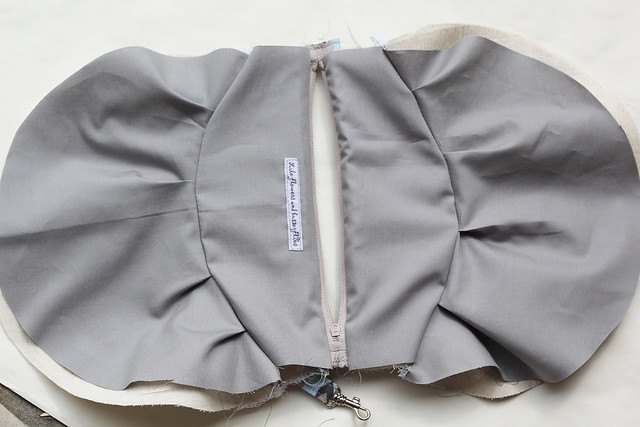
Check if you have sewn all nicely, especially the zipper area.
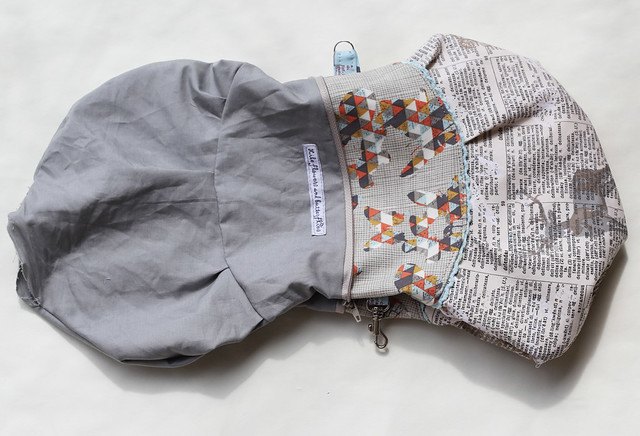
Press the bag and close(sew) the gap.

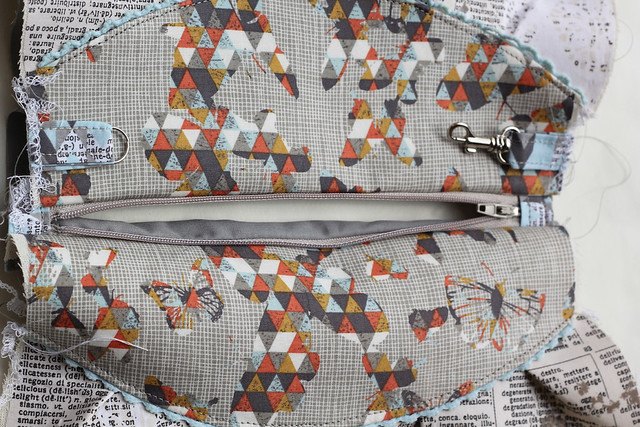
Push the corners out (the zipper's ends) and put the lining inside.
Now you are all done with the bag and just need to sew the handles.
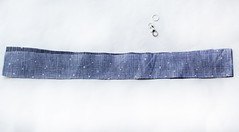
Cut an approximate 30"(make it shorter or longer, upon your needs) x 3" strip of fabric. Fold it in half lengthwise and iron it, then
open and press both sides toward the center crease and press center crease.
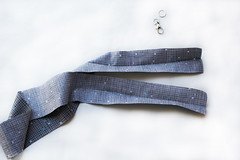
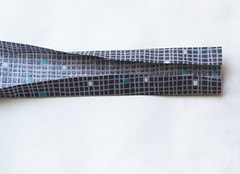
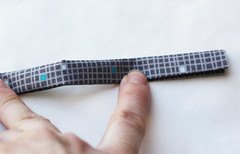
Insert the metal ring on one side and Swivel on the other side. Pin and sew all way around.
Hope that this was useful and that you will make tons of these (and add them to my flickr groups):
x projects using this or any of my tutorials or patterns, please add them to my flickr pattern group and
x projects using Indelible fabrics, please add them to my flickr Indelible group
xo, Katarina
It's time for my first free Indelible tutorial.
Clutch zipper bags are so easy to make and once you learn how, you will be addicted!!! You can decide if you want to add the handles or not, but they may be useful;)
This tutorial is scrap friendly, so you can combine 2 different fabrics for the main sides, just like I did.
Needed supplies:
1. fabric: 1 fat quarter of the fabric for the main sides ( or 2 different fabrics) + 1 fat quarter for the lining + 1/8 fabric for the handle (optional)
I used my Indelible fabrics: IDL-2223 Doiland Gloss Silver + IDL-2227 Flutter Folds Spark for the lighter one and IDL-1229 Stamped Grove Nightfall + IDL-1223 Doiland Gloss Plum
2. medium weight fusible interfacing (to obtain the more durable bag)
3. 8" long (20 cm) zipper
4. 1/2 yard of the decorative trim or ribbon
5. sewing machine, thread (for the best results - use Aurifil), scissors, pins, iron, zipper foot (optional, but preferable)
6. 2 metal rings and 2 Swivel clasp snap clips
So, let's get started!
Print the template .
If you want to make the bag in this dimension, like mine, be sure to
print it at 100% scale, but you can also print this sheet much bigger
and make a bigger bag (in that case just be sure to choose the zipper in appropriate size)
The template sheet includes the upper - smaller piece and bigger - bottom piece.
So, using this template, you need to cut on fold (to obtain the entire, doubled pieces):
2 pieces of the upper main fabric, 2 pieces of the bottom main fabric,
2 lining bottom pieces, 2 lining upper pieces,
2 interfacing bottom pieces, 2 interfacing upper pieces
Iron the fusible interfacing on the back (wrong) sides of the main fabrics.
Trim the eventual interfacing excess.
So, this is what you will have:
Let's prepare the loops with ring and swivel clasp first. Cut an approximate 6 x 2" strip of some fabric leftover.
Fold it in half lengthwise and iron it, then
open and press both sides toward the center crease, press center crease close again and topstitch.
Cut it in two.
Pull the swivel through one end and the ring through the other. Loops are ready to be pinned to one of the upper fabric pieces. The
second ring and swivel will have to be placed on the strap's ends.
Let's prepare the zipper now by covering it's ends with some fabric leftovers.
Cut an approximate 6 x 3" strip of any fabric leftover. Fold it in half lengthwise and iron it, then
open and press both sides toward the center crease and press center crease.
This way, you are making some kind of the tabs or covers for the zipper ends. Cut the strip in two, so that you can cover both zipper ends.
Place the zipper's ends into a sandwich of this fabric tabs. If you want, you can even cover the small metal piece at the end, than just make a bit larger the fabric tab-strip.
Topstitch it.
Pin the fabric loops with metal ring and swivel on both sides of one of the upper main pieces, approx. 1" from the upper, zipper edge.
Pin nice decorative trim onto the bottom edges of both upper main pieces and sew it.
Now lets prepare the bottom pieces, creating the pleats on them.
With any kind of the pencil or marker ( it will not be visible), mark the pleats on the right sides of the fabric, both main and lining pieces.
Fold the fabric into a concertina to make the pleats: fold them going toward the center.
Place pins into the pleats.
Stitch over that edge.
Now we need to join this two pieces together. Find the centers by folding both pieces and marking the centers with pins.
Right sides together, match the centers and pin them together.
Continue pinning along the edges and sew these two parts together.
Turn to the right side and top stitch that edges.
Repeat this on the other side and on the lining pieces.
Now let's sew the zipper in a sandwich between the main piece and lining (right sides together), facing the right side of the zipper with the right side of the main fabric.
Using your zipper foot
(if you don’t have a zipper foot, don’t worry as this can be done with a regular presser foot as long as you go slowly and move the slider to avoid jamming), sew them together using the 1/4" (6 mm) seam allowance.
Repeat the same on the other side of the zipper.
I suggest either pressing (on low heat setting) the both sides at this point or top-stitching.
Place right sides of the main fabric together and lining right sides together. Make sure to unzip the zipper so that is in the middle of the pouch (as you will need to turn the pouch through that gap).
Starting from the lining part, sew all around (be careful when sewing over the zipper) using the 1/4 seam allowance (6 cm). Stop sewing approx. 3-4" (7-10 cm) from the starting point, as you need this gap for turning the bag inside out.
Through that gap, turn the bag inside out.
Check if you have sewn all nicely, especially the zipper area.
Press the bag and close(sew) the gap.
Push the corners out (the zipper's ends) and put the lining inside.
Now you are all done with the bag and just need to sew the handles.
Cut an approximate 30"(make it shorter or longer, upon your needs) x 3" strip of fabric. Fold it in half lengthwise and iron it, then
open and press both sides toward the center crease and press center crease.
Insert the metal ring on one side and Swivel on the other side. Pin and sew all way around.
Hope that this was useful and that you will make tons of these (and add them to my flickr groups):
x projects using this or any of my tutorials or patterns, please add them to my flickr pattern group and
x projects using Indelible fabrics, please add them to my flickr Indelible group
xo, Katarina
The author may collect a small share of sales from the links on this page.


Comments
Join the conversation