How to Repair a Hole in Jeans: Easy Visible Mending Technique

When we have an item of clothing for repair, we usually want to do so as discreetly as possible. We don’t want to broadcast our damaged clothing to the world! Darning and invisible mending are the kind of techniques we might use.
A fun alternative would be to make a feature of the repair and make it not only visible from the right side of the garment, but an enhancement to it.
So, today, I’m going to show you how to repair a hole in jeans using visible mending techniques.
Tools and materials:
- Jeans that need mending
- Patterned fabric
- Fusible interfacing (optional)
- Measuring tape
- Scissors
- Pins
- Contrast colored thread
- Sewing machine with decorative or zigzag stitches

1. Measure the size of the damage
These are the jeans I’m going to be repairing today.
They’re my mom’s vintage jeans from the 1970s but, as you can see, they’re really not wearable in public as they are!
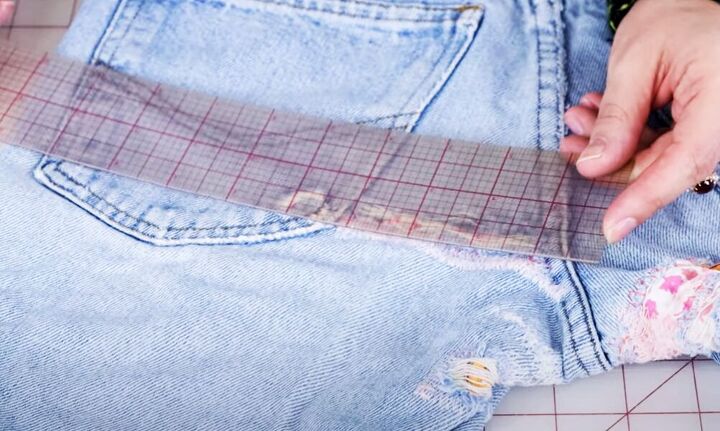
Measure the length and width of the hole and add a couple of inches to both measurements.
In order to reinforce the jeans, the material we’re using to patch them needs to be larger than the damage it’s covering.
The hole in my jeans measures 4 inches by 1.5 inches, so I’ll be using a 6 inch by 3.5 inch piece of fabric.
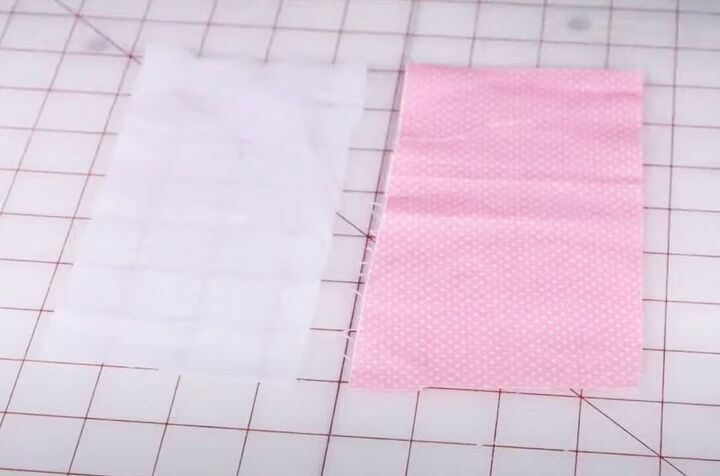
2. Cut and interface the fabric
Fusible interfacing is optional, depending on how firm your patching material is. My pink polka-dot fabric isn’t very thick so I’m adding interfacing to it.
Cut out your fabric and cut the interfacing to the same size.
Place the interfacing on the wrong side of your fabric. Use a cloth to protect your iron and press the interfacing to the fabric using the hottest temperature your fabric will take.
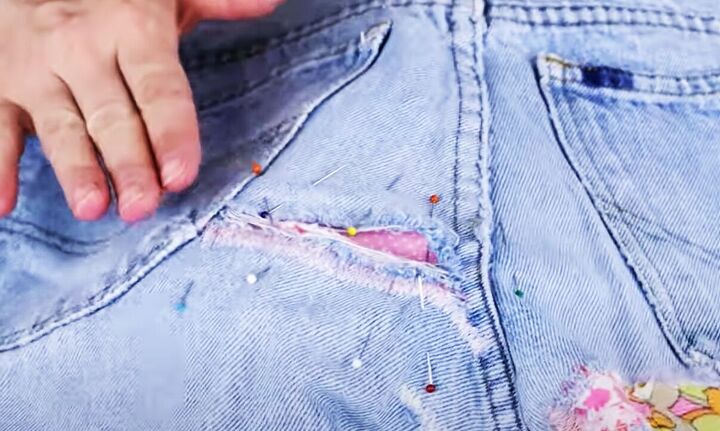
3. Pin the patch
Pin the interfaced fabric on the inside of your jeans, with the right side of the fabric facing outwards.
Keep it flat as you pin it all around, so it won’t move when you’re stitching it.
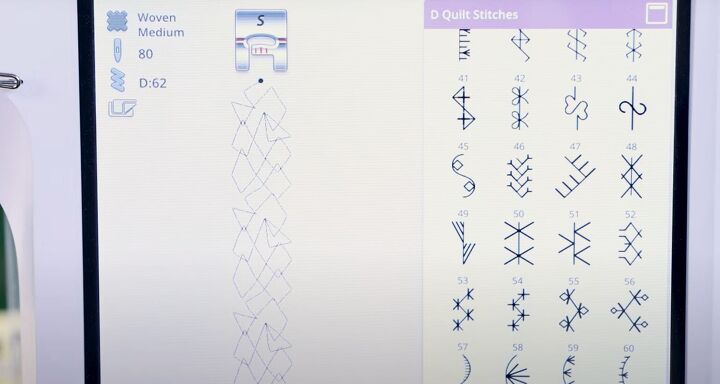
4. Choose your stitches
If your machine doesn’t have decorative stitches, you can absolutely do this technique with a simple zigzag stitch.
But if you have the option, why not have some fun with it?
Check out the stitches built into your machine and try a few of them out on scrap fabric. They don’t always look as you’d expect them to.
I decided on a large, decorative stitch on the outside of the patch and a smaller one on the very edge of the hole.
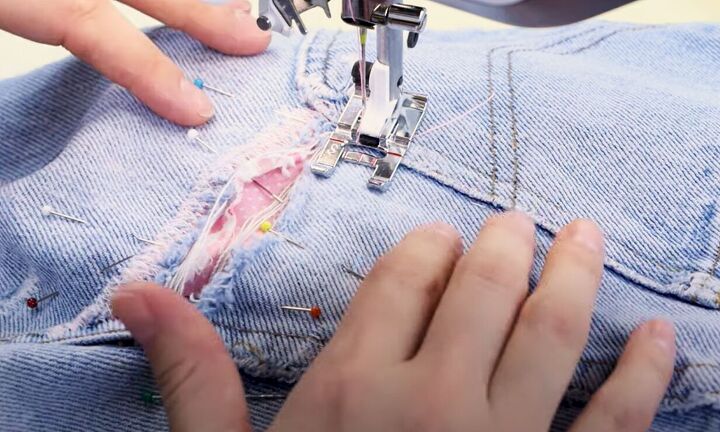
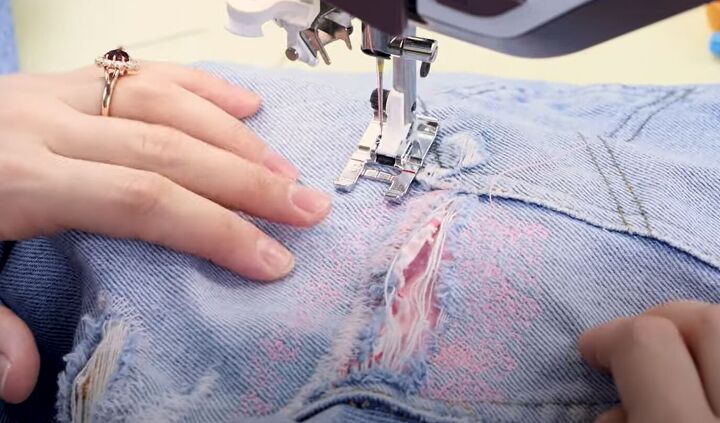
5. Sewing
Start your stitching on the outer edge of the patch. I sewed two rows of the large stitches on each side.
Remember to remove your pins before the needle hits them.
Also watch out that the loose threads from the jeans don’t get caught on the edge of your presser foot.
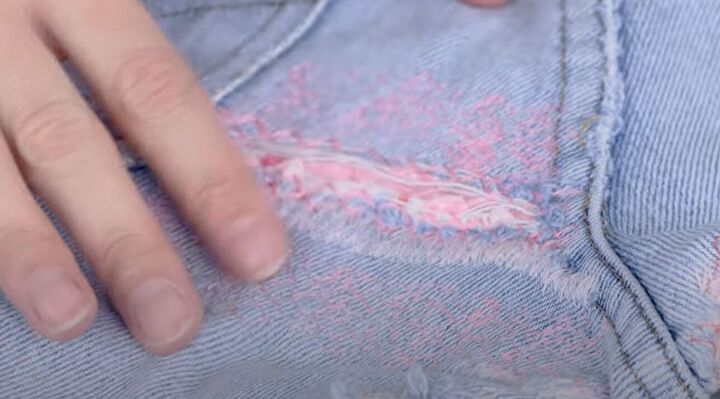
Once the patch is firmly in position, stitch right along the edge of the hole to stop it from lifting, or unraveling any further.
You can also sew more rows perpendicular to the first set to create a grid across the hole.

How to repair a hole in jeans: Visible mending technique
Try the jeans on and see how they look. Mine are finally decent and look even better than they did before.
These techniques could be so fun used in many different ways on various fabrics.
For example, imagine using metallic or rainbow colored thread to attach scraps of expensive fabrics to the outside of your clothes.
Visible mending is eco-friendly too. It extends the longevity of your clothing so it doesn't end up in the landfill. I’m certainly glad I saved my mom’s 70s jeans!
I’d love to see how you use these techniques. Drop me a line in the comments and tell me how you got on with this.
Next, check out my post on How to Sew a Ruffle Sweater Dress.
The author may collect a small share of sales from the links on this page.


Comments
Join the conversation