3 Ways to Use Rhinestone Fringe: DIY Rhinestone Shorts, Dress & Top

Need a bit of sparkle in your life? In this DIY rhinestone fringe tutorial, I'm going to show you how to attach rhinestone trim to fabric to make DIY rhinestone shorts, a dress, and even a cold-shoulder top.
I have been obsessed with trendy rhinestone fringe fashion but in-store, this style costs quite a bit. You can easily recreate this look for your clothes and stick to the budget.
Let's get started with this rhinestone fringe triple threat!
Tools and materials:
- Gem-Tac glue
- Pins
- Needle and thread
- Scissors
- Rhinestone fringe
- Clothes pegs
DIY rhinestone fringe shorts
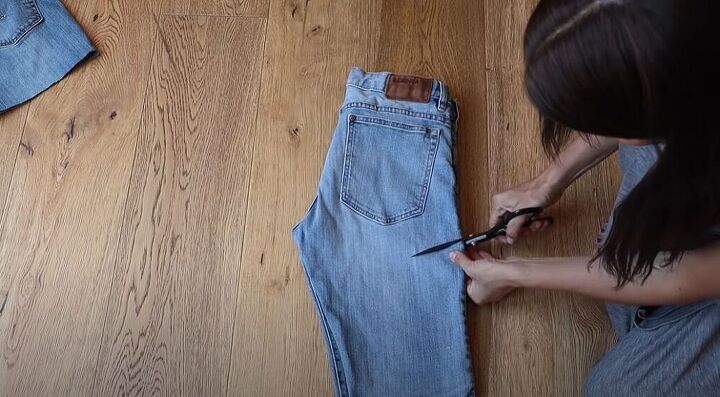
First I decided to work on adding the rhinestone fringe to a pair of jean shorts. I had this pair of jeans that I had thrifted so I decided to cut them into shorts.
When you cut jeans into shorts, you want to make sure the seams are all lined up before you cut. I like to cut mine shorter on the outside and longer on the inside because it creates a more flattering shape.
1. Measure and cut the rhinestone fringe
I threw my shorts in the wash to get the distressed look and then started measuring my rhinestone fringe.
I laid the fringe out along the parts of the shorts that I wanted to add it to, making sure everything was flat and stretched out. When I had the right measurement, I cut the fringe.
I always give myself an extra inch, just in case.
2. Glue the rhinestone fringe to the shorts
I cut the second piece of fringe to match the first and then started working with my Gem-Tac glue.
I applied a little bit of glue along the pocket of my shorts. I love that the Gem-Tac comes out white and thick, and isn’t stringy.
When applying the fringe it’s best to work in sections. So I just added a bit of glue and then dropped the fringe on top of it.
Then, I gently used my fingers to adjust and make sure the fringe lined up and looked neat.
Next, I moved down the side. Here, you want to try and make sure that you get a nice clean curve as you move away from the pocket.
I continued sticking down the fringe using the same technique as before.
I used clothes pegs to hold the fringe in place and put it to the side to dry.
I love how much sparkle the rhinestone fringe adds to this pair of shorts!
DIY rhinestone trim top
Next, I wanted to add this amazing rhinestone fringe to a sweatshirt, creating a fun cold-shoulder top.
1. Pin the cutout area
First I tried on the sweatshirt and pinned where I wanted to have the cold-shoulder cutout
2. Cut out the shoulders
Then, I moved my pins out slightly and cut out the fabric from my sweatshirt.
3. Try on the top and adjust if necessary
I tried on the sweatshirt just in case there were any adjustments I needed to make. I was actually really happy with the way the cutout fell on my shoulder and arm. It was sitting perfectly.
I laid down my sweatshirt, making sure the cutout circle was lying flat, and began to glue the rhinestone trim around the holes.
After each section, I let the fringe sit for a little bit before moving on to the next one. This gave the Gem-Tac time to settle a little.
It’s important to stick the fringe as close to the edge as possible because the glue will also prevent the fabric from fraying.
When I reached the end, I cut the trim as close as possible so that I had a nice, even seam at the shoulder.
4. Clean up the edges
To clean up around the shoulder seam a little, I took a needle and thread and just sewed it to cinch the end and beginning of the fringe together.
This rhinestone fringe totally transformed my sweatshirt into a trendy DIY cold-shoulder top.
DIY rhinestone fringe dress
In a last-minute decision, I decided to add the gorgeous fringe to a dress I’ve had for a couple of years. The front of the dress has an asymmetric overlap and it seemed like the perfect place to add on the rhinestone fringe.
1. Glue the fringe to the dress
The technique to attach the fringe is the exact same, only this time I added slightly more Gem-Tac because I used a bit of a heavier fringe with a thicker binding.
2. Hand-sew the top
I hand-sewed just a little bit right at the top where I started adding the fringe. I did this because this would be the point where the fringe may start to come off and I really wanted to secure it onto the dress.
The rhinestone fringe makes this dress a whole lot more glamorous, and I love the way it flares out when I spin around! This would be perfect for a night out dancing!
DIY rhinestone fringe tutorial
There you have it; three easy ways to revamp your clothes with rhinestone fringe. This simple addition adds a little glitter and glam to your outfit, yet it's so quick and easy to do.
Which rhinestone DIY did you like best? Let me know in the comments!
Enjoyed the project?
The author may collect a small share of sales from the links on this page.


Comments
Join the conversation
Looks great!! But, what about washing these items?
Very cute. Where do you buy the rhinestone fringe?