How to Make Pretty Glitter Resin Jewelry With Fine Glitter & Embeds

In this tutorial, I’m going to show you a few techniques you can use when it comes to making glitter resin jewelry. I’m going to show you how to suspend glitter in resin and how to use embeds alongside one more technique. If this sounds like something you’re interested in, let’s get started.
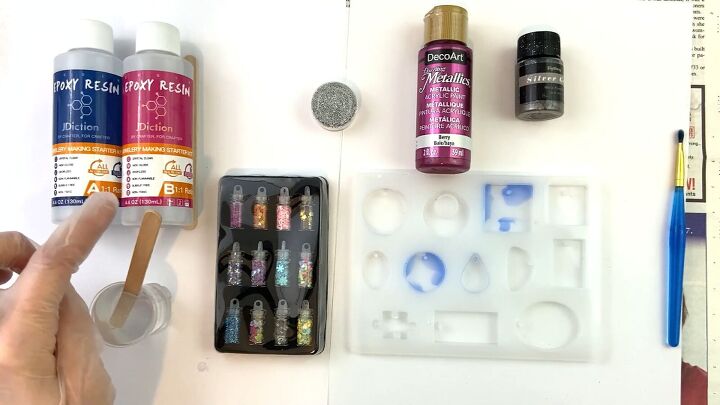
Tools and materials:
- Resin
- Acrylic paint
- Paintbrush
- Cups
- Craft sticks
- Fine glitter
- Embeds
- Resin molds
Technique 1: Fine glitter
1. Mix your resin
I’ve already mixed my resin, but if you haven’t, use A and B and make your resin about 1/2 fl oz of each. Stir slowly for 3-5 minutes.
2. Mix the resin with acrylic paint
Pour about 2/3rds of the resin mixture into a cup. Shake up your acrylic paint first and then pour a few drops into your resin mixture. Then mix it together.
Don’t go too fast or you’ll make bubbles. Look at the stick to see how you like the color and add more paint if desired. Set that aside for now.
3. Add mica powder and glitter
In another cup, pour a small amount of the resin mixture and then add mica powder for color before adding in some glitter to make a paste. Mix.
If you’ve been wondering can you add glitter to resin - the answer is yes. Fine glitter for resin is a great thickening agent while also looking pretty neat.
4. Paint the bottom of the mold
Use a paintbrush and paint the bottom and the edges of one of your resin molds. Let it sit to thicken up.
5. Paint an entire mold
For this next mold, we’re going to use the glitter mix and paint one of our molds. Don’t be afraid to get goopy with it.
The paste that we made will start to pull away from the mold and make these really cool, kind of holey designs. The longer you leave it the more it pulls.
If you don’t like the design it makes, mix it around and repaint it and it’ll change and pull away in different places.
6. Fill the mold with acrylic paint resin mixture
Once you’re satisfied with the design, fill up the mold with the acrylic paint resin mixture and it’ll make a really beautiful design.
7. Paint the bottom of the mold
I’m going to go back to the first mold we made and use this technique on it. I’m just painting along the edges here and once it makes a design I like, I’m going to pour the acrylic paint resin mixture over it.
Technique 2: Embeds technique
1. Mix the resin and embeds
Pour the embeds of your choice into the rest of your clear resin.
I used to pour the embeds into the molds and then the resin over it, but it never did what I wanted it to do. Once I started mixing the embeds in the resin, then I started to get the results I wanted.
Mix well so they separate.
I also added a little bit of fine glitter to add some pizzazz, but this is an optional step if your embeds are big enough.
2. Pour resin into the mold
Pour your resin into the mold. For this mold, I’m pouring in half of the clear, embed resin and half of the acrylic paint resin mixture.
Let your mixtures sit for 24 hours and then remove them from the mold! Here’s the finished glitter resin jewelry. I love the dark, berry color mixed with the white and silver color.
One thing I recommend is when you’re painting the mold with paste to use a thinner resin than a thicker one, so it doesn’t glob together as much.
Glitter resin jewelry tutorial
That’s my tutorial on how to mix glitter into resin to make really fabulous glitter resin jewelry. Let me know which technique was your favorite in the comments below. Thanks for joining!
Enjoyed the project?
Suggested materials:
- Resin
- Acrylic paint
- Paintbrush
- Cups
- Craft sticks
- Fine glitter
- Embeds
- Resin molds
The author may collect a small share of sales from the links on this page.


Comments
Join the conversation