How to DIY an Easy Green Beaded Bracelet

I've made several different styles of memory wire beaded bracelets before but for some reason, I've never made a single strand one.
So today I'm showing you how to make a memory wire bracelet with a single strand of beads. It's a great project if you're a beginner to this type of jewelry making.
You'll be able to practice working with the wire and you'll have something to show for it very quickly.
Tools and materials:
- Memory wire coil
- Beads
- Jump ring
- Chain
- Lobster clasp
- Round nose pliers
- Snub nose pliers
- Electric wire stripper
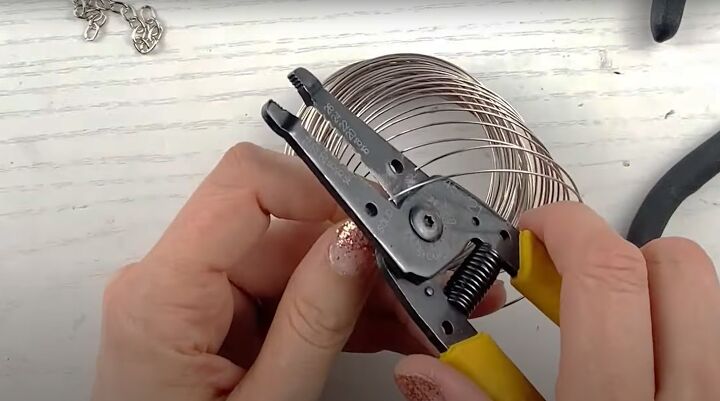
1. Cut the wire
I use an electric wire stripper for this, as memory wire is tough and can be hard to cut.
You want to cut as close as you can to a single coil of wire. The ends don't have to touch exactly.
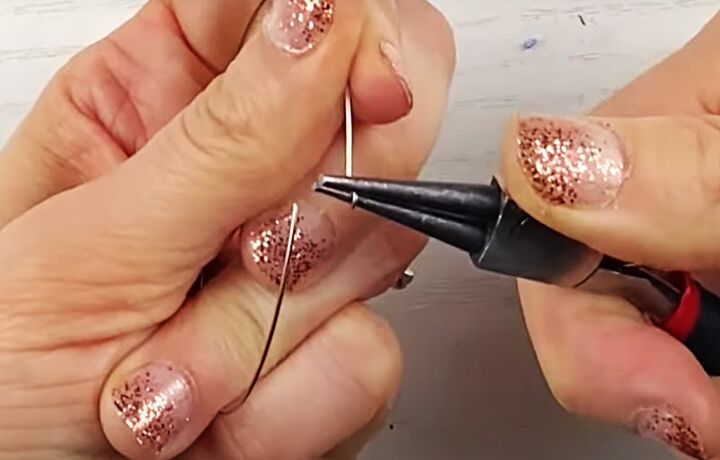
2. Make a loop
Use your round nose pliers to make either a small or a medium size loop. If you're brand new to this, the larger loop is easier to make.
Grip the wire close to one end with the pliers and rotate them away from you, to make a loop. The size of the loop depends on how close to the end of the pliers you hold the wire.
In order to activate the "memory" feature of memory wire, you need to take it past where you want it to be and then bring it back slightly, so it touches at the exact place it's supposed to.
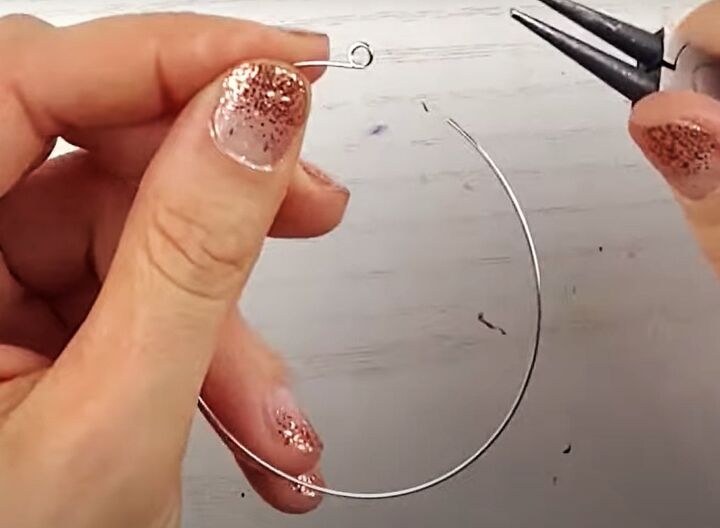
Rotate the wire as far as you can, release it, re-grip it and rotate it again until the end passes the main coil of wire.
Hold the loop with the pliers and pull the loop back very slightly until the end is touching the wire.
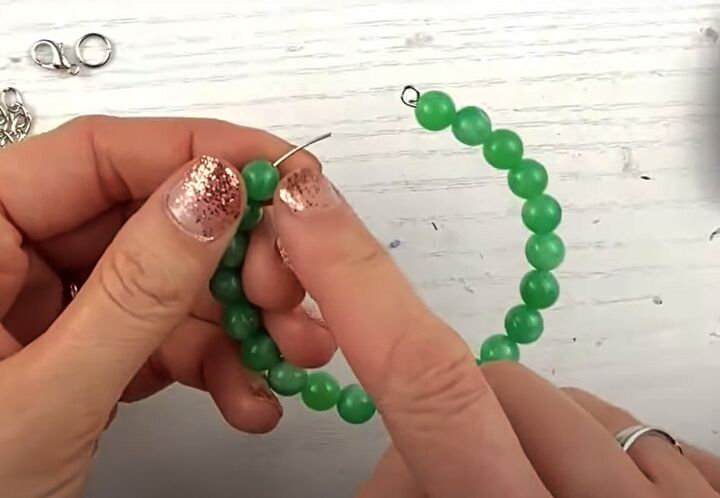
3. Thread the beads
Thread beads on to the open end of the wire in any pattern you like, until the wire is almost full of beads.
You need to leave enough free wire to make a loop but not too much.
If necessary, cut a small piece off the end of the wire, as I needed to do here.
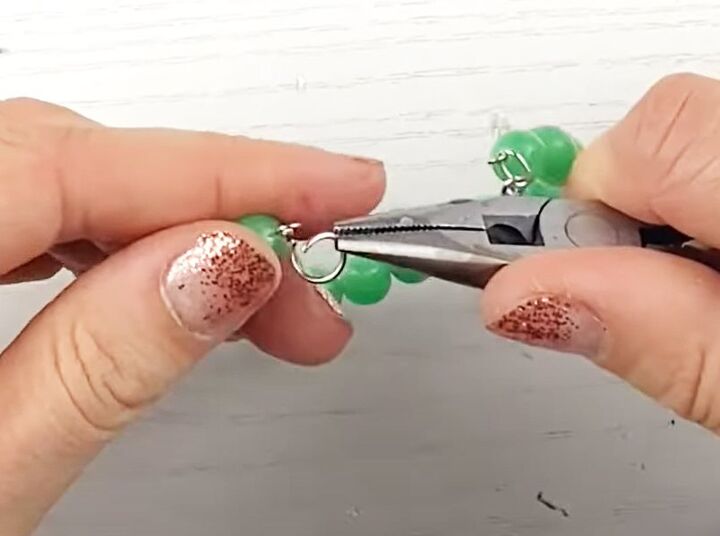
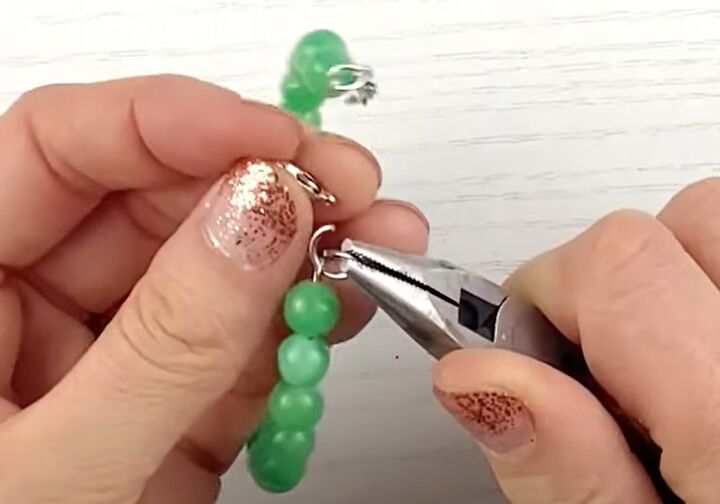
4. Make a second loop
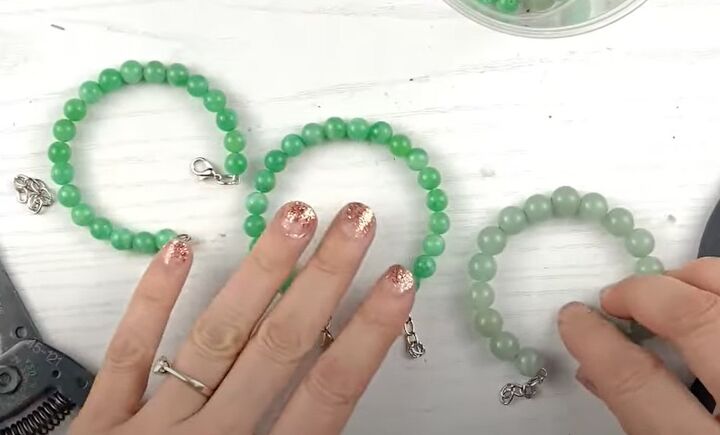
Cut your chain to about five or six links in length.
Use the round nose pliers again to make a loop at the free end of the wire. Before closing the loop, place one link of the chain over the end.
Use snub nose pliers to pinch the loop closed. Make sure it touches without any gap at all.
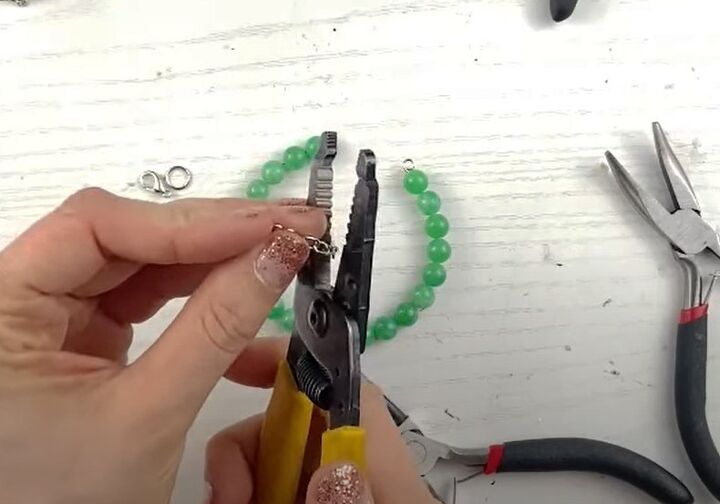
5. Attach the fastening
Open the jump ring and put it through the first loop.
Place the small loop of the lobster claw through the jump ring.

Close the jump ring using a second pair of pliers, making sure it's completely closed.
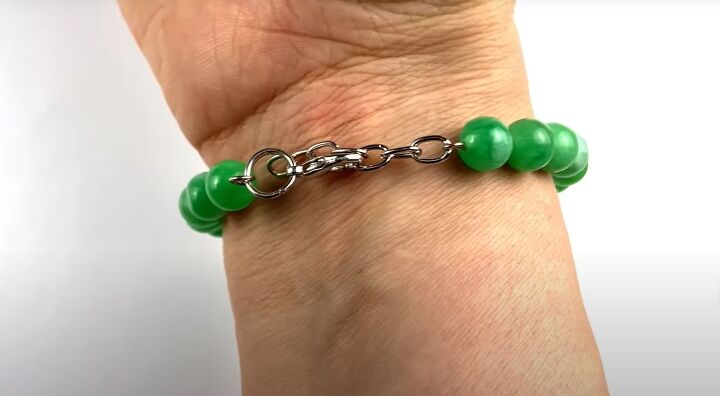
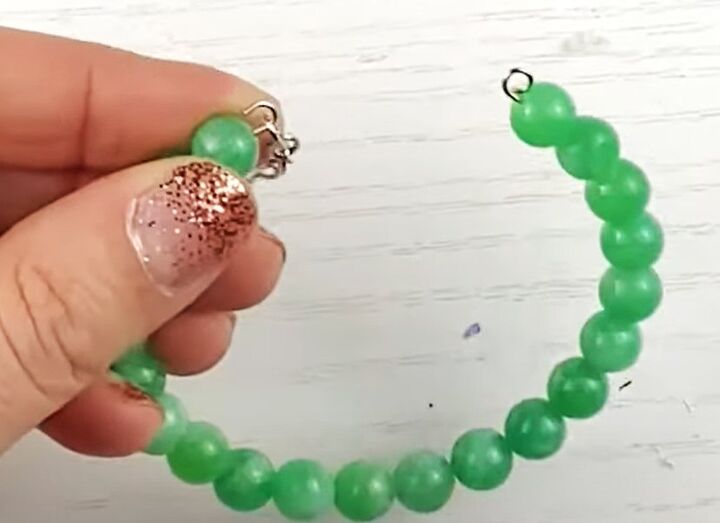
Green beaded bracelet
Now you have a beautiful adjustable bracelet that you can fasten yourself!
Using memory wire makes it so easy. I chose to make a green beaded bracelet, but you can use any beads you have on hand and even make a multi-colored bracelet.
It’s the perfect starter project for working with these tools and I really hope you give it a try. Do let me know in the comments how you get on.
Check out my post on How to DIY Cute Gap UV Resin Earrings.
The author may collect a small share of sales from the links on this page.


Comments
Join the conversation