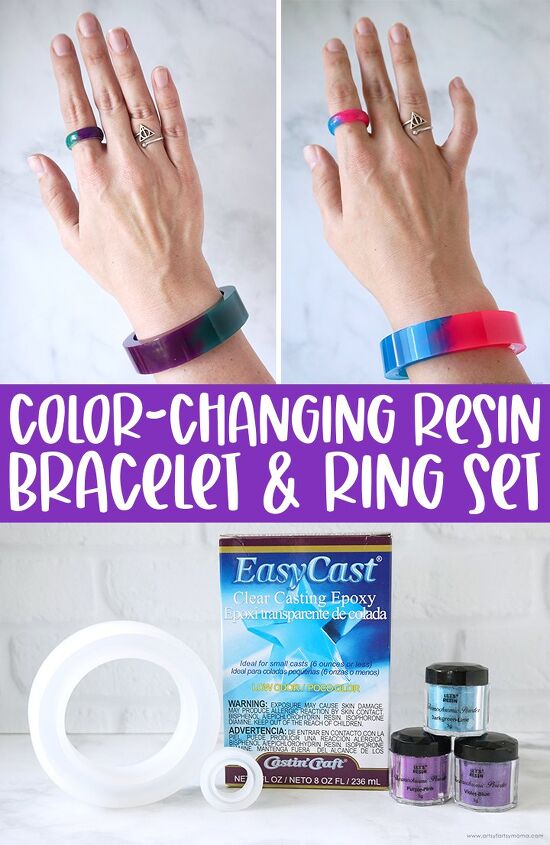
Thermochromic (Color-Changing) Resin Bracelet & Ring Set
Resin is one of my favorite crafting materials. If you're a beginner, jewelry is something simple thing to start with, and is a great go-to gift idea. Not only is this resin bracelet & ring set quite the statement, but it has a fun color-changing twist. Like a mood ring, this set uses the magic of thermochromic (color-changing) powders to change color with heat!! I love how this set turned out, and am excited to show you how you can make a set for yourself!
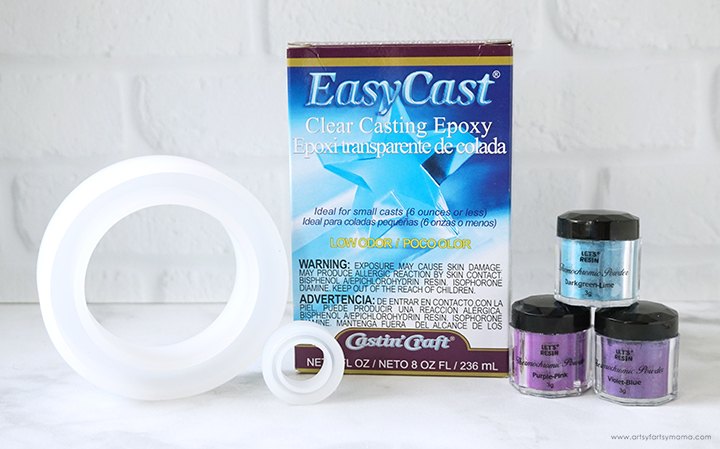
To make your own Color-Changing Resin Bracelet & Ring Set, you will need these supplies:
- EasyCast Clear Casting Epoxy
- Mold Conditioner and Release Spray
- Measuring Cups
- Stirring Sticks
- Disposable Gloves
- Silicone Mat
- Thermochromic Powder
- Bracelet & Jewelry Set Molds
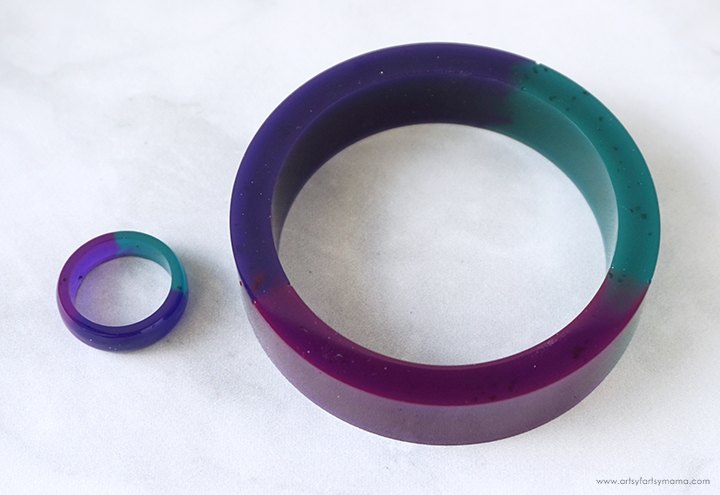
What makes this project so magical is the thermochromic powder! There are 5 different heat-sensitive color changing powders in this set, but I went with just three for this project: purple-pink, dark green-lime, and violet-blue.

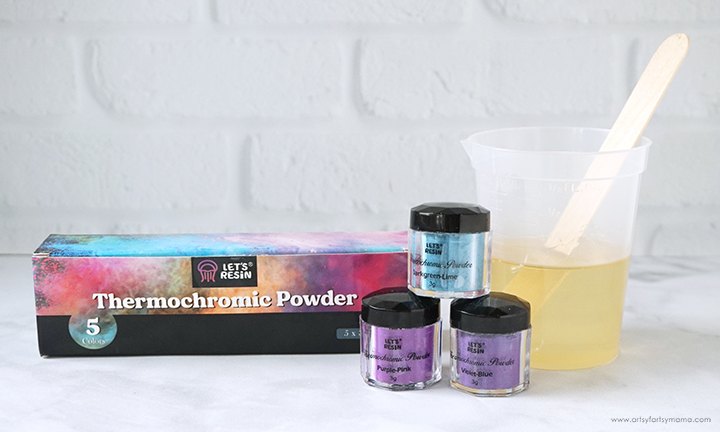
Arrange the bracelet and ring molds onto your silicone mat. Split the resin into three smaller mixing cups. Use the small spoons (included) to add thermochromic powder into each cup. Stir the resin mixtures slowly until the powder is completely combined with the resin. If you want the colors to be more vibrant, add some more powder and mix completely.
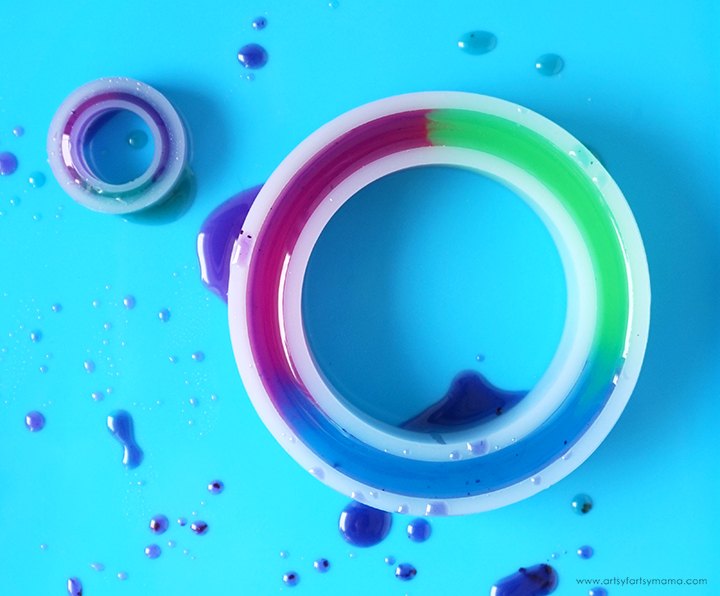
Use droppers or your stir sticks to add a little bit of each resin mixture into the bracelet and ring molds until the mold is full. To prevent a lot of trimming later, make sure not to overfill the molds! Let the resin sit for a few minutes, then use a straw, heat gun, or spritz with 91% alcohol to remove any air bubbles that rise to the top.
“Demolding” (removing resin from a mold) is one of my favorite steps when working with resin. My projects are usually made “upside-down”, so the big reveal so exciting! Carefully remove the bracelet and ring from their molds. If you are having trouble getting the pieces out, you can add a little bit of water into the mold and they should slip right out.
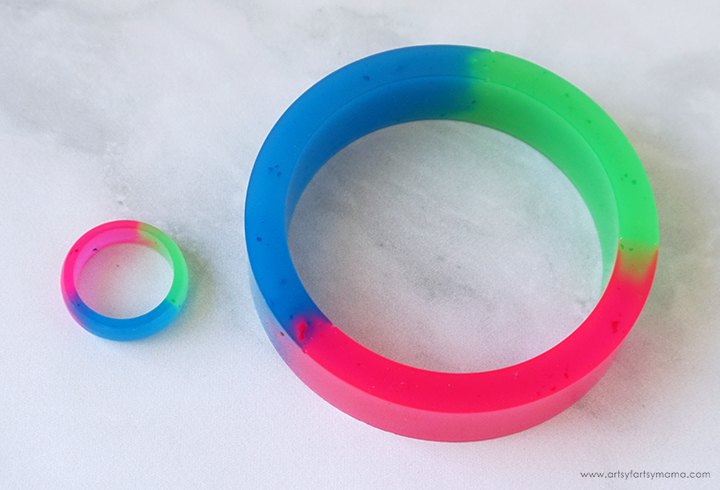
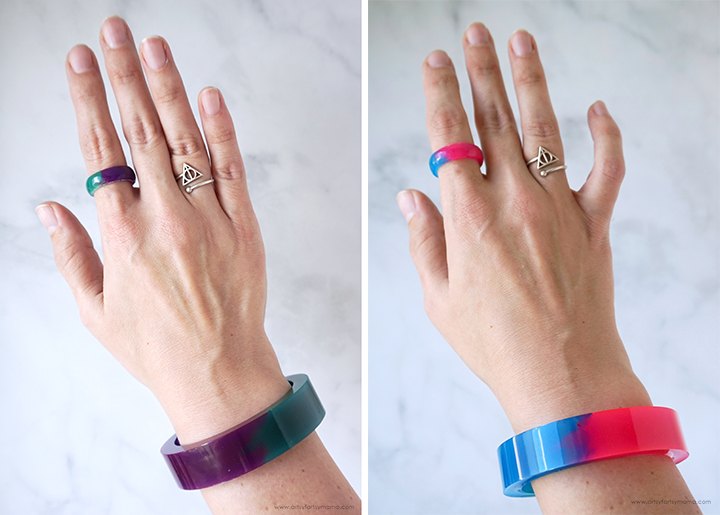
Ready for this?! When heated up to 88º F (31º C), the resin magically color-changes from the darker shades to these brilliant and vibrant ones! I am beyond impressed with the thermochromic powder, and think making jewelry is the perfect use for it.

The ring fits perfectly on my pointer finger, and love how the bracelet fits on my arm. These pieces of jewelry are certainly statement pieces. Once they start color-changing, they will also become a conversation piece! The ring color-changes pretty quickly with body heat, but the bracelet takes a bit longer because it's a bit thicker.
The author may collect a small share of sales from the links on this page.


Comments
Join the conversation