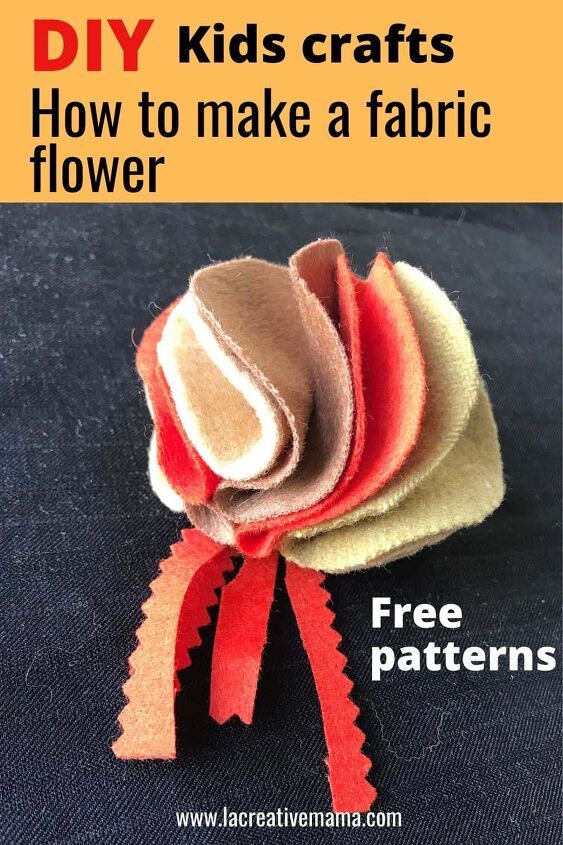
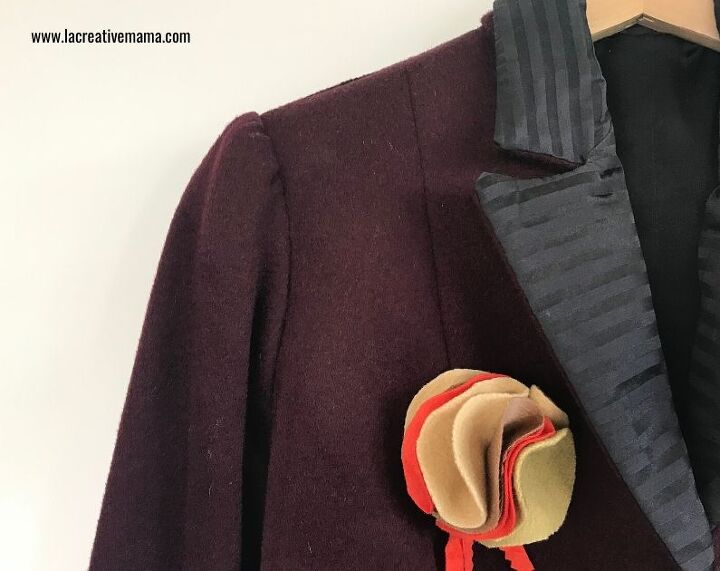
How to Make a Fast and Easy Fabric Flower Brooch
Hi Creative Mamas! I am so excited to share with you how to make a fabric flower brooch using scraps of fabric that you may have from other projects.
This is the perfect fast and easy DIY project to do with your kids during a rainy afternoon. In this article I will show you a super easy step by step process so that you and your kids can make a handmade fabric flower in twenty minutes.
There is minimum sewing and a lot of fun time involved in choosing little pieces of fabrics that go together nicely. The most fun part for the kids is the cutting stage! This project requires cutting lots of fabric circles and kids love that!
The good thing about this project is that you don’t need a sewing machine and you can change the size of the flowers by cutting the circles bigger. It’s as easy as that!
You can download the free patterns which has different circle sizes for you to choose from. You can make lots of flowers and make them into a fabric brooch or hair ties and hang them in this super cool hair clip holder in your kid’s rooms.
“This post contains affiliate links, which means I receive a small commission, at no extra cost to you, if you make a purchase using this link.”
- Fabric: I recommend either fabric scraps or you can buy beautiful felted wool . I have used a combination of wool fabric which I hand dyed and wool fabric scraps.
- Fabric Scissors
- Paper scissors
- Needle and threads
Choose one circle size. Cut around the chosen circle pattern.
Choose three different colors of fabric scraps. In this tutorial I am using felt fabric. I am using a combination of felt wool samples from a wholesale fabric shop as well as an old blanket which I have dyed naturally using coffee.
But you can use whatever fabric you want. Just consider the edges. Some fabrics will fray and that’s a lovely look as well. But if you don’t like fraying edges stick with felted wool, old blankets, an old woolen jacket that you don’t use any more and you may want to recycle.
There are no rules. Place the pattern piece on top of your fabric.
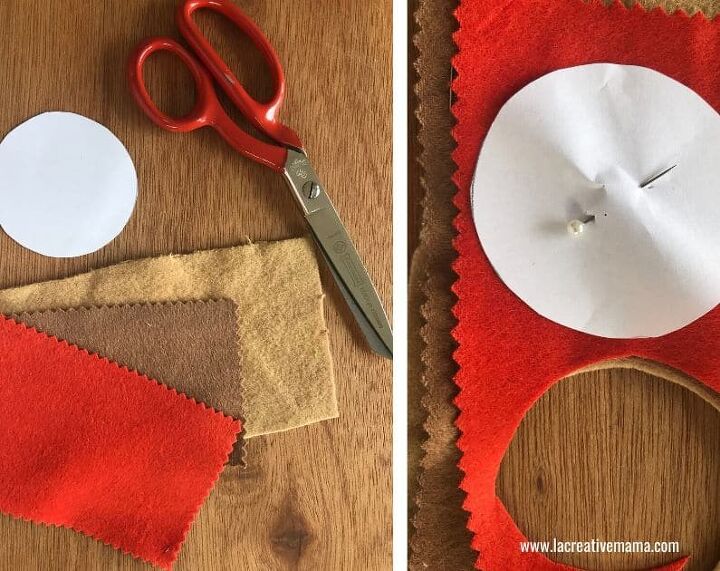
Depending on the fabric thickness you can cut three or four layers of fabric in one go. Cut ten fabric circles.
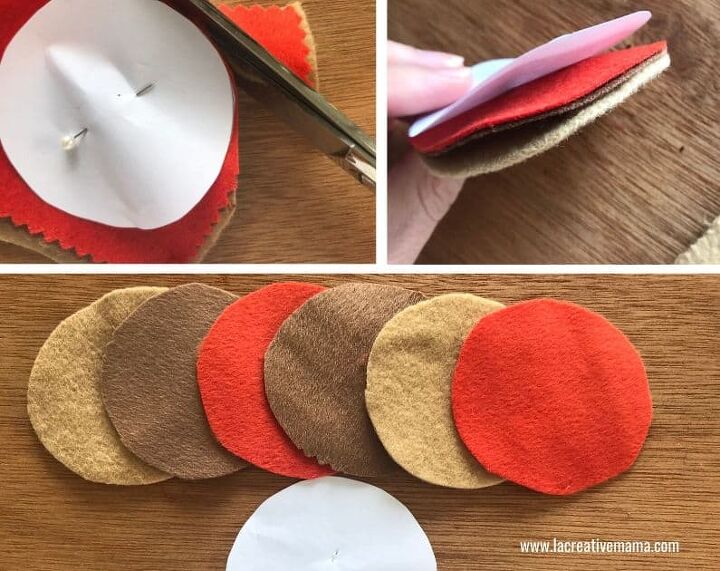
Fold each circle in half and stack them uniformly one on top of each other as shown in illustration below. The folded edges must line up.
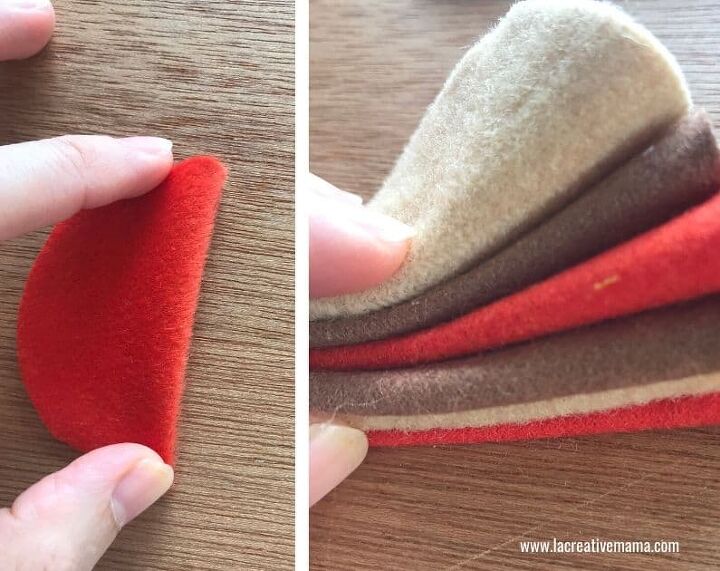
Thread a needle with a double thread. Insert the needle through the middle of each folded circle very close to the fold.

Repeat this one circle at a time pulling the thread tightly in between each circle so that the folded edges are close together.
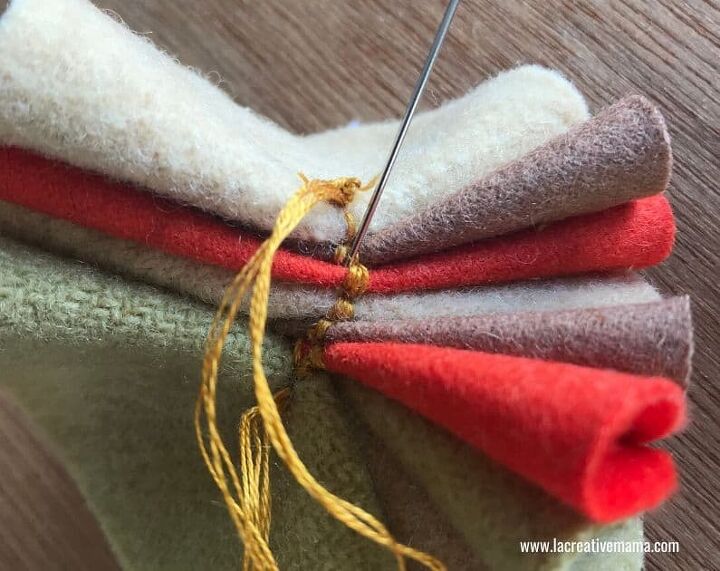
Once you have done this with the ten folded circles insert the needle through all of them. If you have thick fabric you may need to insert your needle three circles at a time.
When you have gone through all of them tie all ends together with a double knot.
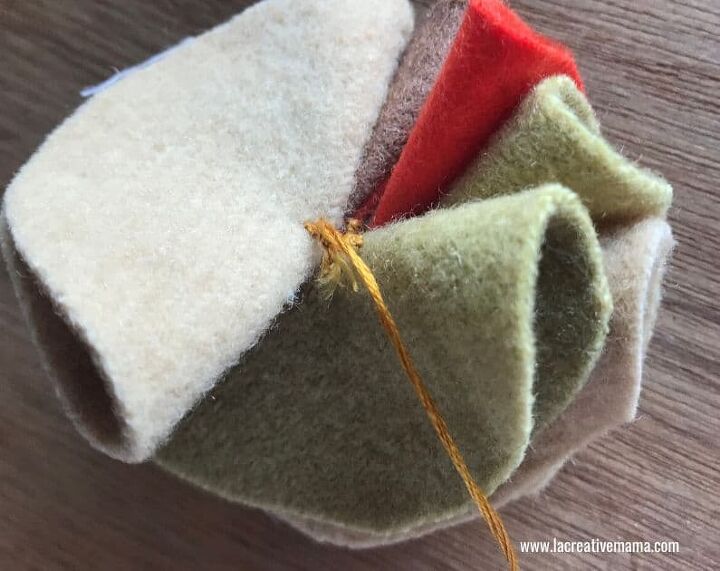
Cut four strips of fabric and sew to the back of two of the circles as shown in illustration below. Trim off excess tying thread. Open the flower, separate the semi circles and fluff up your flower.

It’s super easy. Just repeat the process above but make sure that you cut the biggest circle from the Free Fabric Flower Pattern.
You can adapt this fabric flower as a brooch, a hair tie, a key ring or as a detail for a pillow or curtain. The possibilities are endless really. If you loved the idea of making your own easy and quick fabric flower from fabric scraps check out this great video tutorial for another amazing fabric flower pattern!
The author may collect a small share of sales from the links on this page.


Comments
Join the conversation