How to Make Cute Sparkly Cat Halloween Earrings

Today, we are going to be doing some spooky crafting. We’re going to be making some Halloween earrings. If you’d like to make some DIY Halloween jewelry, this has your name written all over it.
For the earrings, we will be using some Halloween glitter embellishments. There are lots of different pictures out there, I have some really cute googly-eyed bats, mummies, and skulls that would all be great for Halloween earrings.
But, today, I’ll be making some black cat earrings because I love cats and I’ll also be able to wear them year-round. Let's get started!
Tools and materials:
- Glitter embellishments (I used cat ones)
- Wire cutter
- Eye pins
- Fishhook ear wires
- Scissors
- Exacto knife
- Glue gun
- Glitter paper
- Pen
- Coin
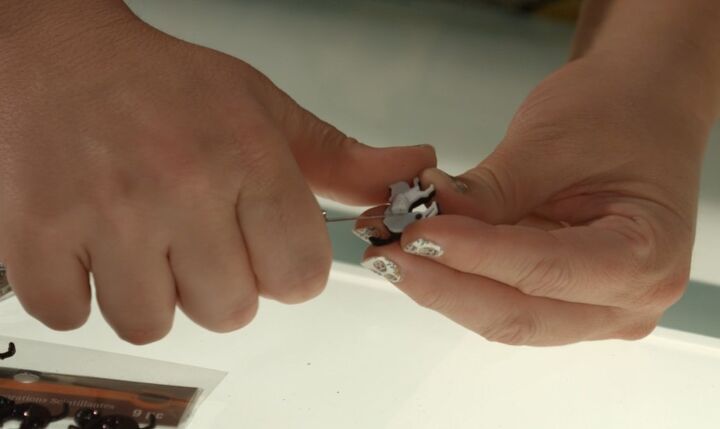
1. Remove the embellishment adhesive
Remove the sticky adhesive on the back of your embellishments as we won't be needing it.
You can pick them off with your fingernail, but you really want the back to be smooth, so I recommend using an Exacto knife.
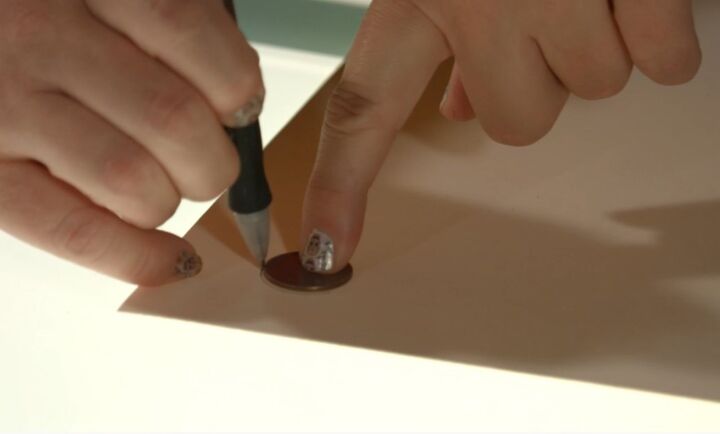
2. Trace moon shapes
For the background of our cat of course we're going to need a nice full moon. I’m taking a quarter coin and if I hold the cat over it, it's not too big, it's not too little so it's actually a perfect shape.
You can of course use any other coin that you like the size of. Because it's easier to cut glitter on the plain side, we're just going to place down that quarter and trace it out. You are going to need four full moons in total, two for each ear.
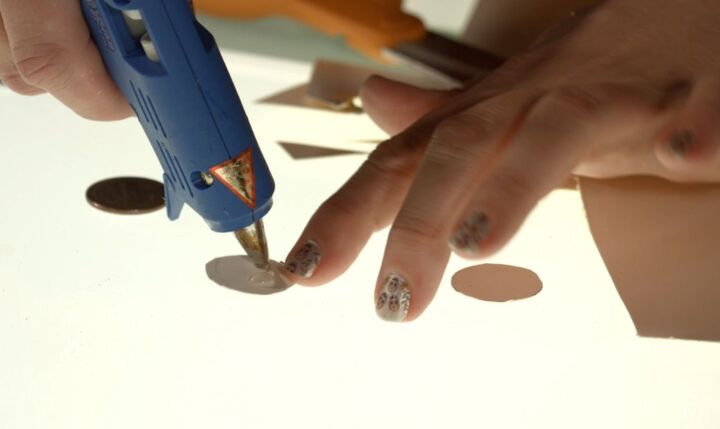
3. Cut out and stick moons together
Then cut the moons out and glue gun the back of them. Very carefully place one on top of the other.
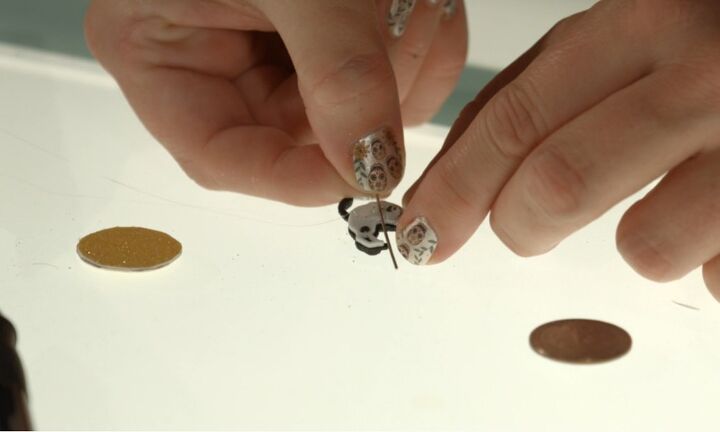
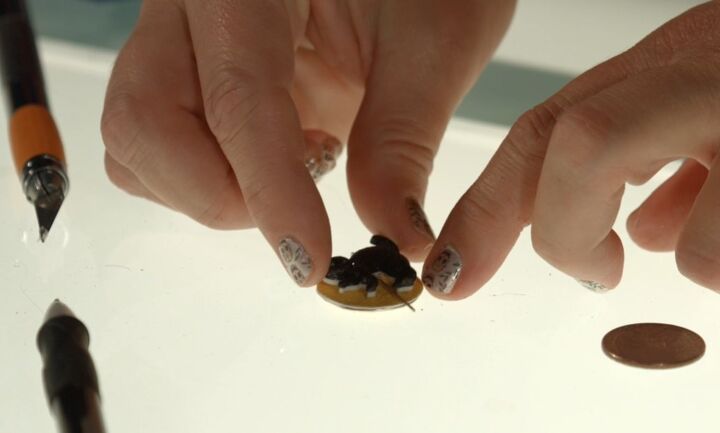
4. Stick the eyepin to the cat
Next, we're going to attach our cat. Have your eye pin handy and then place a little dollop of glue at the center of the cat. You want this to be where you're going to dangle the embellishment from and where we're going to place the eye pin.
Take the eye pin and the loop is going to go exactly where you want to hang from, so you just want it above the cat, you don't want to see too much of that pin. Be slow and steady and press that down.
5. Attach to the moon
Once you've got that down, place another dollop right on top of that pin and also over the remainder of the cat. Then take the moon and place the cat on the moon. Apply some pressure as you want that to really solidify together before we snip the bottom of the pin.
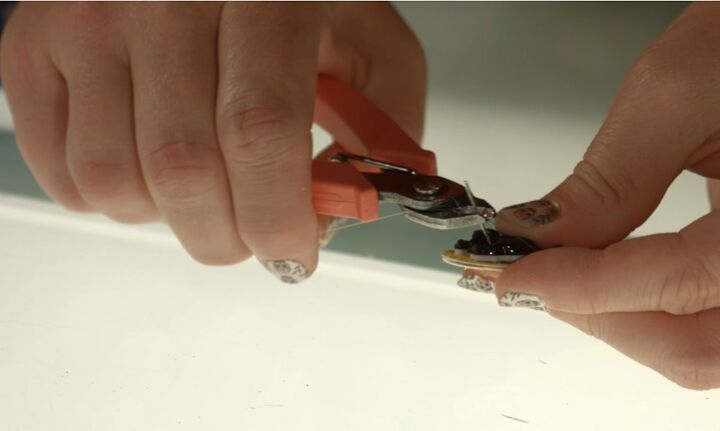
6. Cut the wire
Next, cut the bottom of the wire.
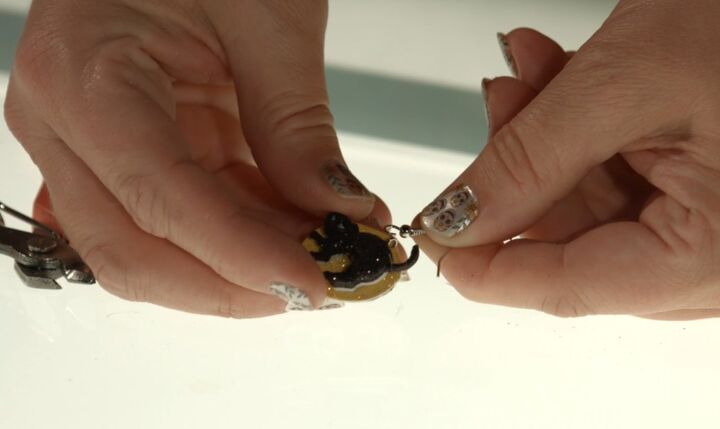
7. Attach the earring hook
Now take your earring hook. The earring hook and the eye pin are both closed so you need to use the wire cutters to open one of them so that you can marry the two together.
Once you’ve attached them, close up the open hole. Repeat with the other earring and then you are done!
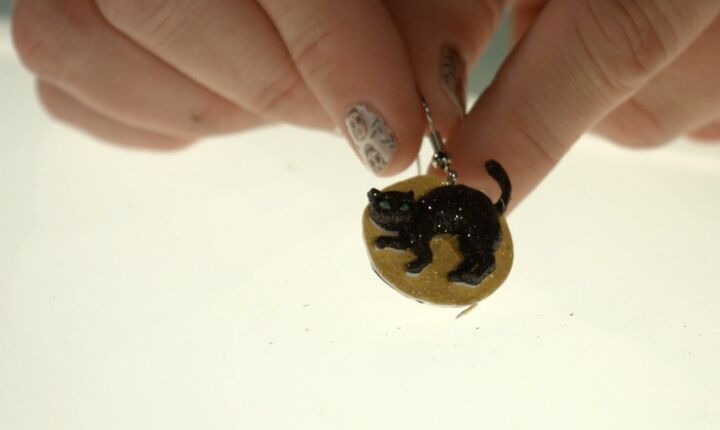
Now we have our sparkly cat Halloween earrings! That DIY was so fun, easy and budget-friendly and the finished earrings are stinkin’ adorable!
I enjoyed doing this art & craft project by myself, but this would also be great for doing with kids or with friends to get you all in the Halloween spirit.
If you enjoyed this tutorial, check out my post on super simple DIY Halloween hair accessories.
The author may collect a small share of sales from the links on this page.


Comments
Join the conversation