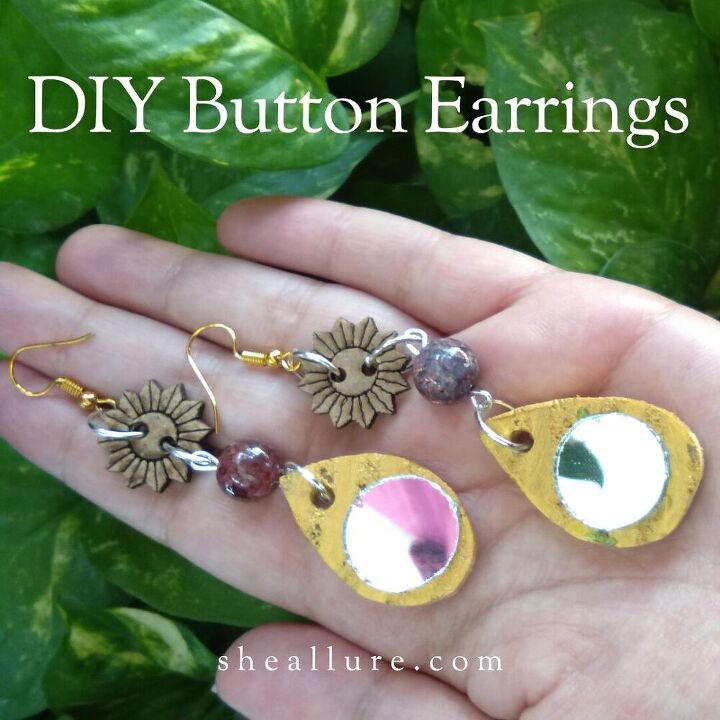
Make Gorgeous Button Earrings in Two Unique Ways
Today, I am gonna teach you how to make button earrings with wooden pieces that will amp up your entire look. These earrings look fabulous in any outfit.
One of the coolest reasons to make these earrings is they are thrifty and environment-friendly. Don't trash things, reuse and make gorgeous upcycled pieces without spending dollars.
How to Make Button Earrings Easily That is Rare & Elevates Your Look
I have got an excellent idea to recycle wood pieces with a beautiful combination of buttons. So first important step is to gather a couple of wooden pieces and forge them using a Dremel machine.
If you don't have a knack for woodworking, get the desired wood shapes from a carpenter. So let me walk you through the process.
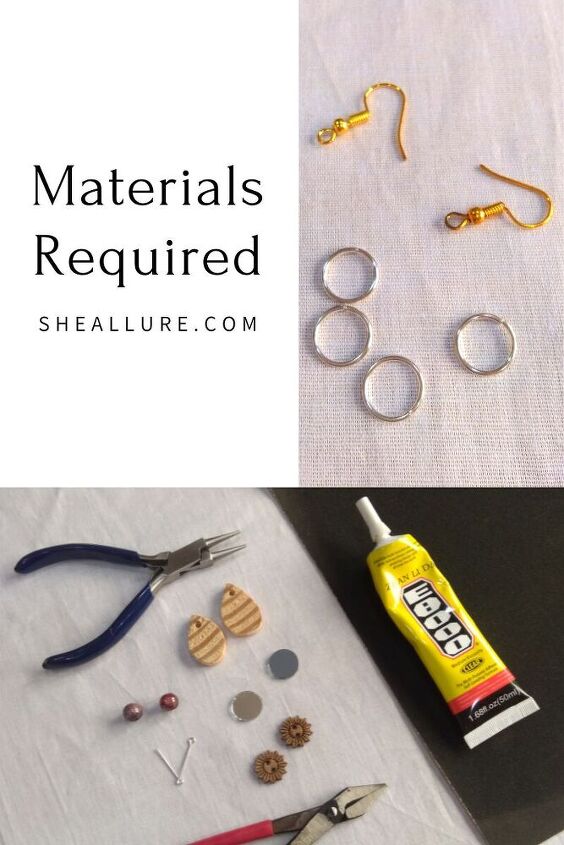
- Fancy wooden Buttons
- Pair of Teardrop wood shapes (Drilled)
- Pair of mirror shapes
- E6000 Glue or E8000 glue
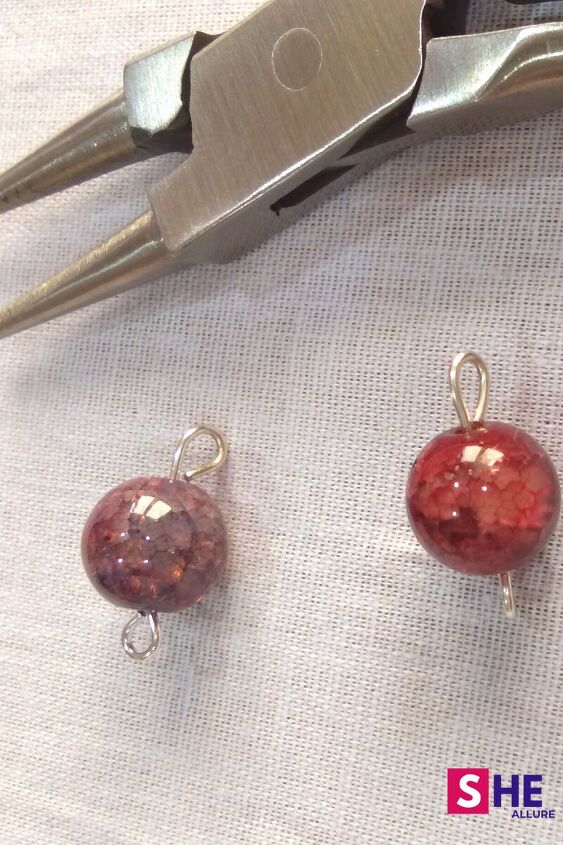
- Pair of Eye Pins
- Pair of fine glass beads
- Acrylic paint
- Paintbrush
- 150 grit sandpaper
- Earring hook
- 12mm jump rings
- Flat nose plier
- Round nose plier
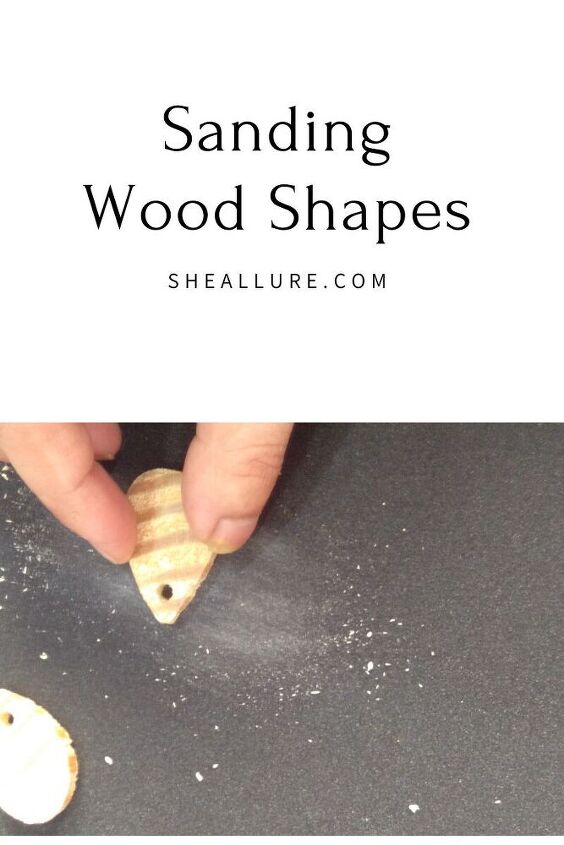
Rub wood shapes continuously on 150-grit sandpaper until you see the scratches are completely gone. You will see a fine finished shape.
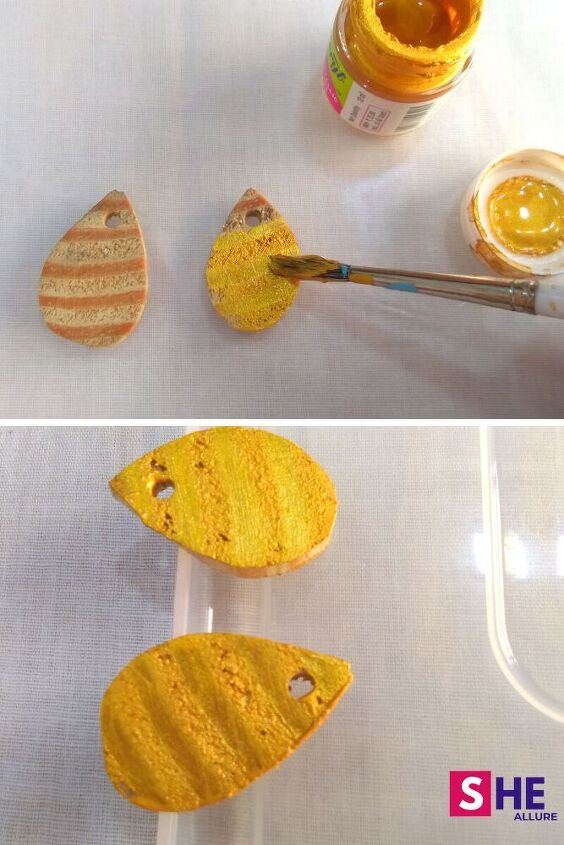
Start to paint wood shapes all over the piece using golden acrylic paint. Let it dry completely.
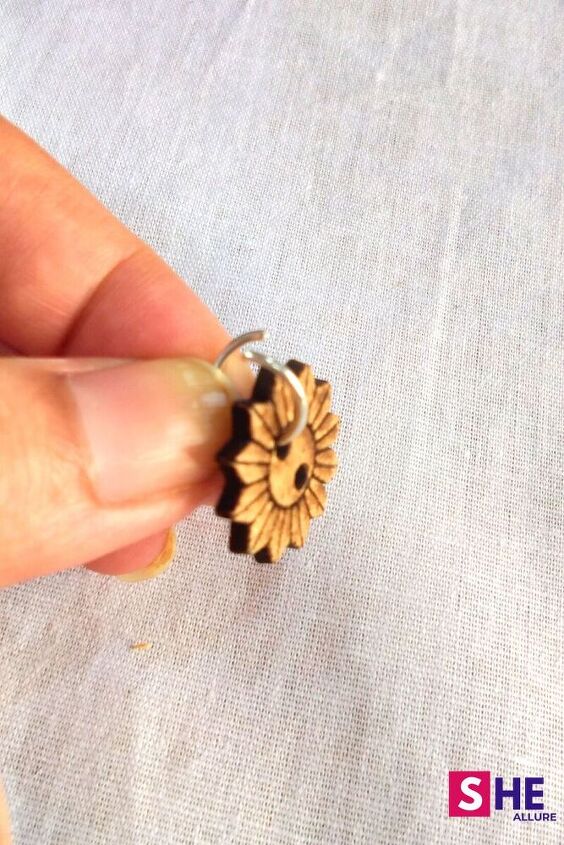
Take a 12mm jump ring which is quite a bigger one and open the ends. Insert them into the buttonhole then close the ends using a flat nose plier.
Once you're done with connecting the components, time to close the end of the jump ring with a flat nose plier. Slightly press the open ends with a plier and it's done.
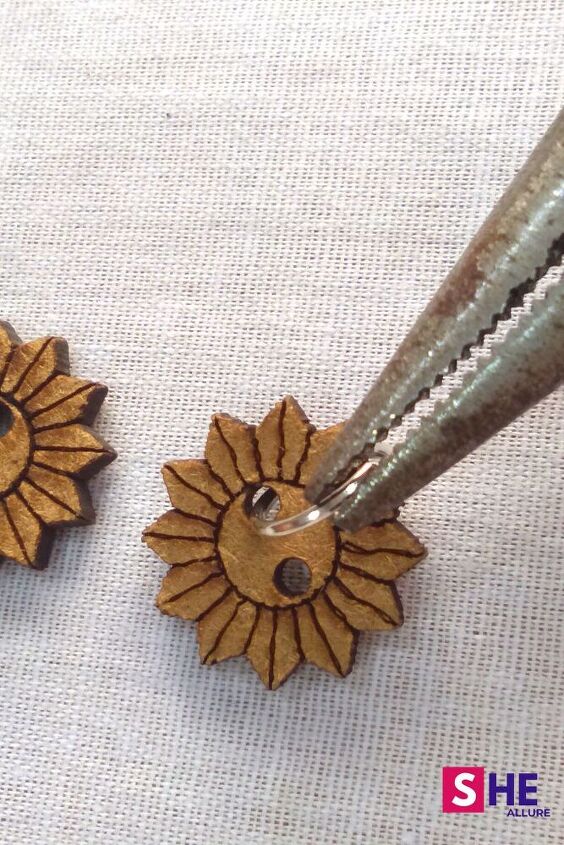
This is a very important step as we are making long drop button earrings. Open the mouth of the jump ring and connect it to the eye-pin loop and finally close the ends of the jump ring with a flat nose plier.
This is a very important step as we are making long drop button earrings. Open the mouth of the jump ring and connect it to the eye-pin loop and finally close the ends of the jump ring with a flat nose plier.

Apply E6000 glue to the wood shape right at the central area and put the mirror shape to it.
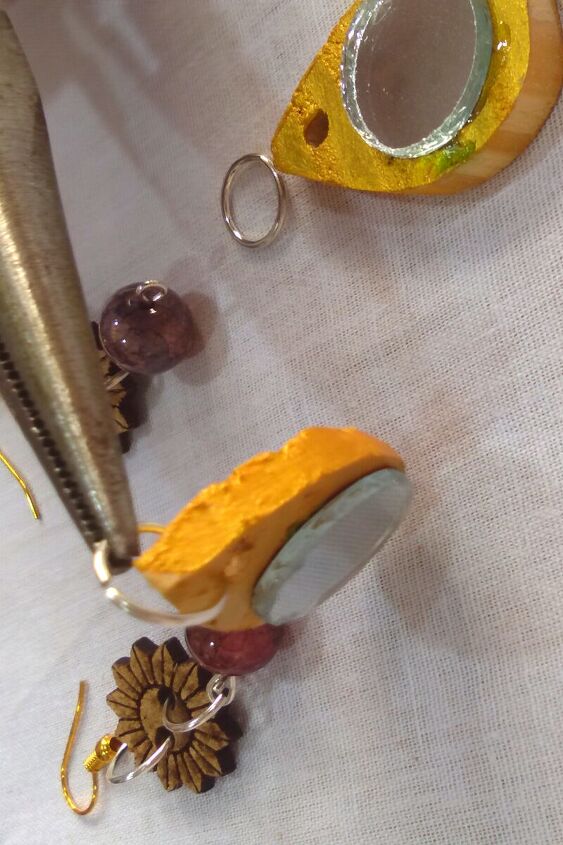
Take another jump ring, open the end, connect to the wood hole, and further with an eye pin loop. You will see the beautiful design shimmers.
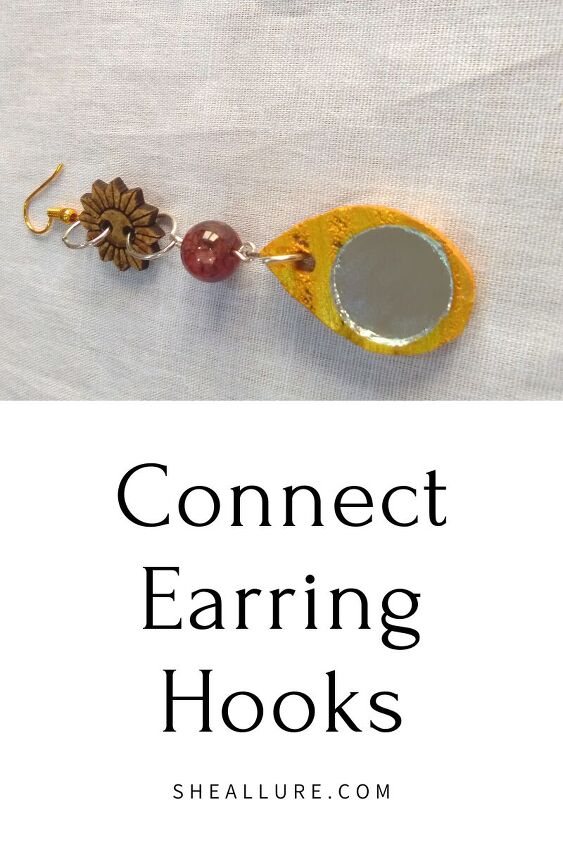
Finally, connect earring hooks over the top of your button earrings and it's all done. In addition, I would strongly recommend apply varnish to the wood shape and leave it overnight. I taught some basics of wooden jewelry you can surely check it out.

Voila! Your gorgeous button bead earrings are now ready to flaunt.
Crafting is so much fun that you just can't resist making another one. I made adorable yellow button bead earrings that look gorgeous with casuals and I feel ecstatic to share one more guide with you.
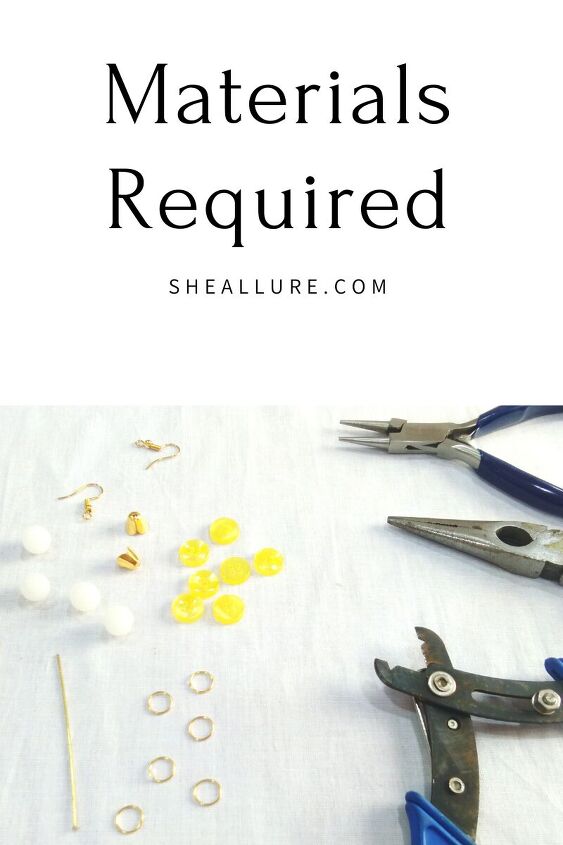
- Yellow Buttons
- White glass beads
- Bead caps
- Earring Hooks
- 8mm Jump rings
- Flat Nose Plier
- Wire Cutter Plier
- Pair of Headpins
- Round Nose Plier
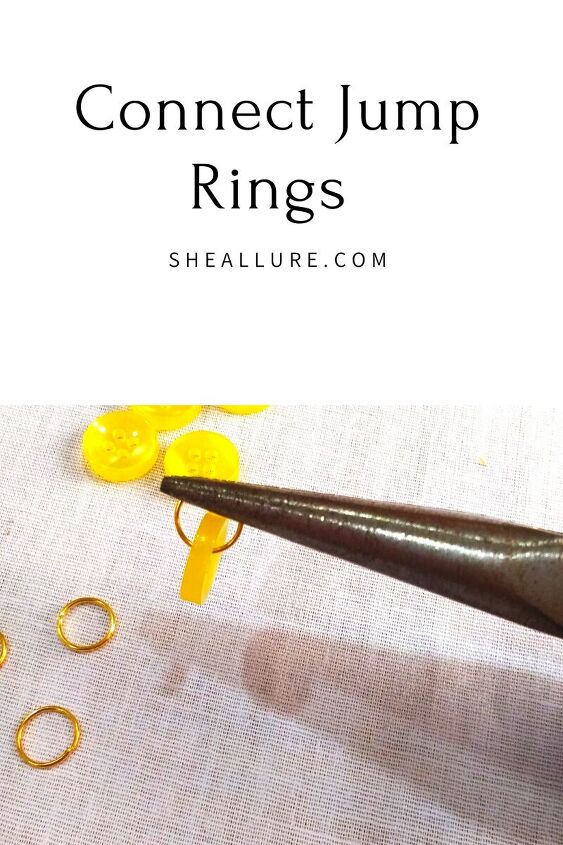
Add one jump ring to the buttonhole and repeat this step. Let me show with the help of an image.
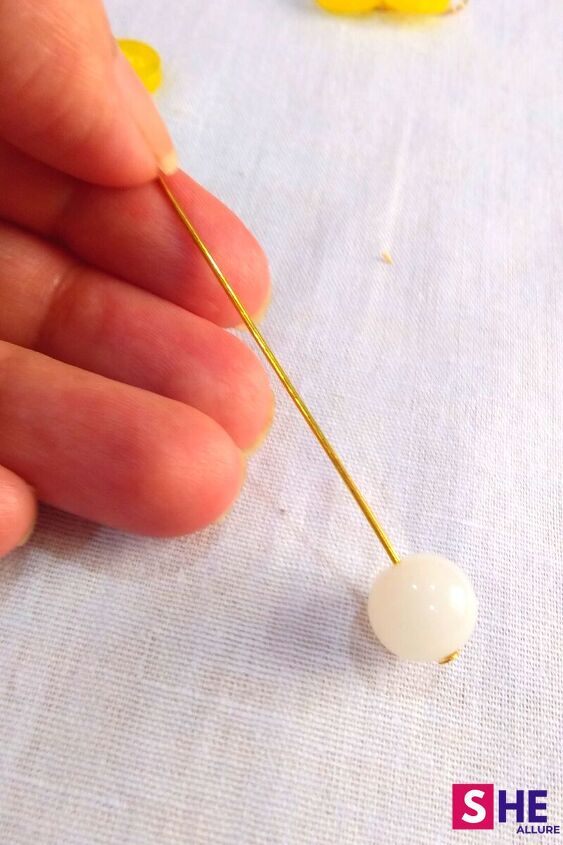
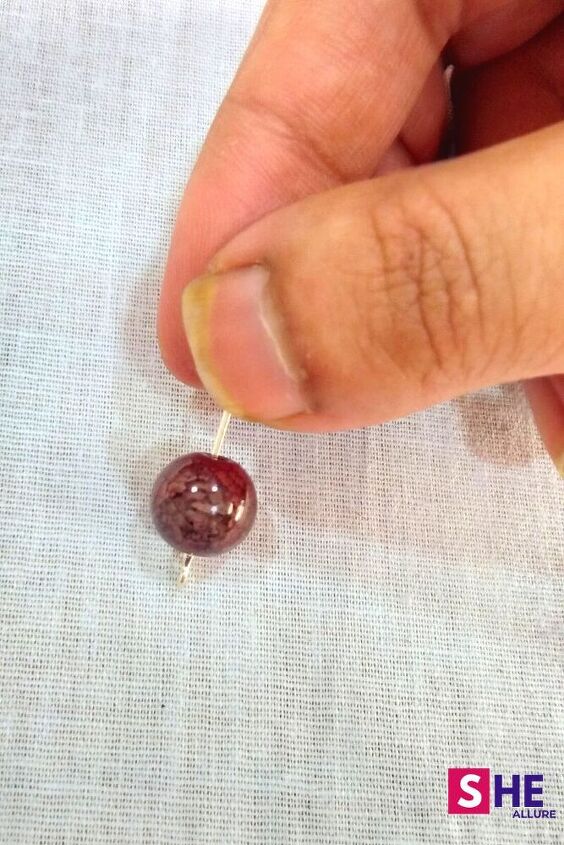
Make a beautiful pattern by taking a headpin and insert a glass bead into it. I have used a white glass bead which will give fabulous look to the earrings.
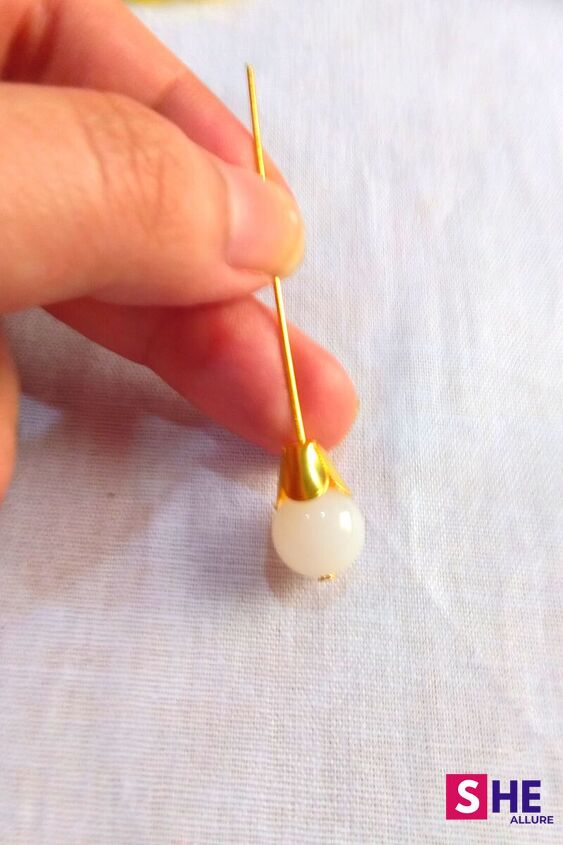
Now, add a bead cap over the top of a glass bead and repeat steps 2 and 3. This will make two similar bead patterns.
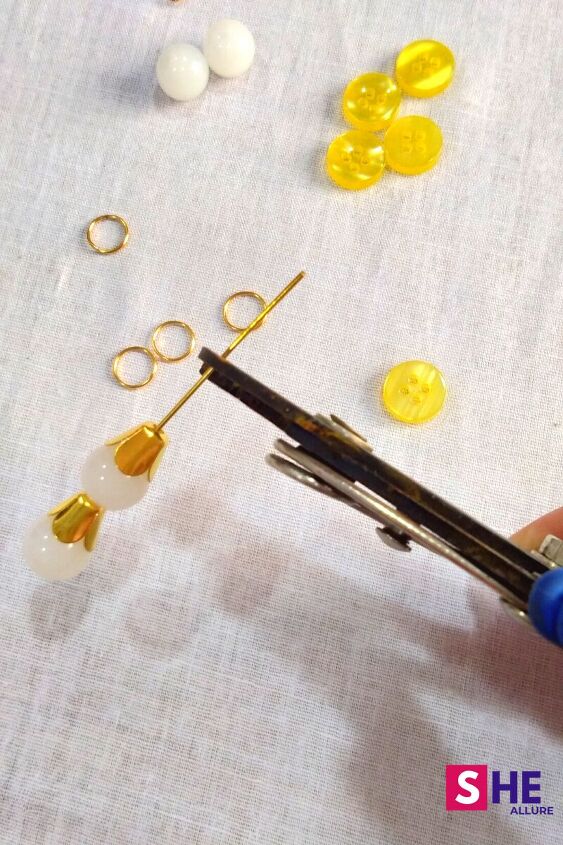
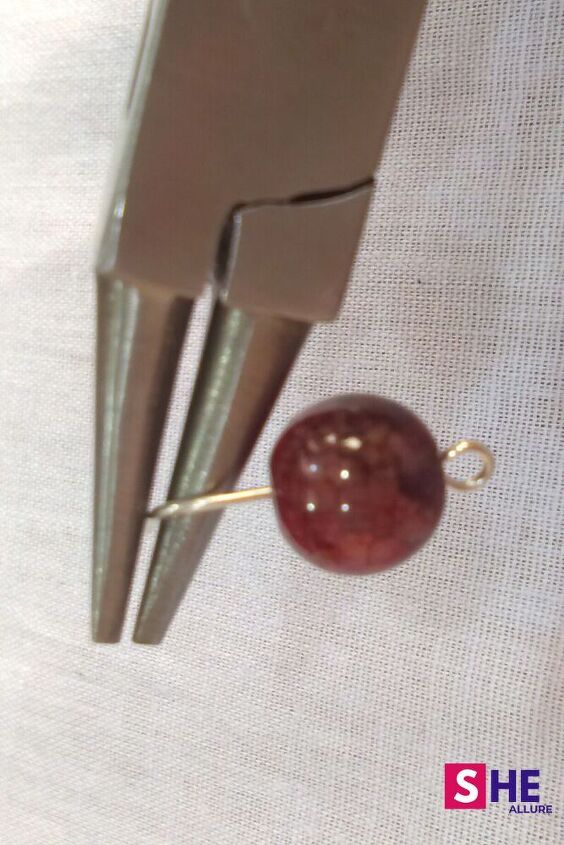
Leave one inch of the wire for making a loop and trim extras with the help of a wire cutter.
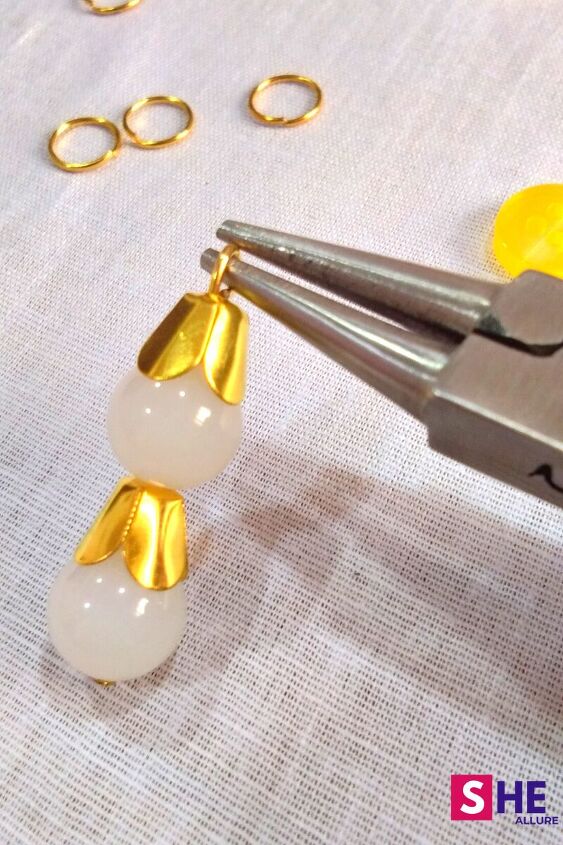
Make a small loop slowly by a round nose plier. This makes a nice hanging that we'll connect further with a jump ring.
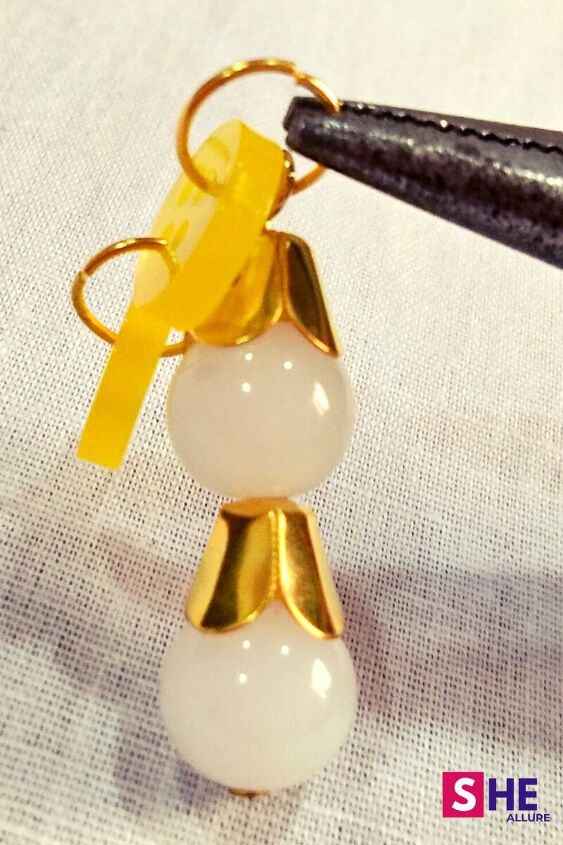
Connect the two components jump ring and a loop to make a beautiful drop earrings design.
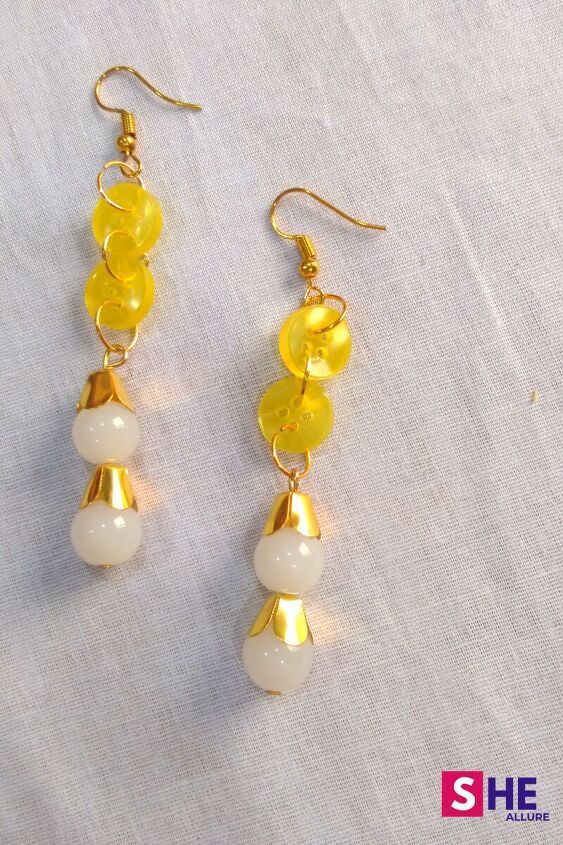
We have reached the final step, simply connect earring hooks at the top of the jump ring and close the ends with a flat nose plier. Voila! your dazzling drop button bead earrings are now ready to wear.
Friends, I hope you enjoyed this tutorial. You can even gift those earrings to your loved ones. Jewelry that is made by you is more precious than the store-bought pieces and they are super easy to craft at home. Isn't it?
So let's invest our exploring and learning new skills that not only amp up your wardrobe but also take you high into entrepreneurship. After all, the path to success lies in doing things on your own. So let's do it and soar high.
The author may collect a small share of sales from the links on this page.


Comments
Join the conversation