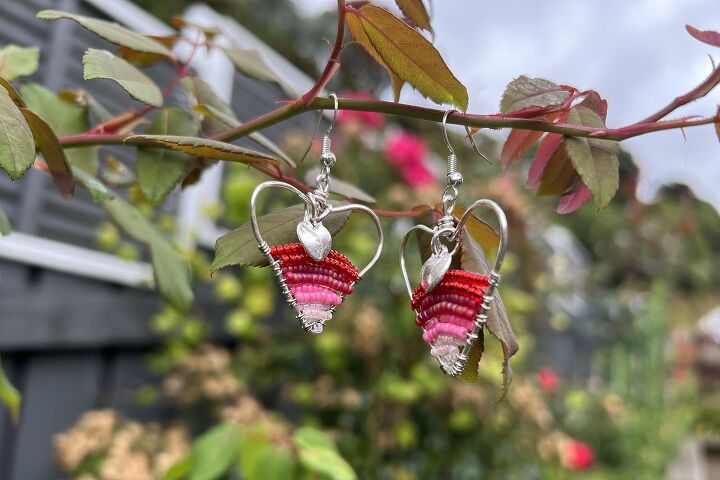
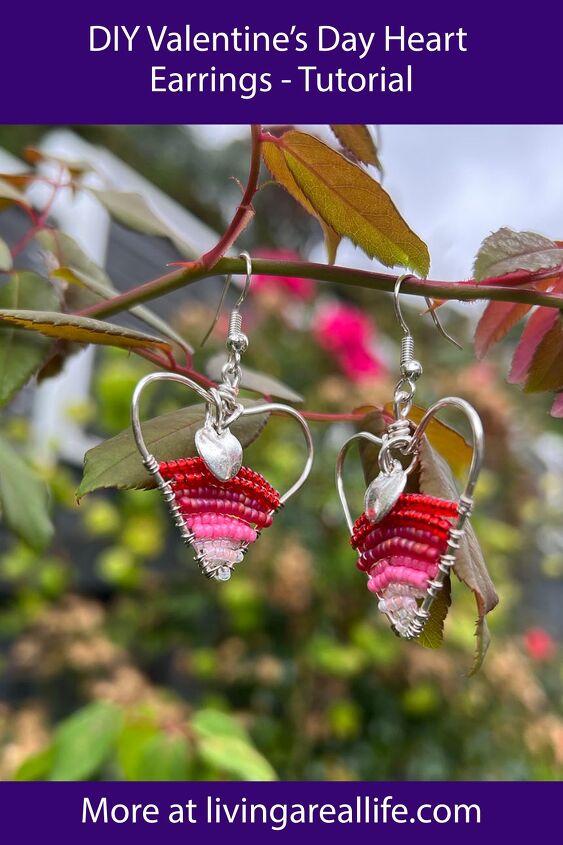
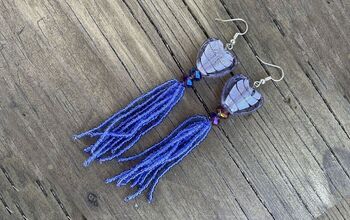
How to Make Valentine's Day Heart Earrings

How to Make Valentine's Day Heart Earrings
How do you feel about Valentine’s Day? While I’m not a huge Valentine’s Day fan, I do love hearts and I love seed beads so today, I’m going to make some heart earrings with some seed beads.
The hearts for these earrings are made from 18 Gauge wire which is reasonably thick but still able to be manipulated into whatever shape you desire. You could use this same technique to make teardrops, squares, or any other shape earrings.
I’ve also used 26 Gauge wire for the wire wrapping.
Wire
When it comes to wire wrapping, I prefer to use a half hard German Style wire. It’s malleable enough to maintain an intricate shape but flexible enough to be able to form shapes. It is strong enough weight-bearing parts of wire-wrapped jewellery. If you harden half-hard wire, it can be used in high stress areas, such as where a clasp is added.
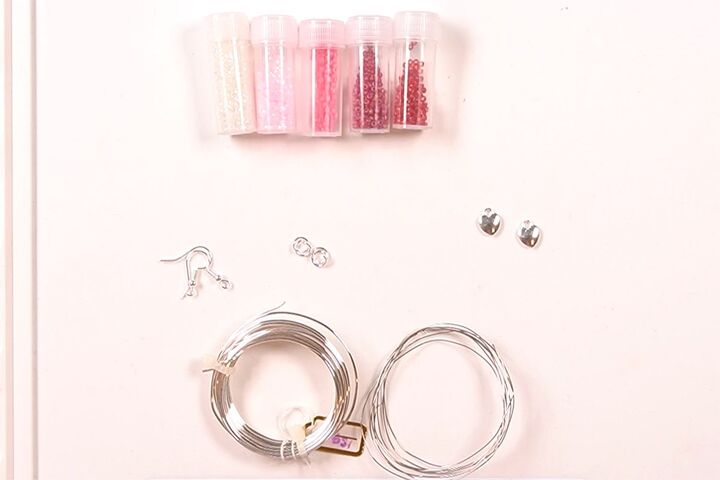
Materials
Here’s what you will need to make these earrings. The requirements given are approximate as the number of beads you require will depend on the size of the heart that you make.
- 26 Gauge German Style Silver wire x 60cm
- 18 GaugeGerman Style Silver wire x 30cm
- 19mm Silver Earhooks x 1pr
- 11/0 Delica Miyuki Seed Beads in Off White x 10 approximately
- 11/0 Delica Miyuki Seed Beads in Lined Pale Pink x 30 approximately
- 11/0 Miyuki Rocailles Dyed Opaque Seed Beads in Pink x 50 approximately
- 11/0 Miyuki Matte Transparent Seed Beads in Red AB x 70 approximately
- 11/0 Miyuki Rocailles Silver Lined Seed Beads in Flame Red x80 approximately
- 11x9mm Silver Heart Charms x 2
- 6mm Silver Jump Rings x 4
Tools
- Chain nose pliers x2
- Round Nose Pliers
- Flush Cutters
- Ruler
- Sharpie Marker
Instructions
Watch the video or read the instructions below.
Making the Hearts
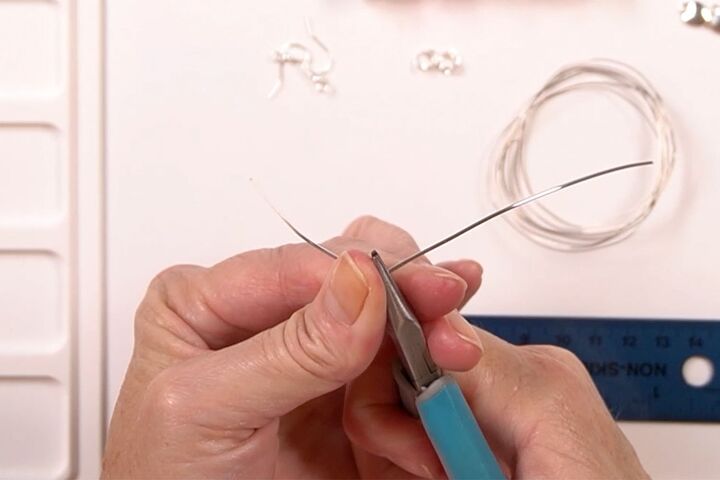
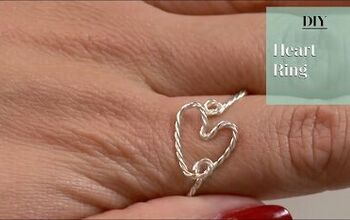
Cut a piece of 18Gauge wire approximately 15cm long. Run your fingers along the length of it to straighten it. Don’t worry if it’s not perfectly straight.
Find the approximate center of the wire and, using your chain nose pliers, make a right angle bend.
Make the bend a. little more than a right angle, then take your ruler and measure 5cm from the bend and make a mark with your marker.
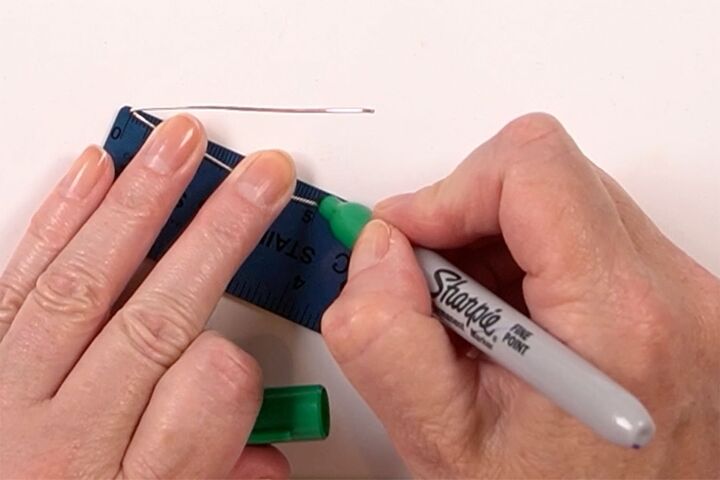
Repeat for the wire on the other side of the bend.
Place one side of the wire over the marker and put your thumb close to the mark you’ve just made.
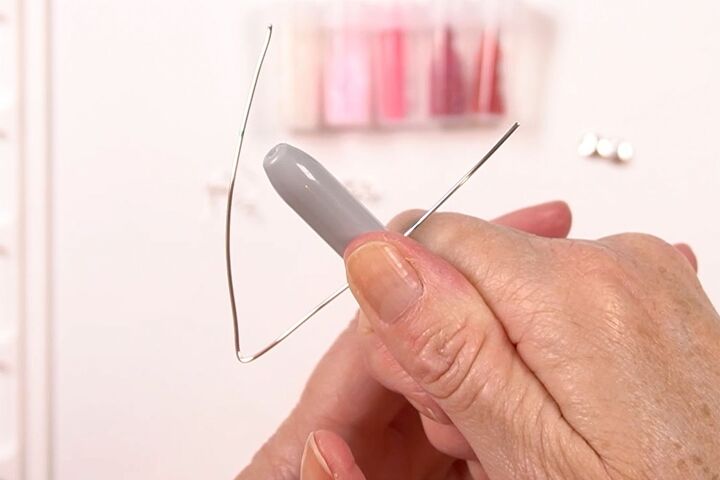
Using your other thumb, bend the wire around the marker.
Now repeat for the other side so that the wires cross over. The wires should cross over where the mark is on each piece of wire.
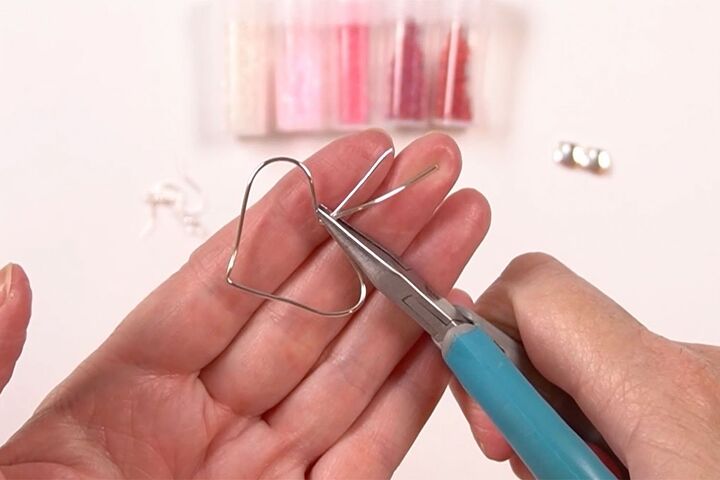
Place the chain nose pliers over the mark on one piece of wire and make a bend around the pliers.
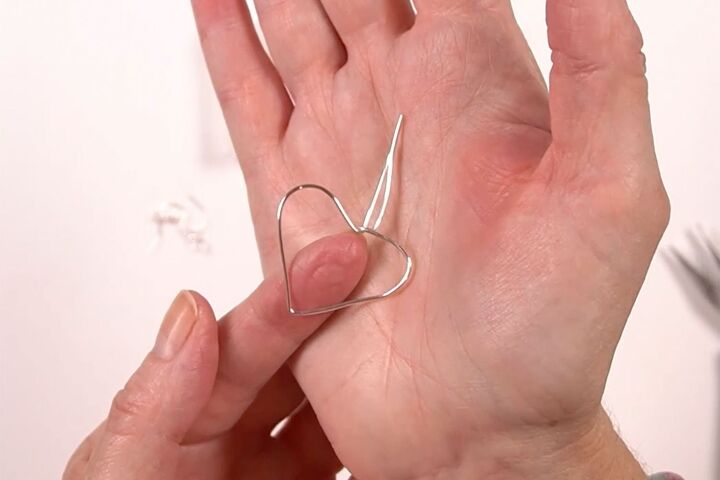
Repeat for the other side. The aim is to have both pieces of wire pointing straight up from the centre of the heart.
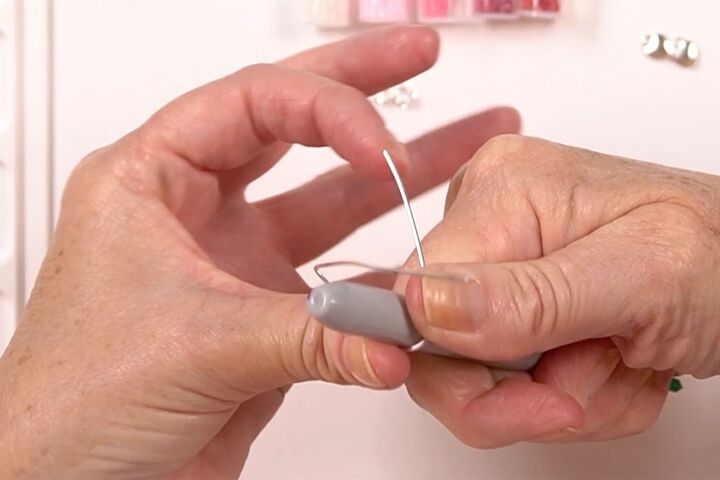
Cross the wire where it bends and hold between the jaws of your pliers and, supporting the heart in your fingers, twist twice.
Take the end of the wire that is twisting around the straight piece and wrap it around the straight piece twice to form a wire wrap. You might find it easier to hold the heart in your hand and use pliers to wrap the end around.
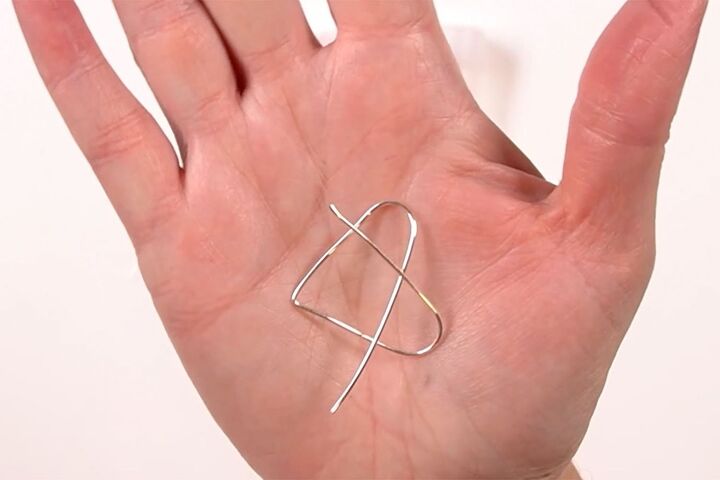
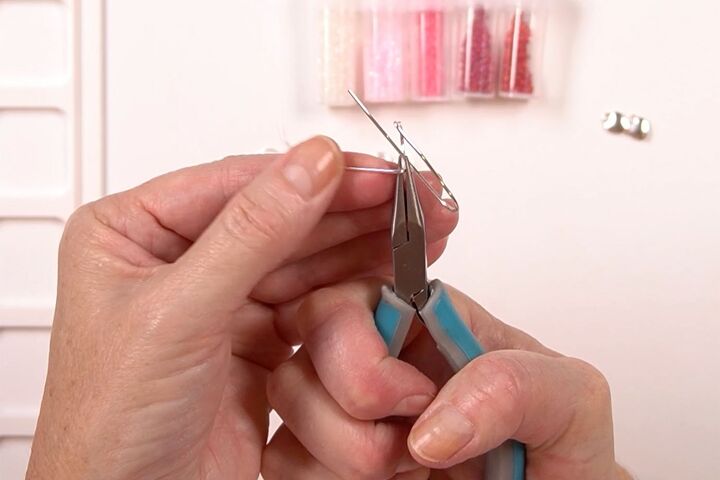
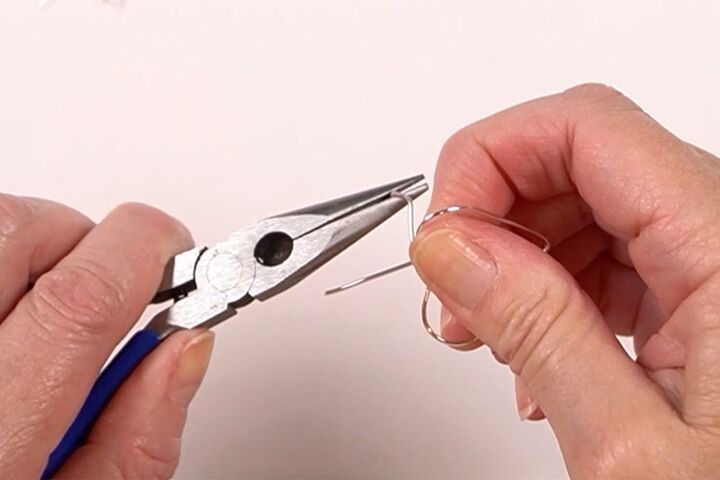
Trim off the tail and tuck it in. Trim the straight piece of wire to approximately 1 cm from top wrap then, using your round nose pliers, make a loop that faces backwards away from the heart. Don’t worry about the loop being centered on over the wraps.
Repeat this entire process to make the second heart. It’s good to do this now so you can measure it against this first one without the beads.
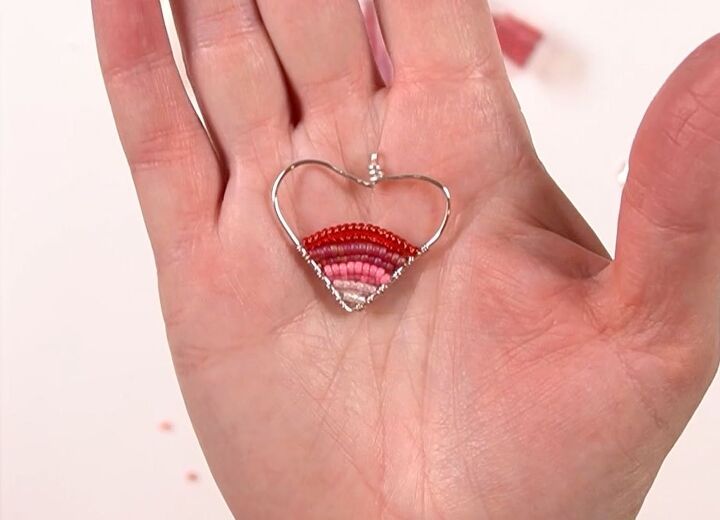
Adding the Beads
Take approximately 30cm of the 26 Gauge wire. With the right side of the heart facing up, bring the 26 Gauge wire up from the bottom through the centre of the heart.Wrap the tail around twice making sure that the short end is closest to the bend or point of the heart. You can manipulate the wire easily with your fingers and, if need be, squeeze the wraps together with your pliers. Trim off the tail.
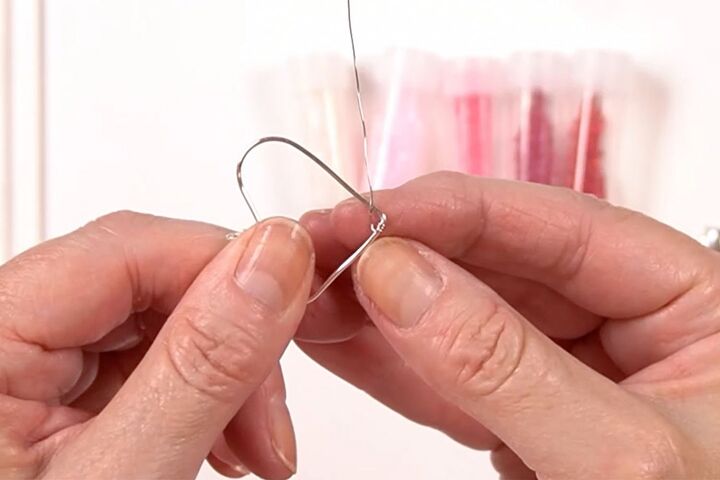
Make sure that the wire is on the top. Feed on one of the off-white seed beads and take the wire across the top. It’s important that the wire lays across the same side of the heart and doesn’t go from top to bottom or vice versa.
Wrap the wire around twice, pulling up from the middle rather than poking the end through, making sure that things are nice and tight and that the bead is sitting correctly. Turn the heart over and add on approximately 3 seed beads to fill the space. Complete three wraps to secure. Make sure that the seed beads are sitting within the frame.
Repeat this process with two rows of each colour, stepping through from light to dark. Remember that the number of beads will be based on how big your heart is. After you complete the last row, wrap the wire around one extra time, squeeze the wraps together, then trim off the end and tuck it in.
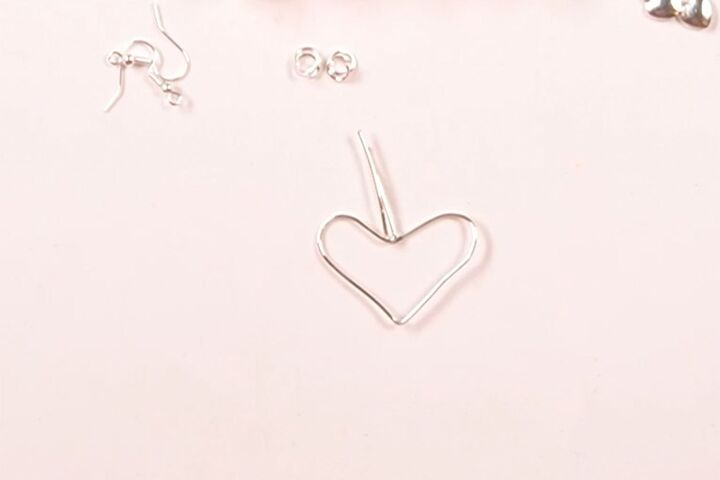
Adding the Charms
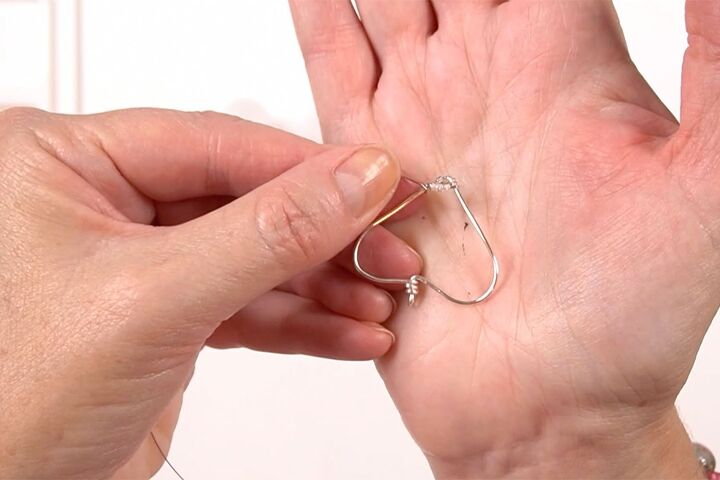
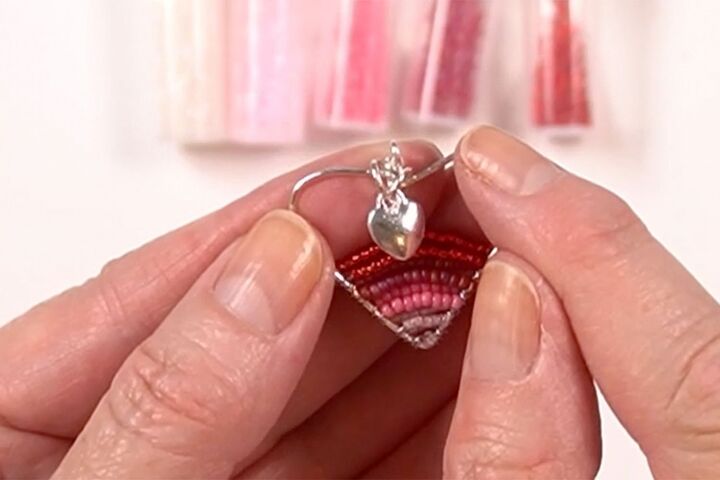
Open one of the jump rings, thread on the heart charm and then place it onto the frame of the heart. Close the jump ring. If you’ve never worked with jump rings before, watch this video. https://youtu.be/iumIu9wTBVE
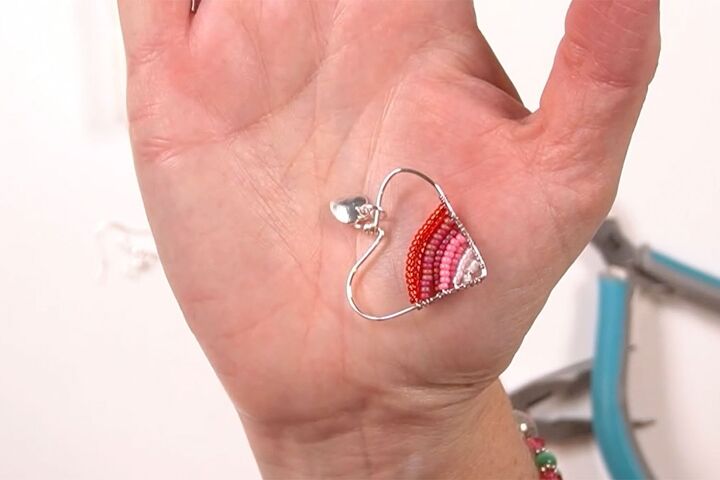
Open another jump ring and feed through the loop of the heart – it’s a tight squeeze but it will go through. Place it on the opposite side of the wire wrap and close the jump ring. You want to make sure that one jump ring is on either side of the wire wrapping.
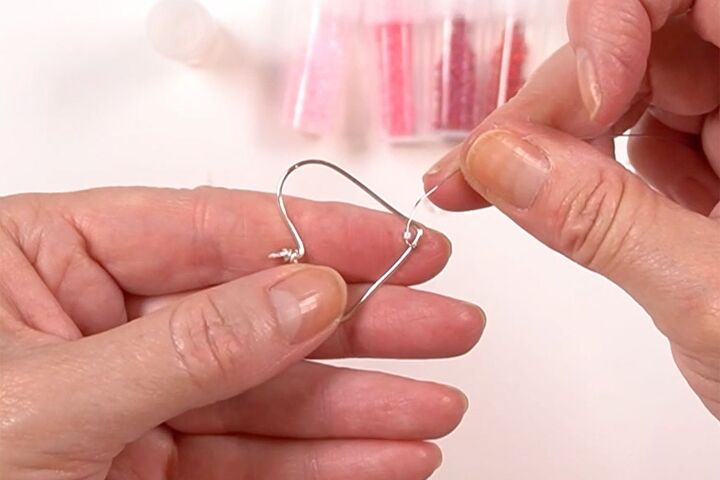
Adding the Ear Hook
All you need to do now is add the ear hook. Holding the loop of the ear hook with your pliers and the rest of the hook in your hand, move your pliers down so that the ear hook opens – the part that opens usually faces the hook.
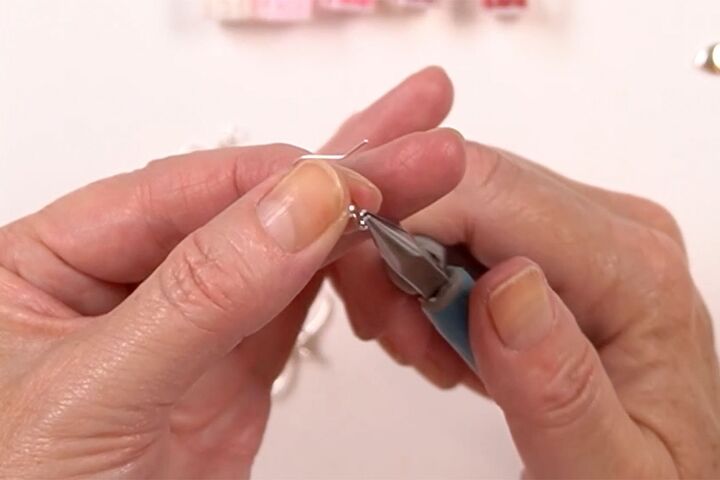
Thread on the loop of your large heart and reverse the process to close the ear hook.
Now repeat for the other earring.
I do hope that you enjoyed making these earrings with me. Why don’t you leave me a comment below and let me know whether you love or hate Valentine’s Day, or maybe you’re somewhere in the middle.
REMEMBER TO PIN FOR INSPIRATION AND SHARE WITH YOUR FRIENDS!!
⇓ PIN THIS ⇓
If you like my blog be sure to click on the RECOMMENDED button and SHARE it with your friends! It’s the best way for my blog to grow. I would love for you to be part of my family so sign up to receive my emails. Every time I post a blog, I will send you an update email. Also, follow me on Facebook HERE, Instagram HERE, and Pinterest HERE.
Come by and say Hey!
The author may collect a small share of sales from the links on this page.


Comments
Join the conversation