How to Make a Beautiful Poppy Polymer Clay Pendant in 9 Simple Steps

In this tutorial, I’m going to show you how to make a polymer clay pendant with a poppy design.
Polymer clay is soft, malleable, and a lot of fun to work with, not to mention you can use it to create some really stunning pieces of jewelry. So get your polymer clay tools together, and let’s begin!
Tools and materials:
- Polymer clay (black, dark green, light green, and red)
- Acrylic roller
- Dotting tool
- Blade cutter
- Needle
- Jump rings
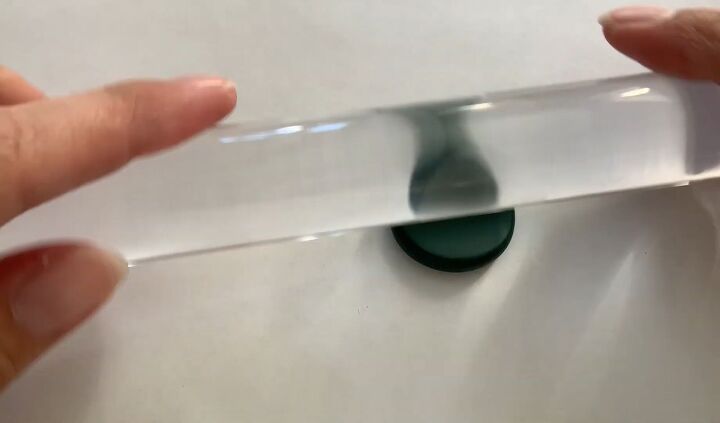
1. Roll the base
Start by rolling a piece of dark green clay to get a flat circle. This will be the base of your pendant.
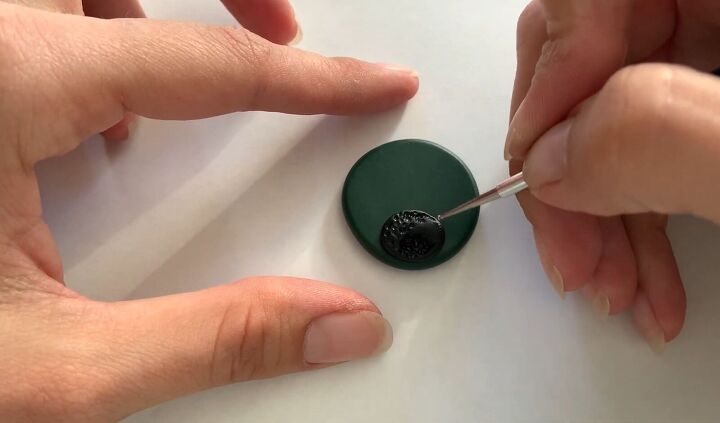
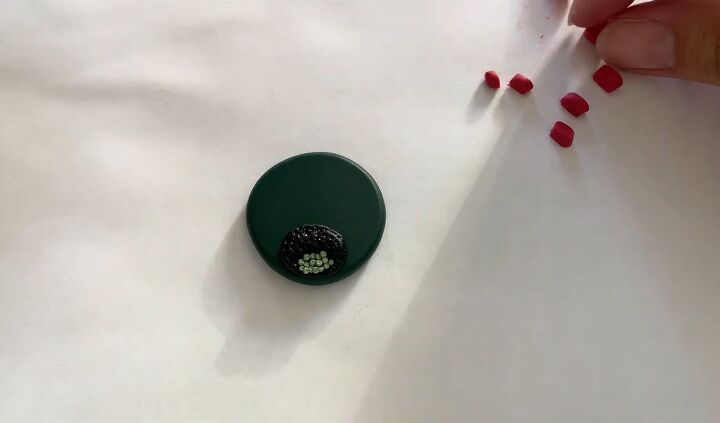
2. Create the center of the flower
Take a smaller piece of black clay and roll it with your fingers to make a small circle.
Then place it on top of the base and use your dotting tool to press it down and make indentations on it all over to look like the center (the ovary) of a poppy.
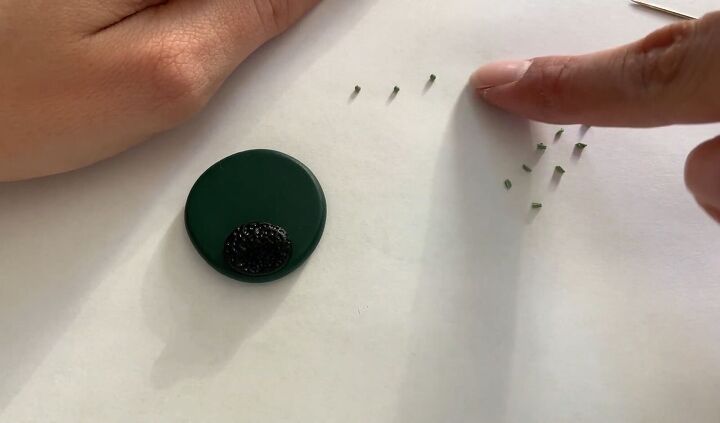
3. Roll and cut green clay
Take a piece of light green clay and roll it with your hands to get a thin sausage shape. Then cut it into very small bits. Proceed to roll each of the little green parts with your finger to make little balls.
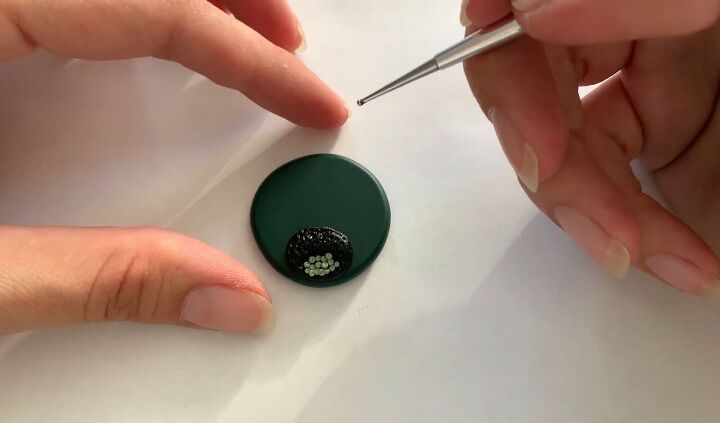
4. Add to the center of the flower
Next, pick up each of the balls with a needle (or another thin tool) and place them at the bottom of the black clay into the indentations that you made. These will be the ovule of the flower.
These green balls of clay should fill about a third of the black clay, as shown.
5. Make the poppy petals
Next, take some red clay and roll it with your hands to get a medium-sized sausage shape. Cut it into little pieces and roll those pieces into balls of different sizes.
Once you’ve rolled the balls, flatten them out into circles. These circles will be your petals.
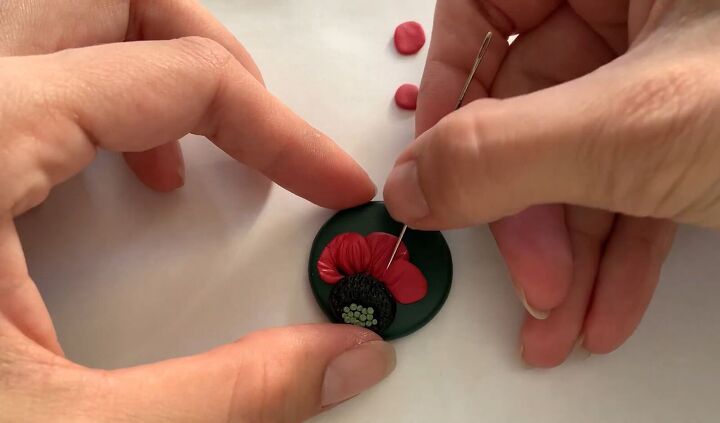
6. Add the petals to the flower
Pick up each of the petals with a needle and place them around the flower’s center. Use the needle to mark lines in the pieces of red clay to make them look more like a petal.
Place the biggest petals down first at the top of the center part, and then place the smaller petals around the sides. Each petal should overlap the ones next to it to create a textured effect.

7. Indent the center
Take your dotting tool to indent the center of the flower again, as it may have got slightly disfigured when you were placing and marking the petals.
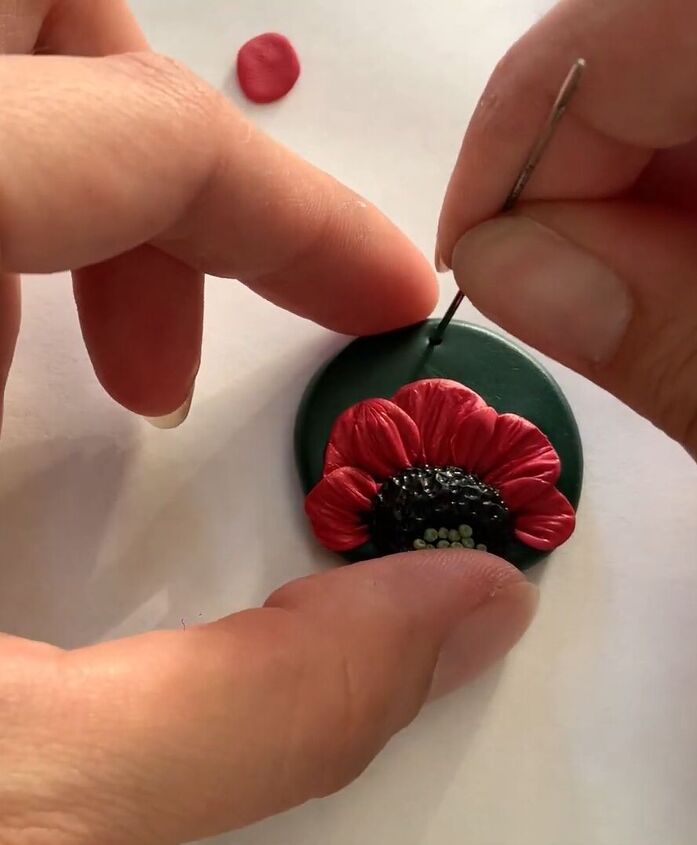
8. Make a hole
Mark a hole at the top of your base that goes through to the other side. This is where your jump ring will go.
9. Bake
Bake the clay in the oven; follow the instructions on your packet of clay to see for how long and at what temperature. Then allow the clay to cool and insert your jump ring to make a poppy pendant necklace.
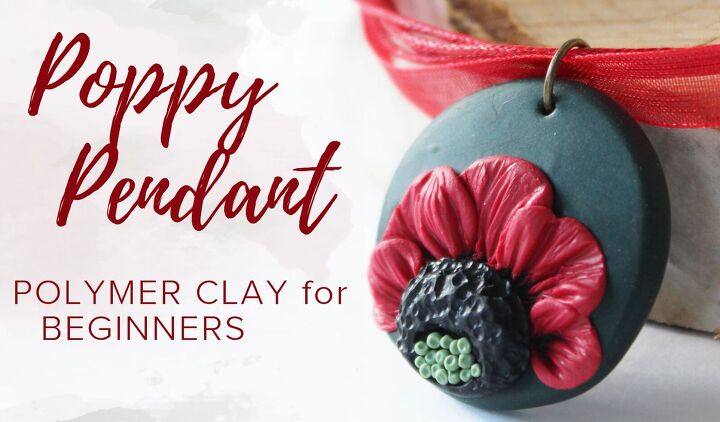
Poppy polymer clay pendant tutorial
Here we have our finished DIY polymer clay pendant. The detailing on each part of the poppy - the ovule, ovary, and petals - is intricate and looks very realistic to an actual poppy.
This pendant makes a cute accessory, and it’s always rewarding to be able to wear something that you made. Let me know your thoughts in the comment below.
The author may collect a small share of sales from the links on this page.


Comments
Join the conversation