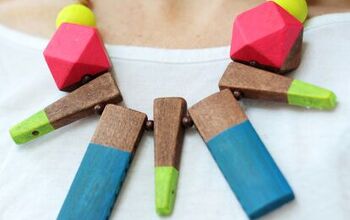
DIY: Statement Necklace

How amazingly can a statement necklace transform a look! I have some in my jewellery box, but I'm never tired of them, that's why I decided to make my collection grow a little bit more with this colourful and original DIY. The main material is a modelling paste that dries with air, so you don't need a special oven to do it and all the materials are really easy to find. I love working with this clay because it gives you a lot of possibilities in jewellery.
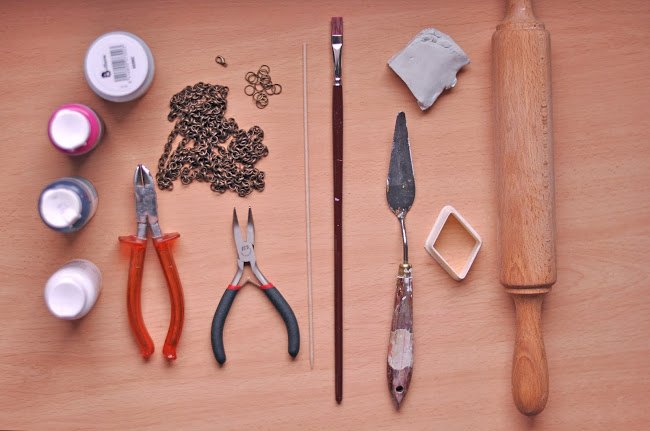
Materials:- Air dry modelling paste / pasta de modelas de secado al aire
- Roller pin
- Pallette knife or spatula
- Biscuit mould
- Sharp stick
- Acrylic paint
- Varnish
- Brush
- Pliers
- Chain, round rings and lobster clasp
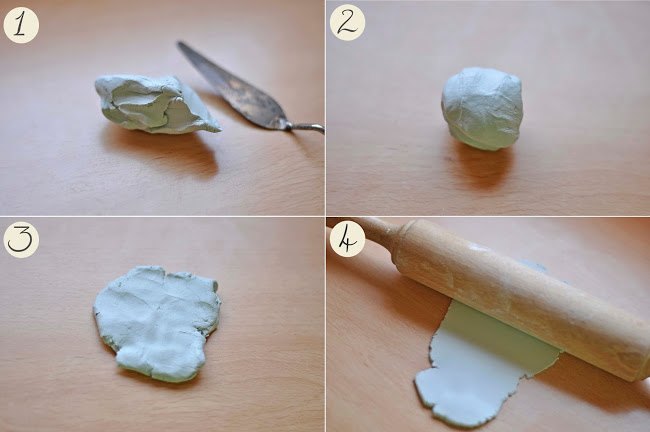
Cut a piece of modelling paste and make a ball with it using your hands. To manipulate it better you can moisten your hand with some water. Put the ball over the surface you're going to work and press it with your fingers a bit. Use the rolling pin to flatten the dough until it is about 1 cm. Carefully, with your hands, unstick it from the surface, face it down and press with the roller pin until it is about 0,5 cm. Try not to manipulate the pieces with your hands a lot, because finger prints don't make them beautiful.
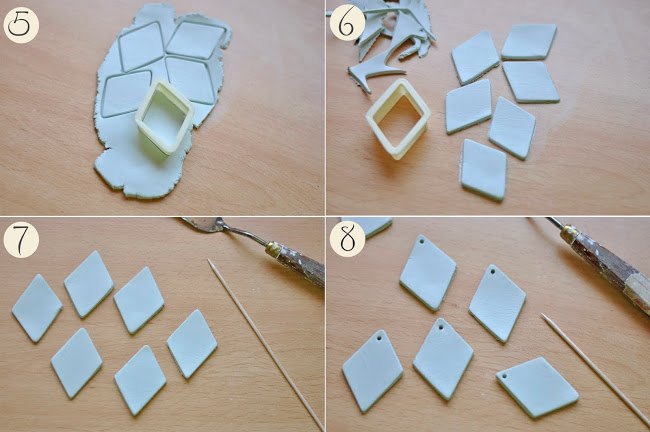
Use the biscuit mould to create the necklace pieces. Remove the excess of paste and unstick the pieces using a spatula o palette knife. With this tool or very carefully with wet fingers, you can smoothen some edges that may not be perfect. With a sharp stick (I used the ones for the brochettes) make a hole at the top of each piece. Leave the pieces dry for one day.
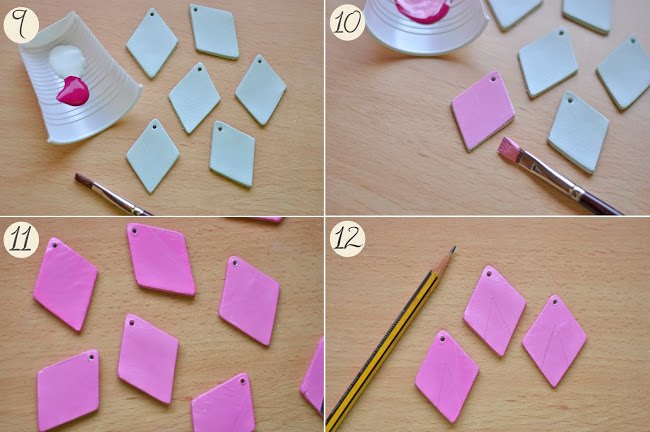
Mix the acrylic paint to paint the base of the pieces. Once they are all painted and dry, with a pencil draw a rhombus at the bottom of each piece and paint with another color.
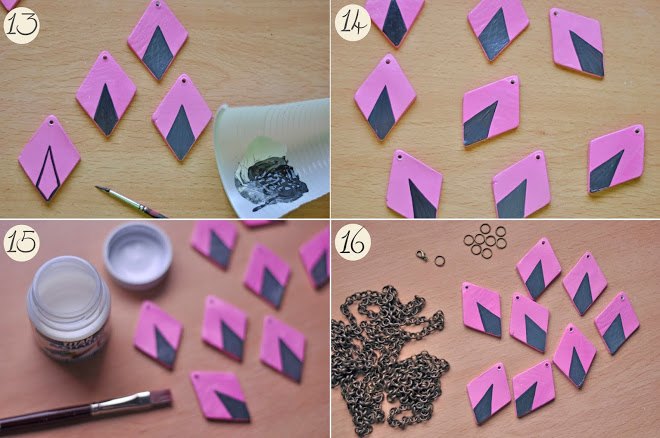
First, with a thin brush, paint the border and then colour the rest of the shape. When they are dry, varnish them. Now it is time to put all the pieces together in a chain to create the necklace.
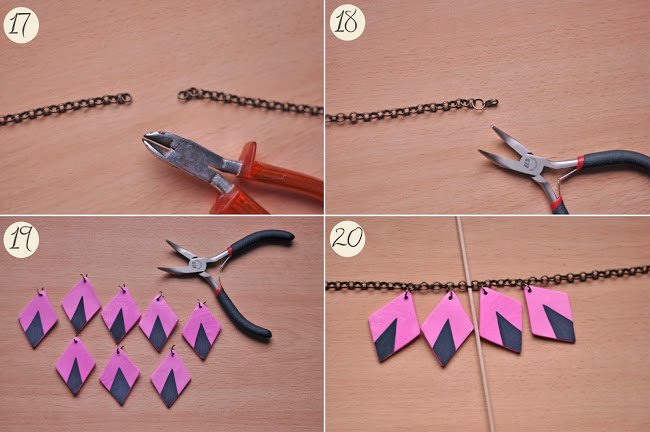
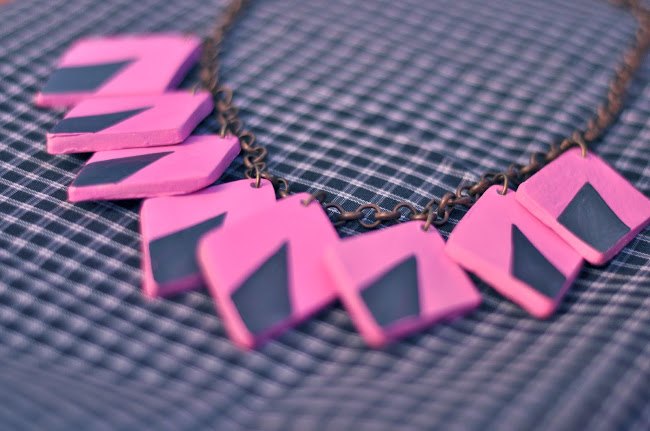
Cut the chain (length of your choice) with the pliers and add a ring and a lobster clasp to one of the ends. Open the round rings and put them in each of the pieces. Fold the chain in half to know where's the middle, and put a stick in the link where the center is, to have it as a reference to start adding the pieces to the chain. Leave the same number of links between each piece you add. Use the pliers to close each ring. That's it! Now you can enjoy your piece of art.
The author may collect a small share of sales from the links on this page.


Comments
Join the conversation