Tie Dye Leggings! (Easy DIY)
Wouldn’t it be great if you could customize your own leggings?! You could choose the colors, the patterns, and the style! In today’s DIY project, we are going to do just that- with TIE DYE!!! 🙂 We are going to transform three pairs of white cotton leggings into one-of-a-kinds pieces using Rit dye and a Tulip tie dye kit! I love tie dying so much because it is fun, easy, and totally freeing! It’s the perfect spring/summer project to do with friends, so I hope you will join me for the tie dying adventure! 🙂
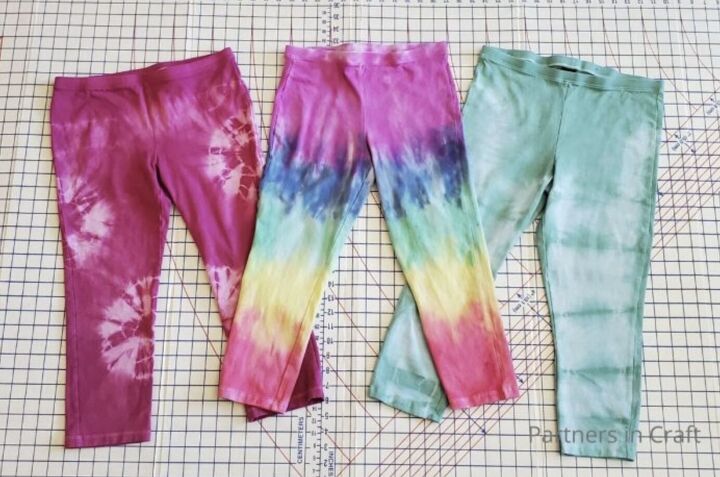
Of course, we have to start with the leggings! I’m using cotton leggings from the brand Hue, which I found on sale at Nordstrom Rack! lol. It’s very important for this project to use leggings that are mostly made of natural fibers. (If you want to dye something that is made of synthetic material, such as polyester, you will need to use dyes specifically made for that kind of fabric. Check your local craft store for ideas!) After a long decision crisis over dye colors, I finally decided on violet and teal Rit dye! I also got a bottle of dye fixative to help set the colors once the dying process was complete. With my rubber band collection handy, I “tied” the leggings in different ways to create different patterns. (Watch the video at the end of this post to see what I did!)
I took my new favorite leggings along on my travels!
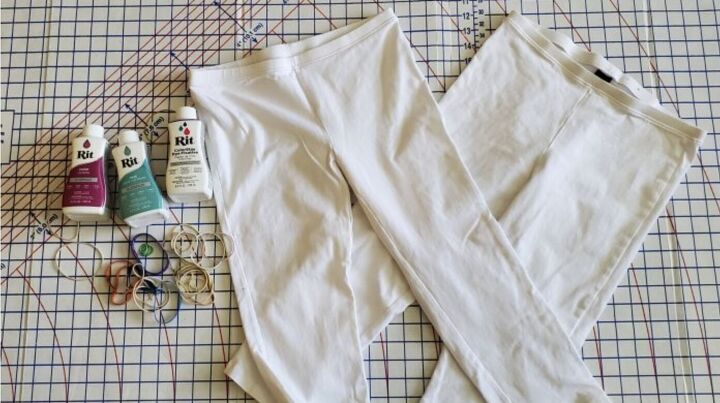
I prepped my kitchen “laboratory” with old towels and lots of cleaning supplies! Next, I simply followed the directions on the dye bottles and filled my sink with hot water, some salt, and dye. I submerged the leggings in the dye until I liked the color, then rinsed them. After they were soaked in a solution of fixative and water, the leggings were ready to be washed and dried!

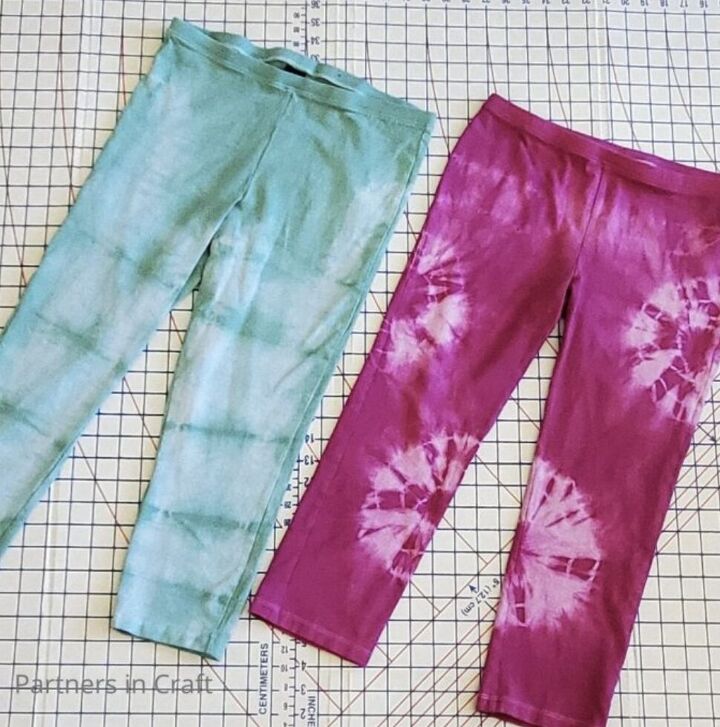
Ta-DA! 🙂 I love how the colors and patterns turned out!!! I plan to wear the violet pair myself and send the teal pair to my sister!
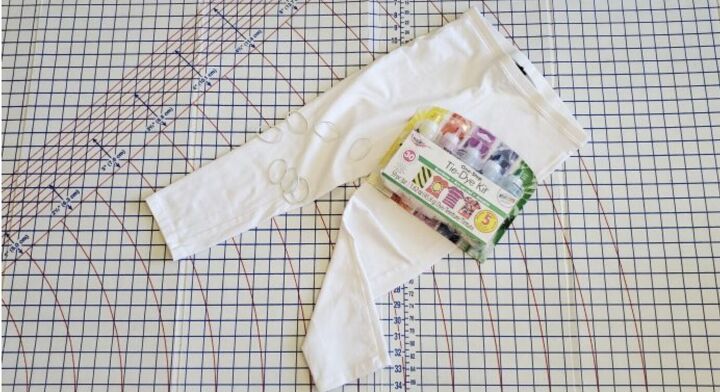
But wait! I have one more pair of leggings, and I think these need to become rainbow-colored! 🙂 My tie dye kit from Tulip had everything I need to tie up my leggings and get dying!

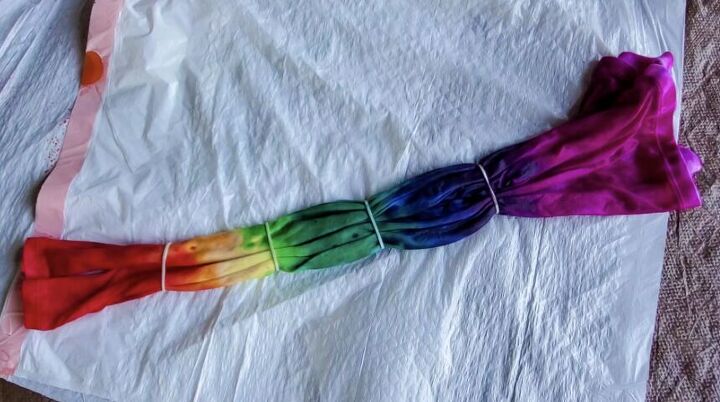
This time, I took the project outside to my carport! I covered the ground with a tarp and worked over trash bags to minimize mess. I then got the leggings wet, filled the dye bottles with water, and got dying! I followed the package directions and allowed the leggings to sit in a plastic bag for several hours before washing and drying them.
I hope you all enjoyed today’s tie dye adventure! 🙂 I sure had fun and can’t wait to do more! Be sure to subscribe for new fun, bright projects coming your way soon! Stay crafty, Everyone! 😉

You can check out the whole tie dye process in this Youtube video! 🙂
The author may collect a small share of sales from the links on this page.


Comments
Join the conversation