2 Quick & Easy Upcycling Ideas: DIY Fur Collar & Strappy Leggings

Today, I'm going to share two easy upcycling ideas. We'll cover how to upgrade a cardigan with a DIY fur collar, as well as how to make cute strappy leggings. Follow along to learn what I did or to get some upcycling inspiration of your own. Let's get started!
Tools and materials:
- Old leggings
- Old cardigan
- Seam ripper
- Thin waistband elastic
- Scrap fluffy fabric
- Sewing pins
- Scissors
- Sewing machine with zigzag foot
How to make strappy leggings
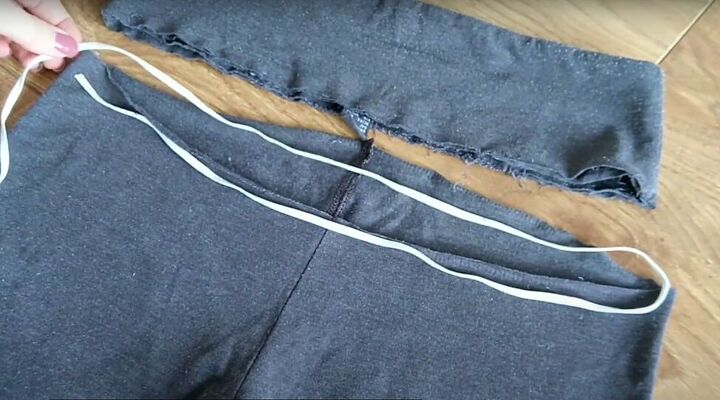
1. Remove the waistband
Remove the waistband on your old leggings with a seam ripper. Then, cut a piece of waistband elastic to fit the circumference of the new top of your leggings.

2. Sew the new elastic
Sew the elastic into the leggings by folding the top edge of the leggings over the elastic and sewing with a zigzag stitch.

3. Cut out a teardrop shape
Draw and then cut out a small teardrop shape at the top front center of your leggings right below the elastic. Make it as small as you can.
4. Cut the elastic waistband
Then cut through the elastic waistband to open up the tear-drop hole.
5. Sew the second piece of elastic
Cut another piece of elastic the same length as the whole edge of the opening you just made.
Sew the elastic into the opening the same way you sewed it into the waistband.
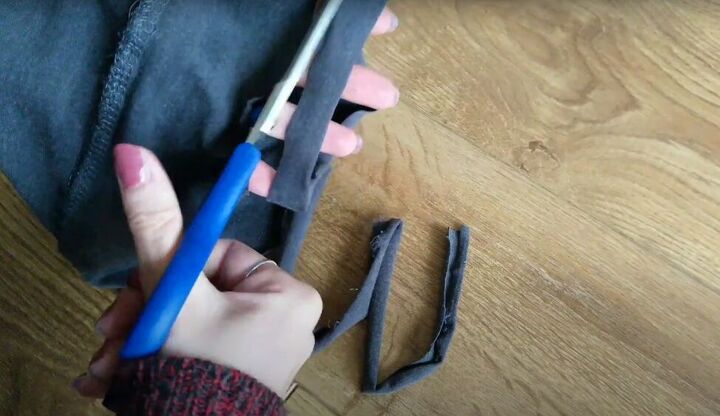
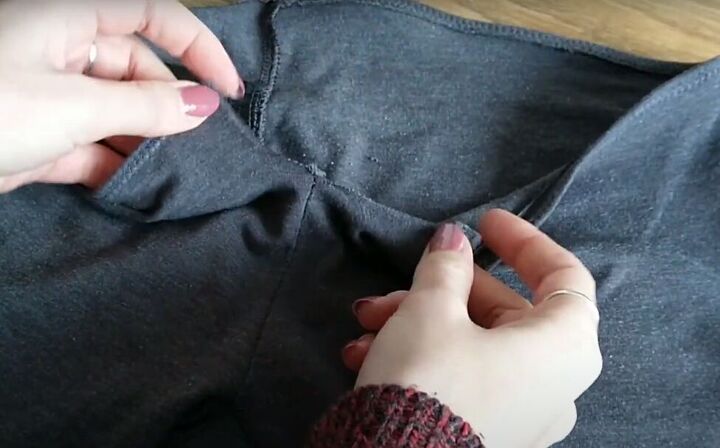
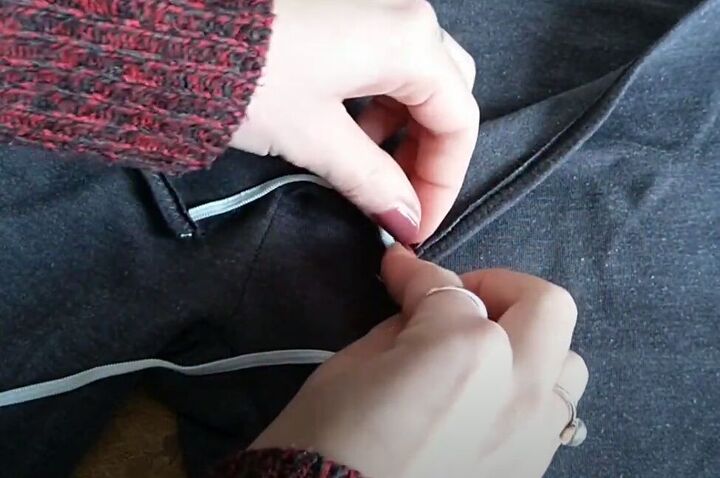
6. Make the straps
Cut four long strips from the waistband fabric you removed.
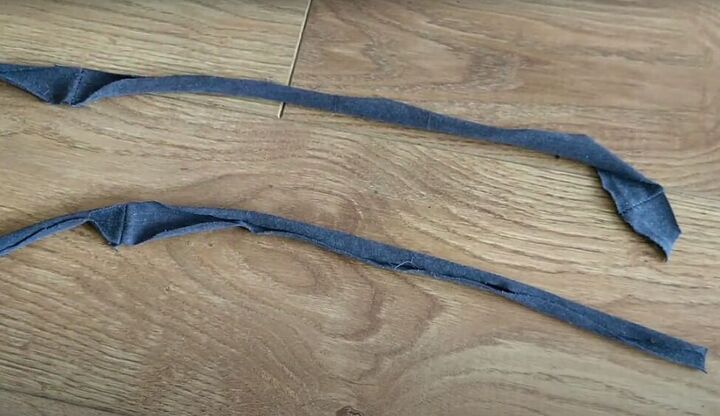
Sew two strips together end-to-end to make longer strips. Then fold each of the long strips in half lengthwise and sew along the long edge.

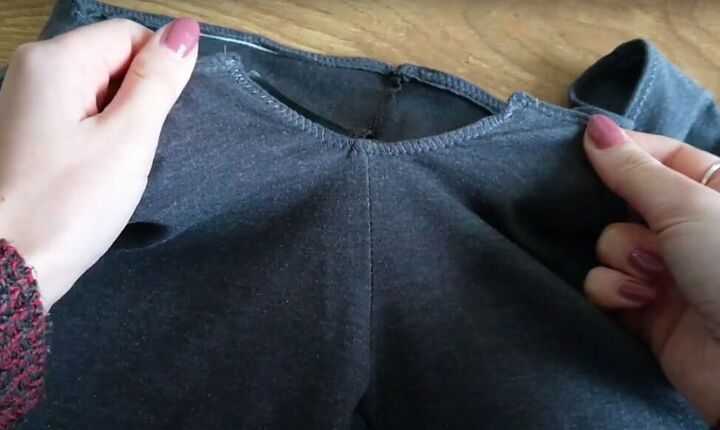
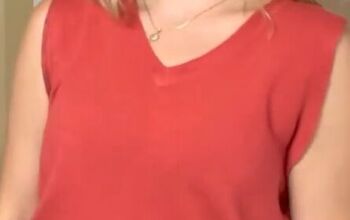
Turn your strips right side out and attach one end of a strip to the opening at the front of your leggings.
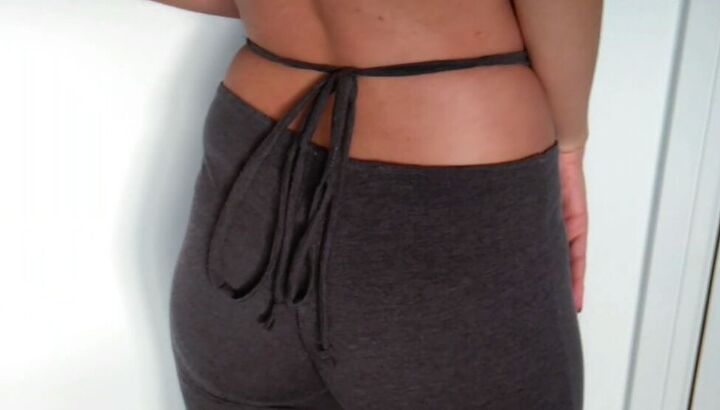
To wear these upcycled leggings, simply tie the straps behind your back.
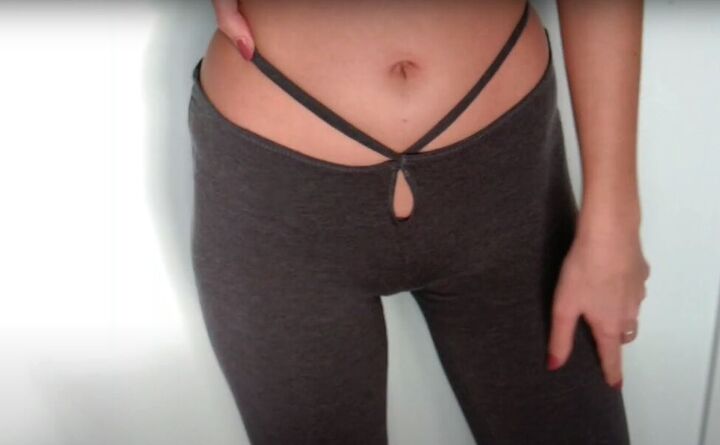
Here’s how it looks in the front.
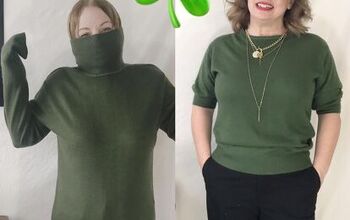
DIY fur collar cardigan
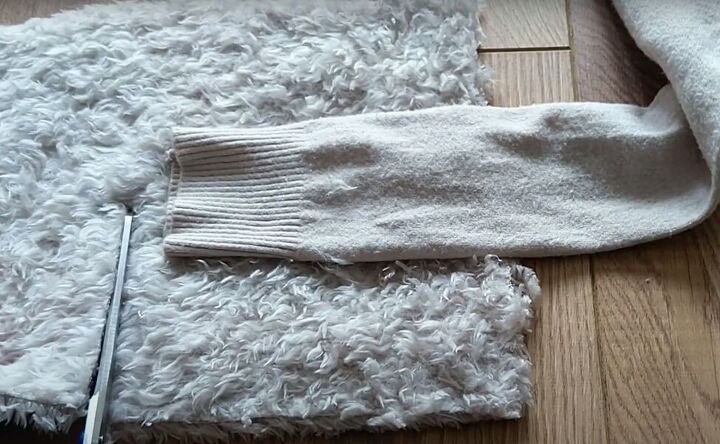
1. Cut the cuffs
Using the lower part of the cardigan sleeve as a guide, cut out four rectangles from your fluffy fabric that are large enough to fit around the sleeve.
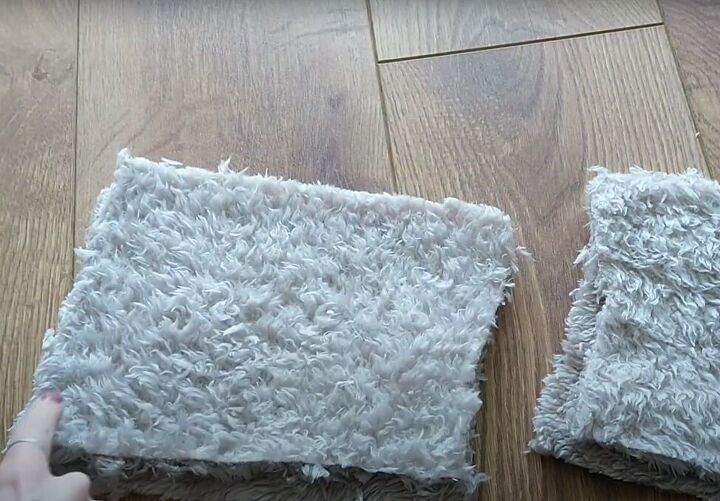
2. Sew the cuffs
Place two rectangles together with right sides facing in and sew along the top and bottom (long) edges. Repeat with the other two rectangles.
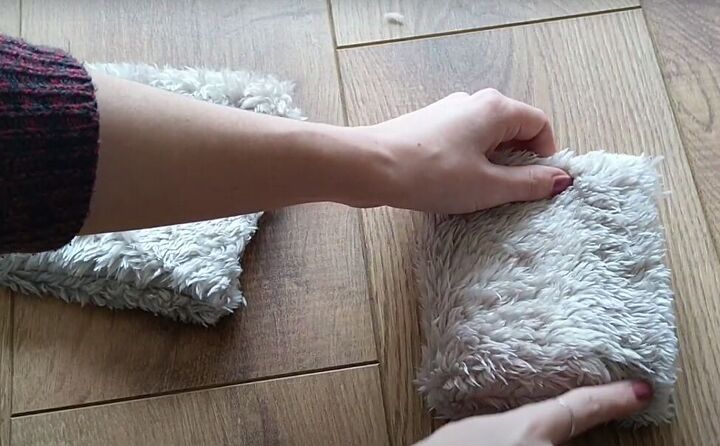
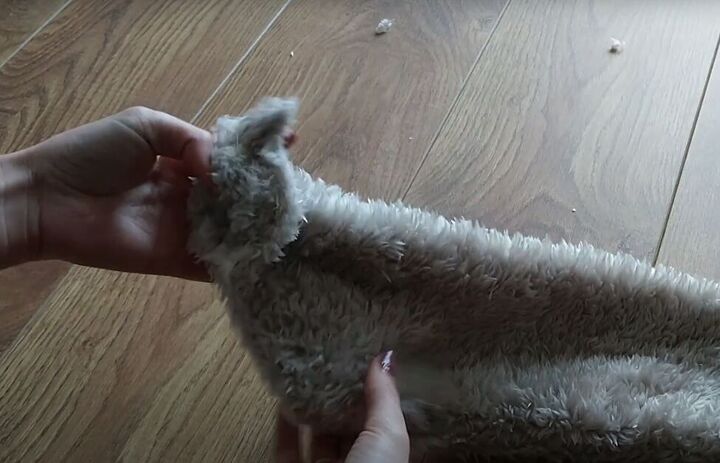
Turn them right side out and fold them in half widthwise. Sew along the open edge so you end up with two double-thickness tubes.
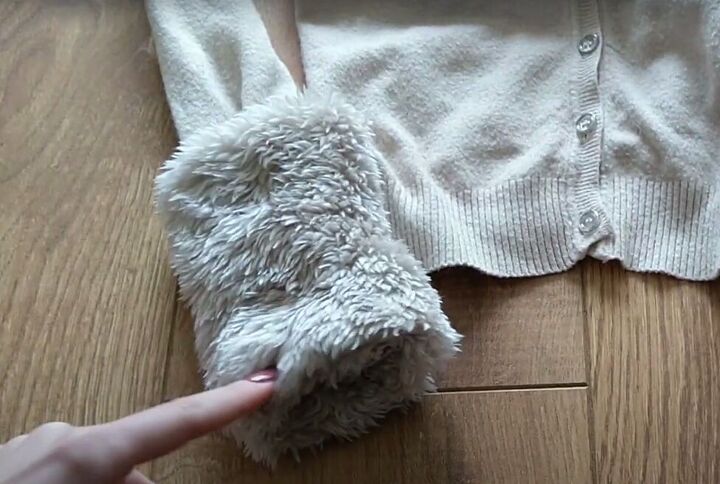
Now turn them over again so the newest seam is on the inside. Pull one tube over each cardigan sleeve. I chose to not attach these furry cuffs to the cardigan, so I can slip them on and off.
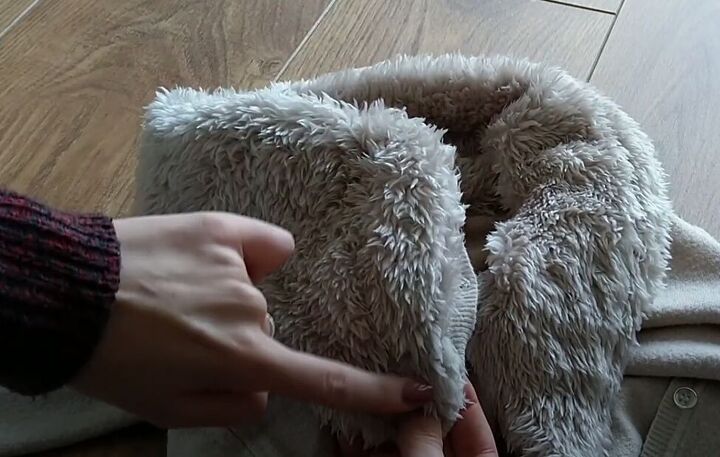
3. Add a furry collar
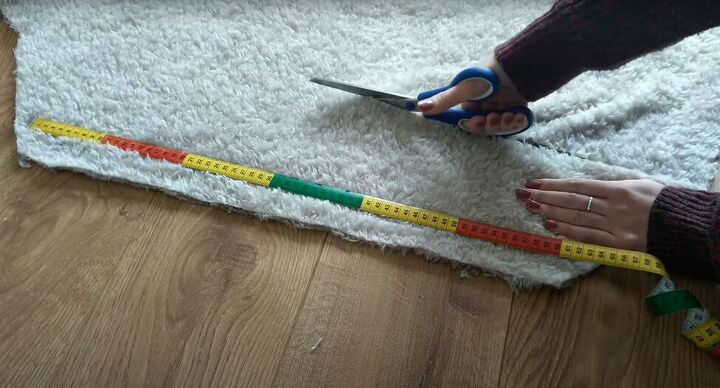
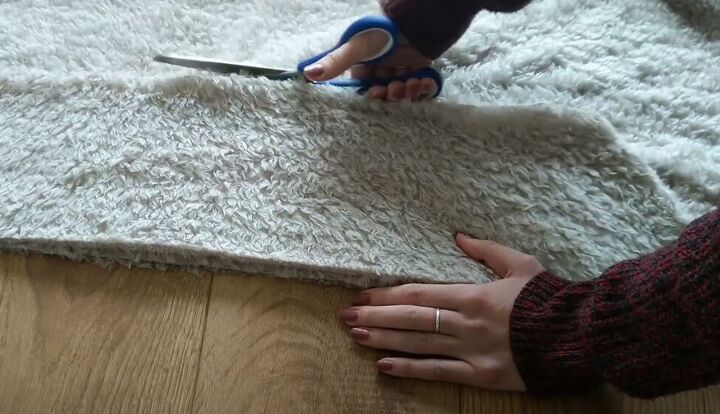
Measure the entire circumference of your cardigan neckline. Cut one large trapezoid from your fluffy fabric, ensuring that the shorter long edge is at least the circumference of your cardigan neckline.
Use your first trapezoid as a pattern to cut a second identical one.
Place the trapezoids together with right sides facing in and sew along all edges leaving one small opening.
Then, turn your furry collar right side out and sew up the small opening.
4. Attach the DIY fur collar
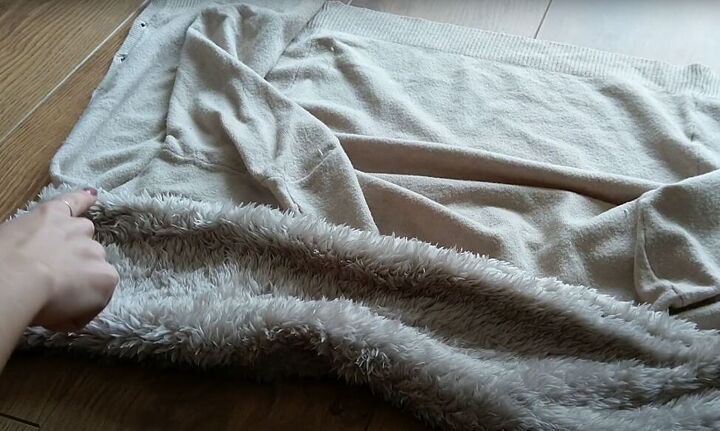
Pin and sew the shorter long edge of the collar to the outside of the cardigan neckline.
Flip the collar to the outside and pin and sew the angled edges of the collar to the upper opening of the front of the cardigan.

Upcycling ideas
Here’s the finished upcycled cardigan with the DIY fur collar. And since I didn’t attach the furry cuffs, I can wear the cardigan with or without them.
Try out these upcycling ideas for yourself and leave me a comment about how they turned out for you.
The author may collect a small share of sales from the links on this page.


Comments
Join the conversation
The sweater is adorable!