Follow This Easy Mermaid Braid Tutorial for Gorgeous Occasion Hair

Today, I’m going to recreate my engagement party hairstyle for you. I wore my hair in a side-swept mermaid braid. It looks gorgeous and it is so easy to do at home. Let’s get started.
Tools and materials:
- Hair clip
- Hair tie
- Hair extensions
- Bobby pins
- Curler
- Hair spray
- Brush
- Flowers
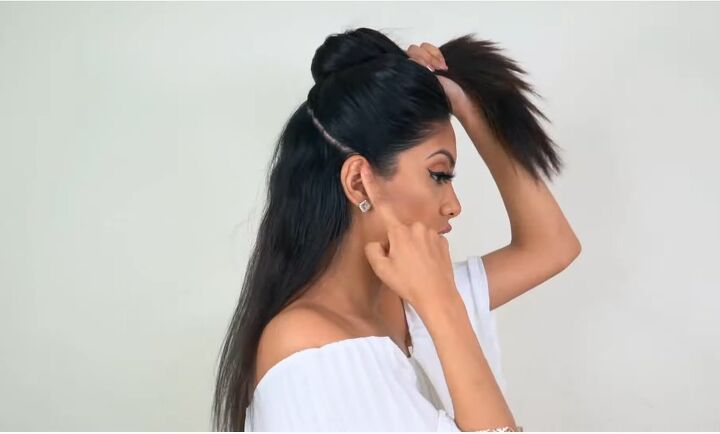
1. Separate your hair
Section your hair off into a half-ponytail. The line separating your hair, going from the tops of your ears to the back of your head, should be curved and not flat.
Once that’s clipped away, tie the remaining hair into a ponytail.
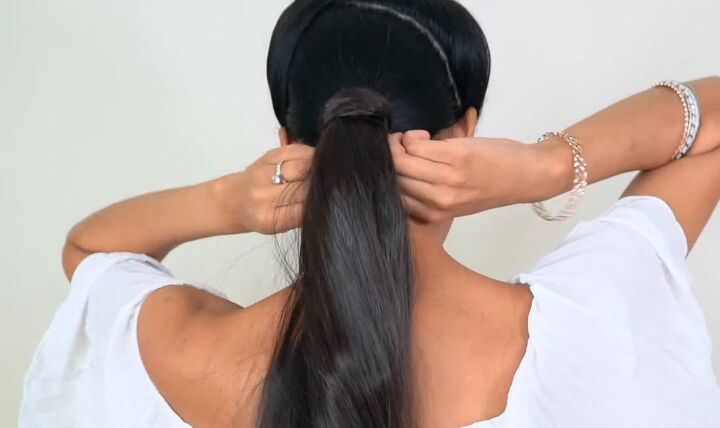
2. Attach hair extensions
Grab some hair extensions and clip them to your hair. My extensions are in a ponytail shape but if you don't have a ponytail, it's fine, you can use regular tracks and roll them around your ponytail.
Wrap hair around the top of the extensions to cover them. Use some bobby pins to secure the extensions.
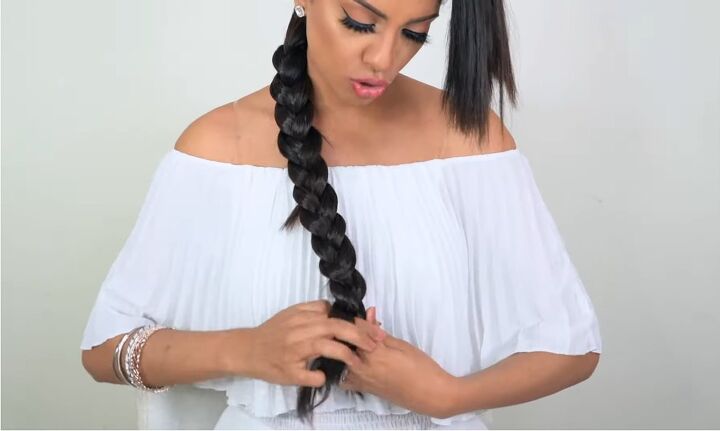
3. Braid your hair
Split into three equal sections and in each section be sure to include some of your natural hair as well as some of the extension hair.
Take the outside sections and cross them over the center and continue to do that until you’re all the way at the bottom.
Make sure that you braid nice and tight so that, when you later fan it open, it won’t fall apart on you.
As you're braiding, if any short pieces of hair start falling out of the braid, don't stress over it. It’s going to be camouflaged with the flowers.
Once done, tie the bottom with an elastic.
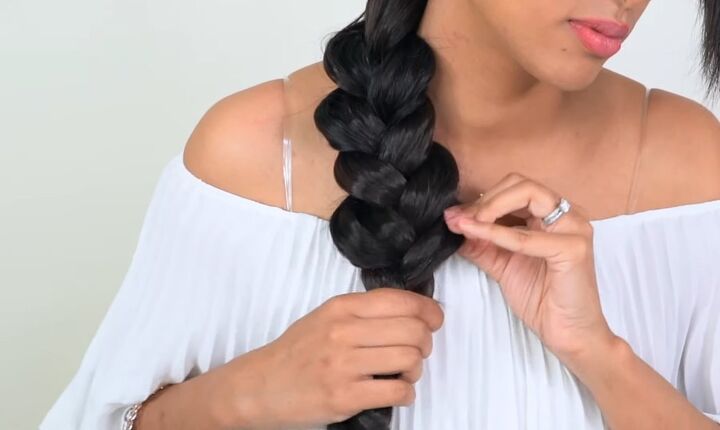
4. Fan the braid open
Fan the braid open from the top. I find it works best if you grab the outer edges and gently pinch them open.
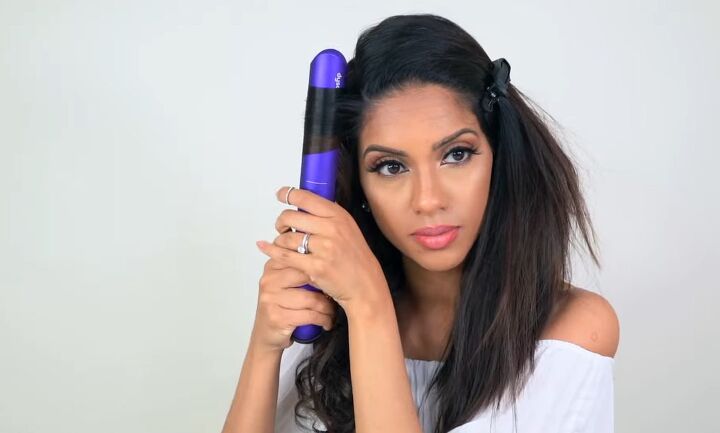
5. Curl your hair
Now curl the front section of your hair. Alternate between curling the strands backward and forwards.
When your curls are done, you can go in with a little bit of texture spray or hairspray. Shake out the curls to mess them up a bit for a more natural look.
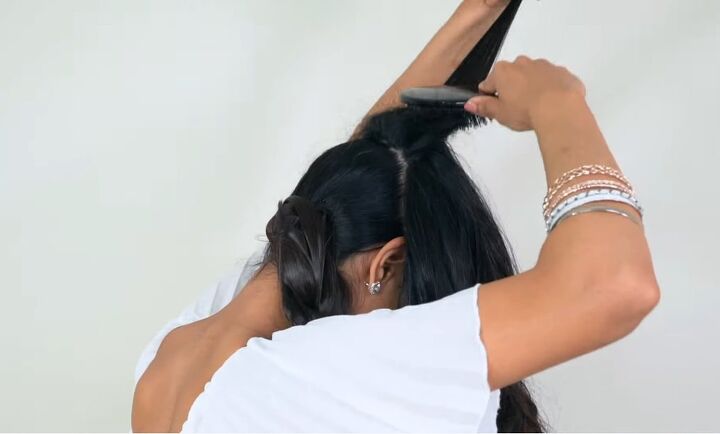
6. Backcomb your hair
Put your head down and grab your section of curly hair.
Now take some small sections and tease everything at the root by backcombing the first 3-4 inches of your hair. We want to poof it out to get it nice and big.
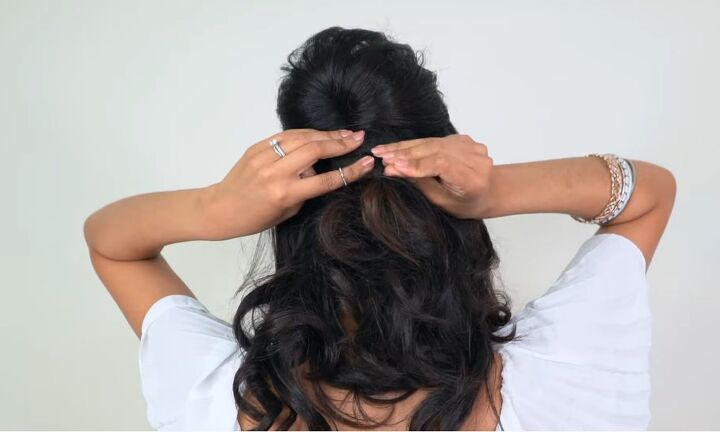
7. Pin back hair back
Separate your curled hair into a front section and a back section. Give the back section a gentle twist and then secure it with a bobby pin.

8. Pin front hair back
With the remaining front section, twist the pieces sporadically and fan them. Apply hair spray.
Then, pin them back into the center. Twist the sides and fan them open to create some texture. It’s up to you how much hair you leave out at the front and how much you pin back.
We want the curls to cascade and blend into the braid so that it looks like one solid unit.
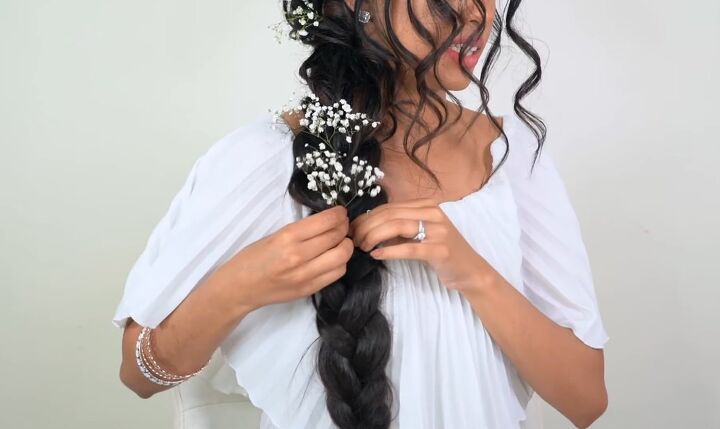
9. Add flowers
You can finish it off at this point, or there is also the option to pin in some rhinestones.
I’m going for a princess garden vibe so I’m going to finish the look off with some Baby’s Breath flowers. All of the hairspray and pins in my hair create enough of a cushion to keep the flowers in the braid so that they don’t slide out.
You just want to eyeball the flowers in a way so that they're somewhat around the same distance from each other. Lower down the braid you're going to be using smaller pieces of the flowers.
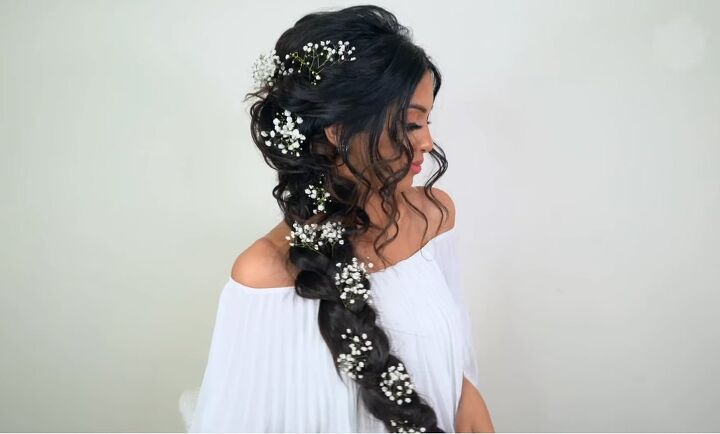
Completed mermaid braid
And here is the finished side-swept braid! I love how big and textured the braid looks and the flowers add a gorgeous, princess-like finishing touch.
This is the perfect hairstyle for any celebratory occasion. What event would you wear this mermaid braid hairstyle for?
The author may collect a small share of sales from the links on this page.


Comments
Join the conversation