This Unique DIY Robe Can Also Be Worn as an Elegant Wrap Dress

This tutorial will show you how to make a simple DIY robe. Because it wraps around and has an extended sleeve, this unique DIY robe can also be worn as a wrap dress. You can decide which you want, and make it whatever length you like.
Tools and materials:
- 3 Yards of Ankara fabric
- Thread
- Scissors
- Chalk
- Measuring tape
- Sewing machine
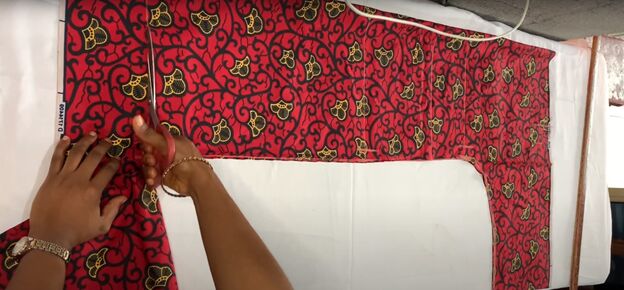
1. Shape and cut back piece
Fold the fabric in half lengthwise and use the fold as the vertical center front of the robe. Mark the following points from what will be the top of the robe:
- Shoulder width divided by 2
- Full sleeve length
- Distance from shoulder to bust
- Distance from shoulder to under bust
- Distance from shoulder to hip
- Distance from shoulder to hem
Extend all of those marks by chalking straight lines across the fabric. You know have a sort of grid across the fabric indicating where the robe will fall on different parts of your body.
Now you need to mark some body widths. Divide your bust circumference by 4, add one inch for seam allowance and mark that on the fabric along the bust point line. Do the same for your hip circumference measurement, and mark that on the hip line. Draw a line from the point on the bust line to the point on the hip line. Mark the same hip circumference measurement along the bottom hemline and connect that point to the hip line point.
Next, measure your arm circumference, divide by 2 and add one inch for seam allowance. Mark that measurement on the fabric. Continue your chalk outline from the bust to create the sleeve outline.
To see how to create, connect, and cut all of these measurements, watch the video from 1:13 to 3:15.
Finally, mark the depth and width of the neckline on the fabric. Since the fabric is folded, only mark half the width of the neckline.
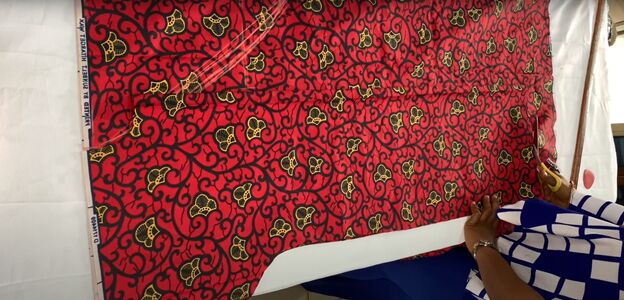
2. Cut the front piece
Fold the remaining fabric in half. Fold the back piece in half and use it as your pattern for the front piece. Place the folded back piece on the open edge of the back fabric, not on the fold. The front piece is going to wrap over the back piece, so it will need to be much wider.
Place a mark on the fold of the fabric 10 inches below the top. Then, draw a curve on the front piece fabric from the top of the neckline point on the back piece to the 10-inch mark you just made.
Cut out the front piece and cut open along the fold, so you have two front pieces.
3. Make the edge band
With fabric doubled, cut a piece of fabric 3 inches wide and as long as possible with your fabric. This band will attach to the robe from the center bottom of one front side, up, around the neckline and down the other front side, so it needs to be really long.
Sew the short ends of the two band pieces together to make an even longer strip. Fold the band in half lengthwise and iron it flat.
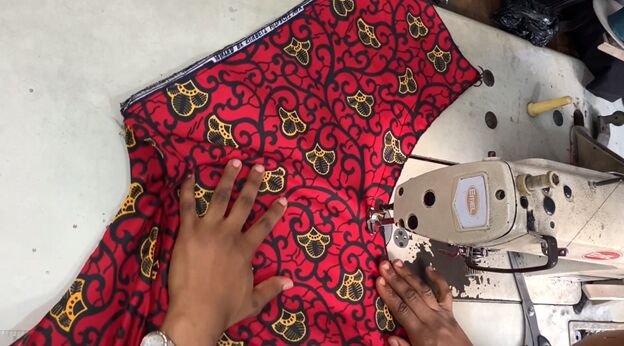
4. Attach the pieces
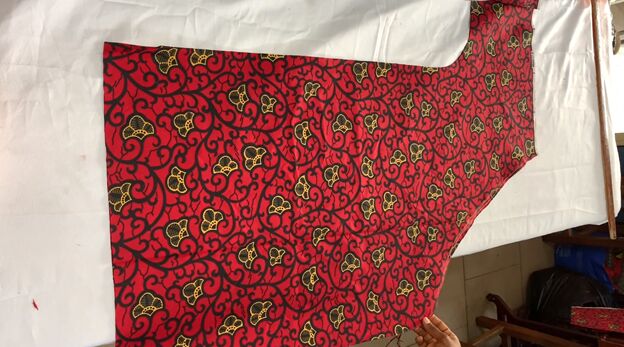
Place one of the front pieces on top of the back piece, right sides facing, aligning the body and sleeve. Sew along the shoulder and outside sleeve. Fold in the sleeve hem and sew.
Now, sew the underarm and down the side seam, shaping the sleeve as necessary to account for the needed sleeve width. Repeat the same process to attach the other front piece.
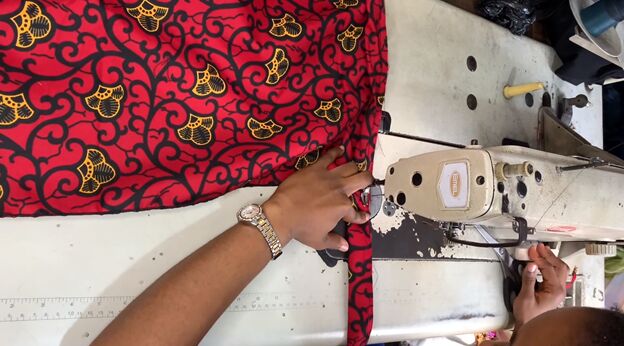
5. Attach the band
Sew the long band to the robe, right sides together, starting at the bottom front center, going up, around the neck and down the other side. Trim off the excess band at the bottom.

It may be a little difficult to see in this picture, but here is the final result!

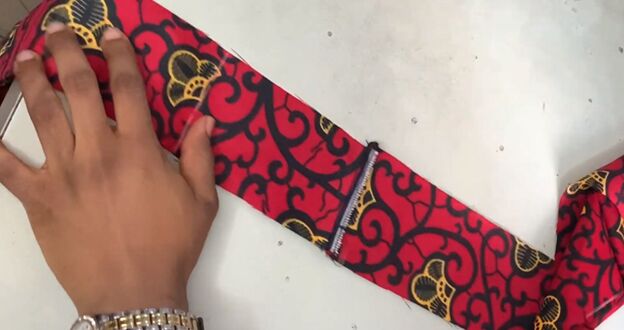
You can also use leftover fabric to make a matching tie belt if you wish, like the one in this image.
The author may collect a small share of sales from the links on this page.


Comments
Join the conversation
Yes I will try this!you make it seem easy and the instructions are well done!