Sew the Perfect Gift: 5 Easy-Sew Gift Ideas With Step-by-Step Videos

Looking for some DIY gift ideas? Here you’ll find easy DIY sewing Christmas gift ideas so you can sew the perfect gift! All these easy sewing gifts have their own video links below in case you need more detail.
Tools and materials:
- Fabric
- Fusible interfacing
- Zippers
- Sewing machine
- Needle and thread
- Scissors
- Pen
- Pins
1. Slide pen pouch
Exterior fabric
- 7⅛″×9⅞″ 2 pieces
- 4″×2¾″ 1 piece
Contrast color fabric
- 13½″×8¾″ 1 piece
- 2″×2¾″ 1 piece
Lining
- 7⅛″×9⅞″ 2 pieces
8-inch zipper
Fusible interfacing
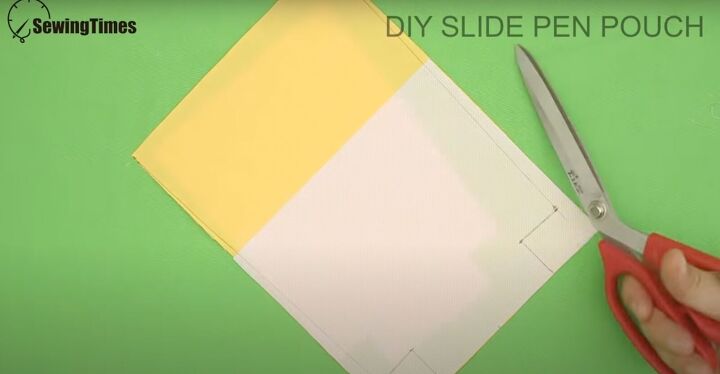
Cut all the fabric pieces. Iron the fusible interfacing to the fabric.
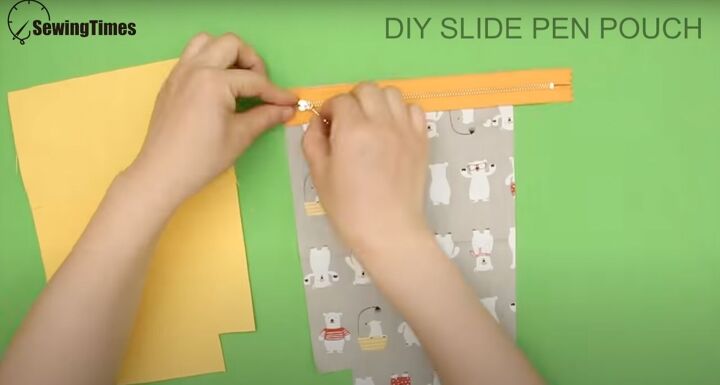
Clip the zipper to the top of the fabric. Have the fabric right side facing up and the other fabric with the fusible interfacing up.
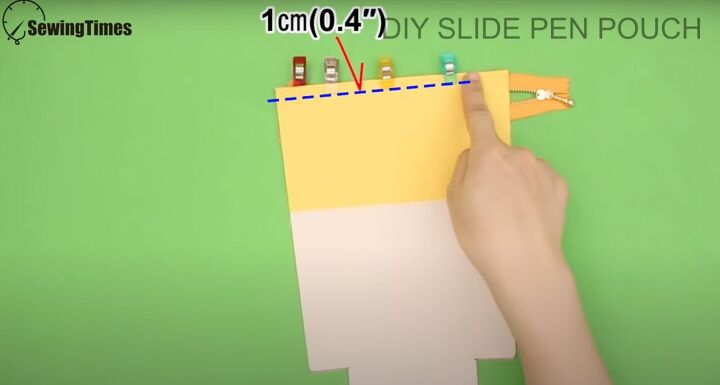
Sew ⅛ inch from the top.
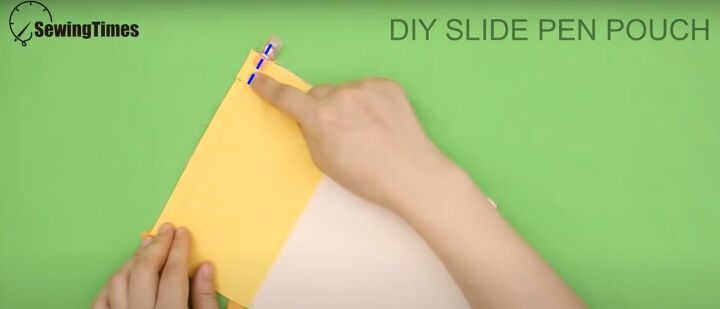
Open the fabric. Fold in the zip tape in and sew the rest of the seam.
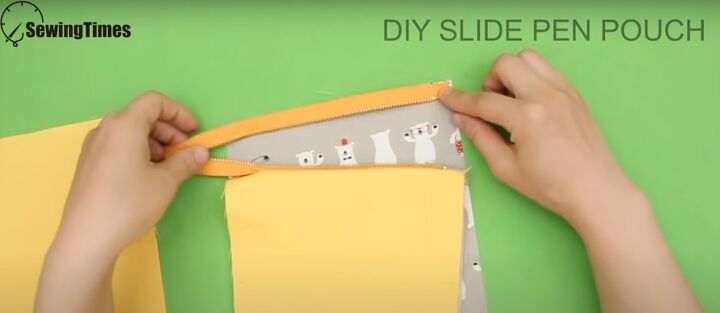
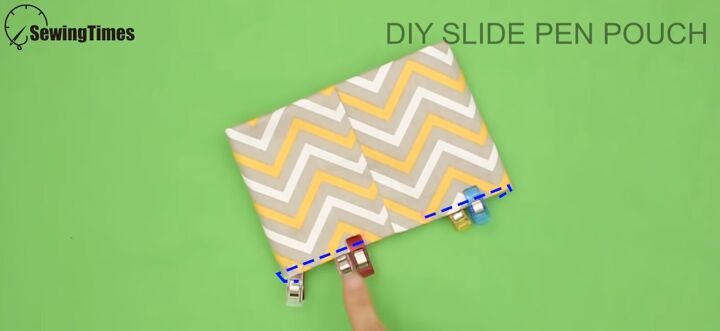
Flip the fabric and close the zipper. Lay the other 2 pieces of fabric on top, sandwiching the zipper between them. Sew in the same way.
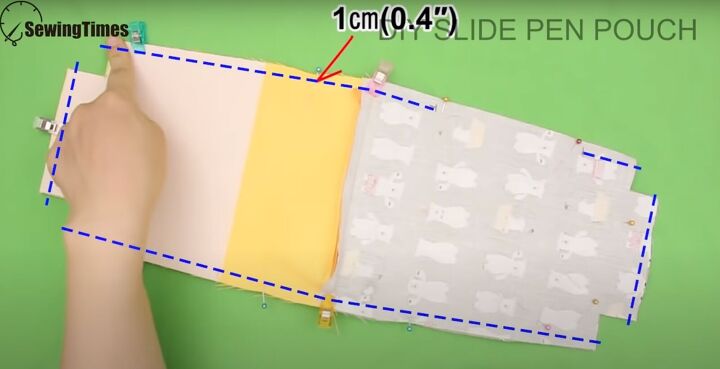
Open the sides. Match the pieces with the fusible interfacing to one side and the plain fabric to the other. Sew ¼ inch around, leaving a 2-inch space unsewn. Keep the corners unsewn.
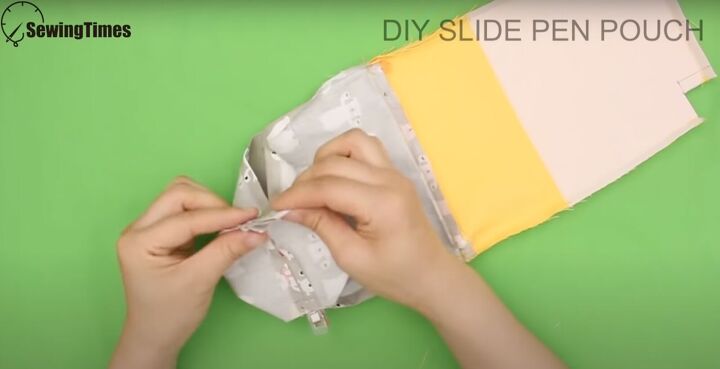
Pinch the unsewn corners, clip them, then sew them down.
Flip the pouch inside out and blind stitch the opening closed. Tuck in the lining. Topstitch all around the zipper.
Iron the fusible interfacing to the larger piece of fabric in the center. Fold it in half right sides together. Sew the open edge with a ¼-inch seam allowance to create a sleeve.
Iron the sleeve so the seam is flat and open in the center. Pinch in the center to fold it so the fabric is right facing. Clip the edges and sew right at the edge. Add 2 small tabs at the seams.
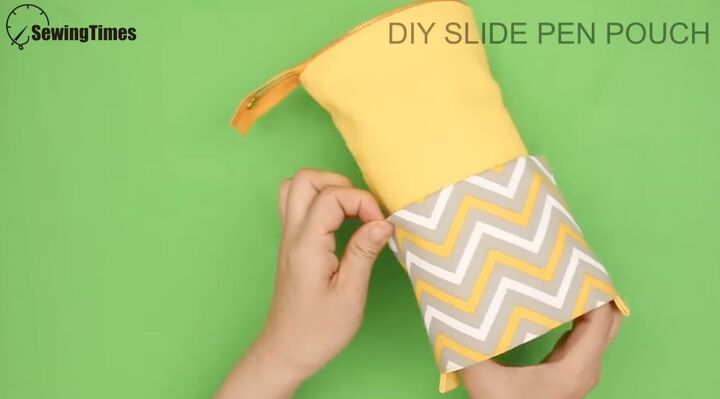
Insert the pouch into the sleeve and have the sleeve right at the top.
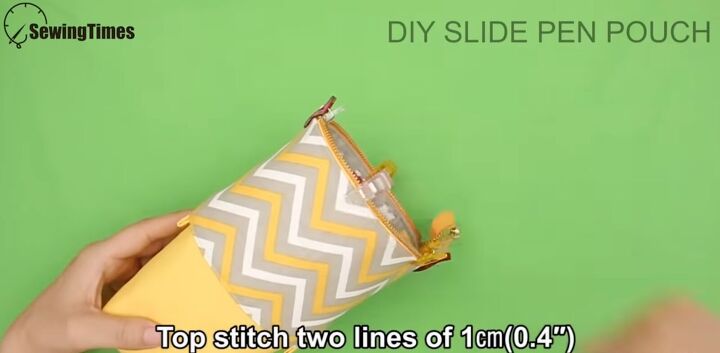
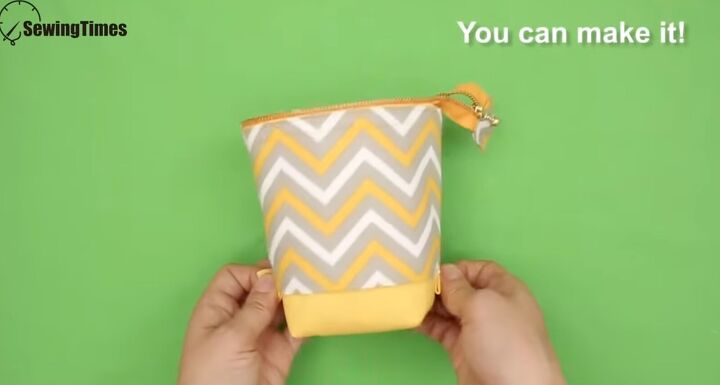
Double topstitch at ¼ inch at the very top of the pouch. Use the tabs to pull down the bag.
2. Origami triangle coin purse
- Outer fabric 1 piece 10⅜″ × 4¼″
- Lining 1 piece 10⅜″ × 4¼″
- Fusible interfacing
- Snaps
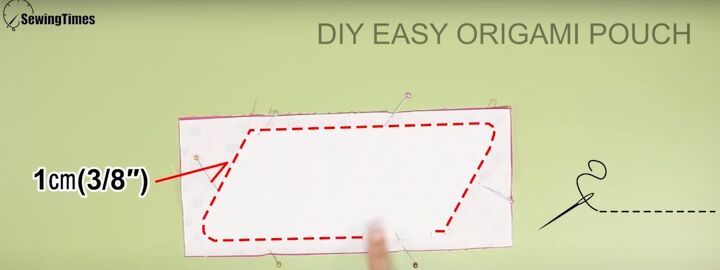
Iron the fusible interfacing to the fabric. Place the fabrics right sides together.
Follow the pattern above, measuring 2" in the top left and bottom right corners to create the rhomboid shape. Round the corners.
Sew the pattern leaving a space. Cut out the fabric.
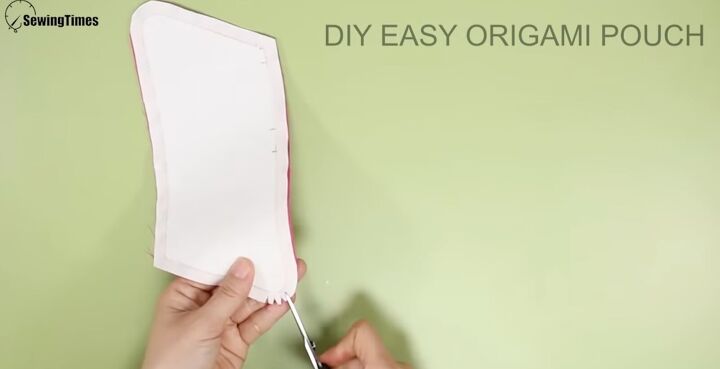
Snip the rounded edges so they lay flat. Flip it inside out. Iron.
Stitch the very edge.
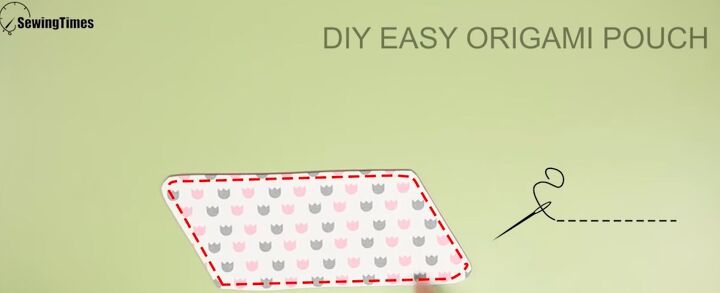
Add snaps at either end. Fold the fabric so one edge touches the other. Clip in place. Then fold the left edge in.
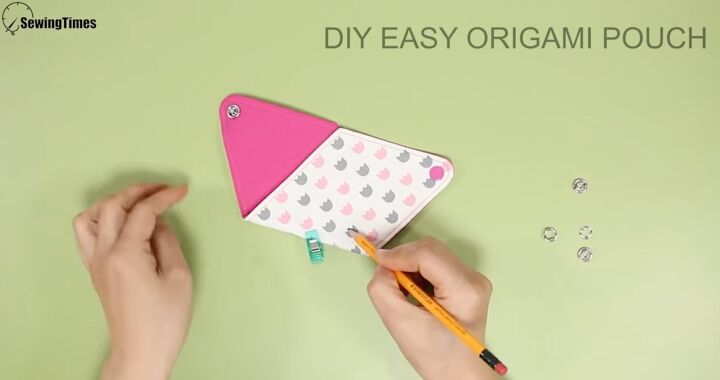
Mark the spot for the other half of the snap. Then fold the other way to mark the second snap closure.
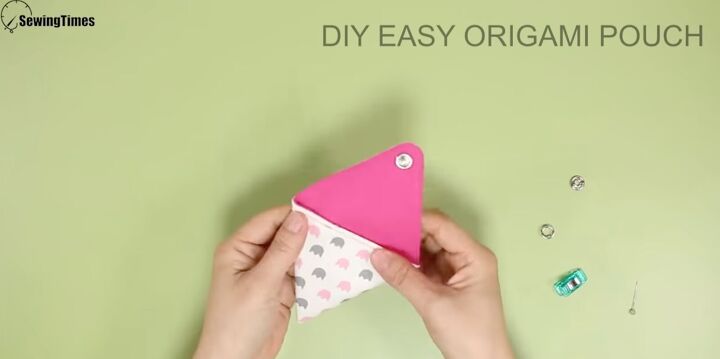
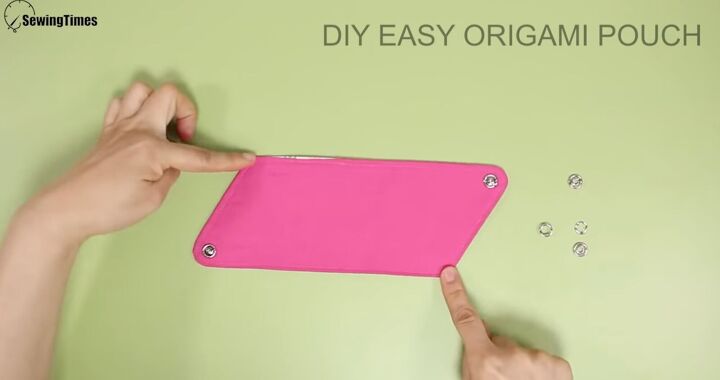
You’ll end up with 2 triangles and 2 cute ways to hold small things!
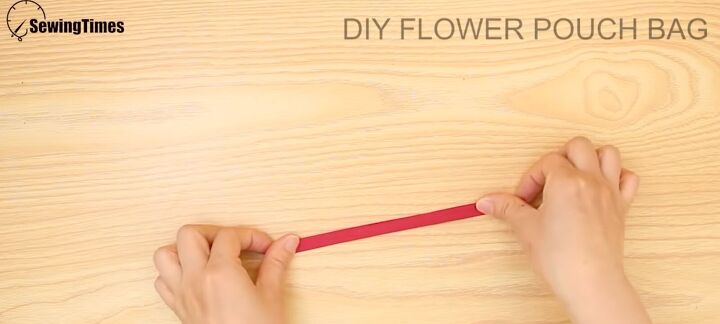
3. Flower pouch bag
- Flower pouch pattern
- Outer layer 2 pieces 7½″ × 11″
- Lining 2 pieces 7½″ × 11″ and 1 piece 1½″ × 6″
- Fusible interfacing
- Cotton string
- Safety pin
Trace the pattern onto the lining and exterior fabric. Iron the fusible interfacing to the fabric.
Fold the small piece of lining into thirds and then in half. Clip. Sew lengthwise on both sides.
Sew to the exterior fabric to make a loop one-quarter way down from the top.

Lay the fabric right sides together. Clip the bottom to sew a flat bottom. Sew with a ¼-inch seam allowance. Flip inside out. Trim the fabric as per the pattern.

Cut the lining fabric to match the pattern. Lay the two pieces together and sew, leaving 2 inches unsewn. Sew the lining bottom to create a flat bottom.
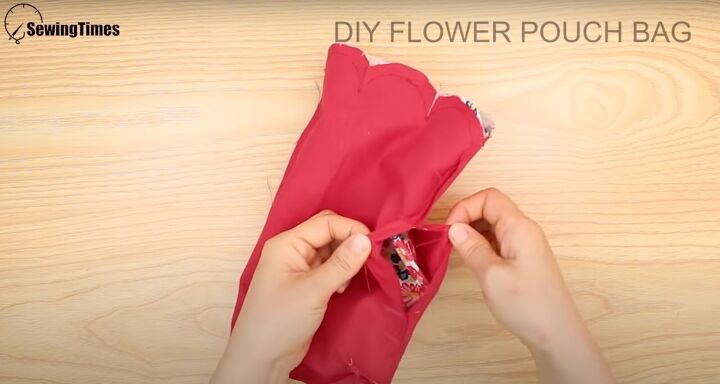
Insert the exterior fabric into the lining so right sides are together. Pin the top. Sew all around. Use the unsewn opening to flip the bag inside out.
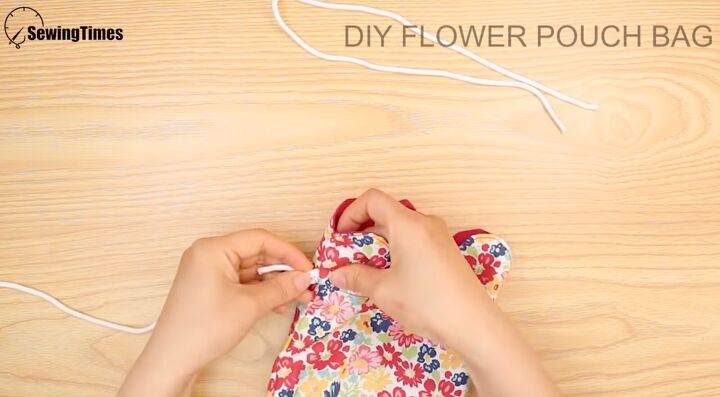
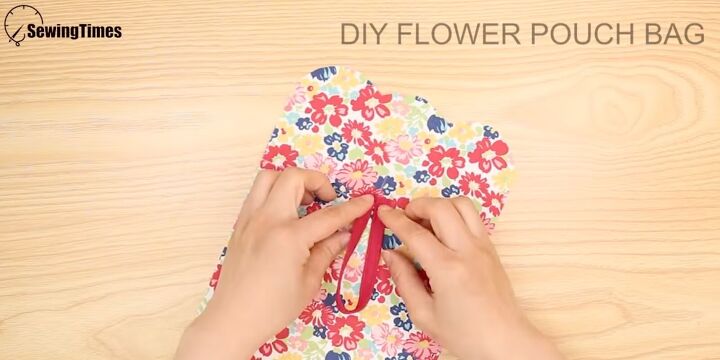
Insert the cotton string using a safety pin.
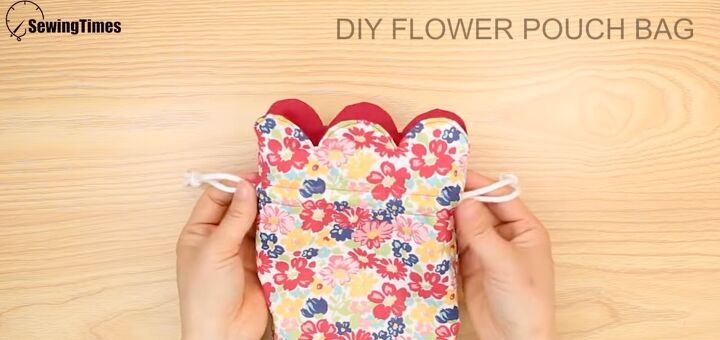
Use 2 strings and knot the ends once they’re fed through. Pull to create a beautiful flower.
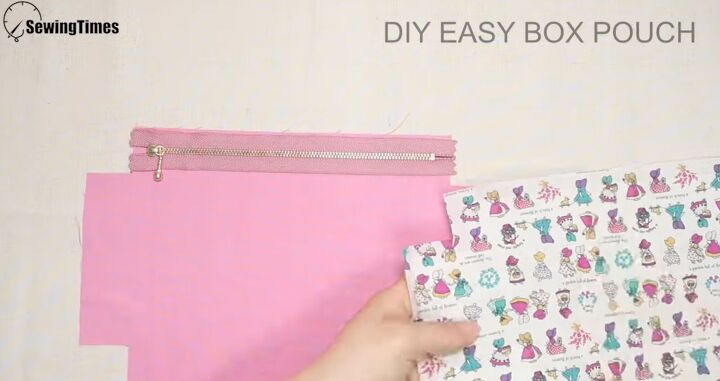
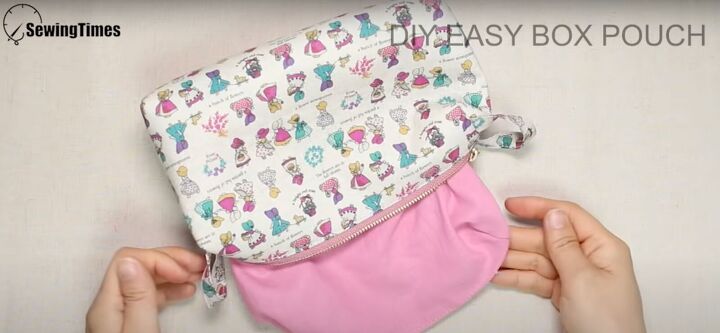
4. Box pouch
Short handle
Outer layer
- 2 pieces 11½″ × 7⅜″
- 2 pieces 5″ × 2″
Lining
- 2 pieces 11½″ × 7⅜″
8-inch zipper
Fusible interfacing
Long handle
Outer layer
- 2 pieces 8½″ × 1⅞″
- 2 pieces 11½″ × 6″
- 2 pieces 8″ × 3¼″
Lining
- 2 pieces 11½″ × 7⅜″
8-inch zipper
Fusible interfacing
Cut the fabric pieces and iron the fusible interfacing.
Lay an exterior fabric and lining with the zipper on top. Sew them together. Then, lay the sewn zipper piece on top of the other lining. Sandwich the exterior fabric with the fusible interface.
Sew them together with a ¼-inch seam allowance.
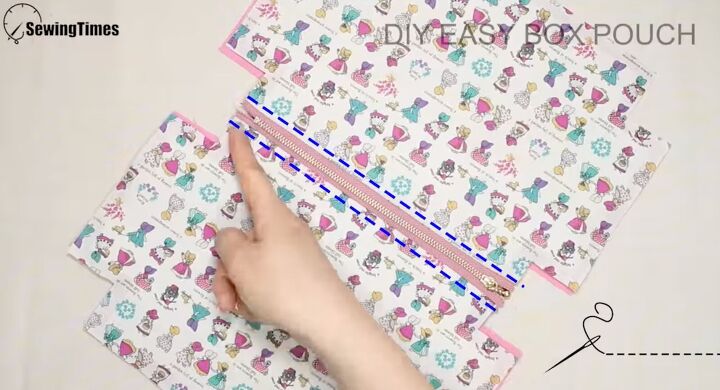
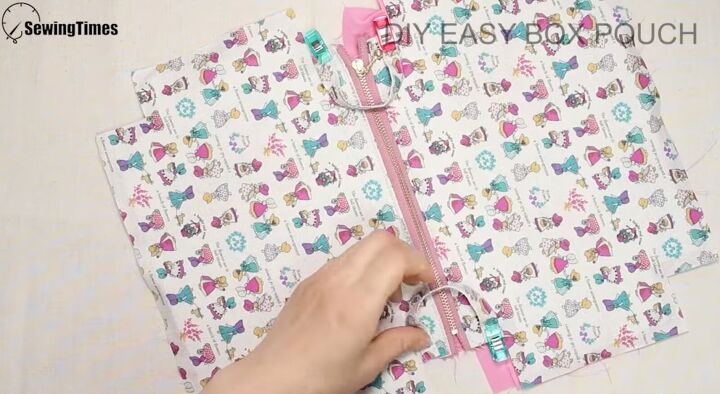
Flip open and place the lining together and the exterior fabrics together. Topstitch the zipper.
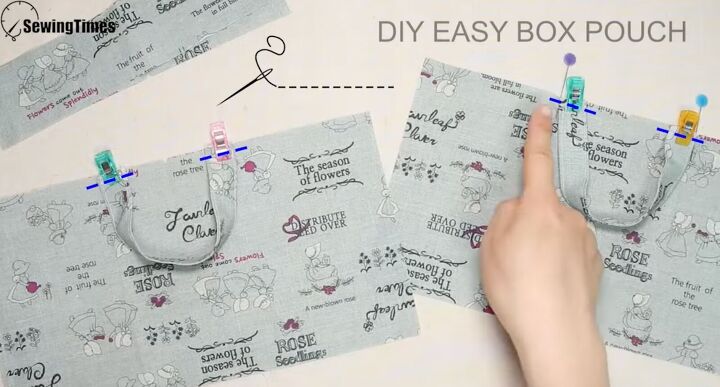
If making the short handles, use the shorter exterior fabric. Fold into thirds and then in half. Iron. Sew both edges lengthwise.
Clip near the zipper on one side. Then, fold the loop and clip on the other side. Roll up the lining and sew them to the tops of the exterior fabric.
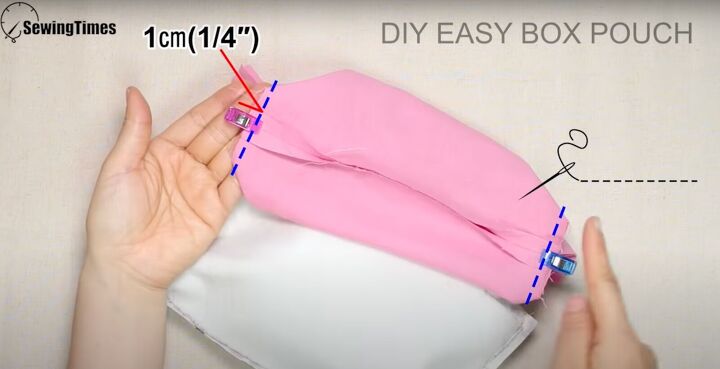
If making the longer handles, fold the handle exterior fabric into thirds and then in half. Sew the edges lengthwise as close to the edge as possible. Clip the straps onto the exterior fabric and sew.
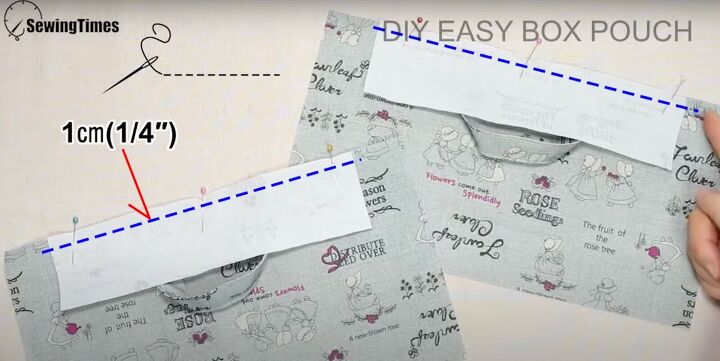
Add an additional piece of fabric at the very top.
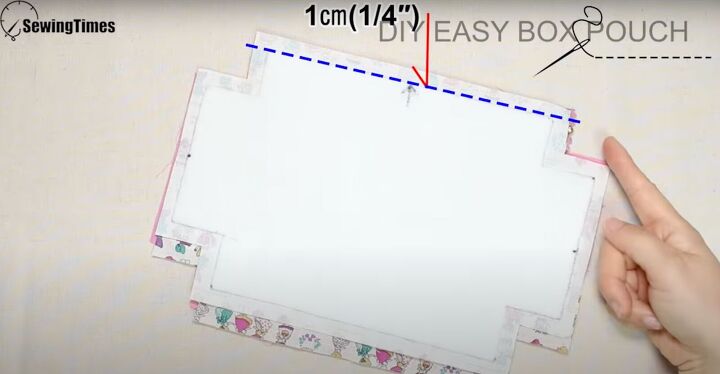
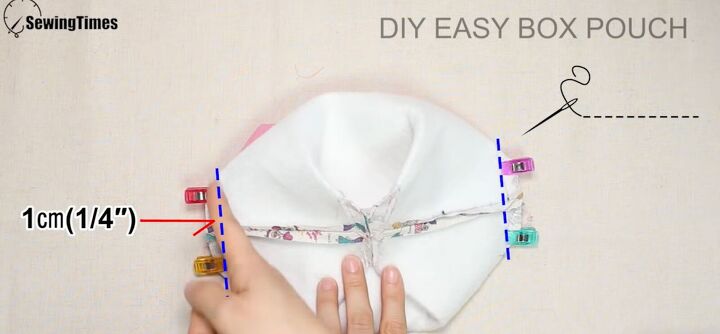
Place the lining to one side and the exterior fabric to the other. Sew all around with a ¼-inch seam allowance, leaving a 2-inch space in the lining and the corners unsewn.
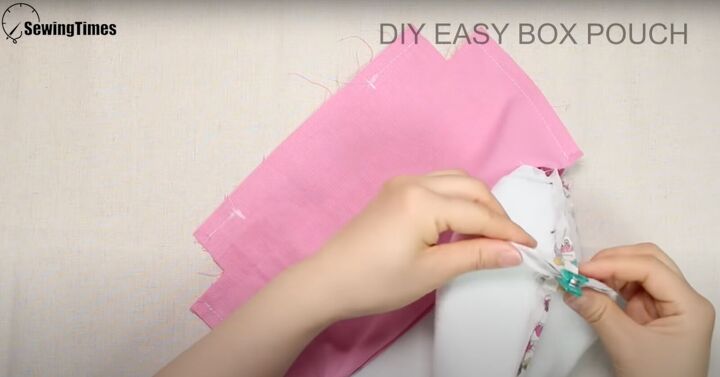
Once the bag is sewn, pinch the unsewn corners in both the exterior and lining fabric.
Sew them in the other direction with a ¼-inch seam allowance.
Flip the bag inside out. Blind stitch the lining closed and tuck into the bag.
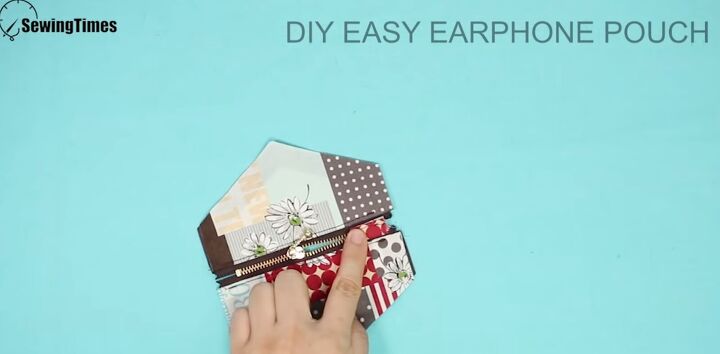
5. Earphone pouch
Outer layer
- 1 piece 5¼″ × 6″
- 2 pieces 5¼″ × 3¼″
- 1 piece 1½″ × 2″
Lining
- 1 piece 5¼″ × 6″
- 2 pieces 5¼″ × 3¼″
4-inch zipper
Fusible interfacing
Cut the fabrics and iron the fusible interfacing.
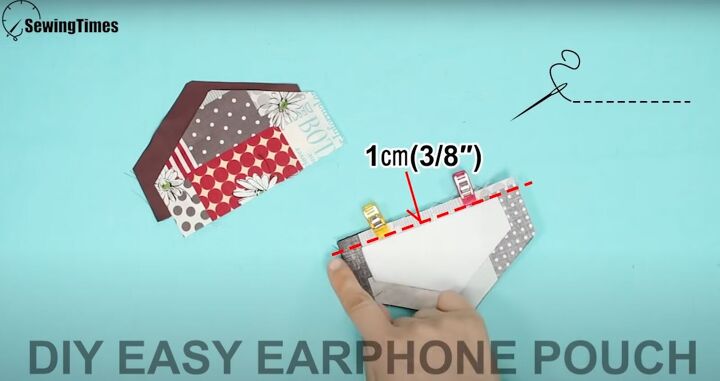
Lay the zipper on the lining with the exterior fabric on top, right sides together. Sew at ⅜ inch.
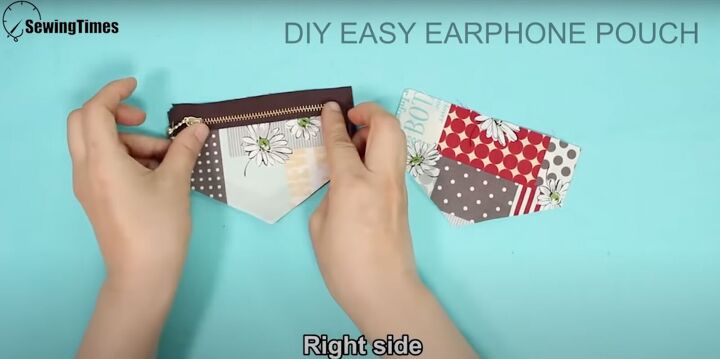
Flip so the zipper is on top. Lay the other lining flat and the zipper piece right side up. Lay the other exterior piece on top so right sides are together.
Sew at ⅜ inch. Topstitch the zipper.
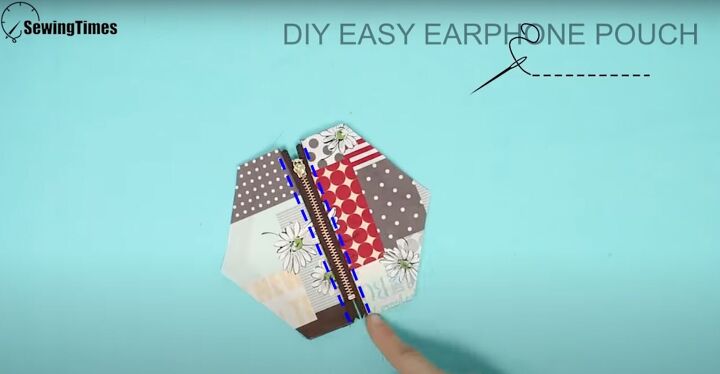
Fold the small exterior piece into thirds and then in half. Sew lengthwise on one side. Fold the tab in half. Attach the open end of the loop to the zip tape by sewing it in place.

Place the larger lining and exterior fabric wrong sides together. Lay the zipper piece on top.
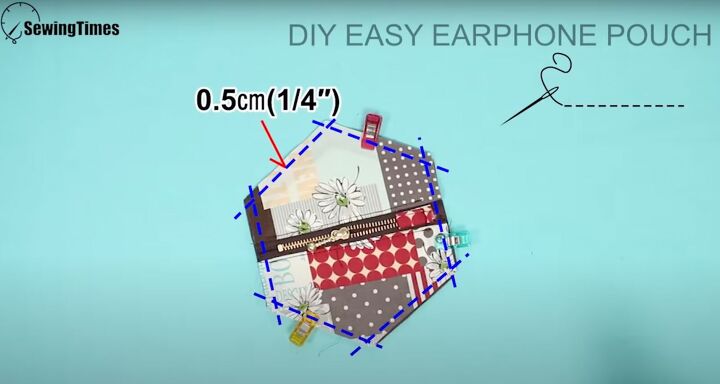
Sew all around at ¼ inch. Snip off the corners. Flip the bag inside out. Sew all around the lining at ⅜ inch. Then flip it right side out.
Sew the perfect gift
These 5 easy-sew projects are perfect for gifting! Let me know in the comments which ones you tried!
The author may collect a small share of sales from the links on this page.


Comments
Join the conversation