Create Custom Shoes From Old Sneakers and Flip-Flops

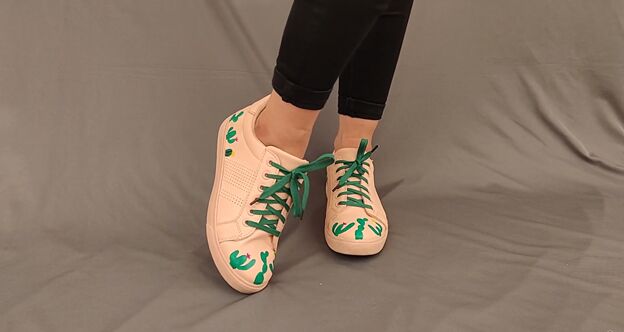
This DIY custom shoe tutorial is going to help you turn your tired old sneakers and your plain flip-flops into new shoes that show off your distinct style! For my project, I used a pair of sneakers I’ve worn for years and added a cactus design to spruce them up. Then I took a pair of plain flip-flops and used some leftover colorful fabric to turn them into a new pretty pair of shoes.
Tools and materials:
- Footwear: sneakers and flip-flops
- Acrylic paint in colors of your choice
- Paintbrushes
- Leftover fabric
- Pencil
- Scissors
- Masking tape

Upstyle your plain sneakers
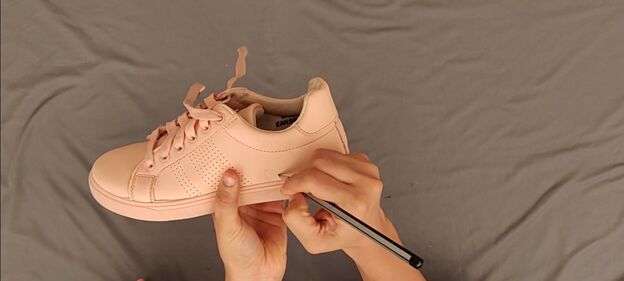
Step 1: Create your pattern on your sneakers
Although I chose a cactus pattern, you can let your imagine loose and pick any design you wish. Once you’ve decided on how you’d like your custom shoes to look, you are ready to start drawing your pattern or design onto your sneakers with a pencil. If there is already a pattern embedded in your shoes, then avoid adding more detail to that section and draw on the smooth unadorned areas of your shoes.
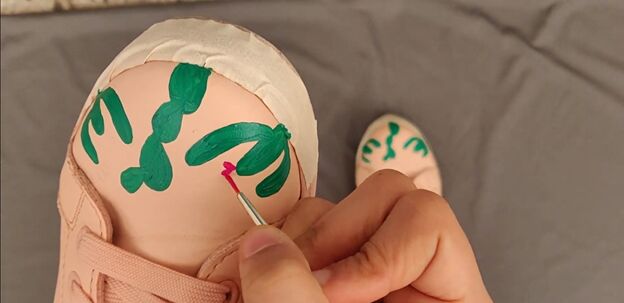
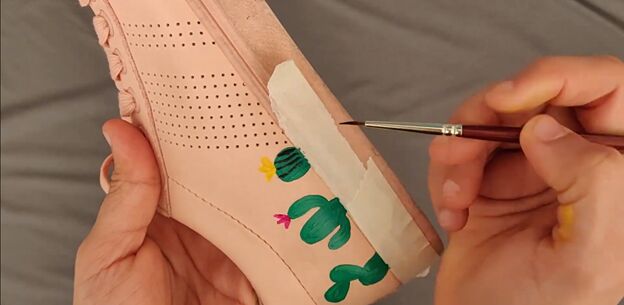
Step 2: Add color to your drawing
Tuck your sneaker shoelaces inside the shoes to keep them out of the way. Put paper masking tape around the soles of your shoes to keep the paint off them. Now you are ready to get stylish! Use your acrylic paint to carefully fill in your drawn pattern with the colors you have chosen. Tip: use bright colors that differ from the color of the shoes to make sure it shows up well. Leave your newly painted shoes to dry for 24 hours and then spray with some waterproofing spray.
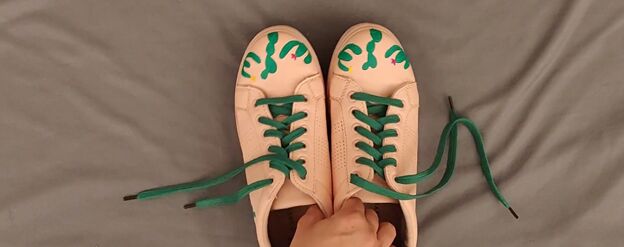
Step 3: Add more color with new shoelaces
If you want even more color on your painted shoes, swap out the shoelaces for new ones that match the painted pattern.

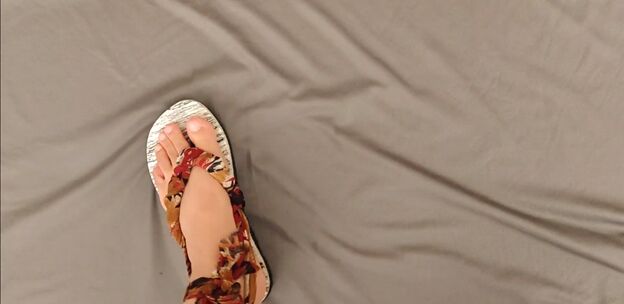
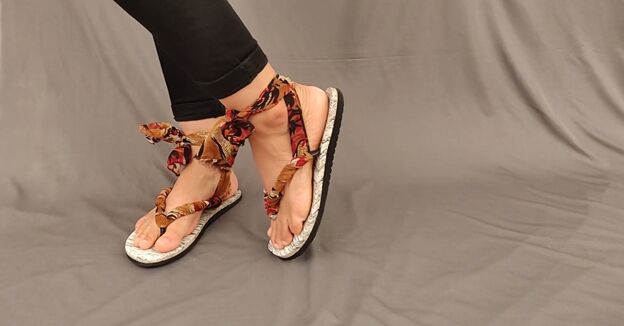
Create custom shoes from flip-flops
Prepare the fabric
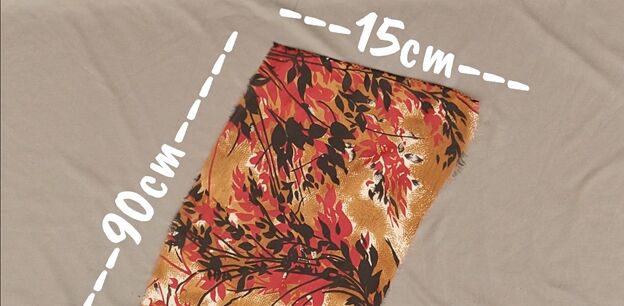
Cut two pieces of fabric measuring 90 cm. (35.5 inches) x 15 cm. (6 inches) each. You can use longer pieces of fabric if you wish, depending on what kind of strap you would like your new custom shoes to have (more about this later).

Step 2: Roll the fabric
Lay the fabric on your worktable and fold both sides the middle lengthwise, then roll it up lengthwise.
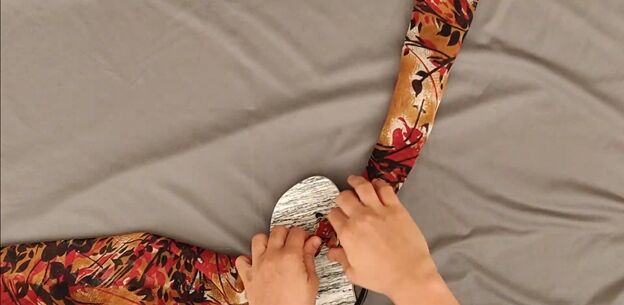
Step 3: Attach the fabric
Put the center point of your fabric length the middle of the flip flop, at the toe piece, and begin winding each side of the fabric around the top straps of the flip flop, covering the whole strap.
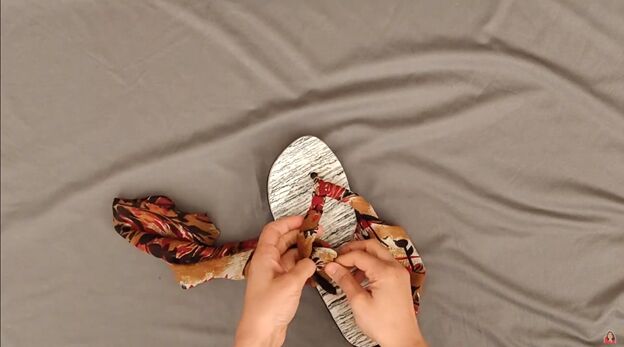
Step 4: Create the strap
Even out the wrapped fabric around the toe strap by just fluffing it out a bit. Now the top of your custom shoe is done, and you can decide what kind of ankle strap to make. If you have a short length of excess fabric after wrapping the top straps, use it to create an ankle strap. If you prefer an espadrille-style tie, then use a longer piece of fabric that will give you enough length to tie it up your leg.
Let me know which of these DIY custom shoe tutorials you decided to try and tag me on Instagram to share your custom shoe creation!
The author may collect a small share of sales from the links on this page.


Comments
Join the conversation
I love flip flops, but find the middle bit so uncomfortable, I am hoping that your idea might help with that. Great idea :)
Omg! Who knew u could do this to sneakers n flip flops. I Love it, n I'm going to do this these to mine!!!! N this is going to save u a lot of money designing ur own style!!!!