DIY Shoes- Transform Your Shoes Into Something Unique!

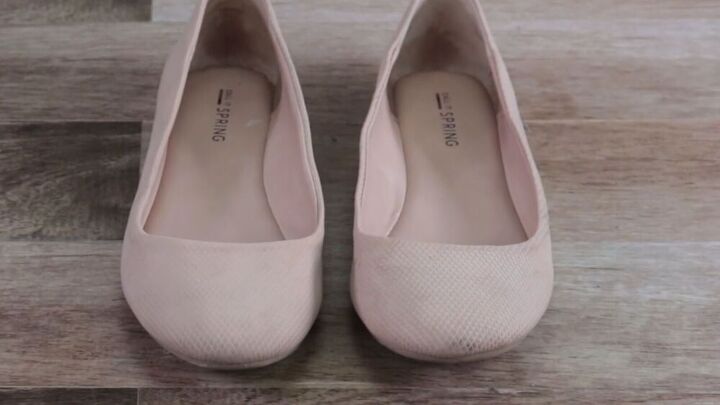
I had a pair of old, discolored ballet flats. They still fit great, and I wanted to spruce them up a little. I found the perfect solution, and I want to share my secret to amazing DIY shoes with you. So, instead of tossing them out, you can give your DIY painted shoes a new flavor and style! The tutorial is super easy; you may need to go out and grab some materials, but it's definitely worth it! Did I mention the process itself is super fun? It's like an art project! So, grab your paintbrush, and let's upcycle your shoes!
Tools and materials:
- Old flats
- Fabric acrylic paint
- Soft-bristled brush
- Mixed buttons/embellishments
- Lace ribbon
- E6000 glue
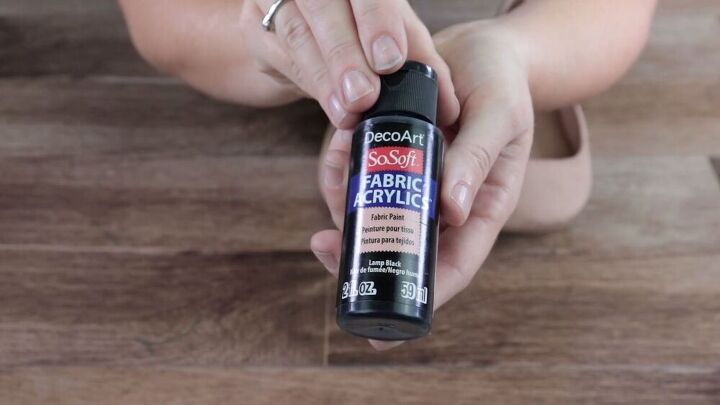
Choose and prep your paint
Use some fabric acrylic paint. I like the Decoart brand, but I am sure any good, reputable brand will do. Decoart is super soft to work with; it's permanent and requires no heat setting. This paint brand adheres to all textiles, so it won't be leaving your shoes super stiff. I chose black for these DIY shoes, but any color of choice will do since this is your project.
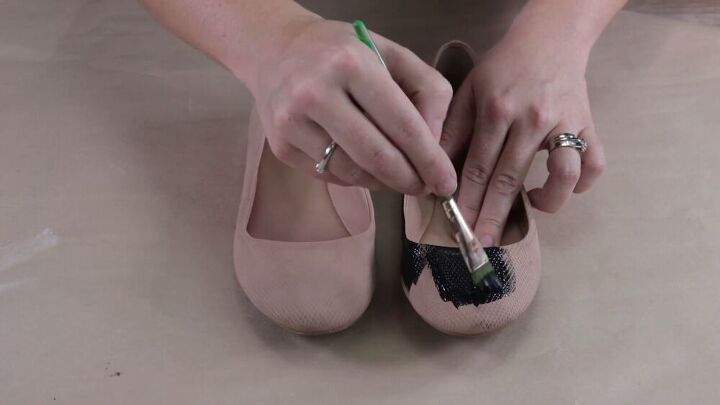
Paint your shoes
Using a soft-bristled brush, go ahead and get painting! Using soft, quick strokes, cover the shoe's whole surface and let it dry for at least 12 hours.
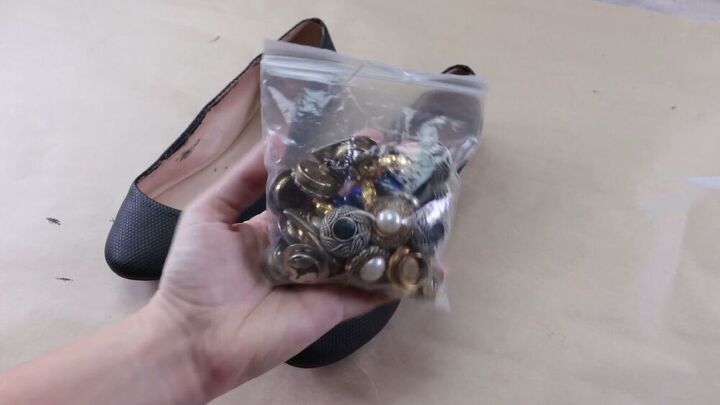
Embellish away!
So, you can opt for a basic kind of shoe; that means only paint will do. Or, you can take it up a notch and have some fun!. I got a bag of mixed buttons and embellishments from my local thrift store.
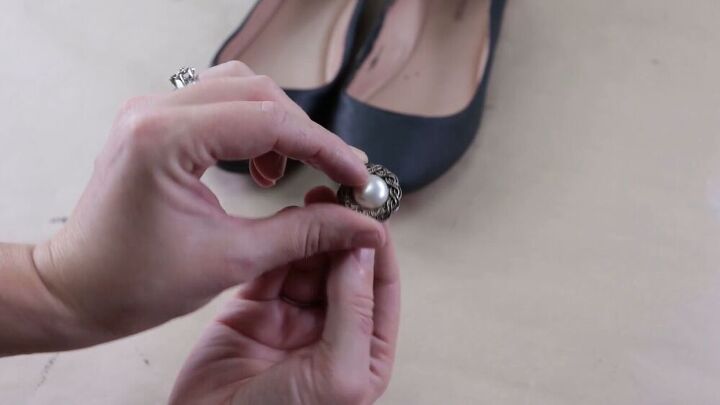
Choose two buttons/clasps that have the same design.
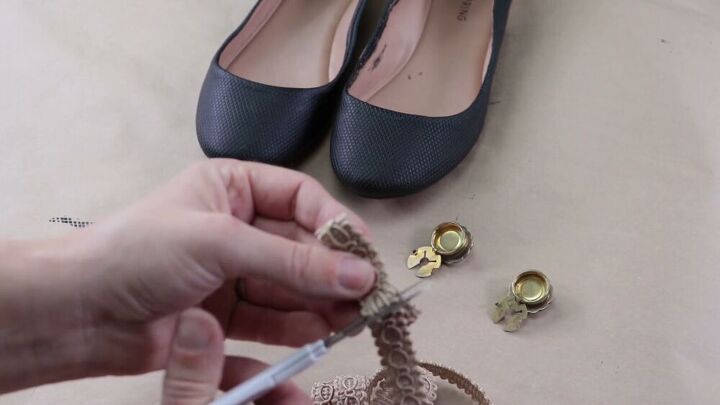
Next, take a lace embellished ribbon and create a bow. Fold over the end of the ribbon about half an inch and do the same to the other end. Cut the end when your bow is assembled.
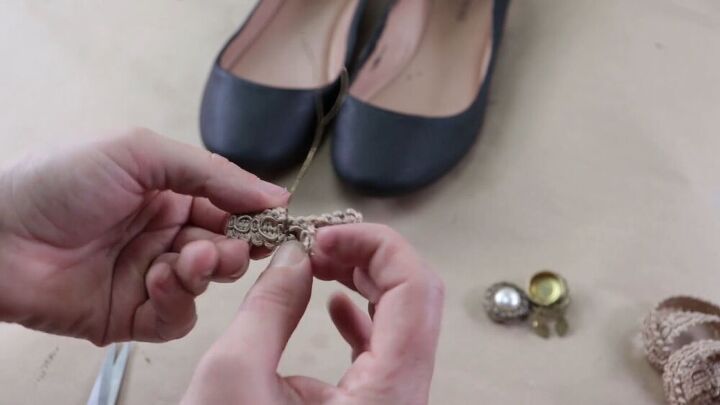
Take some floral wire; here I am using gold, so it matches the whole vibe of my look. Wrap it around the ribbon- make sure it's a tight wrap and that you are pinching in the middle as you wrap the wire. The ribbon should be stiff, with the wire holding the shape upright.
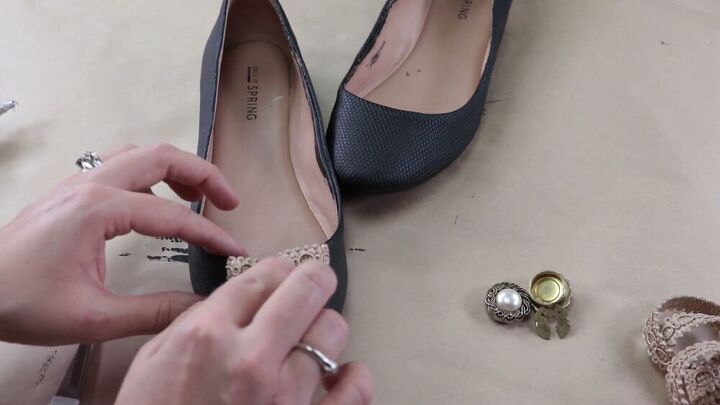
Snip off the ends of the wire and attach the ribbon to the shoe. Use a really good glue, and here I am using E6000 glue. Apply a little to the top front section of the shoe and press the ribbon down on the blob of glue.
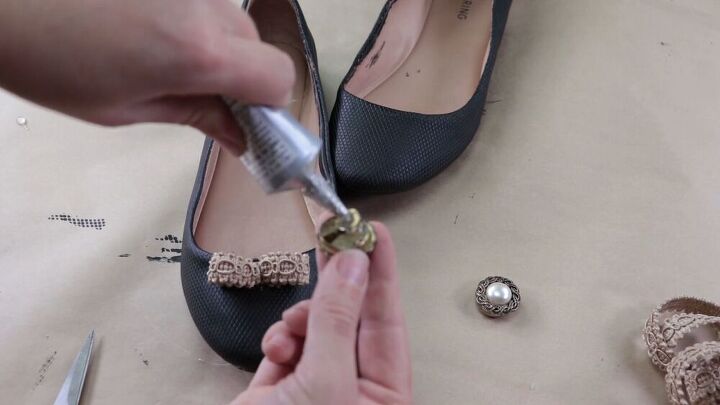
Add a blob of glue on the back of your embellishment and place it on the ribbon center. Repeat the same steps for the other shoe. I suggest waiting around 6-12 hours before wearing your shoes so that the glue sets in and is completely dry.
TIP-
When gluing down the ribbon and embellishment, press super hard and hold it in place for a couple of seconds.
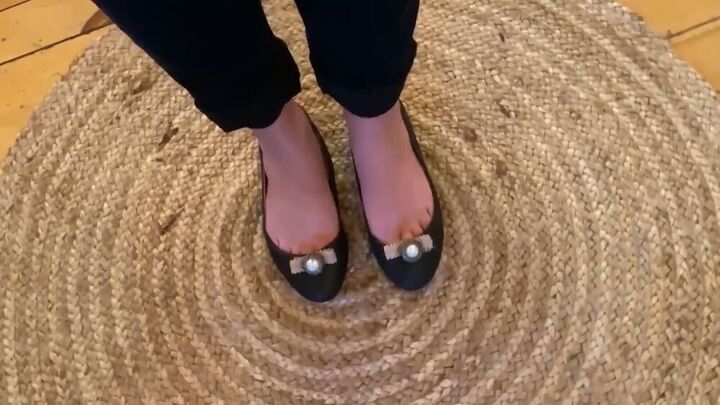
Here you go, new, embellished, and lovely flats. How lovely do these look? It feels so good that I can turn a pair of shoes destined for the trash into a functional, stylish shoe! I love how sleek this looks! I encourage you to get creative here, use any paint color and embellishments of your choice, this is your project, so own it!
The author may collect a small share of sales from the links on this page.


Comments
Join the conversation
I'm interested in trying this project, but I wonder if the paint comes off onto one's foot?
You can use @ special shoe colouring liquid. Melatonin I think it’s called. You put it on like liquid shoe polish. Let it dry. It is not expensive. I live in Australia so not Sure if you will have it overseas. You can buy it in shoe repair shops and some retail shops over here. My Mum and I used it when ever we want’ed to change the colour of our shoes. The thing I liked about it was it came with @ foam applicator plus it was not hard to put on