Make: Styled Up Slip On Sneakers {Full DIY Tutorial}

Customise your sneakers with heat transfer vinyl in any design you like
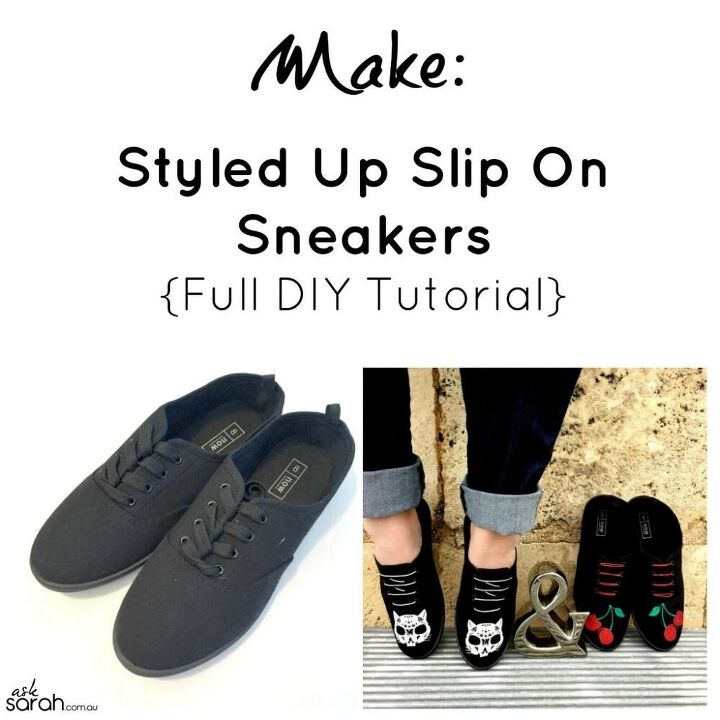
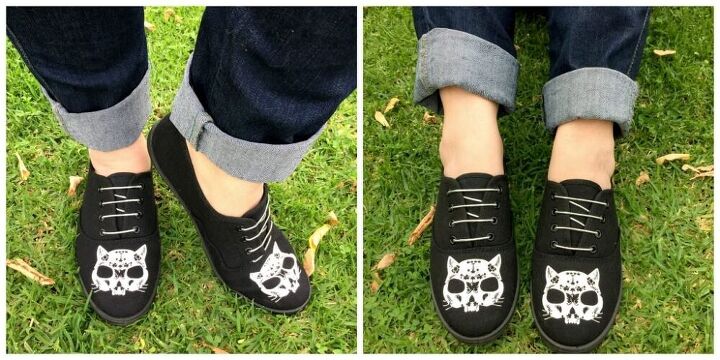
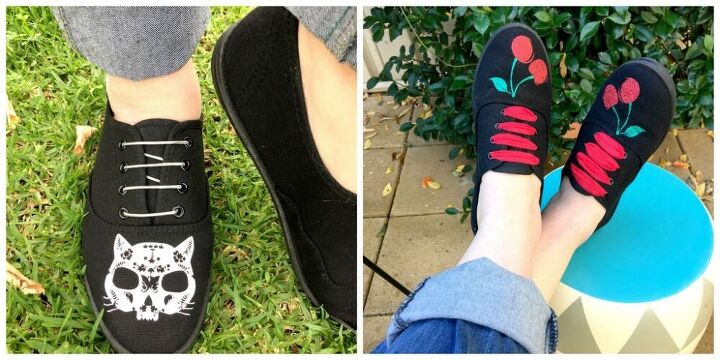
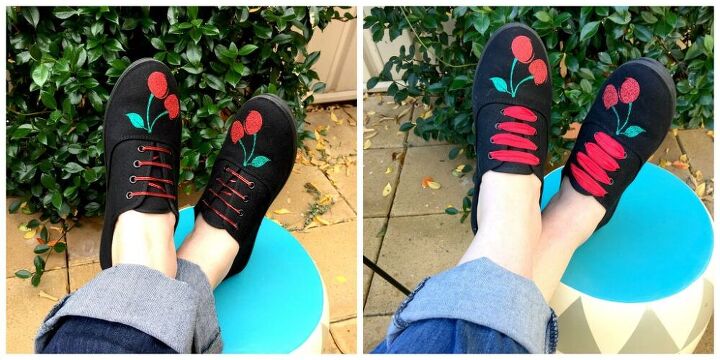
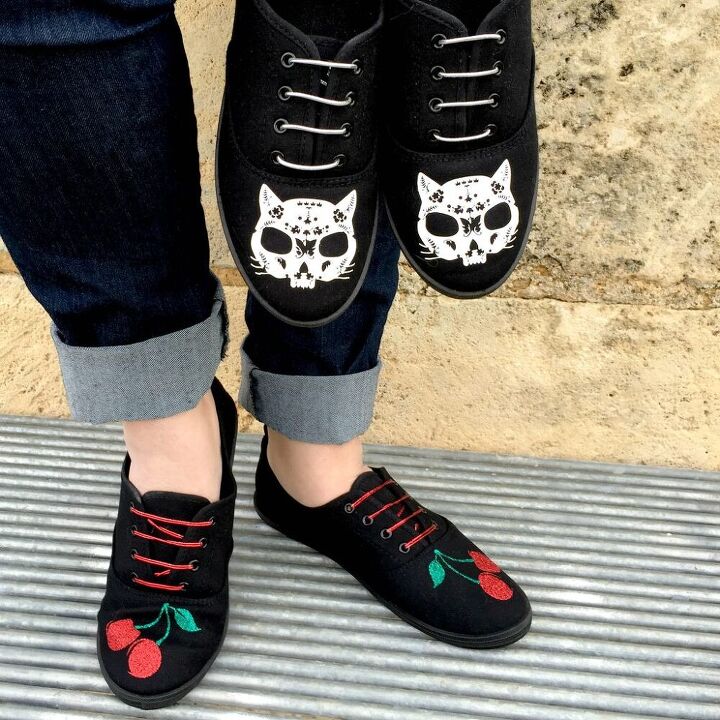
Sneakers are super functional. They are comfy and all terrain and pretty good in most situations. We all wore Vans to death in high school but we were chatting around the craft table and no one has really worn them since. Mostly because they are so utilitarian looking – but they don’t have to be! You can personalize them with pretty much any decal you can design, cut and fit on the shoe. We also swapped the laces for elastic to turn them into slip ons because no one has time for laces! These shoes were designed to slip on in (see what I did there?) to our wardrobe and go with the stuff that gets worn around here. Cherries are a good old fashioned staple, less fluffy than flowers, fruit is fru fru without the fru. And glitter is always awesome. The second pair takes up some of the popular themes we have around here. Cat, check. Sugar skull, check. Awesome, check. Now, we understand about cultural appropriation. We on the Ask team are fully into the rituals of familial afterlife care and the exploration of life and death that these sugar skulls represent. We enjoy these symbols with sensitivity. But hey, we are getting sorta close to Halloween, so you might enjoy these are part of that cultural ritual.
We are a big fans of magic. Magic in a bottle (hey there Martha Stewart craft paints), Magic in a can (can anyone say Shellac?) but heat transfer vinyl (HTV) is magic. Completely amazing stuff! It comes as a thin vinyl with a clear plastic backing. You can use a cutting machine, such as a Silhouette or Cricut to cut out all sorts of designs. These machines make a ‘kiss cut’ where they cut through the vinyl but not the backing. Then you can remove the parts of the design you don’t need (called ‘weeding’). Flip the transfer into the fabric, so the backing is facing up, and iron the transfer on. Peel away the backing and your design is fixed! It will stay on through many washes to come, just wash on cold and line dry. But the best part is that the glitter transfer has the glitter embedded, so the glitter doesn’t shed. Because glitter that doesn’t shed is actual, real magic!
We used a Silhouette machine to cut our designs. If you don’t have a cutter, you could easily draw simple images on to HTV and cut them out with a craft knife. It won’t be the easiest but many crafters manage with this method. Just remember to mirror your images (especially letters) so they come out the right way! I can understand if this project really makes you want a cutting machine. We know all about that kind of yearning here. Buying (an old, second hand) cutter was such a great investment. Especially because the male collaborator on the Ask team is a rather tech oriented graphic designer. It’s not a girly scrapbook cutter, it’s a home CAD cutter. So, with the design and the tech, let’s do this!
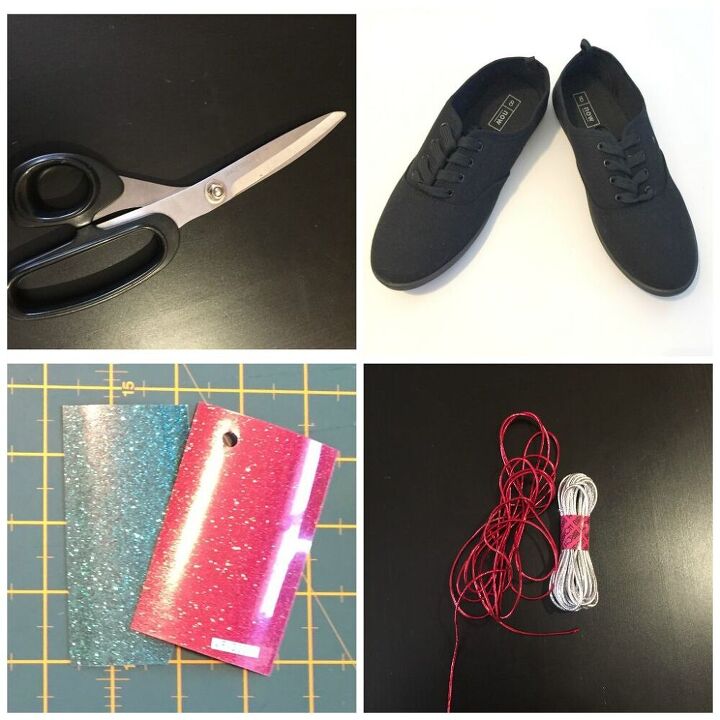
You’ll need: Canvas or fabric sneakersHeat transfer vinylOur cutting files (link below)Elastic Cord – about 2mIron, pressing cloth, scissors Gather Supplies You’ll find canvas sneakers pretty much anywhere you look (perhaps even in your cupboard) but Kmart & Target seem to have them year round in a variety of colours. We fancy elastic cord for laces but flat elastic will work too. Craft or fabric stores will have some basic colours but you’ll find a huge range online. There are several brands of HTV on the Australian market, both Silhouette & Cricut make their own, you can find both at various online craft stores. Most HTV comes in rolls & we prefer to buy in A4 sheets so we can have all the colours, so we bought ours from an online sign writing supply store based in NSW Australia (Picture Perfect Products).
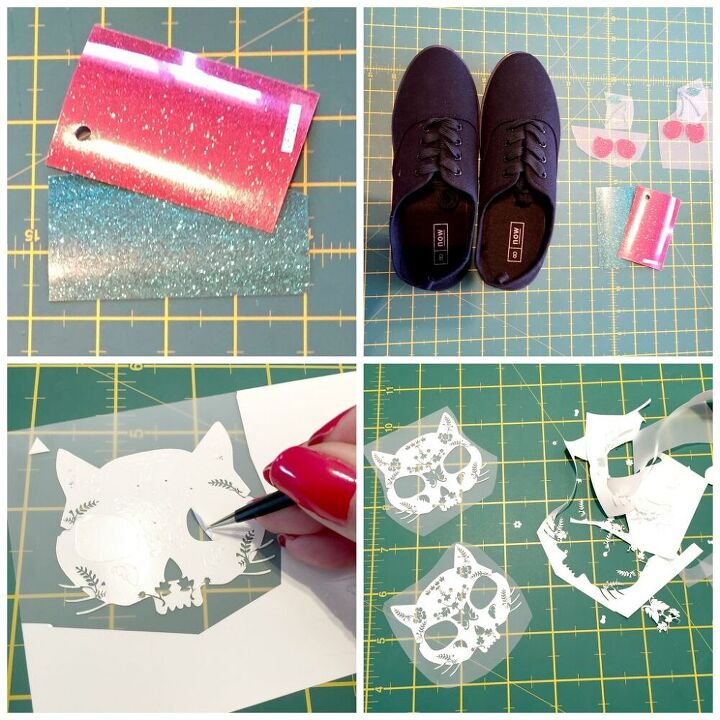
Design & Cut We ran with cherries and cat sugar skulls but you can unleash your inner designer and go with whatever takes your fancy. Just make sure to measure the area you have to work with and scale accordingly. Set up the file, insert the HTV and cut the images with your cutter of choice. Always do a test cut to check your blade depth! Each piece of HTV is different. Weed out the excess pieces of transfer very carefully. The cat sugar skull has lots of finicky details, so take it slow and careful!

Heat & Bond Once your transfer is ready, turn the iron on to the heat setting your HTV requires. It’s best to remove the laces from the shoe. They are probably polyester or similar and you don’t want to melt them. Stuff the shoe with a sock or two to fill up the toe box. You want a nice firm surface, so that when you iron on the transfer the shoe won’t collapse down. Otherwise you’ll melt the rubber sole and that ain’t cool! Arrange the transfer to gauge placement. As the cherries were in two parts, I placed both parts on the shoe to get the right placement but only ironed one part at a time. Once you have the transfer where you want it, cover it with a pressing cloth (or a thin, clean tea towel) and iron it on to the shoe. Hold the iron, with steady pressure, for the time indicated for the brand of HTV you have (6 secs was perfect for ours). Be super careful not to melt any of the rubber sole! Before peeling the backing away, check that everything is correctly adhered. The curve of the toe box can be tricky, so press any bits that are lifting. Once the transfer is fully set, carefully remove the backing. Rinse and repeat for the other shoe…
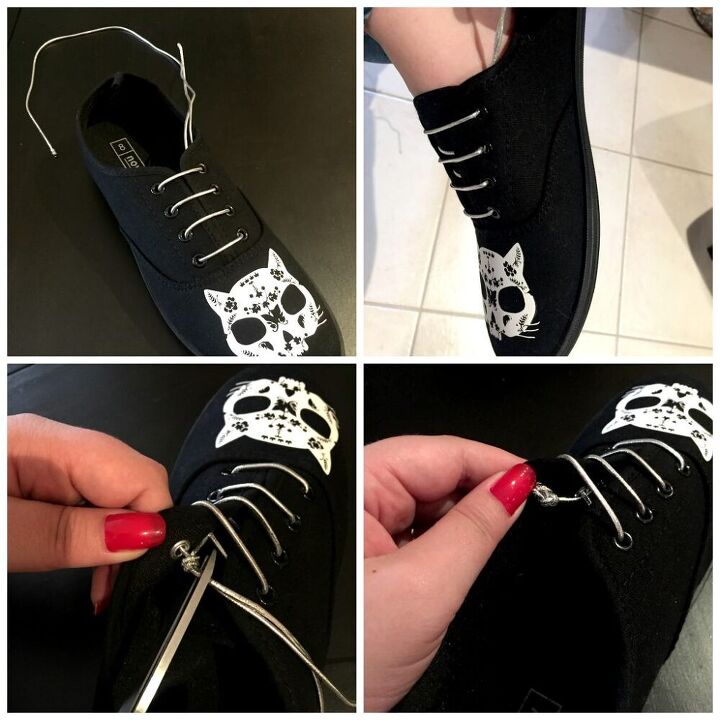
Elastic Fantastic You want the elastic to be nice and firm, so your shoes stay on your feet. 6mm round elastic seemed pretty common and was very available. Anything less will probably only last a little while. But hey, we are impatient and were hell bent on red metallic elastic. We found some online but wouldn’t wait (we ordered it for later anyway).So we doubled up some 3mm elastic that we found locally. It’s a short term fix but it will last a few months but it looks perfect. Flat, regular elastic is also fine but if you are going for the flat laced look, fold over elastic (FOE) would be perfect and it comes in a zillion colours & cutesy designs. Yes, we also tried red FOE on the cherry print sneakers too because we like lacing options.
Anyway, lace up those sneakers however you like but make sure that both the left and right lace (OMG, lace would make awesome laces. Elastic of not!) end up coming out at the same grommet. Both at the left or both at the right. Slip on your shoe, tug the elastic until the shoe is firm on your foot. Hold tight to both laces and remove the shoe. Tie a big juicy knot (big enough that it won’t slide out of the grommet) and check the fit again. Then confidently snip off the excess.
That is it! In a few a painless steps, you have completely transformed your sneakers with transfer and saved yourself preciously seconds that you would have spent tying your shoes. I know you are ignited with the sparkly possibilities that lay ahead. You’ve already looked online and squealed with delight when you realized these plain sneakers can be snapped up for less than the cost of pre-packaged sandwich. You are already thinking about the design possibilities. A favourite sports team, a friend’s wedding shower, an awesome cosplay. You know what to do and how to do it. Go on my friend, go boldly and be your own sneaker stylist. If you make your own, please share pics…. Want more shoe DIYS? Whipped Cream With A Cherry On Top Ballet Flats (Guest post on The Dressed Aesthetic) Ribbon Ballet Flats & Ankle Strap Ballet Flats Chilli Pepper Embellished Espadrilles This tutorial was originally published in Indie Love Magazine.
The author may collect a small share of sales from the links on this page.


Comments
Join the conversation
Love this project! Thanks for sharing!