Painting Old Oxford Heels for a Brand New Look

Do you ever see a pair of unique shoes you love, but the price just keeps them on your Pinterest board instead of your closet? If you are handy with a paintbrush, you can create your own dream shoes!
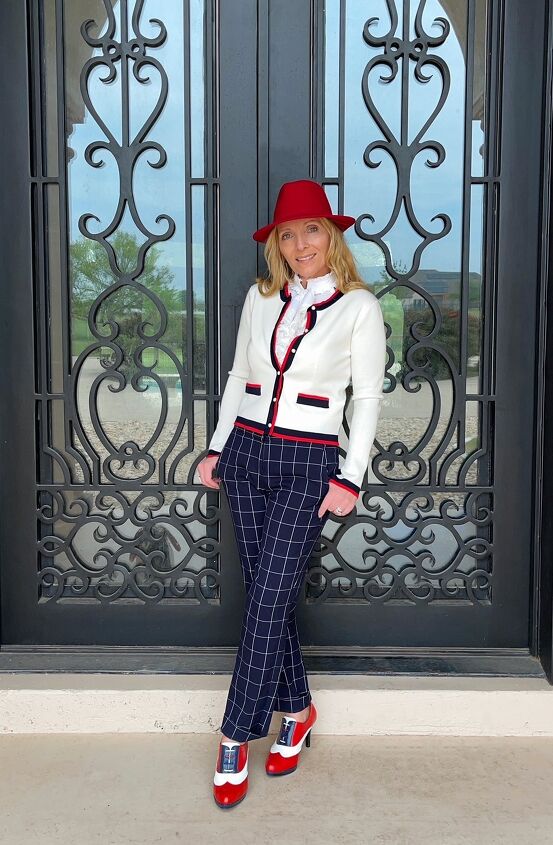
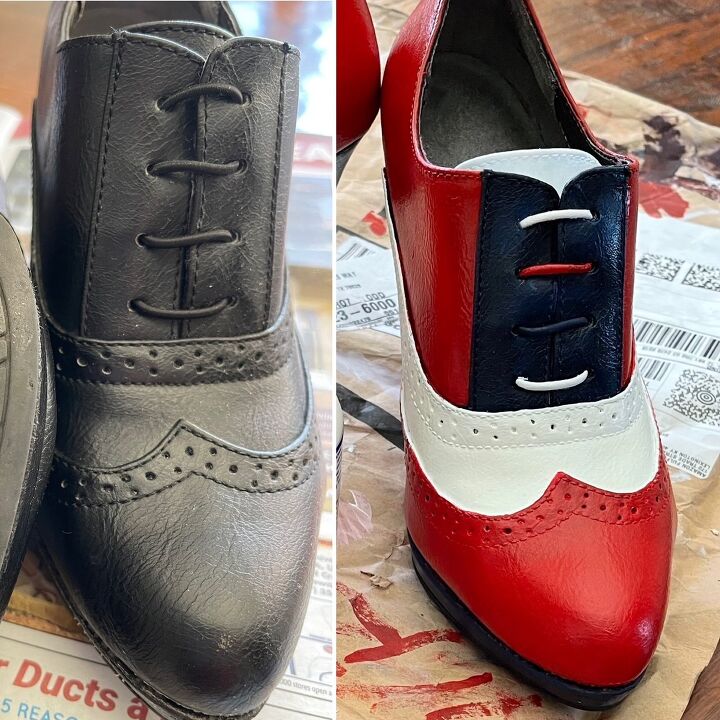
I like my shoes to be unique and to match my outfits. I wear a lot of navy and red together and have looked for the longest time for red, navy, and white oxford heels with no luck. I decided to paint them myself so I could get the right shades that I needed.
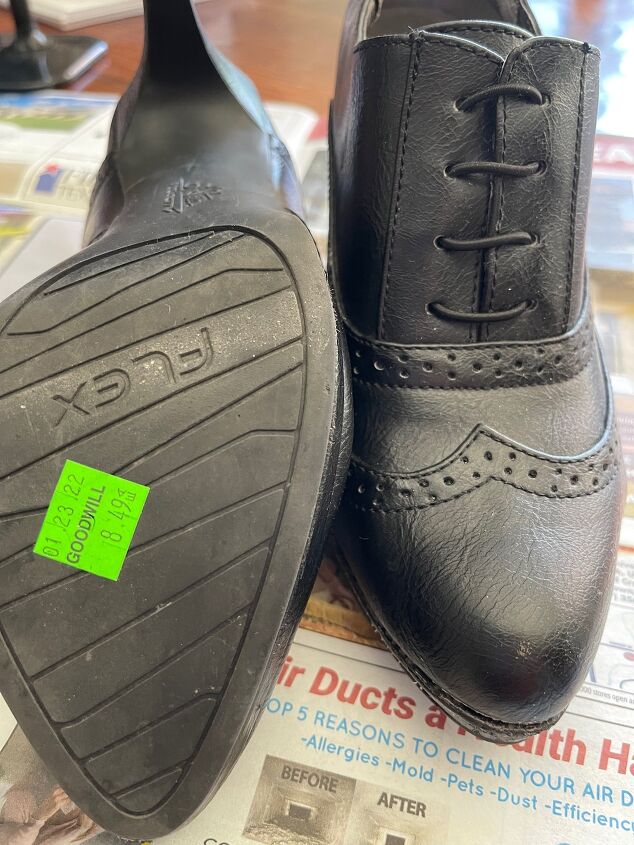
I headed to my local Goodwill to find an inexpensive pair, in case they didn't turn out, I didn't want to invest a lot. I was lucky to find the perfect wingtip pair for only $8.49. The heel shafts were scratched which was okay since they were going to be painted. The shoes were in great condition other than that.
When choosing a shoe, I would stay away from patent leather, you can remove the finish, but my experience is that the paint just does not adhere as well to them.
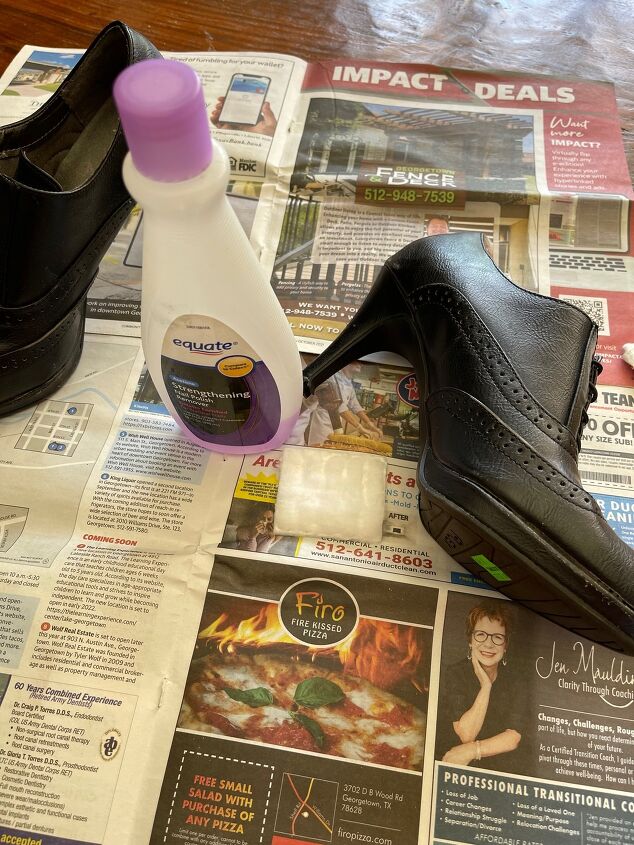
The first step is to clean and sanitize the shoes. I use sanitized wipes and go over them a couple of times inside and out. After they dry, I follow that by using Lysol, especially on the insides and soles. Let them dry completely before starting. Use nail polish remover or preferably Angelhaus deglosser to take off /dull the sheen, this is a very important step to help the paint adhere.
I paint a lot, so I didn't tape off the soles, you may want to do that if you are concerned about getting paint where you don't want it.
Use Angelhaus satin acrylic leather paint for best adhesion, it's inexpensive and comes in a lot of colors. If you like a glossier shoe, they do sell it in gloss as well. They sell them in 1 or 4 oz, I DIY a lot so I keep lots of colors on hand for various projects and usually buy the larger sizes. A little goes a long way with this paint.
A small angle craft paintbrush will help to get into the nooks and around the sole.
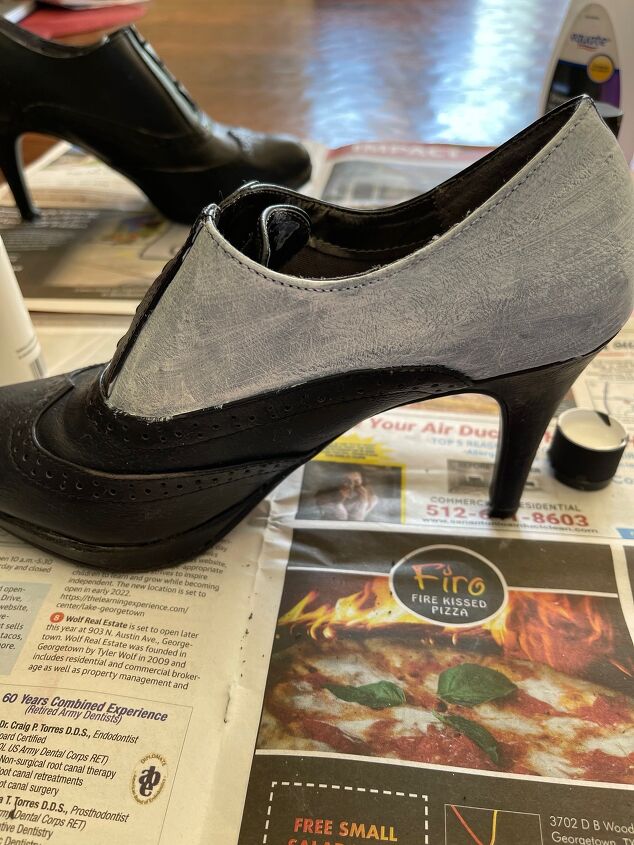
This will project will take several coats depending on the type of shoe material. If painting multiple colors, make sure to let each color dry before moving on to the next as you may smudge it while drying in trying to handle the shoe.
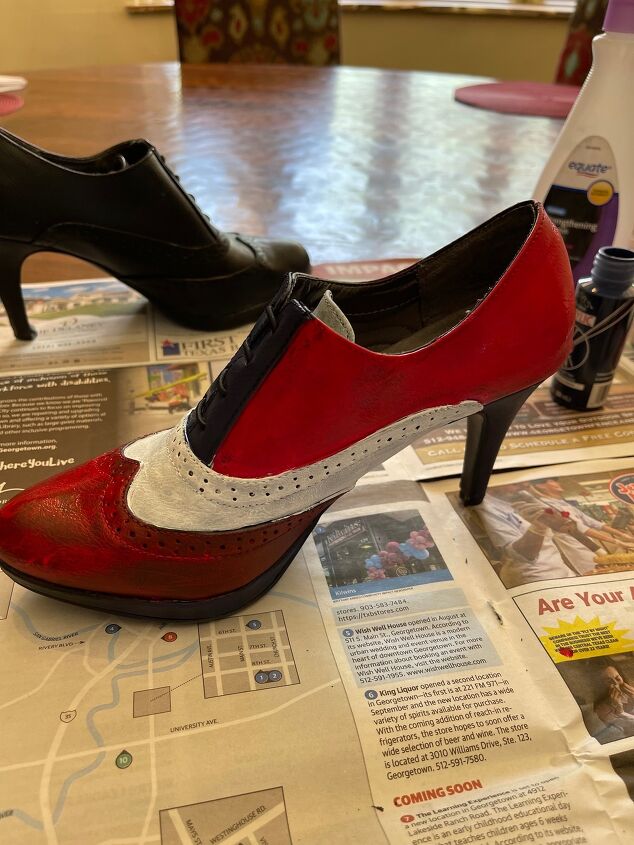
They will look pretty scary at first but don't give up! Especially when you are going from black to a lighter color, the black can bleed through the first few coats. The navy paint looked good after 1 coat. It's VERY important to do thin coats and let them dry completely before doing another round. Make sure you do not have runs, or globs, and make sure to watch your brushstrokes as well. Once it dries you cannot remove globs, it will ruin the paint if you do.
2 coats Angelus leather satin finisher gives it just the right shine for my taste. Make sure to let each thin coat dry completely before applying the 2nd coat.

The shoes now look brand new! Once worn and bland, they are now sassy and fun. I am not sure how long painted shoes will last, but I can touch them up if they crack or scratch. Or repaint them a different color later.
I personally would only paint ruined or faded shoes and not risk ruining a pair of new shoes just to change the color. They will NOT be as durable as a factory finish.

I always have my shoes shelved so they don't get damaged, and I don't wear my painted pairs quite as often to prolong their life.

It's a great way to have one-of-a-kind shoes without the hefty price tag! Plus it helps to keep shoes out of the landfill when they get scuffed or faded.
Best of luck to you with your shoe creations!
Eden
The author may collect a small share of sales from the links on this page.


Comments
Join the conversation
Is there a final clear coat you could apply to make the paint last longer?
Thanks!