Make an Upcycled Denim Skirt–transform Old Jeans!
Today I’ve got an easy refashion for you in this upcycled denim skirt. Probably most of us have at least one pair of jeans that have maybe lived their lives in their pantsy state, but they still have some good wear left in them.
Jeans are prime refashioning materials, and one of the simplest ways to breathe some new life into them is by turning them into a skirt.
I’ll show you how to take jeans, chop them up to get a skirt with just a teeny bit of sewing, then we’ll talk raw hems and other embellishments you can add to make this project truly your own.
So find a pair of jeans that fit you in the hips, a pair of scissors, and let’s get to work.


Supplies for your upcycled denim skirt
- Jeans: 1 pair that fit you in the hips–any color is good here. I spiced mine up with some ice dyeing first. Here’s how to ice dye fabric.
- denim thread to match the original jeans thread
- denim needle for your sewing machine
- scissors
- pins
- seam ripper
- ruler + chalk
- Fray check or Fray block
- darning needle
- extra denim or other similar weight fabric for contrast if you go the maxi skirt route

Cutting the jeans
before!
First try on your jeans, and decide how long you want the skirt to be. I always like to end skirts around my knees. Mark it with a pin and square off the cut line. I actually made mine slightly longer in back by marking the center of the back of my knee on the back and the top of my knee on the front.
You don’t *have to* cut off any length either. Some of my students at the Sew Much Talent retreat made their upcycled denim skirts into maxi skirts to pretty dramatic results. If you go the maxi skirt route, you will need extra denim once we get into revamping things in a couple steps.
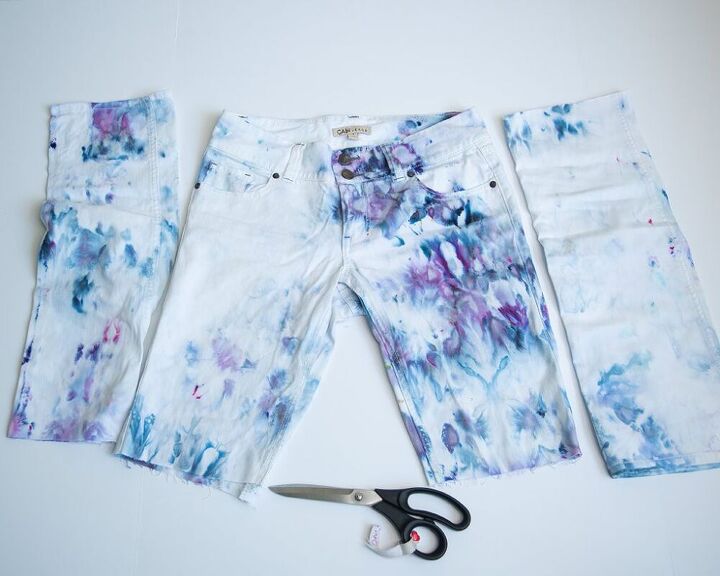
Whatever path you choose, make sure you leave room for a hem. You don’t need to add anything extra for a raw hem. For a traditional double turned jeans hem, add 1″ in length past the finished length. When you’re happy with things, cut off those legs.
Set aside the bottom legs for later.
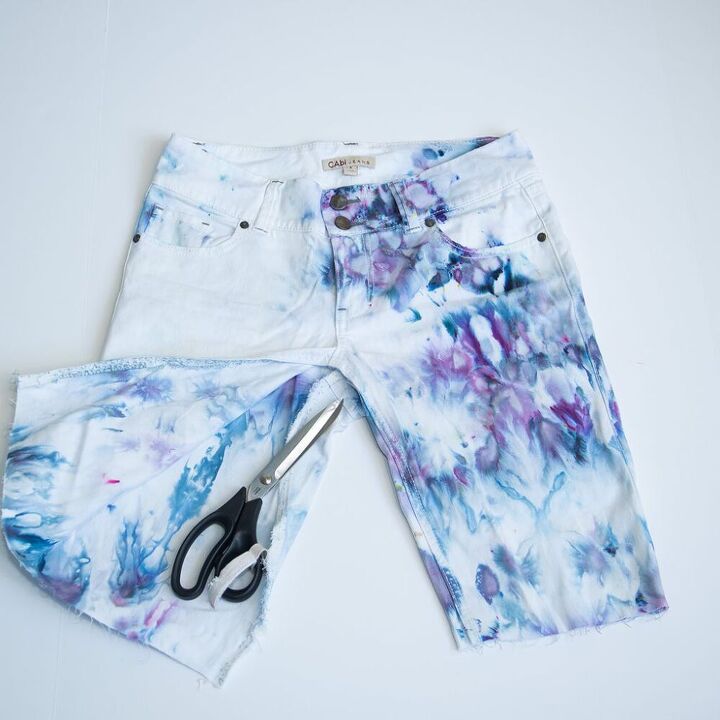
Open up the inseam
Now you want to open up the inseam of your jeans. A seam ripper will do you good, though I used scissors because this thread was really stubborn.
Go all the way up one leg and around and back down again the other leg, opening up the entire seam.
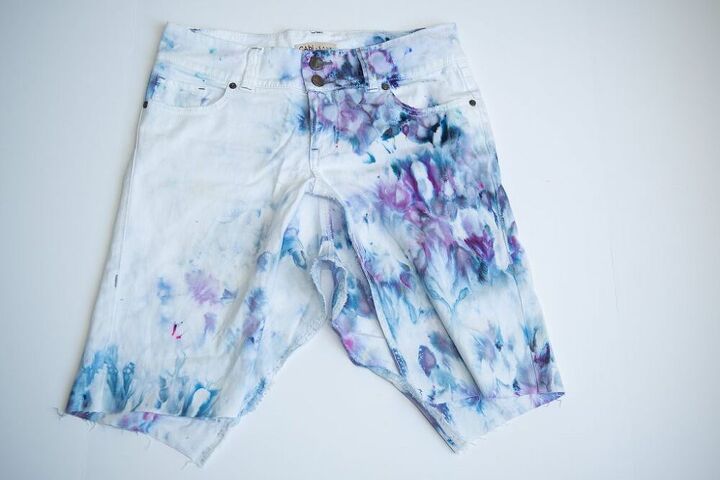
Open up the crotch seams
See how the crotch seams bubble up in the middle as they’re sitting flat? Yeah, we don’t want that. That’s all the space that would be for your boot in pants that we don’t need in a skirt.
So with your seam ripper open up the front and back crotch seams partially. On both sides, you only need to go as far as it takes for the seam to sit flat on the table.
On the front, do not go past the zipper unless you like replacing fly fronts. I’m guessing you’re sane and are not into that, so stop before that zip!
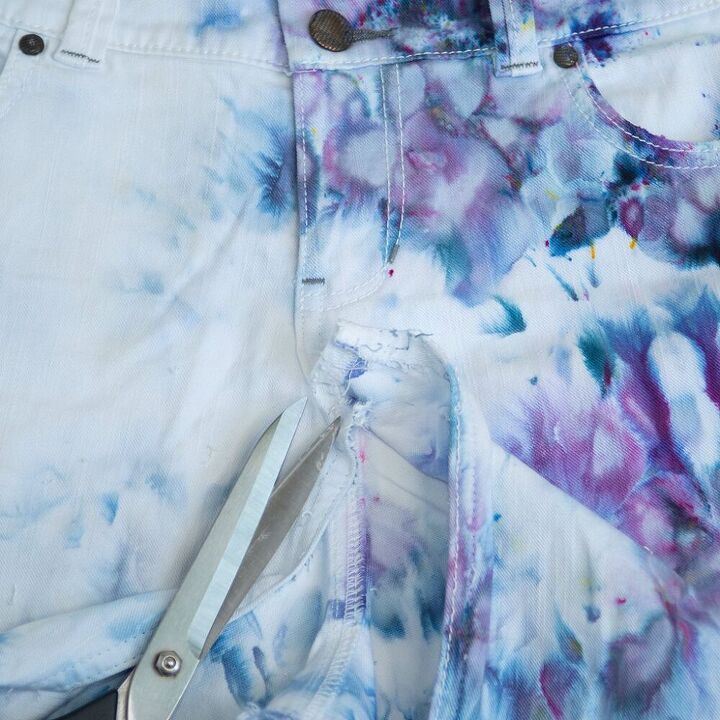
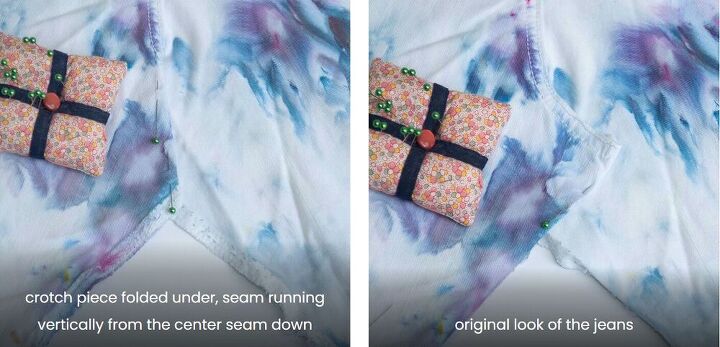
Vertical or angled?
At this point, you need to overlap the crotch seams on the front and then on the back. At this point you’ll have to decide if you like the look of the original crotch seam angling over the seam or a line that hangs vertically.
There’s no right or wrong here, it’s just a preference. If you go with a vertical line, you’ll have to fold the extra crotch piece out of the way (you can cut it off later once it’s topstitched).
If you want to keep that original look of the jeans, just fold one side over the other so that it sits flat and pin. Here’s the difference to help you decide.
Sewing the front of your upcycled denim skirt
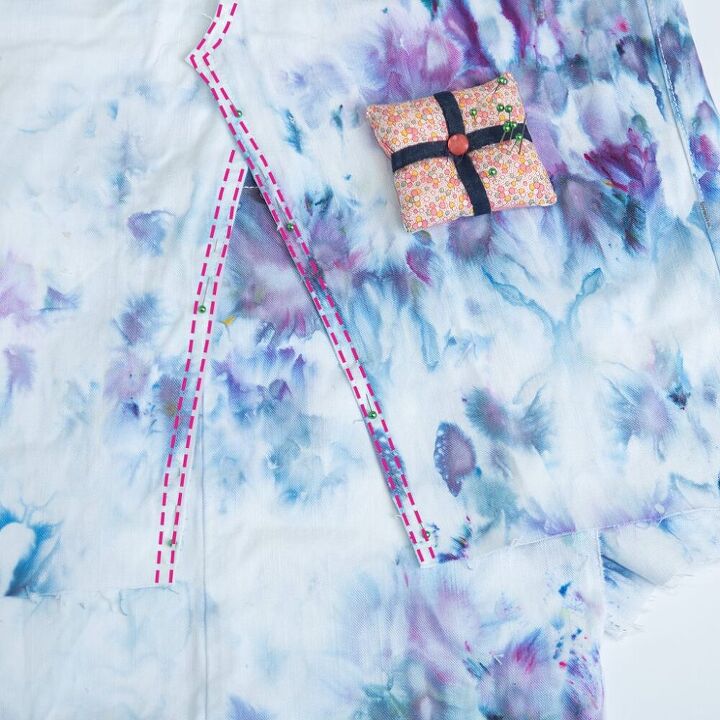
At this point, grab one of your extra leg pieces and cut open one of the seams.
Now we have to bridge the gap with the extra fabric. On the front side, slide in the extra fabric so that it covers the gap. Keep about 1/2″ of extra at the top from the wrong side so that you’ll have room to finish the seam later.
Pin in place and stitch down the fabric from the right side following the holes from the original stitching. Do not backstitch, just overlap the stitches by a few stitches past where you stopped cutting open the seam.
Trim away the extra fabric on the wrong side, about 1/2″ away from your stitching. Finish off the raw edge of that extra fabric with a zigzag stitch or a serger.
On to sewing the back, finishing it up and adding some pizazz (does anyone use that word anymore, LOL?!)…
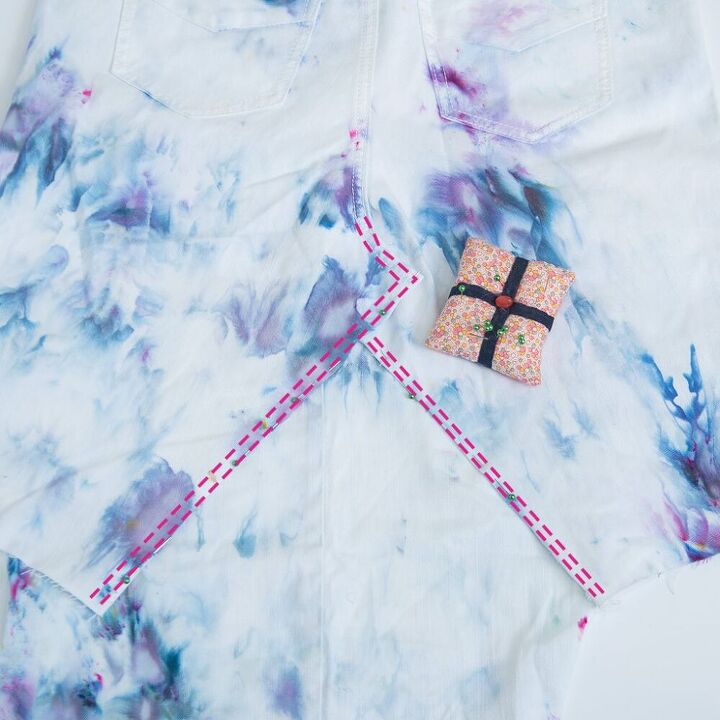
Sewing the back of your upcycled denim skirt
Next, flip the skirt over to the back side. Slip the extra fabric in place under your overlapped crotch seam and pin it in place just like you did on the front.
At this point, try on the skirt. There will be a natural point that the skirt wants to sit flat, but that spot might poof out right at that center back where you added the fabric.
I personally like that because I like the built in walking ease that provides. If you are not into that, take off your skirt and take out the pins. Move the back legs closer together so there’s less of a gap.
When you’re happy with that back fit, pin everything into place. Topstitch the legs to the added denim in place along the original stitching lines on the legs and the crotch piece. Again, don’t backstitch here. Overlap the stitches by a few stitches past where you stopped cutting open the seam.
Cut off the extra fabric behind the back, leaving that extra 1/2″ around the stitching. Serge or zigzag that raw edge to finish it.
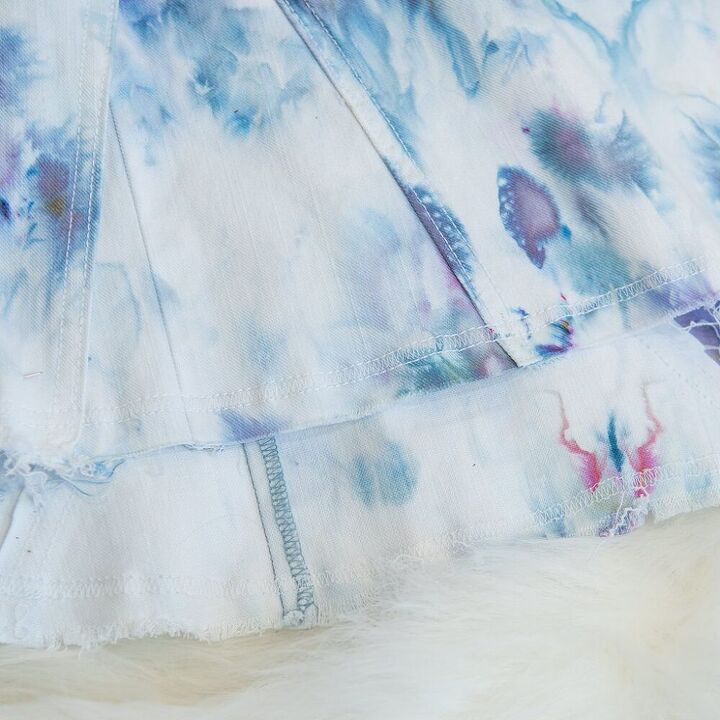
Cut the extra fabric
To finish off the front and back, cut away the extra fabric so that it’s even with the bottoms of the legs.
Hemming your upcycled denim skirt
Standard hem
If you’re doing a double turned hem, press up 1/2″, then press another 1/2″. It’s not a bad idea to hammer the hem flat because denim, she’s a sturdy thing.
Then stitch your hem into place from the right side, close to that inner pressed edge.
Raw denim hem
If instead, you want to go the raw denim hem route here’s how to do it.
First run two rows of straight stopstitching in your denim thread. Keep the rows 1/4″ apart. Start stitching at least 1/2″ away from the raw edge so there’s plenty of room for fringe.
It’s not necessary, but I rather like to run a zigzag stitch between the straight topstitched rows whenever I do raw hems.
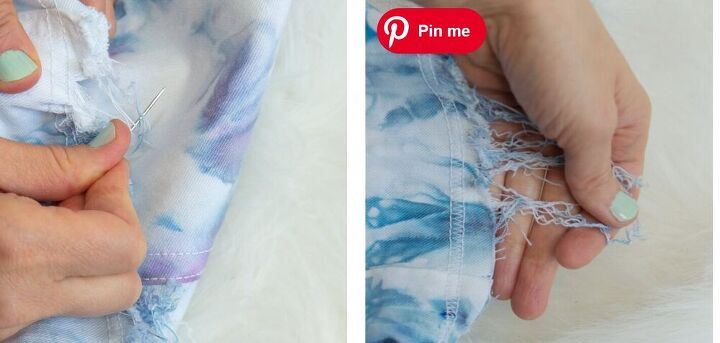
How to fringe the denim
Next grab your darning needle or other big needle with a sharp end. Stick it into the fabric past your stitching and pull out the cross grain threads.
This is the point that you pull out a movie and keep at it. It’s going to take a little while to go all the way around your hem.
Sometimes you can tease one thread out and pull it all the way along the length so that you fringe a whole lot in one go. This is really fun, but just be careful you don’t accidentally go past your stitching line. The needle is slower, but it will give you ultimate control of where that fringe is forming.
At some point your hem is going to have that hot mess look with scraggly bits all hanging down. That’s why you have scissors, friend. Just cut off that nonsense so that it’s even with the rest of the fringed hem.

Keep fringing until you’re within a scant 1/8″ of your stitching line. Finish the hem by applying Fray Block or Fray Check right along the top edge of the fringing.
Your upcycled denim skirt is done! But if you want to make it extra fabulous here’s what else you can do.
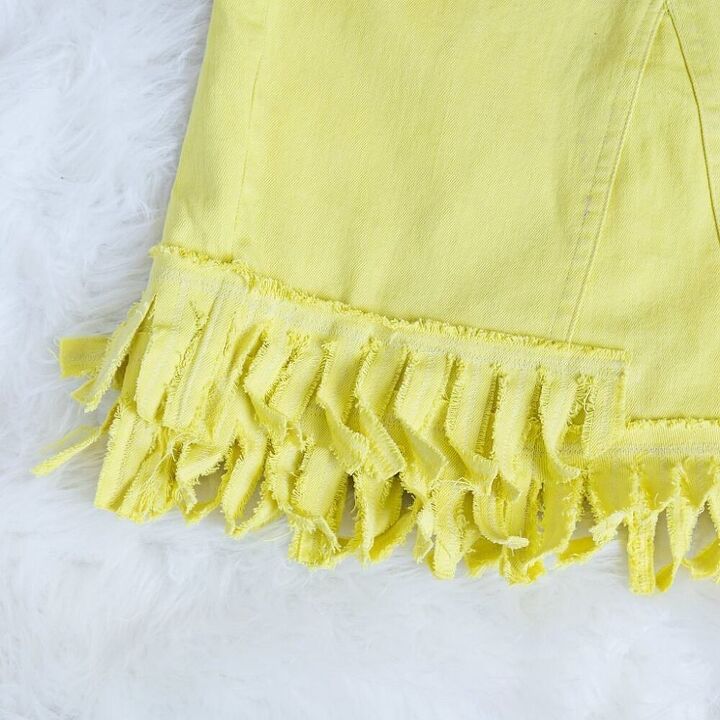
- Make extra fringe trim with your leftover denim and apply it to the hem. It can go around the whole hem, or just part of it like I did on this skirt.
- Make some DIY denim flowers and pin them to your skirt.
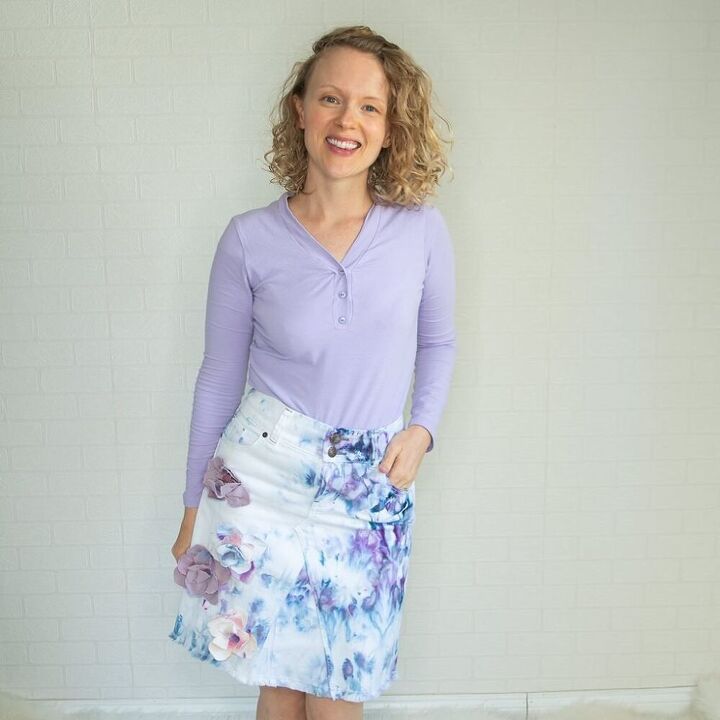
So that is how you make jeans into a jean skirt. Enjoy wearing your new skirt!
The author may collect a small share of sales from the links on this page.


Comments
Join the conversation
I started this project. The front is sewed..the back is still giving me fits. I put it away....The main problem is that the jeans are STILL too big on the sides. (Ive lost 26lbs. Looking for an idea on how to save them still and yes, help on closing the back
I thank you for this awesome idea. I will try it in some of my old style pants that I do not want to get rid of them yet. I love this great idea. I will try this in with granddaughters old jeans to make beautiful skirts for them.