Color Blocking & Pattern Testing

The crazy person that I am, yes I decided to help Kimberly, the maker behind Straight Stitch Designs with her pattern testing. The item? The Wedgwood pleated skirt. Now so you get the full picture, I am in the middle of testing for another fabulous maker and not only that, I have to finish a client's outfit all by the 22nd! So why add one more item to my plate? Why the hell not! The pattern was released 2/22/16 and it's on sale HERE!
Another reason I decided to help with this testing is because I had already made a skirt similar to this one so I was like I can do this in my sleep. You know where I’m going with this right now right?? Yup, I waited until the last possible moment and damn it to all that I know and love about sewing, this was not the breeze that I thought it was going to be. Although the skirt is not a difficult skirt, we as testers have to follow the instructions in order to give our feedback to the pattern makers.
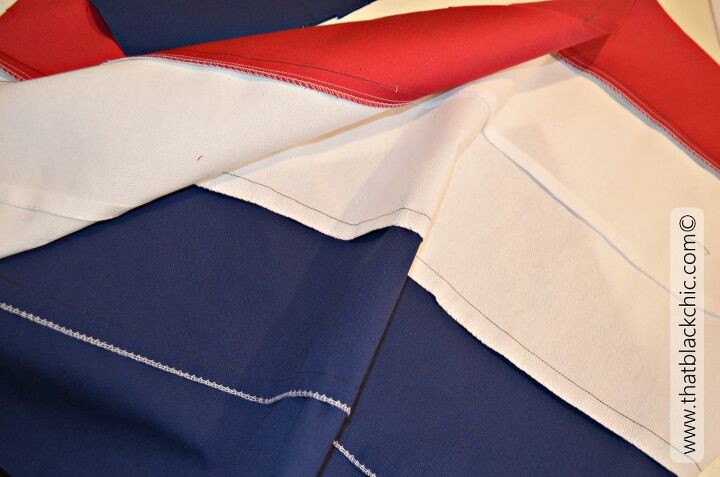
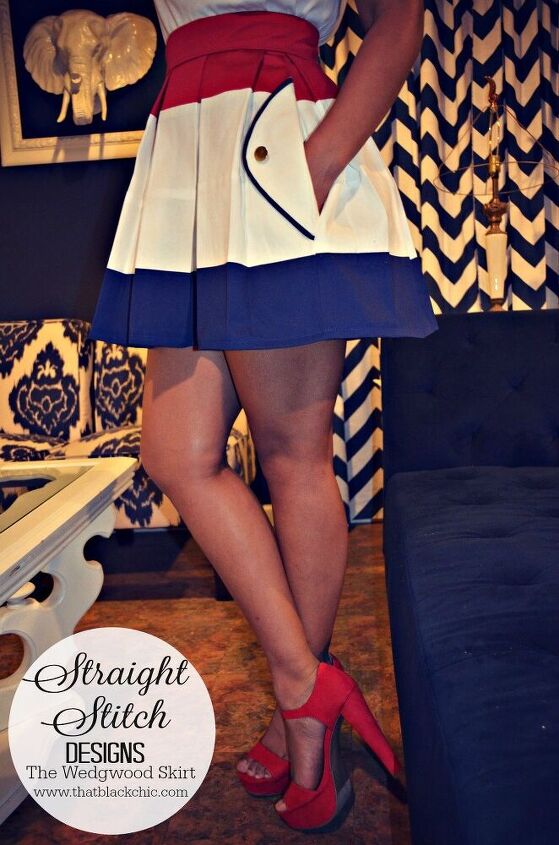
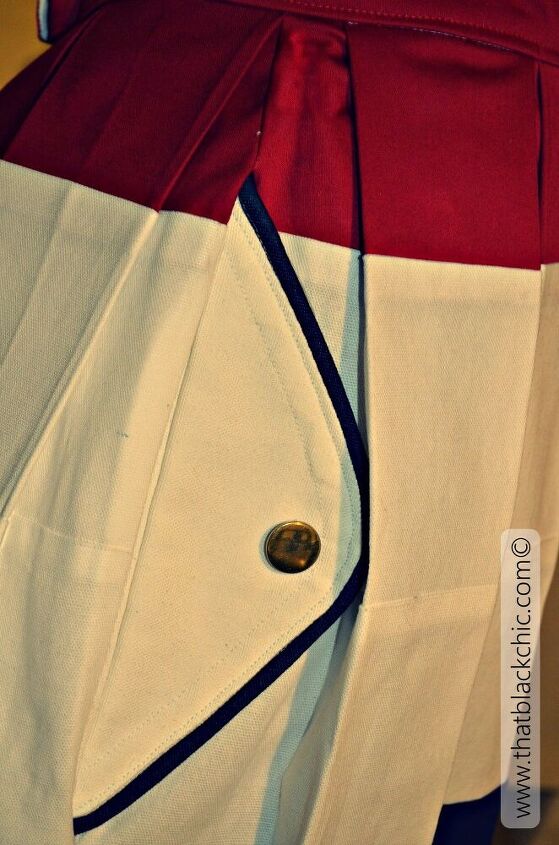
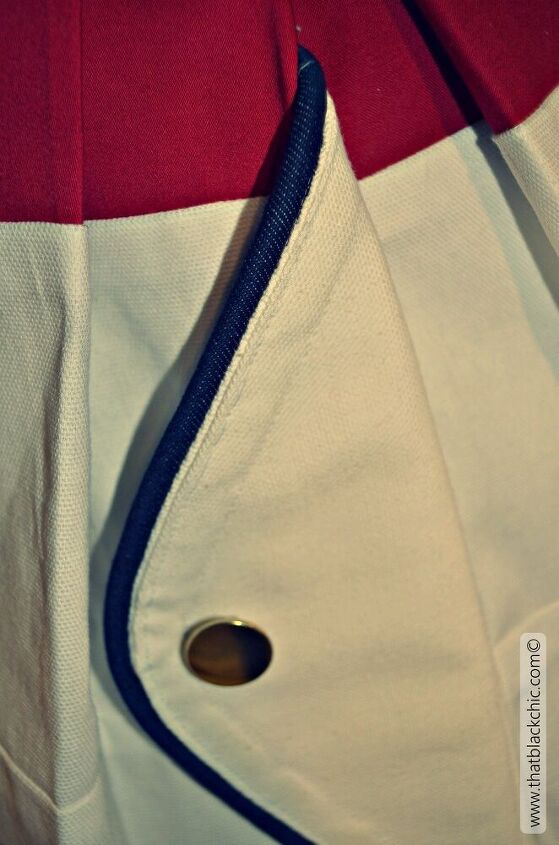
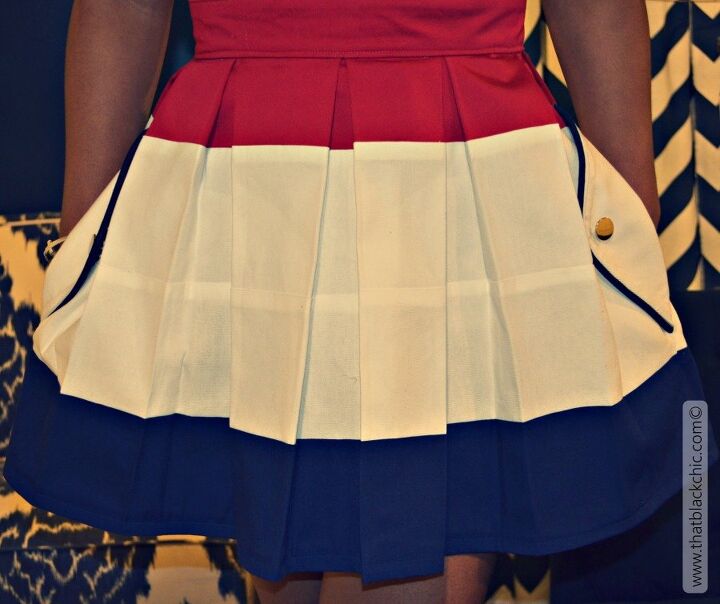
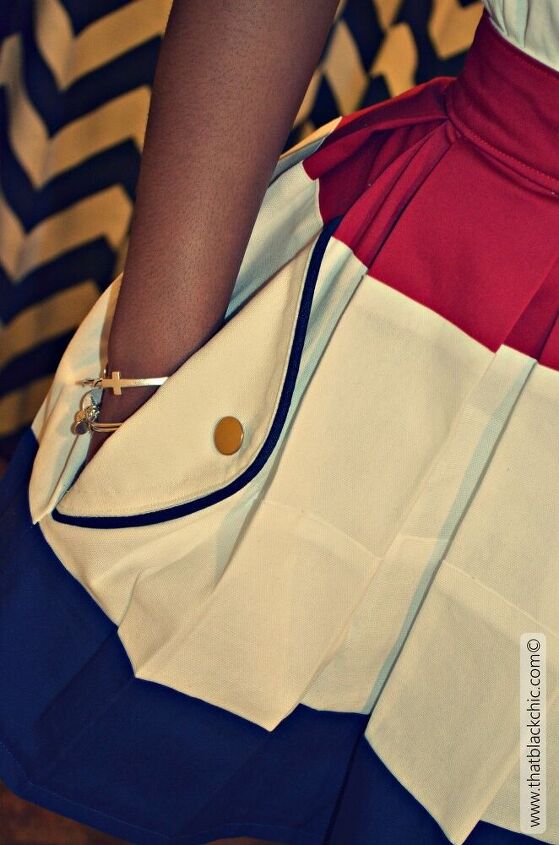
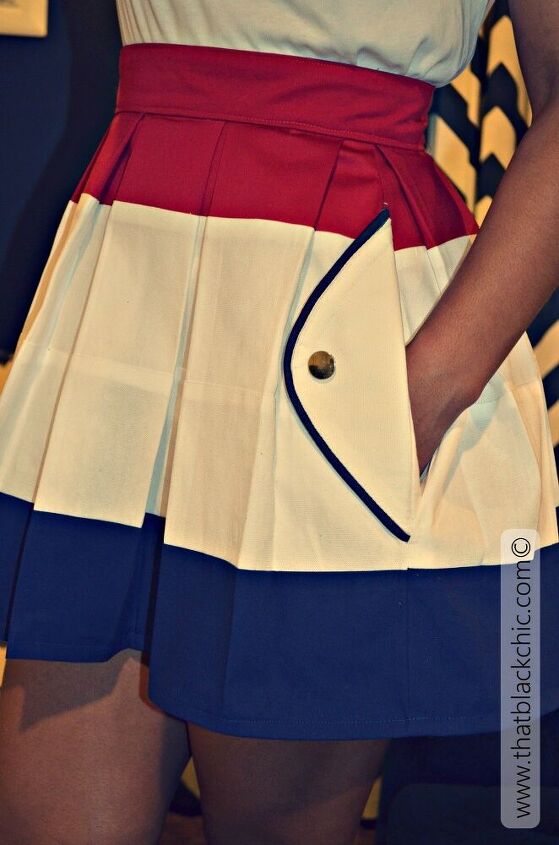
My fabric of choice: scrap strips from a prior project, we have some red sateen stretch, white canvas and 100% navy colored denim
are all in the mix to make this color block skirt.
The Wedgwood skirt pattern does not come with the color blocking option but you can easily create it yourself two different ways.
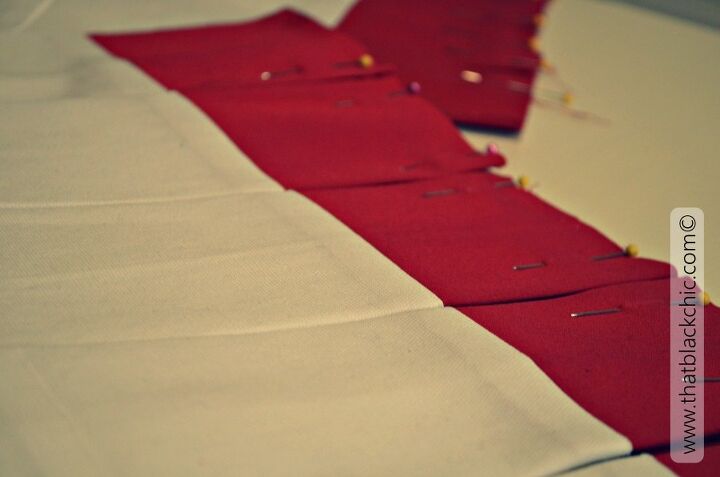
1. The way I did it was by cutting strips of fabric [your cutting game has to be tight right now!] and sewing them together to make your fabric pieces. I measured the height and width of the skirt pattern piece to see how big my piece of fabric needed to be. I then sewed my strips together [Your straight stitch has to be on point right here] I serged the seams and cut out my pattern pieces.
2. You can cut your pattern pieces into three pieces and add a seam allowance to the places where you cut the pattern apart for your color blocking. Now just cut put your fabric, sew your colors together and follow the sewing instructions.
This was truly a challenge for me because I always do my own thing when using patterns, sometimes it’s a hit and sometimes not. So I was focused on these instructions. Now after saying all that ish, I was ripping my hair out over here. I would read one part and go ahead to the next part or what I thought was the next part.......WRONG, now remove stitching and follow the dang instructions Michelle!!!!
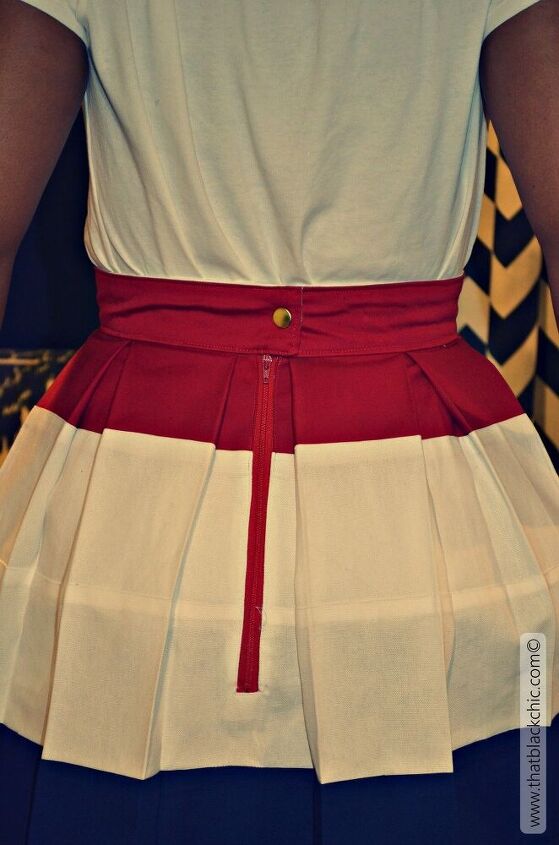
Sooooo after I got my act together all my pleats and pockets in place, it came time to add the waist-band from hell. Oh how can that be you ask? Well let me tell you. I could not decipher the instructions for this waist-band installation to save my life. Now you know, that I know how to sew a waistband but remember I was following the instructions. I was not the only slow person in this area, I had to go the testing group to see what the heck I should be doing with the damn waistband.
I was seriously sitting there reading the resolution and the words where just swirling in the air all jumbled up not making any sense to me at all. I finally got it and after I got it, I felt like I do when I put IKEA furniture together........"Seriously that's all I had to do???" There were things that I may have done differently but that is just because I have experience sewing and can maneuver things in another manner.
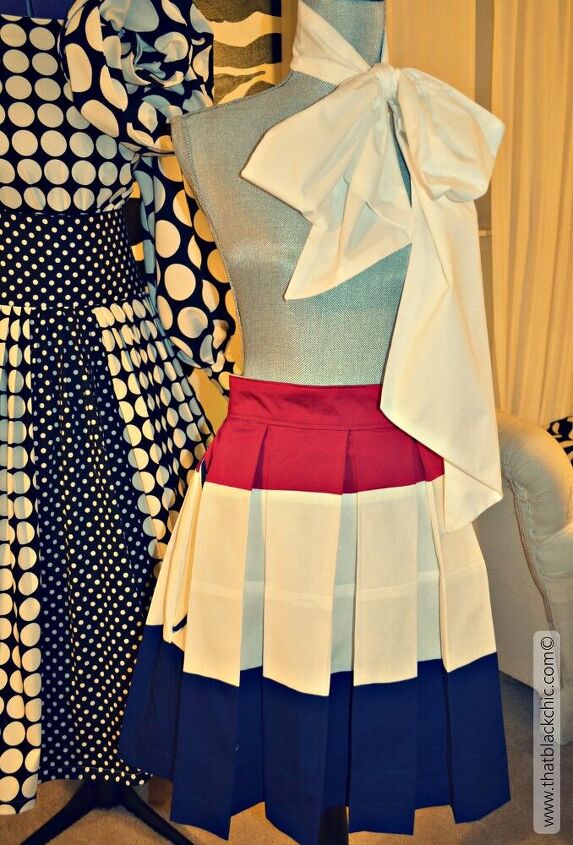
You'll notice I originally made longer, it was 22 inches long [first photo on dress form] and my daughter was like this is too long. I had to shorten two more inches and hem 1/2 inch.

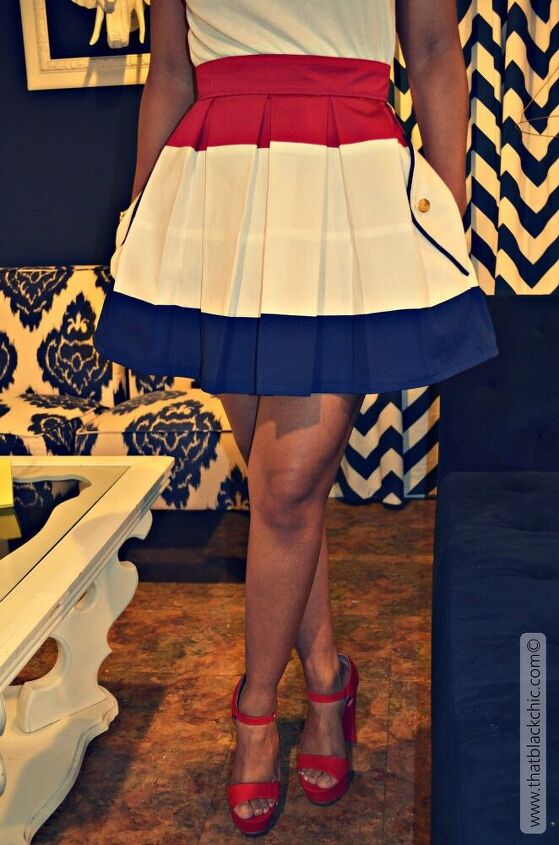
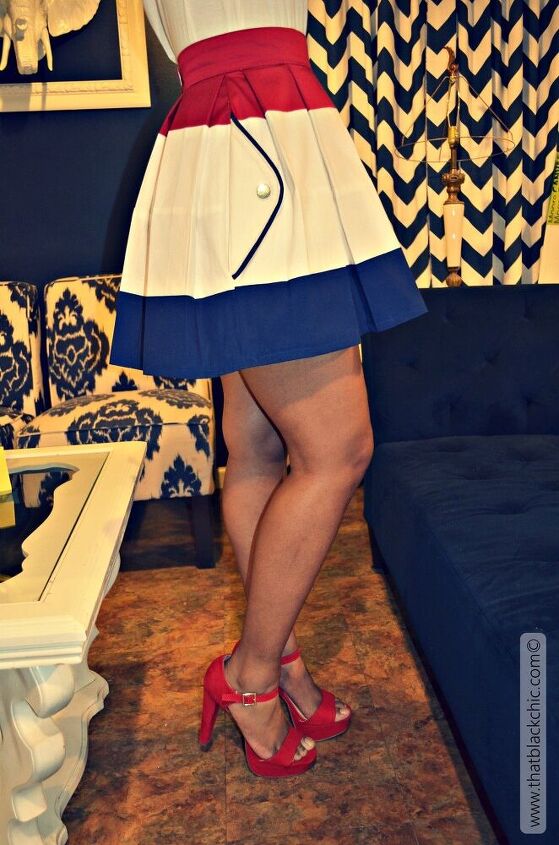
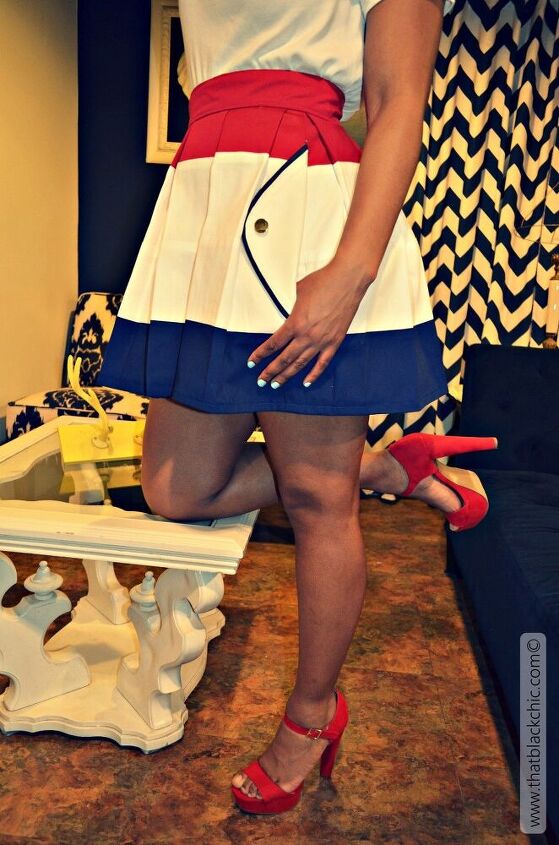
Results are that this a cute skirt and Mori likes it so it’s a winner. I could see one in denim with gathers instead of the pleats, that would be cute too.
The author may collect a small share of sales from the links on this page.


Comments
Join the conversation