Free Pillowcase Dress Pattern and Size Chart (for Girls)
Surprise your little princess with an adorable new pillowcase dress! This pattern comes in multiple sizes so you don’t have to worry if it’ll fit your kid, and you surely don’t need to worry if she’ll like it or not.
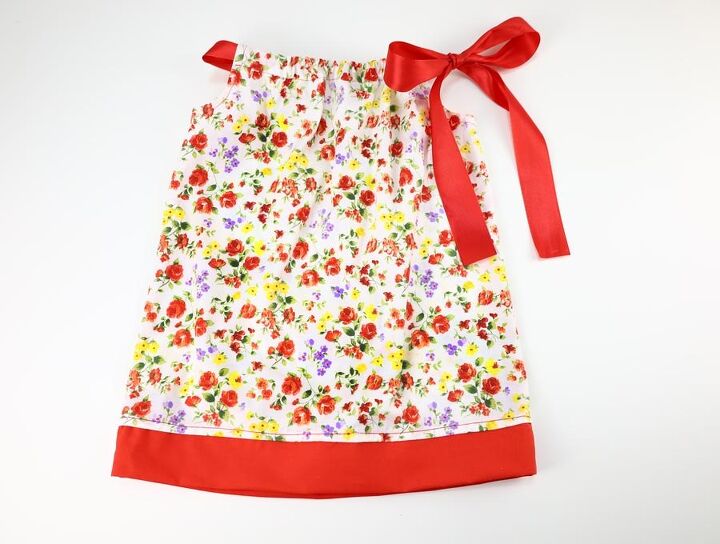
The simple yet beautiful style of the pillowcase dress makes it one of the most popular outfits for little girls. This particular pattern lets you choose between two options, one with the ties on both shoulders, and another with a tie on just one shoulder.
Cut the fabric
Consult the pillowcase dress size chart at HelloSewing and cut out two pieces of fabric according to it. Place them onto each other with the wrong sides in.
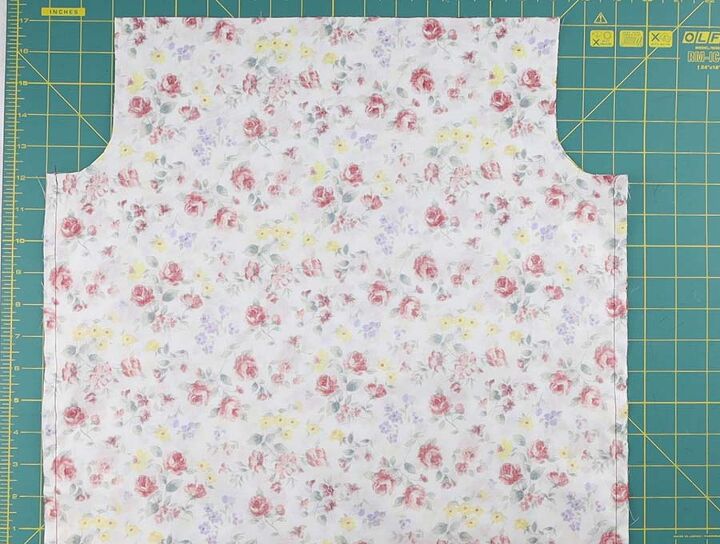
Set the fabric onto your workspace so that the long edges are on the sides. Measure out 2 inches from the top-right corner towards the middle and 5 inches from the top down. Mark the measurements and cut the marked section so that it has a curve. Repeat with the top-left corner.
Sew the pillowcase dress
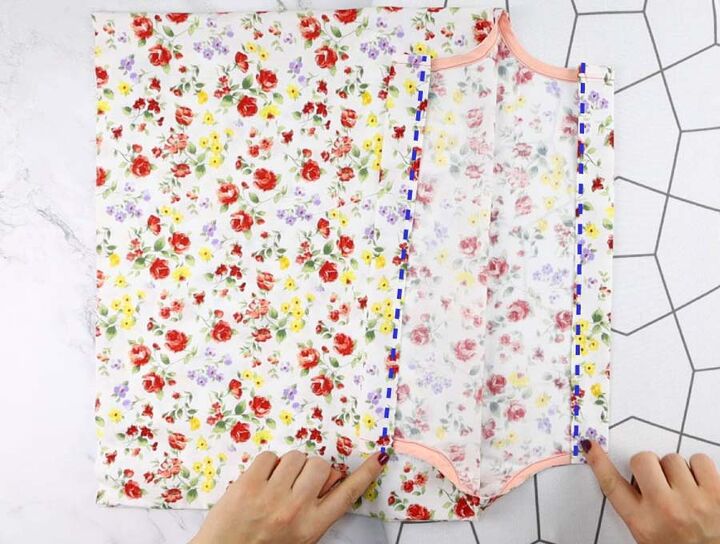
Place the fabric pieces onto each other so that the edges align and the right sides are in. Sew the two long edges. Stitch them again with a serger machine or a regular machine that’s set on a zig-zag stitch.
Turn the dress around. Unfold a bias tape and stitch it to the armhole, the tape's right side against the dress’ right side. Repeat with the second armhole.
Fold the bias tape towards the wrong side and stitch it again, going as close to the edge as possible. Do so for both armholes.
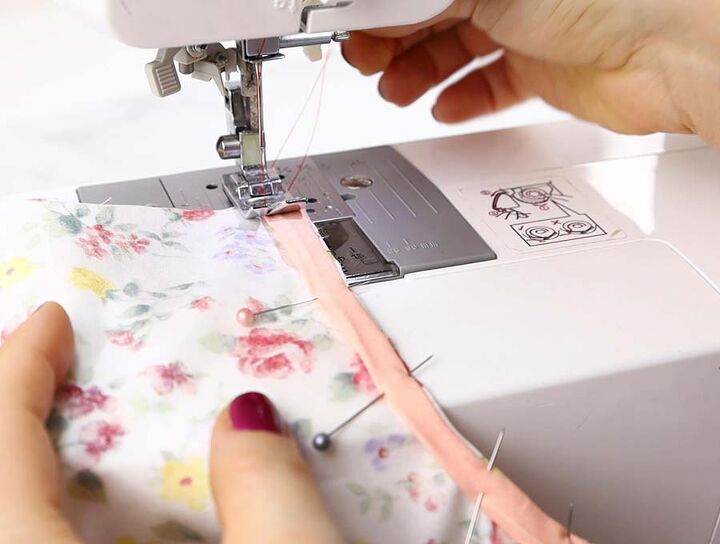
Turn the dress around. Unfold a bias tape and stitch it to the armhole, the tape's right side against the dress’ right side. Repeat with the second armhole.
Fold the bias tape towards the wrong side and stitch it again, going as close to the edge as possible. Do so for both armholes.
Finish the dress
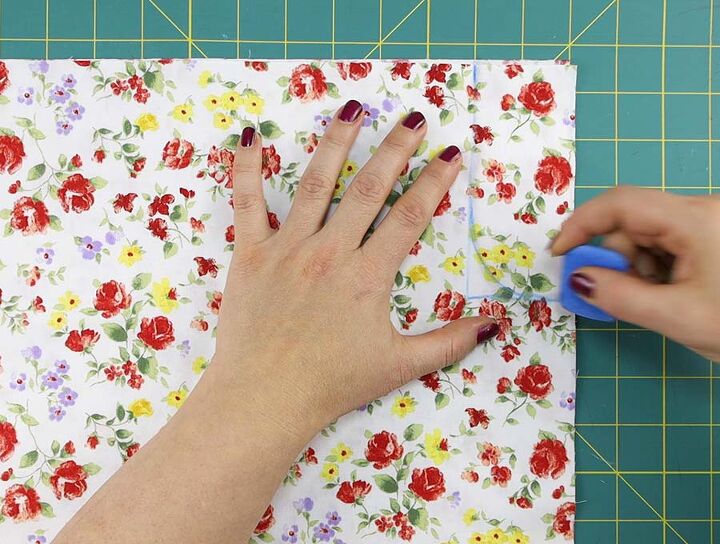
Fold the top edge of the dress in for a quarter-inch, then a whole inch, and press it. Repeat for both layers.
Sew the two casings.
Fold the bottom edge in for a quarter-inch twice, press it, and stitch it.
Thread the ribbon into the casings on the top. Make sure that one ribbon goes through both of the casings. Slightly burn the ends of the ribbon to prevent fraying, then tie them into a bow.
Stitch vertically across the ribbon and the casings to secure the two in place
Optional – Add a band
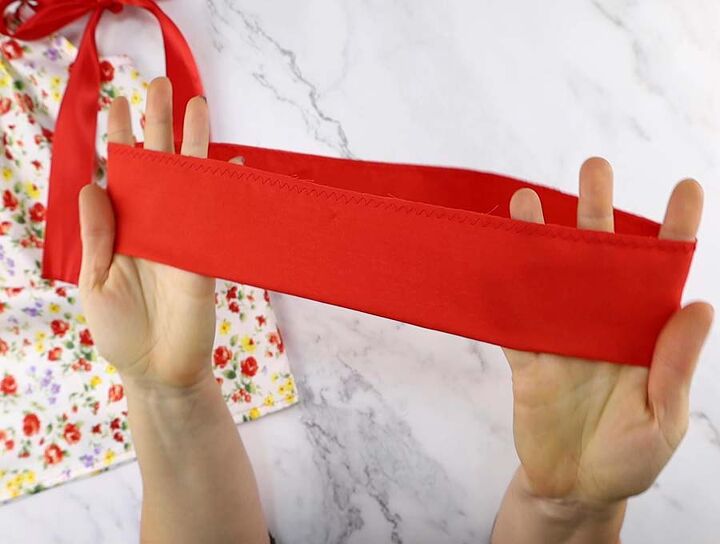
Sew two overlapped 5-inch fabric pieces together along their short edges, with their right sides facing in.
Fold the band in half along its length with its right side out and sew all around it.
Insert it into the skirt at the bottom so that it’s visible as much as you like and stitch it in place along the original hem.
What did you think of this pillowcase dress? Adorable, isn’t it? Get the free printable pillowcase size chat here and whip up a dress today!
Also - feel free to leave any thoughts and suggestions in the comments below, we appreciate your input! Remember to come back often and take a look at our new tutorials, we have more coming out in the future. Have fun sewing!
The author may collect a small share of sales from the links on this page.


Comments
Join the conversation