How to Make a Simple Skirt Out of 1 Yard of Fabric in Just 30 Minutes

If you want to know how to make a skirt out of one yard of fabric, here is an easy DIY skirt that you can make in about half an hour. It’s not hard to learn how to sew a skirt. If you can sew a straight line, you can make this skirt!
If you can find a piece of fabric with the selvage on it to make your first DIY skirt, as I show in this tutorial, that will make it much easier. Let’s get started me showing you how to sew a skirt for beginners!
Tools and materials:
- 1 yard fabric
- ¾ to 1 yard of 1½-inch elastic
- Matching thread
- Sewing machine
- Safety pin
- Pins
- Marking pen/tailor’s chalk
- Index card/pen
- Ruler
- Seam gauge (optional)
- Iron
- Scissors
- Serger (optional)
1. Make the skirt panels
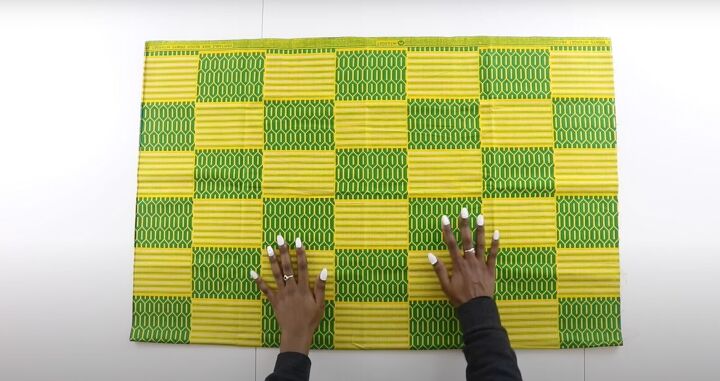
Fold the fabric in half. The fabric I am using in this tutorial has the selvage or the edge of the fabric on it.
This is quite helpful because it helps you to know where the ends are, which way is the right side of the fabric and makes hemming a lot easier.
Fold it so the selvage edges match perfectly. Use the iron to press the fold and to smooth any wrinkles or bumps in the fabric. You want everything to be nice and straight.
Open the fabric. Cut along the crease line. If you’re not confident yet, you can use tailor’s chalk to trace the guideline for you to cut.
2. Sew up the side panels
Lay the first panel with the right side facing up. Keep the selvage on the bottom. Lay the second panel on top, with the right side facing down, also with the selvage at the bottom.
Pin up the sides. Leave a ½-inch seam allowance or space between the very edge of the fabric and where you’re going to sew the seams.
Lay the fabric into the sewing machine. Start sewing and backstitch (go forward a few stitches and then stitch backward and then stitch forward again).
Keep moving forward, pulling out the pins as you sew along. Backstitch again at the end.
Finish the raw edges of the seam allowance with a serger. If you don’t have a serger, use a zigzag stitch on both side seams and at the raw edge of the top of the skirt.
Once that’s done, press the seam allowance of the skirt towards one side.
3. Sew the elastic casing
If you have a seam gauge, move it to 2 inches. Lay it at the edge of the fabric on top to know how much to fold over.
If you don’t have a seam gauge, use your ruler and a pen to measure down on an index card the 2-inch mark. Draw a horizontal line across the index card so you can measure the 2-inch mark on your fabric.
Lay the card down on the fabric and fold over the fabric at 2 inches. Press the fabric at this marking all the way around the waistline. Once it’s nice and crisp, pin it in place.
You’ll sew right at the seam line. Line up the seam edge at the presser foot. When pinning, make sure to leave a space to insert the elastic in.
A tip I find helpful is to have a start and stop pin with the space in between. Start at the start point with a straight stitch at the seam line and backstitch.
Continue sewing all the way across, making sure to stop at the stop pin.
4. Insert the elastic
Measure your waist. Use that measurement subtracting 2 inches to know how much elastic to cut. Once you’ve cut the elastic, attach a safety pin at one end.
Insert the elastic at the gap, pushing and pulling it through the fabric as you tunnel it through to the other side of the gap. When the two ends meet, remove the safety pin and overlap the elastic.
Pin the elastic together. Check the elastic waistband to make sure it’s not twisted or bunched up.
Zigzag stitch the elastic ends together, sewing it several times to make sure it is secure.
Once the elastics are sewn, pull the sides of the skirt at the elastic to pull the ends in. Keep pulling on the elastic waistband to distribute the gathers evenly around the waist.
Pin the top of the elastic so it doesn’t move and get sewn to the fabric when you sew up the gap. Stitch the gap closed. Make sure to backstitch.
5. Hem
At the bottom of the skirt, use your index card or seam gauge to measure ½ inch. Fold the fabric up ½ inch and press all the way around. Pin in place.
Turn the skirt right sides facing out. Line up the fabric with the edge of the presser foot to do a topstitch. Do a backstitch and then sew the topstitch all the way around. Backstitch at the end.
Press the hem and the skirt if there are any bumps or wrinkles.
How to make a skirt
You’re done making your DIY skirt! Please let me know in the comments if my tutorial on how to make a skirt in about 30 minutes using just one yard of fabric helped you make a skirt!
I’d love to see your work so please share your photos!
Enjoyed the project?
Suggested materials:
- 1 yard fabric
- ¾ to 1 yard of 1½-inch elastic
- Matching thread
- Sewing machine
- Safety pin
- Pins
- Marking pen/tailor’s chalk
- Index card/pen
- Ruler
- Seam gauge (optional)
- Iron
- Scissors
- Serger (optional)
The author may collect a small share of sales from the links on this page.


Comments
Join the conversation
TY for the info
I like, I like🥰