How to Sew a Bias Satin Skirt
There is nothing better than a satin bias cut skirt to pair with a variety of garments and shoes from your wardrobe. Bias cut skirts can be styled in so many ways they truly are one of the most versatile items in your wardrobe.
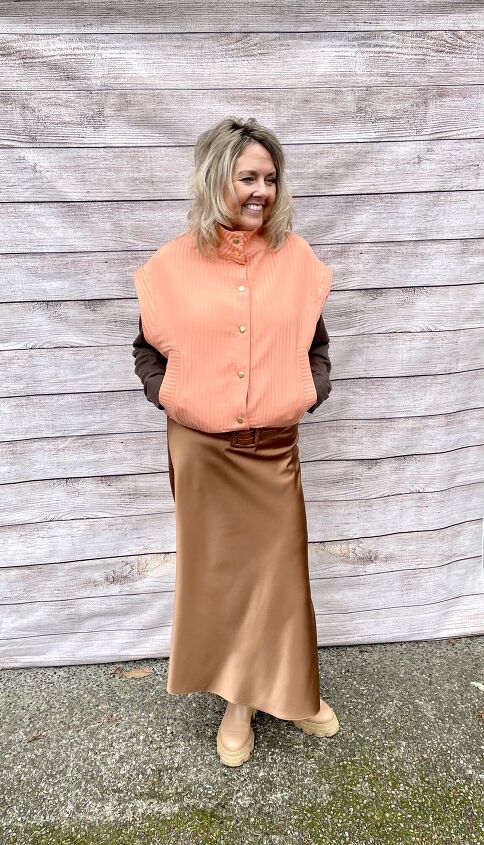
If you are looking for a stylish skirt with a unique silhouette the Dezi from Seamwork is the perfect choice. As the waist is gathered I made the size based on my hip measurements and it fits perfectly. I love the silhouette of the Dezi. The fluted skirt adds flare and a unique take on a minimalist bias skirt. The pattern is designed to have a diagonal seam across the middle of the skirt. I combined the two pattern pieces for both the front and back of the skirt to eliminate this seam to keep the styling simple to showcase the satin. I lengthened the skirt by 6 inches for more of a maxi style.
If you haven’t sewn a bias cut skirt before make sure you head over to this Seamwork tutorial which offers lots of suggestions and advice for that perfect make. Seamwork also has a great YouTube here where Haley shares lots of tips.
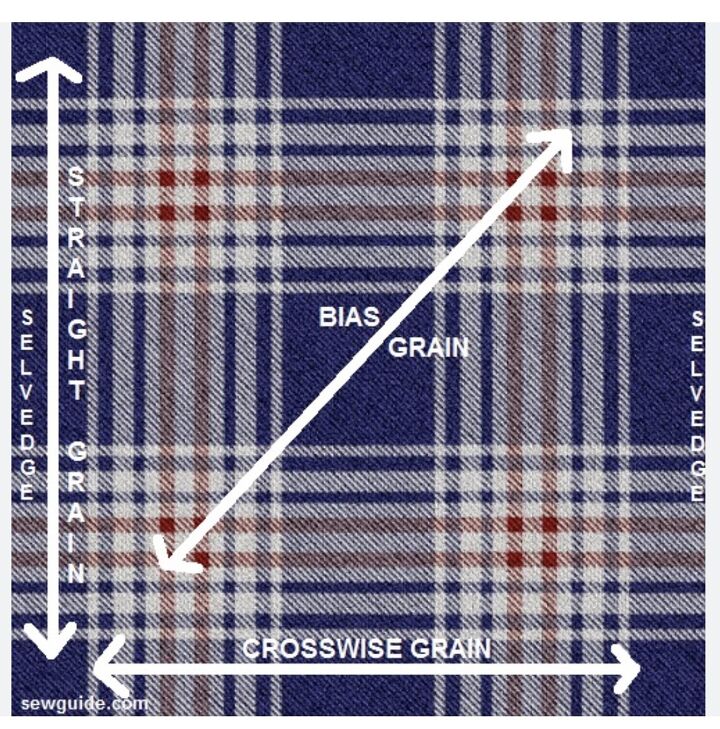
What does cutting on the bias mean?
A bias cut is a special technique where fabric is cut at a 45 degree diagonal angle across the weave (grain) of the fabric. Cutting the fabric in this way gives a woven fabric lovely drape and softness as well as extra stretch. Cutting on the bias can transform the right choice of fabric into a classic sleek garment.
All woven fabrics are created by weaving warp and weft threads. The warp threads run horizontally along the selvage (edge) of the fabric. The weft runs perpendicular to the selvage. The bias grain runs at a 45 degree angle across the warp and weft. When cutting something at a bias angle it releases tension across the weave resulting in more stretch and drape.
A bias-cut skirt can be a showstopper, but it does take time and careful planning to sew it well. It is definitely a garment that can't be rushed even if the pattern is simple. Working through the process carefully and taking your time will result in a beautifully sewn garment that has the ultimate drape and proper stretch for wearing. Here are a few simple steps that can help to make your project a success, eliminating the challenges that can occur when cutting and sewing on the bias.
Choose a simple pattern and the right fabric
Cotton, silk, linen and challis are perfect choices for your first bias-cut garment. Avoid choosing rayon as it is very stretchy. Satin and silks are more challenging to work with because of the sheen of the fabric. They look fantastic, but you will need to take extra care with the fit, seams and pressing. They show every mistake!
Cut on a large surface
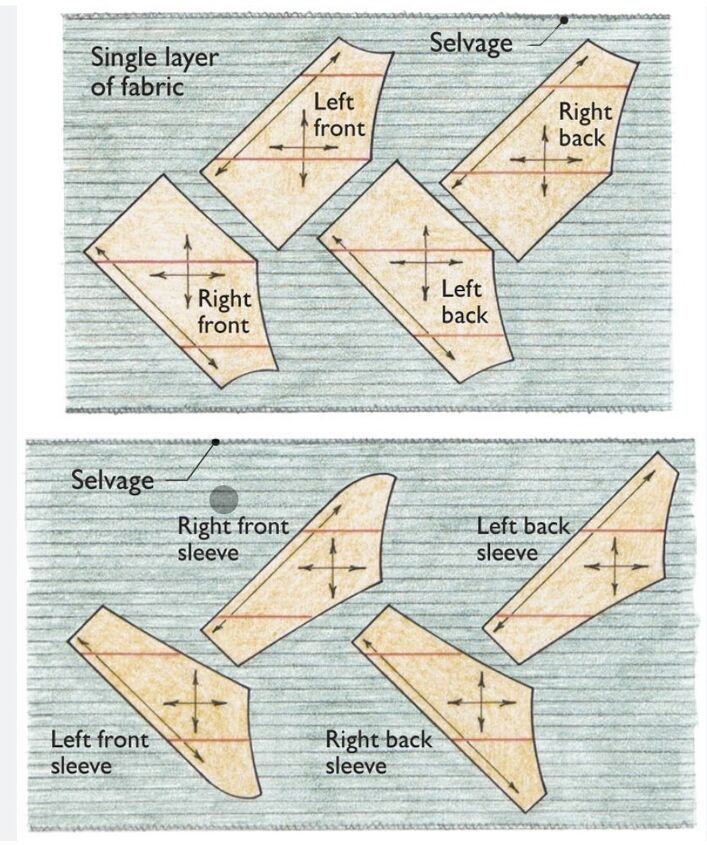
It is best to cut out pattern pieces as a single fabric layer. Cutting on the fold can result in your fabric stretching and it is more difficult to cut perfectly on the bias. Clear a large flat surface to spread out your fabric, avoiding having any fabric hanging over the edge. Pay particular attention to the grainline on each pattern piece. Cut pieces on the perpendicular to ensure both sides are evenly balanced, making sure your grainline markings are parallel. If you cut them on the parallel they will stretch more. When working with a satin or silk, make sure you are aware of the sheen of the fabric, especially after you flip them to cut mirror images. Otherwise the sheen of the fabric will make it look like your front and back panels are different shades. Plan and cut carefully.
Handle your fabric with care
When cutting and sewing your fabric, make sure that you are not pulling or tugging it. It is easier to stretch fabric cut on the bias, as it is intended to stretch more easily. Gently guide your fabric under the presser foot; let your machine do the work. Stretched out seams will look puckered and they will not hang well, spoiling the look of your garment.
When it comes time to press your garment, make sure you are actually “pressing” and not ironing. Place the iron on top of that you want to press, then lift the iron and move it along the seam to press it again. ”Ironing” by moving the iron back and forth along the seam will also stretch the fabric.
Be aware of your seam allowance
When cutting on the bias make sure to have ample seam allowance. It is easier to finish the raw edges of your fabric and press the seams open so they lie flat eliminating bulk. The fit and finish of your garment is always easier to achieve when you have plenty of seam allowance to work with.
Don’t rush your make and allow for “Hang Time”
Once you have your pattern pieces cut out, slip stitch in a contrasting thread where the notches are on your pattern. Then hang the individual pieces for 2-3 days. Take the pieces down and lay them flat, repositioning the paper pattern piece over top of the fabric making sure to match the notches on the pattern to the hand stitched notches on your garment pieces. You will notice that certain parts are bigger than the original pattern piece because they have stretched during the hanging process due to the bias cut. Trim these parts back to the original pattern size. Once your garment is complete rehang it for another 24 hours, trimming back any stretched fabric before hemming.
I chose to do a roll hem on my skirt. A roll hem is a very small, simple hem that finishes a skirt like this beautifully. Many sewing machines come with a roll hem foot. If you have never done a roll hem there are lots of great tutorials on YouTube. Make sure to practise on a scrap piece of fabric to adjust the amount of fabric roll and the angle that you feed the fabric into the foot. Remember not to tug the hemline as you sew so that the fabric doesn’t stretch or pucker. Make sure to give the hemline a really good “press’ to flatten it out. The result will be a crisp, clean hemline.
When sewing a garment cut on the bias, make sure you aren’t rushed so you can enjoy the process. You will be so pleased with the result and you will love wearing such a simple, elegant garment.
After all... There is Sew Much To Design
Happy Bias Skirt Sewing,
Lou Sheffer
0 views0 commentsPost not marked as liked

The author may collect a small share of sales from the links on this page.


Comments
Join the conversation