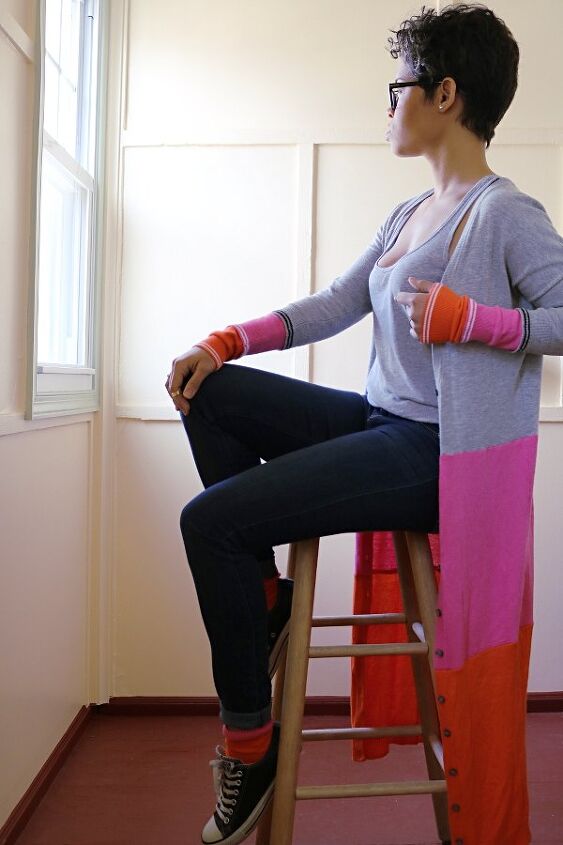
DIY Colorblock Maxi Cardigan Sweater
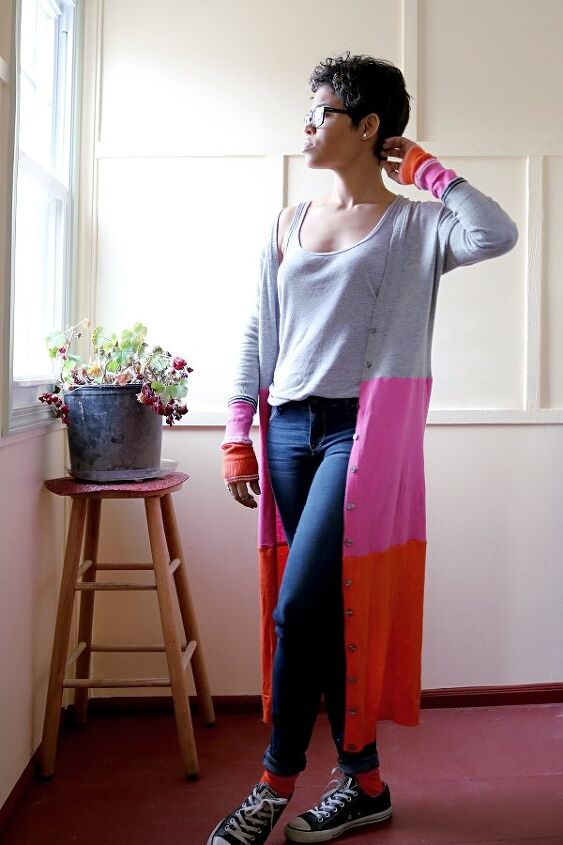
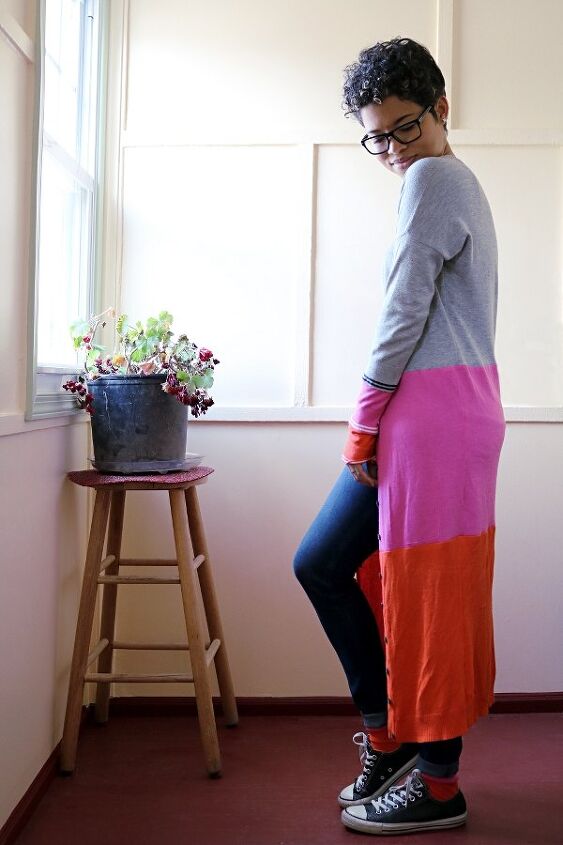
If this maxi cardigan doesn’t scream Spring, then I don’t know what will! I’ve been hanging on to these secondhand cardigans even though they barely saw the light of day. I loved the colors but wasn’t too fond of the three-quarter sleeves.
With that in mind, I felt confident taking on another sweater project after my last tutorial. But no lie, I hesitated at the thought of butchering not just one, but three sweaters! Eek! I just couldn’t shake the idea I had in mind and before I knew it, I had severed one in half.
Here’s what I did:
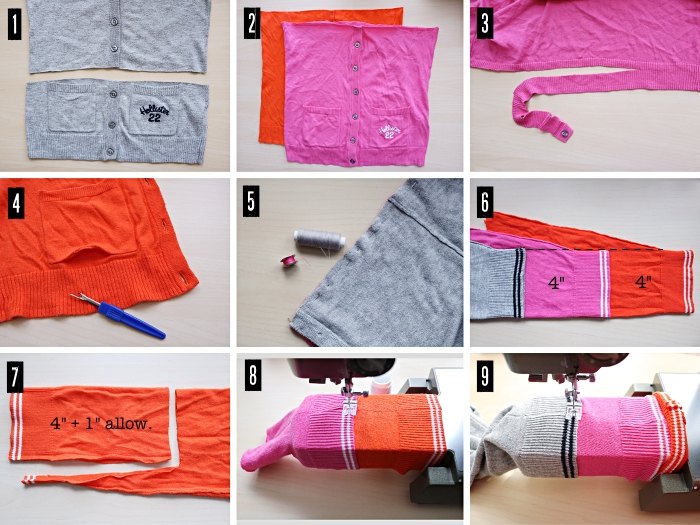
- First, was deciding what order I wanted the colors. The grey I placed on top because it was a size small and the others were mediums. I started by buttoning it up and laying it out nice and flat. I didn’t want to include the pockets, so I removed the lower section from the pockets down.
- For the other two sweaters, I also buttoned and laid them out. Before cutting, I used a ruler and made a line across the front, 2 inches above the top button.
- After they were cut, I then removed the trim from the bottom of the pink block, leaving a 1/2 inch for allowance. *Since the pink was going in the center, the trim wasn’t needed.
- Once that was done, I carefully removed all the pockets with my seam ripper. *They were no longer functional and added bulk.
- Next, was sewing the blocks together. I started with the grey and pink, matching and pinning the side seams together first. *I used matching threads for each layer (personal preference). Using a ballpoint needle and straight stitch, I held the fabric firmly while sewing, allowing it to stretch as I went along. I did the same for the other block, before trimming and pressing the seams.
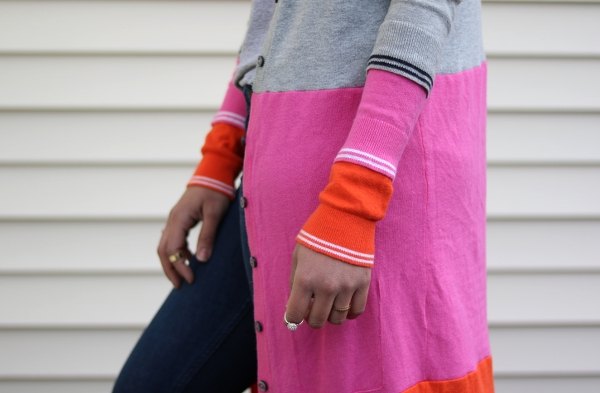
- Once the color block was complete, I removed the sleeves (pink and orange) from the scraps. I laid them inside-out with the grey and overlapped them, leaving the pink and orange layers 4 inches in length. Using the grey cuff as a guide, I made a line along the seams, adding 1 inch for allowance.
- Afterwards, I took in each of the sleeves/cuff by stitching along the lines and stopping at the 5 inch mark. I then cut away the excess.
- Next, I placed the orange cuff inside the pink, then pulled it onto my machine with the extension table removed. I then measure 4 inches as I sewed, stretching and following the bottom stripe on the cuff.
- The same was done for the grey cuff. Except, I had to roll up the orange cuff before sewing, to get a more accurate measurement. Lastly, I trimmed the allowances approx. 1/4 inch and pressed. *The fabric doesn’t fray so there was no need to serge.

My only regret with this project was not using a zigzag stitch to join the panels. I mean, it turned out great with the straight stitch but I felt the finish would’ve probably been a little better.
I was so eager to see the finished product, that the thought never crossed my mind. That, and me being soo accustomed to using a straight stitch for everything! It’s like I forget my machine has other functions. Oh well, you live and you learn right!
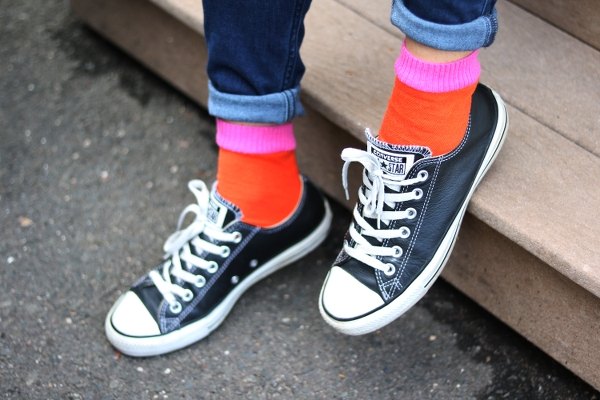
Anyways, not sure if you peeped the matching socks but, you guessed it! They were also DIYed, following this tutorial. I made it my own and added the ribbing.
Thoughts?
The author may collect a small share of sales from the links on this page.


Comments
Join the conversation
Wow! That looks great! I agree about the model, and I love her haircut! Thanks for sharing!
Since the sleeves on sweaters are usually too short for me, this is a great option! Thanks!