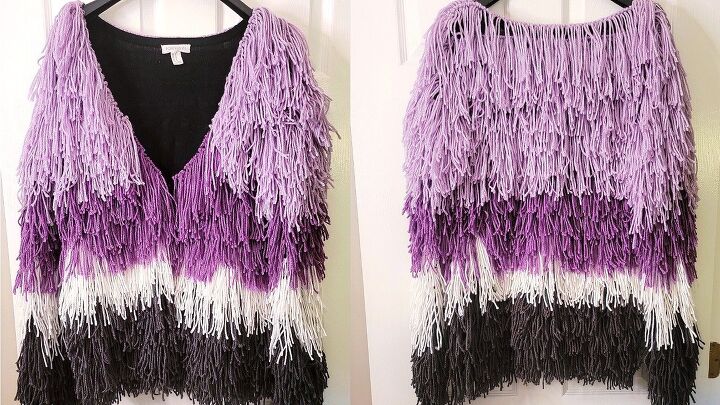
Trendy No Sew DIY Shaggy Cardigan

It's "Sweater Weather" season and I'm all about it! Nothing says fall and winter like some super cute fall fashion. I'm DIY'ing a shaggy cardigan for this project. I'm so proud of this cardigan because it's too cute and it basically mimics some of the trendy shag cardigan sweaters that you see in stores that cost a lot more. I made my shaggy cardigan for a fraction of the price. I used an old sweater that was on its way to the trash and some yarn to achieve a custom high end look.
Trendy No Sew DIY Shaggy Cardigan
Materials:
- Yarn (I used four different colors of yarn)
- E6000 Fabric Glue
- Scissors
- An Up-cycled Sweater (A plain sweater that is no longer being worn)
Directions:
- Grab a plain sweater from your closet that you're no longer wearing.
- Create multiple long individual chain link tassels to adhere to the cardigan. (You will have to create enough tassel links to cover the entire sweater!)
- To start cut a string of yarn the size of the left or right side of the cardigan. Tie a double/triple knot at each end of the string. Tape down each end and cut smaller strings the same length to loop onto the taped down string of yarn.
- Start at the bottom of the cardigan by adding a line of fabric glue one line at a time. Then, adhere a long chain link tassel to that line of fabric glue.
- Tip: I made sure that each row was approximately an inch a part and I put books on top of each row to make sure that the glue was secure. You want to make sure that you keep the sweater stretched out so that every time you're gluing the yarn down that nothing's getting snagged and nothing's getting bunched.
- Repeat the same process around the entire sweater. (I chose to use an ombre effect for my design).
- Then, let the glue cure. (I recommend laying the cardigan flat and placing something flat on top, that can cover the entire finished cardigan to secure the bond).
I placed magazines and heavy books on top of the yarn after gluing. This helped to add pressure and create a more secure bond.
And after everything dries...... you should have a fashionable Fall/Winter shag cardigan that looks store bought! What a transition? I love how this up-cycle turned out!
FRONT
BACK
Let me know if you decide to try this DIY! Say Hi and tag me @CraftingwithCass on Instagram.
Check out the video for more!
Affiliate links may have been used in this post.
0 commentsPost not marked as liked
Enjoyed the project?
Suggested materials:
- Yarn (Jo Anns)
- Old Cardigan (Already Owned)
- Scissors (Already Owned)
- Fabric Glue (Amazon)
The author may collect a small share of sales from the links on this page.


Comments
Join the conversation