How to Make a DIY Harry Styles Cardigan

In this tutorial, I’m going to show you how to make a DIY Harry Styles cardigan, based on the patchwork cardigan he famously wore for the Today Show performance! I'll show you how I made the cardigan crochet pattern and assembled the cardigan too.
Harry Styles looks amazing wearing in this rainbow cardigan (although, to be fair, he looks amazing whatever he wears), and you will too! Grab your needle and yarn, and let’s jump on in.
Tools and materials:
- Yarn
- Needle
- Buttons
- Scissors
- Crochet hook
- Measuring tape
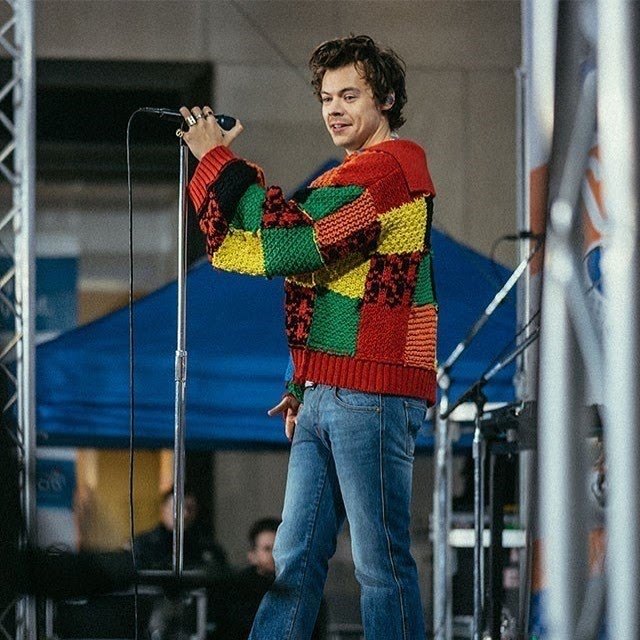
This is the Harry Styles cardigan I'm aiming to recreate!
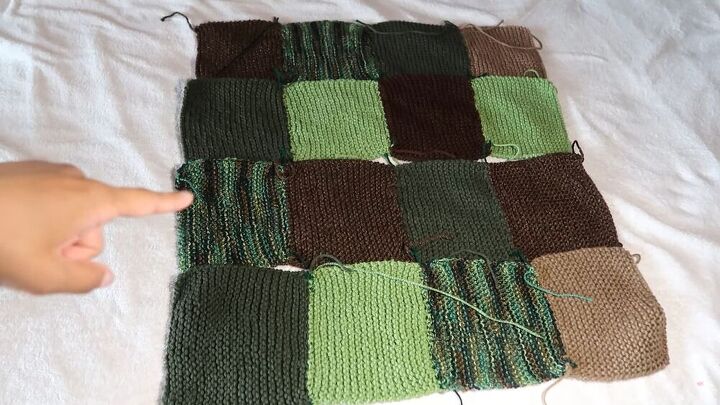
1. Crochet patchwork squares
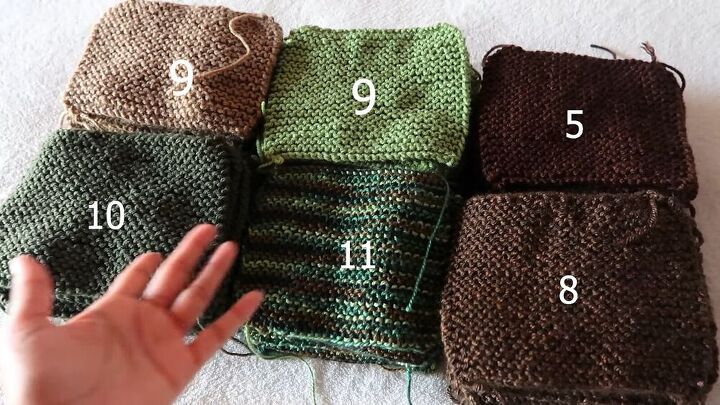
First, I crocheted the patchwork squares. I used this amount of rectangles for each color for my cardigan. That’s 52 pieces in total. Each rectangle is roughly 6 inches wide and 7 inches long (15.2x17.8cm).
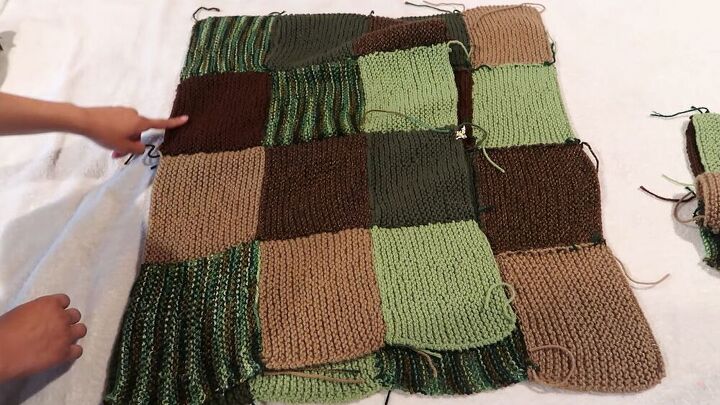
2. Arrange the front panels
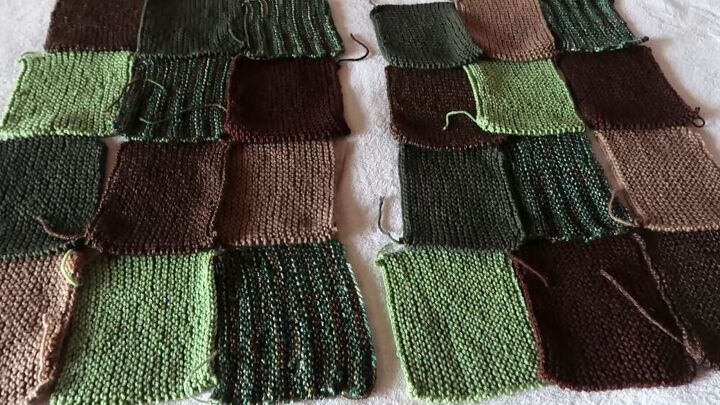
Arrange two 3x4 panels for the front of the cardigan and make sure that none of the same colors are touching.
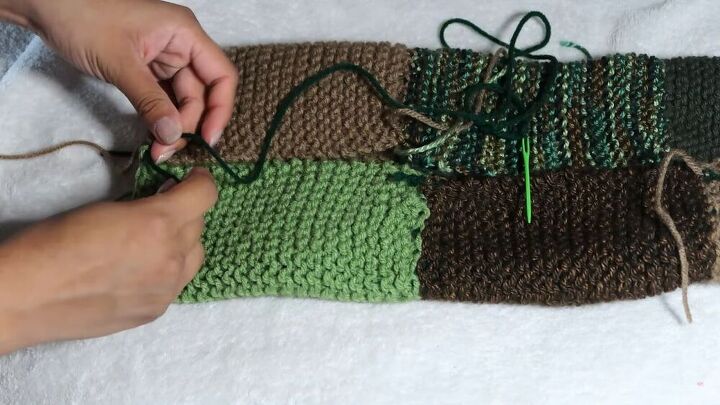
3. Assemble the front pieces
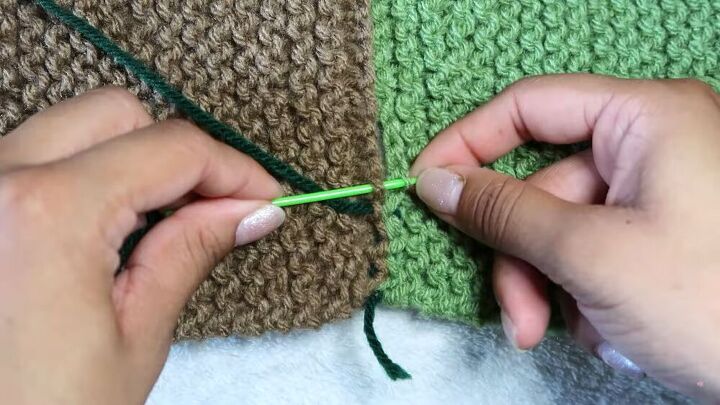
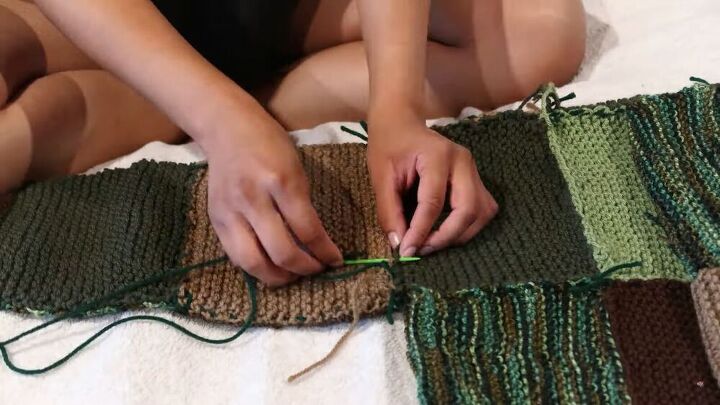
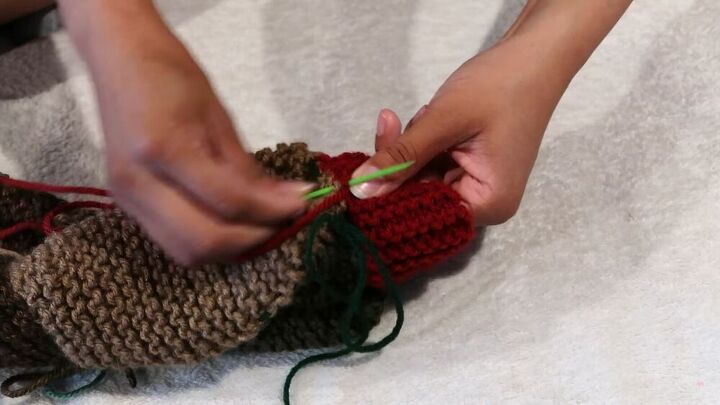
Assemble the cardigan by taking the rows of three rectangles and sewing the pieces together. I’m using a dark forest green yarn and I’m doing a back and forth method to reduce the yarn’s visibility from the other side.
When you’ve sewn all your rows, attach them together using the same sewing method. Once done, do the same thing for the second panel.
4. Assemble the back
The back of the cardigan measures 4x4. Attach the pieces together side by side and then join each line together.
5. Make the sleeves
The sleeves are a 3x2 shape, and I’ll be using the same exact method of sewing - joining the neighboring rectangles together first, then joining the rows together.
Once that’s done, fold the sleeve in half, making sure that the wrong side is facing outwards, then sew along the edge to create a tube of yarn. Do the same for the other sleeve.
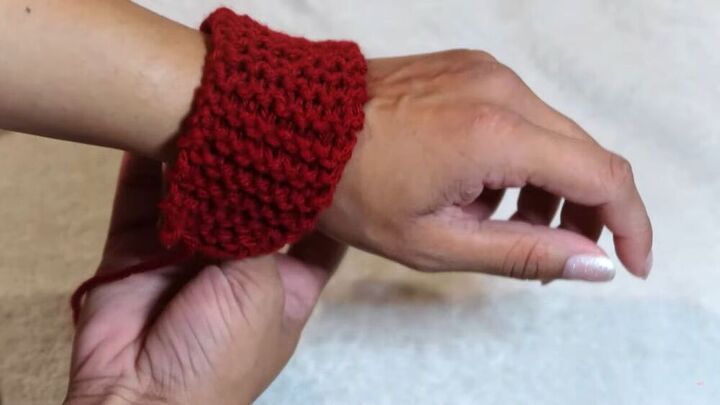
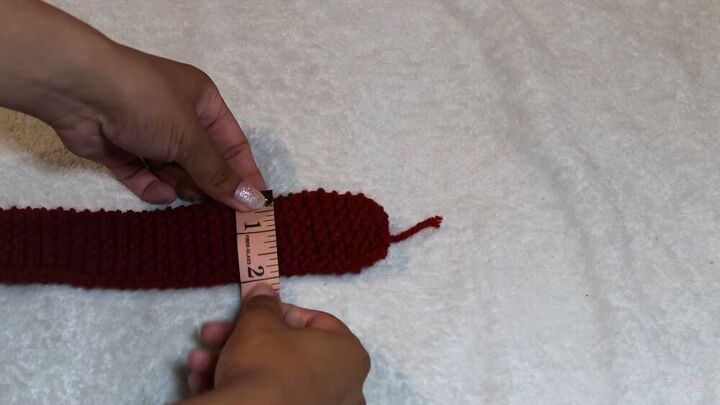
6. Make the cuffs
To create the cuffs, I used a purl stitch like the rest of the cardigan. I used seven chains and knitted it until it was enough to wrap around my wrist. It ended up measuring about 2 inches long and 6 inches wide (5x15.2cm).
To connect cuffs, double thread the needle for durability and sew until everything feels closed and secure.
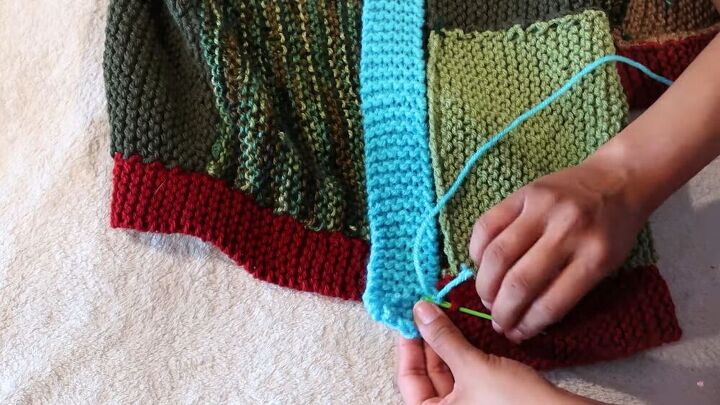
7. Make the hem
The hem is also 2 inches (5cm) long. The length is the same as the width of the cardigan.
8. Assemble the cardigan
Before attaching the hem, assemble the front and back of the cardigan together. Start with the wrong side of the back panel and overlap it with one side of the front panel, with the right side facing outwards.
Sew the bottom three rectangles together; the top rectangle needs to be left alone because that’s where the sleeve will go later.
Open up the front panel, now having both the front and the back panels with the wrong side facing us, and just start attaching them together. Then do the same thing with the other front panel.
Once done, sew the top of the cardigan together but only the first two rectangles (from the outer sides). Leave the third rectangle completely alone because that is where your neck will be. Sew along the edge and repeat the same process on the other side of the cardigan.
9. Attach the sleeves
Make sure that the wrong side of the sleeves is facing outwards and attach them to the side gaps that we created. Do this all around the hole and make sure you’re leaving the tunnel open for your arm to come through.
10. Attach the cuffs and the hem
For the wrists, temporarily scrunch the ends of the wrists together with the yarn so that it will be easier to attach the cuffs. Once scrunched to a decent amount, use red yarn to attach the cuffs to a now smaller hole.
Have the wrong side of the cuffs facing outwards. Once the cuffs are sewn around the sleeve hole, cut off the green yarn. For the long ribbing, simply take it and attach it all around the bottom of the cardigan.
11. Add the front ribbing and buttons
For the front of the cardigan's ribbing, just attach it onto the edges of the cardigan and sew it on. It's the same width as the red ribbing. I also added a thin red ribbing to the neck area.
For the buttons, I just eyeballed the placement and sewed them on. The last part is cutting off all the loose yarn and turning the cardigan right side out.
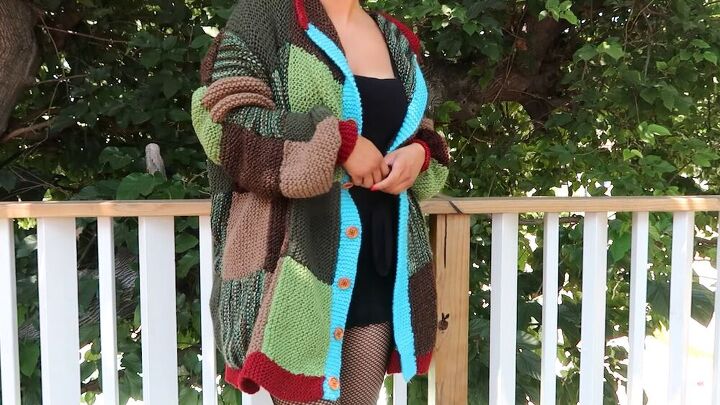
DIY Harry Styles cardigan tutorial
I give this cardigan a 10 out of 10, and it is now my favorite clothing item. I don't want to take my Harry Styles cardigan off! The cardigan does take quite a long time to crochet and then assemble, but don't let this throw you off - it is worth every minute!
The author may collect a small share of sales from the links on this page.


Comments
Join the conversation
Better than Harry’s!
Never thought to make a jacket but have made a few skirts in my time .( For my daughter when she was small ) Love your jacket !!