Painting Tutorial: How to DIY a Cute Planet Sweatshirt

In this tutorial, I’m going to be turning a plain sweatshirt into a planet sweatshirt using animal crossing sweater designs!
I found this design online, and it’s very interesting and creative. Let’s get started on this DIY planet sweatshirt.
Tools and materials:
- Solid fabric paints
- Shimmer fabric paints
- Paintbrushes
- Fabric outliner
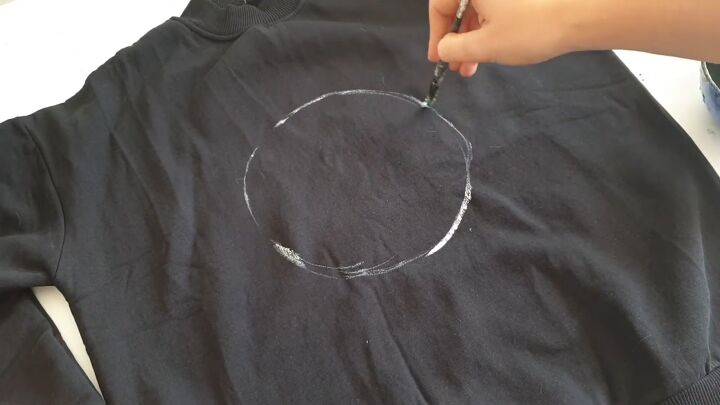
1. Paint a circle
Paint a circle on the center of the sweatshirt with white fabric paint. I’m free-handing this, but freehanding is not necessary.
When you paint on clothes, you can use transfer paper to transfer any image or circle but for me, painting free-hand is more interesting.
2. Paint rings
This planet is red like Mars but has rings like Saturn, so paint rings around the planet.
3. Fill in the planet
Fill in the planet with white fabric paint to create the undercoat.
4. Let dry
Put the sweatshirt in the sun and let the undercoat dry.
5. Gather your paints
To make the planet colorful and shiny, use a lot of shimmer colors. I’ll be using red, blue, and silver shimmers.
For the opaque colors, I’ll be using red, blue, purple, black, and yellow.
6. Begin painting the planet red
To paint the planet red, you won’t just be using red.
Use yellow and white to paint the highlights and purple, blue, and black to paint the shadow.
7. Create the planet reliefs
As the planet's surface is not smooth, tap with the brush to create its reliefs.
8. Continue painting the planet
Here, you can see how I used all of the colors to add dimension, light, and shadow to the planet.
After filling in the entire planet, I used separate white and red outlines to add a glow to it.
9. Paint the rings
To paint the rings, mix silver with purple. Use black as well.
To make the rings a bit more graphic, use a silver fabric outliner to create lines on the rings.
10. Begin painting space dust
For the background, I decided to improvise and use the custom design’s gray waves as the main idea but with many different colors.
Use all of the colors to create the first wave of space dust behind the planet. To create space dust, just tap the brush against the sweater.
11. Add stars
You can create stars by using the brush to add white paint and smudging it with your finger, or you can splatter paint with the brush.
12. Paint the sleeves
I also decided to paint more space dust and stars on the sleeves. You can also do this on the collar and the hem.
13. Draw lines with pearl outliner
The more techniques, the better, so use a pearl outliner to add random lines to the space dust. The pearl outliner is so beautiful and so shiny.
DIY planet sweatshirt
This animal crossing sweater wasn’t very hard, and if you have some artistic skills, hopefully this tutorial helped you create this planet sweatshirt for yourself!
Let me know what you think of the finished design down below.
For more painting tutorials, check out my Easy DIY Custom Painted Jeans Tutorial.
Enjoyed the project?
Suggested materials:
- Solid fabric paints
- Shimmer fabric paints
- Paintbrushes
- Fabric outliner
The author may collect a small share of sales from the links on this page.


Comments
Join the conversation