Swirl Bracelets – DIY Adjustable Bracelets

Learn how to make swirl bracelets using just fabric paint! These DIY adjustable bracelets are incredibly easy to make, making them a great craft for kids, but they come out absolutely beautiful, making them also great for adults.
I originally had the idea for these whimsical and stretchy bracelets at a street fair. One of the stalls was selling these beautiful swirly plastic bracelets for something like $20-30 each. The woman managing the stall showed me how they’re completely adjustable. I picked one up and thought it felt familiar. It took me a minute, but then I realized they felt (and smelled) like window cling paint or fabric paint! Therefore I tried making them myself and was delighted with the results!
Materials:
Fabric Paint (Various colors)
Plastic Bag
Choose another color of fabric paint and add dots next to the ones you already made.
Continue filling in as many colors of dots as you would like until almost all of the space is filled in.
Take the back of a paintbrush and starting on one end, move it in a figure-8 pattern through the paint.
Let them dry completely and carefully peel them off of the plastic.
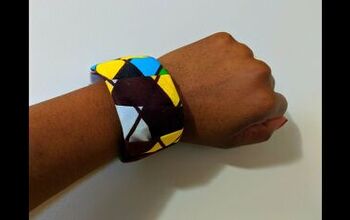
Wrap the swirl bracelet around your wrist and allow it to overlap, sticking to itself.
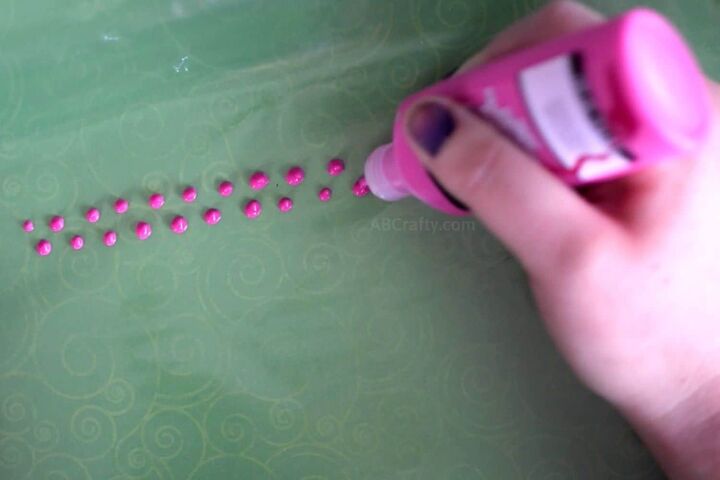
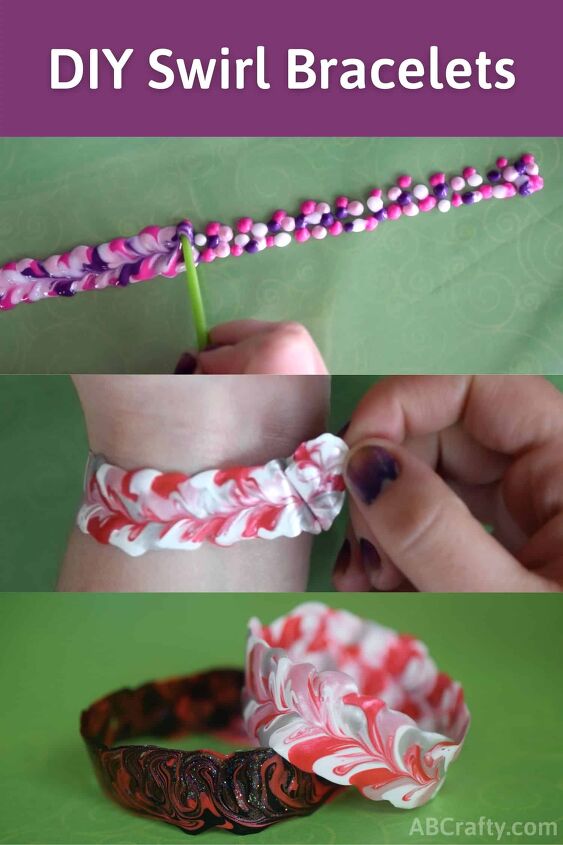
Start by placing a plastic ziploc bag on the table. Then using one color of fabric paint, draw little dots in a row. I like to stagger them to start, making two rows.
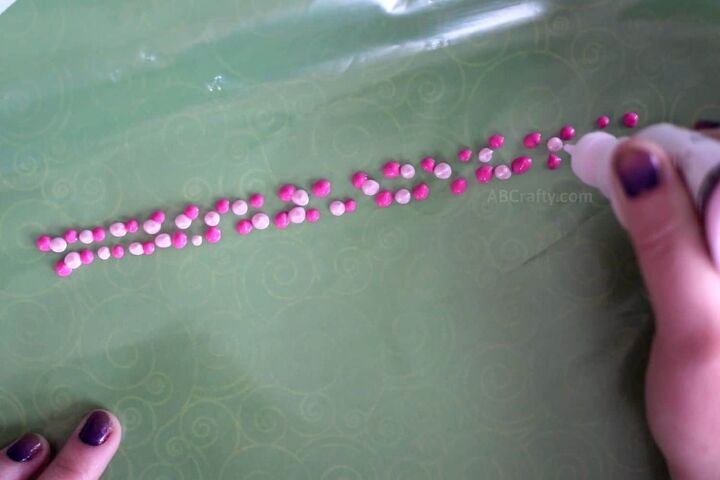
Then use a second color of fabric paint to add more dots between the first ones you made.
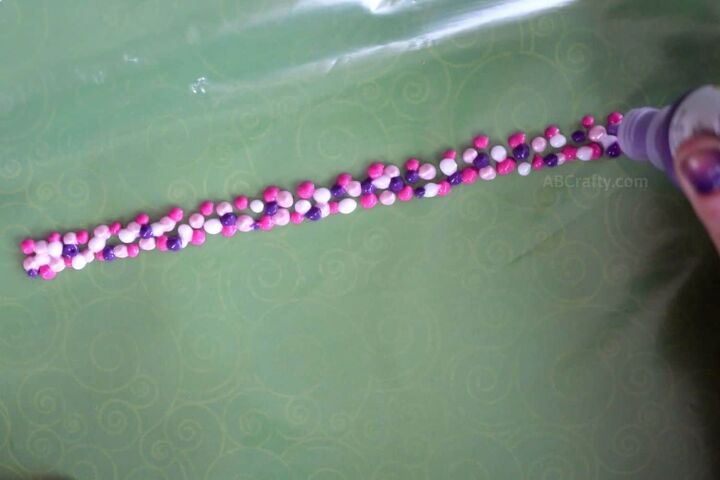
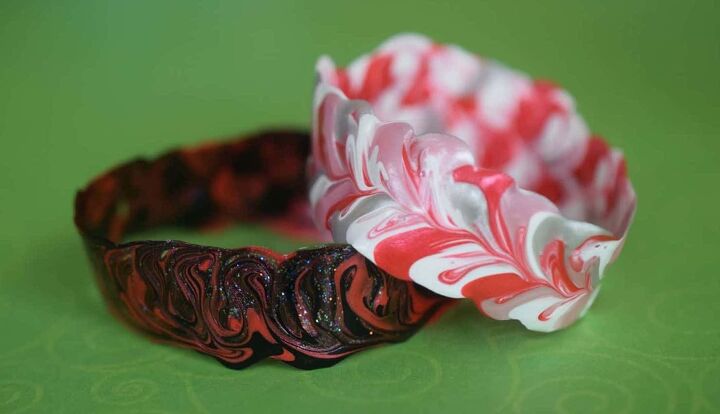
Continue adding dots using different colors of fabric paint. You can also combine different styles of paint - For example for this one I used shimmery paints, matte ones, and the white is actually a clear glitter one.

Next, use a toothpick (or in my case, the back of a paintbrush) to create swirls throughout the paint. You can do this by going up and down, drawing figure-8's as you go.
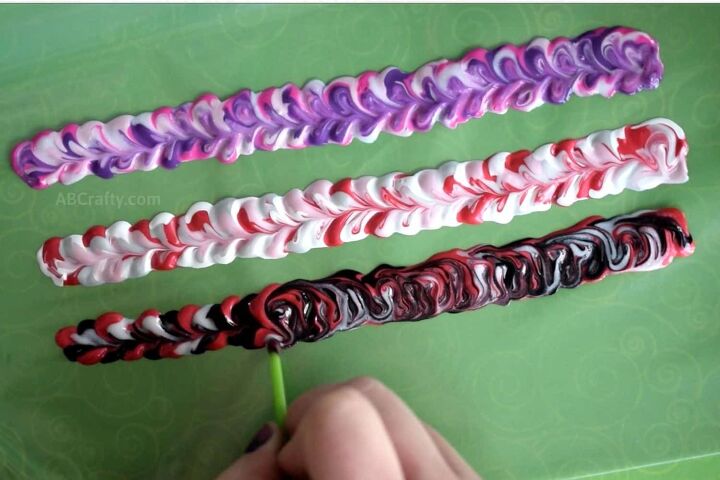
You can even make a bunch of different ones all at the same time. Just be careful to not let the colors mix.
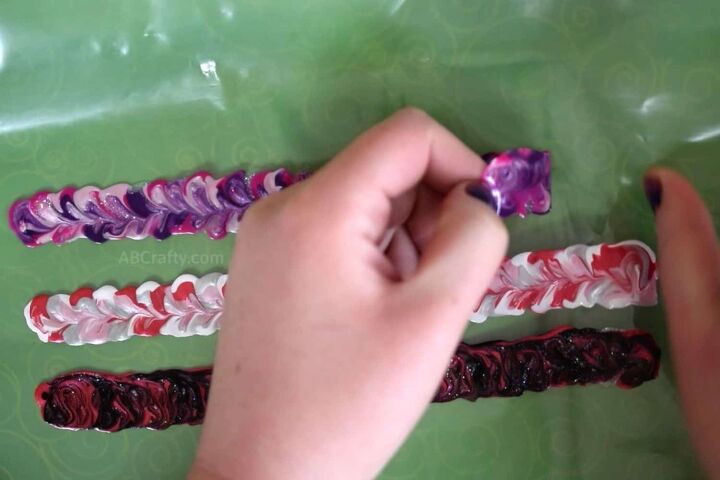
Let the paint dry and then carefully peal them off the plastic. Be very careful to not let them stick to themselves on the bottom or they'll be nearly impossible to pull apart again.
(The top can stick to the bottom, but and the tops won't really stick to each other. But the bottoms will immediately stick together)
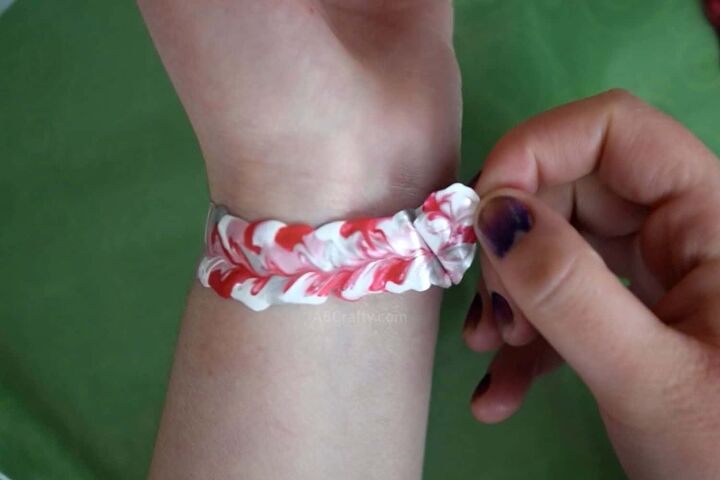
To put on the bracelet, simply wrap it around your wrist and stick it to itself! Then place it back on some plastic when you're not wearing it.
If video's more your thing, here's a video to follow along.
The author may collect a small share of sales from the links on this page.


Comments
Join the conversation
These bracelets are super cute! Thanks for the idea:). Would parchment paper work instead of a plastic bag?
I haven't tried it, but I would imagine it would stick to parchment paper. I recommend testing it first just to be sure.