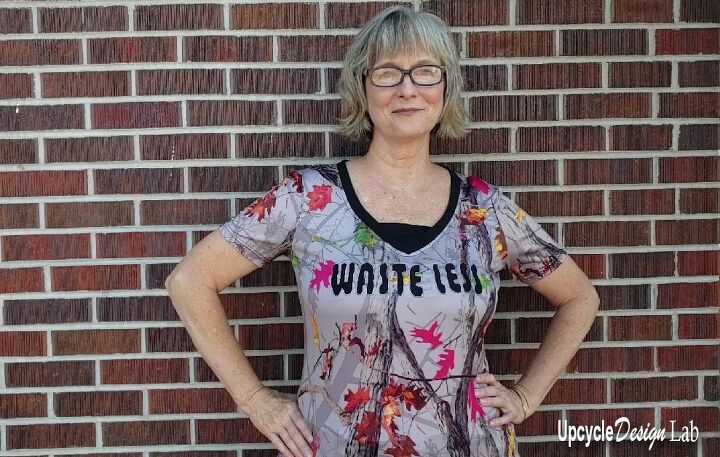
7 Fun Ways To Upstyle T-shirts Using a Cricut Cutting Machine
Hey there,
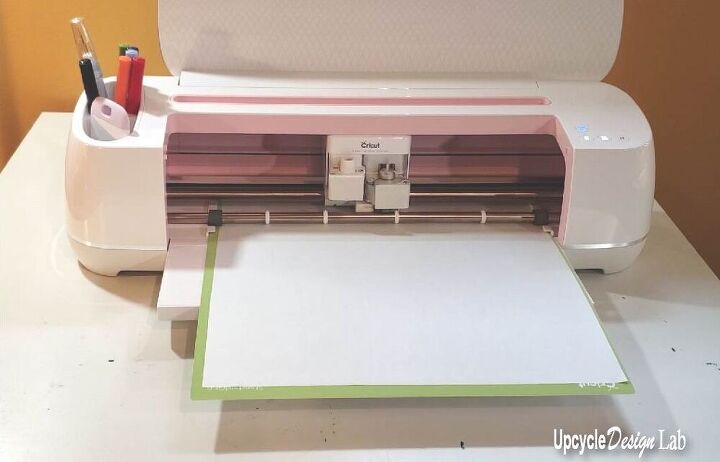
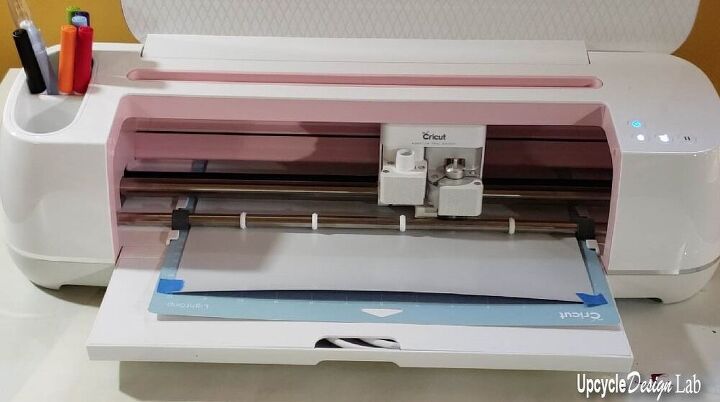
Do you have a Cricut? So many people do these days. They are a little bit of an investment, but I took the plunge a few months ago. I am still learning how to use my new Cricut Maker, and I have certainly made a few mistakes along the way, but it is fun to use and easy to get started.
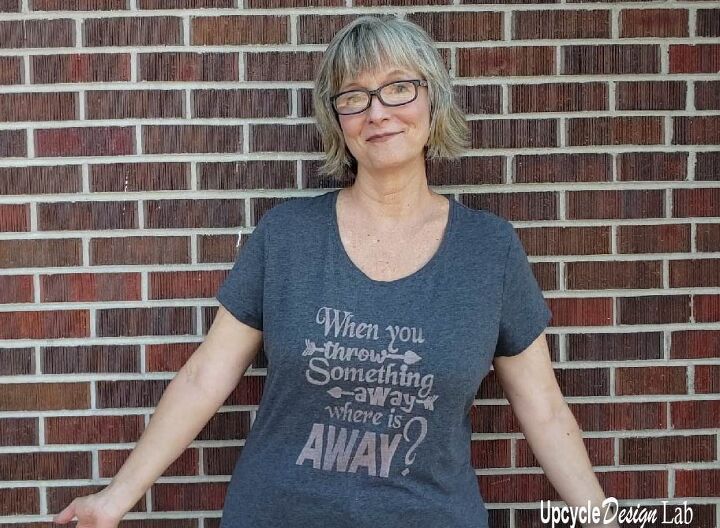
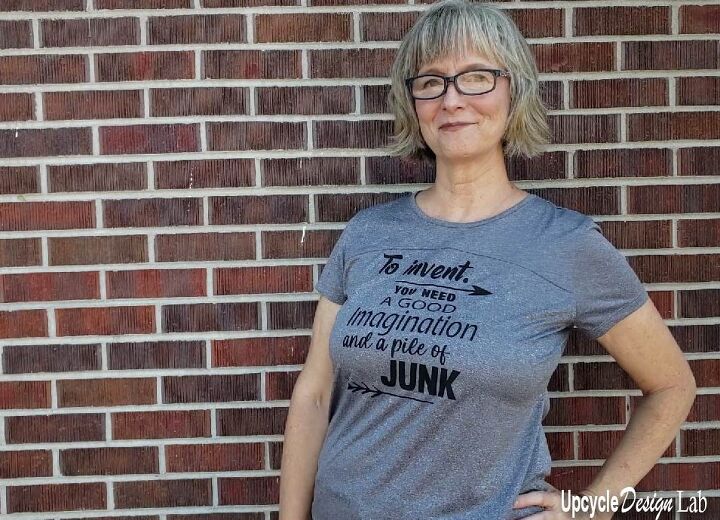
Today I am sharing the seven different techniques I used to add some artwork to some plain thrift shop t-shirts and knit tops. I am sure there are many more techniques out there, and you can also combine different methods to get even more variety. I used several quotes and a few graphics to add designs to my shirts, using my Cricut Maker and the following techniques.
Advertising Disclosure: Upcycle Design Lab may be compensated in exchange for featured placement of certain sponsored products and services, or your clicking on links posted on this website.
Check out this video for a quick overview. And for a quick look at all the materials used in these projects check out my Amazon Idea List for T-shirt Embellishment.
I am sure you are all familiar with bleaching t-shirts to embellish them. It is one of my favorite ways to refashion a t-shirt. It is just so versatile, from using bleach to make a tie-dye effect, or splatter for a more random look, to using stencils for intricate designs and shapes. One quick Google search will show you the variety of talented people and what they can do with bleach designs.
It is also a very inexpensive way to embellish a shirt. All you need is your shirt, an iron, some freezer paper, and some bleach. I, of course, also mentioned the Cricut cutting machine, which is a bit more of an investment.
But if you don’t have a cutting machine, you can also hand cut your designs with a bit of patience . Here are some shirt designs that I made before I got my Cricut. They do take more time, but you can still get detailed and intricate designs.
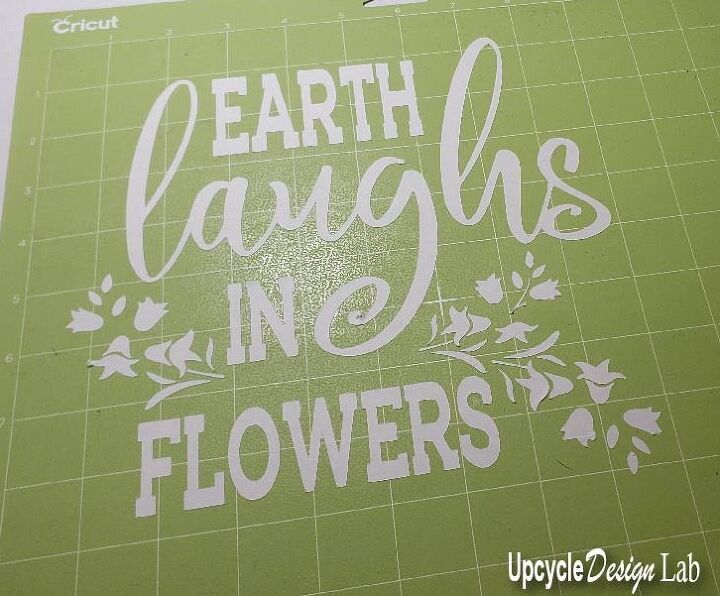
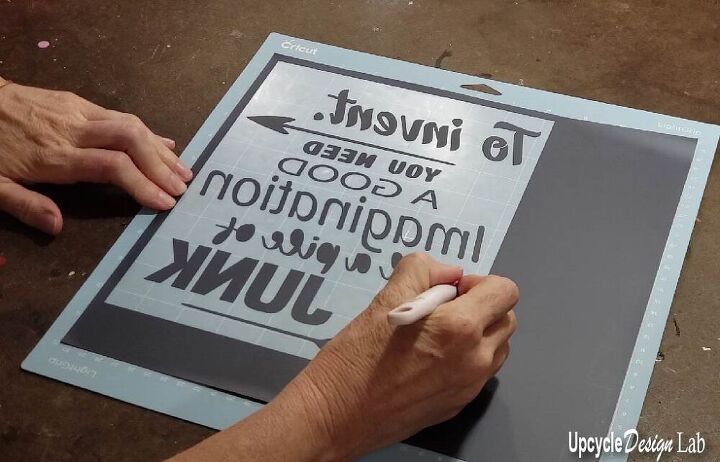
If you are as new to using the Cricut Maker as I am, freezer paper is an inexpensive material to learn, so it is a great start.
I have seen tutorials that recommend mirroring the image and cutting the freezer paper’s shiny side up. Other tutorials recommend cutting the image facing up with the shiny side of the paper stuck to the cutting mat. I have tried it both ways, and there doesn’t seem to be a difference in how well the freezer paper sticks to the shirt after cutting, so my recommendation is not to mirror the image when cutting out your design. It is easier to read and transfer to the shirt.
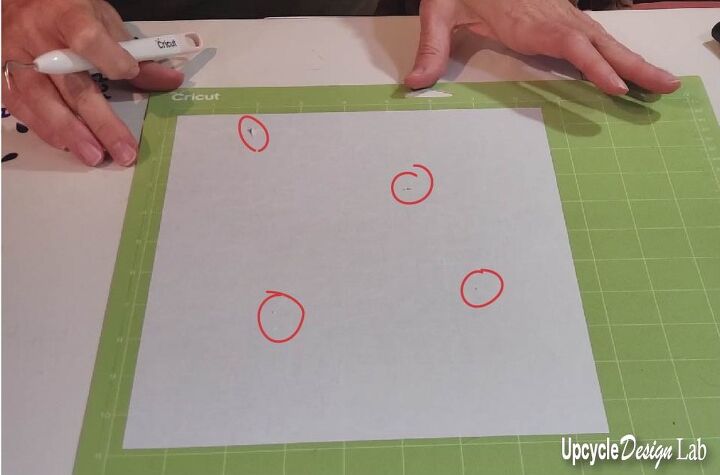
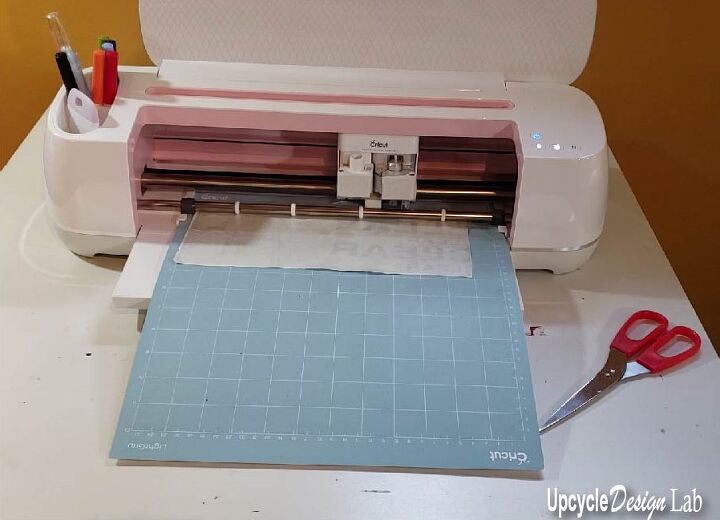
As you already know, I am no Cricut expert, but I have cut a fair amount of freezer paper with my Cricut machine. Almost without exception, small pieces of paper pull away from the mat during the cutting process. I have primarily used my light grip mat to cut the freezer paper. I tested out the standard grip mat with freezer paper, and I still had small pieces pulling away from the mat during cutting. Also, the design was more challenging to remove from the standard grip mat.
So overall, I think the light grip mat is the best choice. As I said, I am no expert. I don’t know if I am not adhering to the paper well enough to the mat or if my mat is not clean enough. The latter is highly probable as we have six hairy four-legged creatures in our house and two two-legged creatures who are allergic to the vacuum cleaner. The other problem that I have had with freezer paper is small sections that do not get cut. I have tried increasing the blade pressure from the default to more, but this hasn’t made a difference that I can decern. It could be that I need a sharper blade, but the other materials I cut after the freezer paper cut perfectly.
Anyway, the point is that I can still use these stencils even though they don’t look perfect when they come out of the machine.
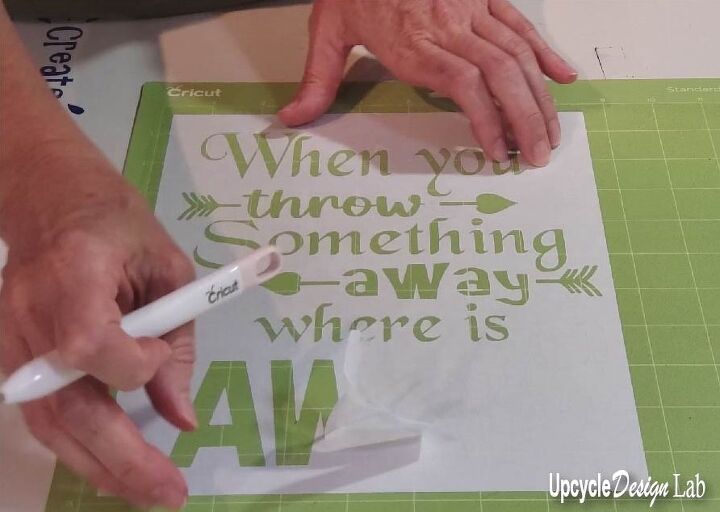
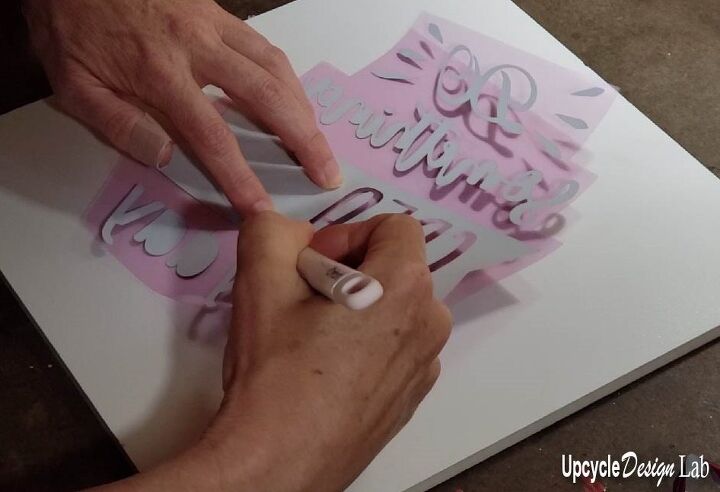
One of the fun things about working with bleach designs is making either a positive or a negative print of your design. The choice you make will determine which part of the design you weed out. Either way, you want to weed the freezer paper while it is on the cutting mat.
Here are a couple of examples of what I mean by positive and negative prints.

Transfer tape is still a bit of a mystery to me. I mean, I understand the basics of how it works. You use it to lift your design from one surface and place it intact to another surface. But the stickiness factor needs to increase with each move. Right?
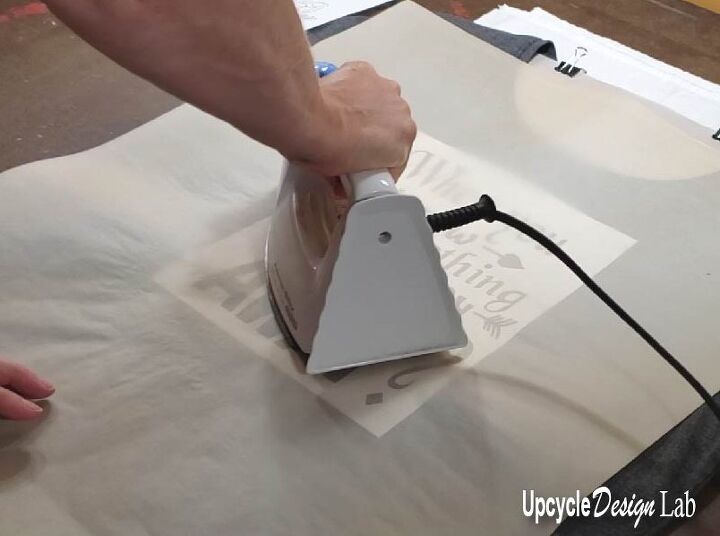
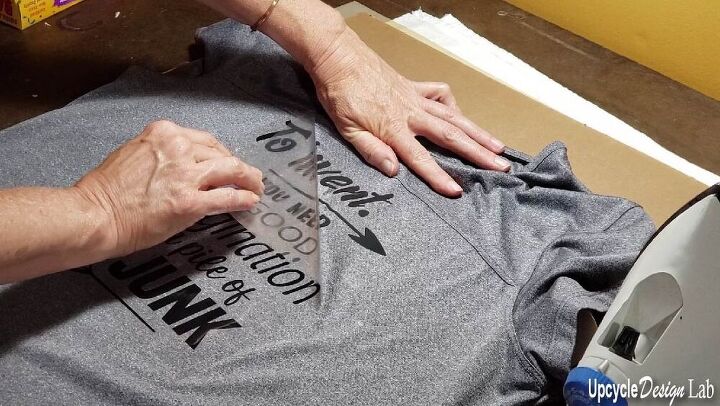
I have seen some YouTubers use transfer tape with freezer paper, but I have tried it, and so far, it is not in my skill set. For me, it is still faster to move and place the pieces individually onto the shirt. It is super easy for those of you who have never used a freezer paper stencil on fabric. You use an iron to press the shiny side of the freezer paper onto the fabric. I use the temperature that suits the garment. The freezer paper seals to the fabric, making an excellent stencil surface, and when finished, the freezer paper is easy to remove and leaves no residue on the fabric.
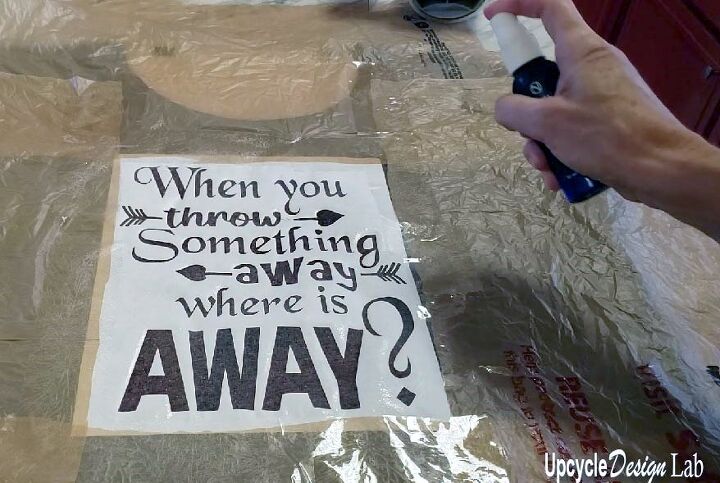
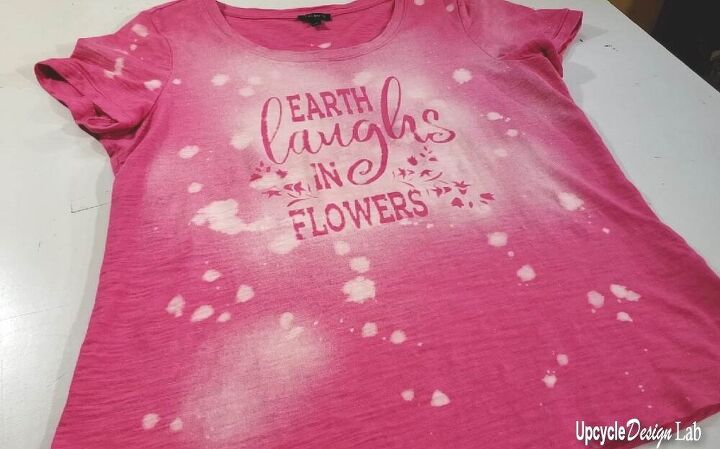
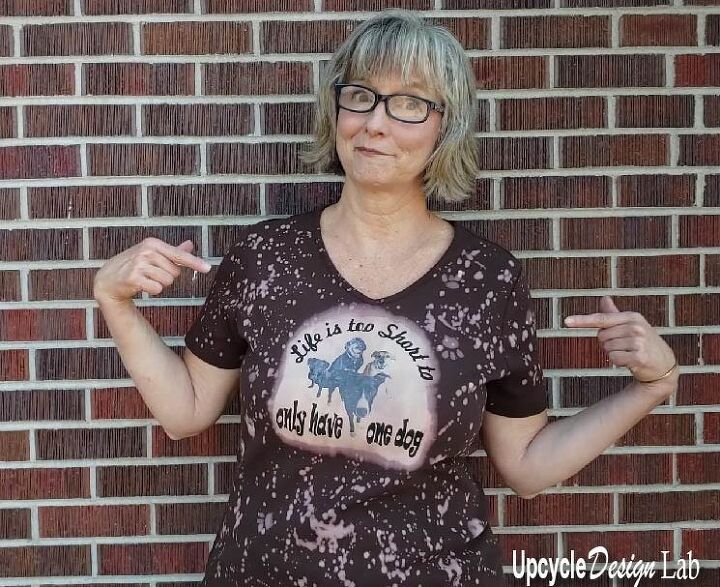
I should have mentioned this earlier, but you need a shirt with high cotton content; 100% cotton bleaches the fastest, but you can also bleach cotton blends. There are many ways to apply bleach, but my preferred way is to use a spray bottle. This method gives the most even coverage without saturating the fabric, and I think it is the best way to apply the bleach when making a positive bleach print. I like to use the spray bottle over the stencil for negative images, but I usually add more significant, random drops of bleach to the shirt outside the design area when making a negative print shirt.
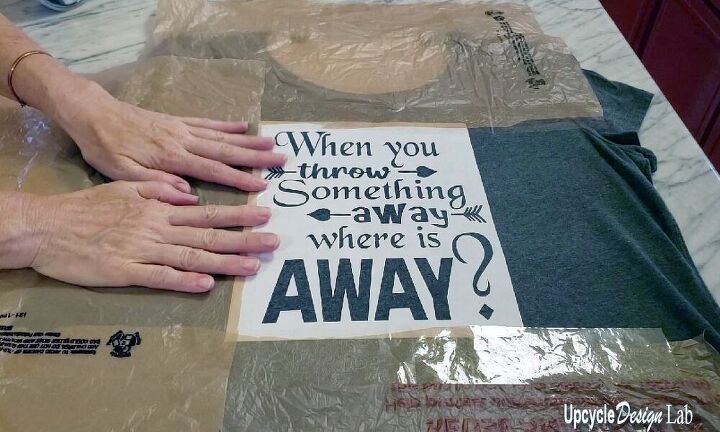
If and how you protect your garment is a personal choice, but you will most likely want to protect the other side if you have a design you want on one side of the shirt. So you will want a nonporous material inside the shirt, and outside the shirt anywhere you don’t want bleach. I usually use parchment paper inside the shirt and plastic bags and tape for the outside.
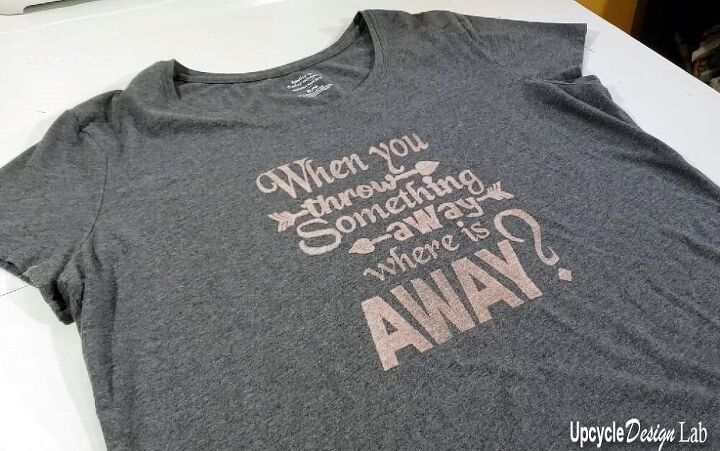
There really are no rules here. Sometimes I have stopped the bleaching process after a few minutes, and other times I have let it go for over an hour. The timing depends on a few factors. The fiber content of the shirt makes a big difference, the color of the shirt can play a role, and of course, the effect you are trying to achieve comes into play. My thinking is a little longer is always better. When I started bleaching, I was afraid that I was going to damage the fabric with the bleach, and of course, this is possible, but in my experience, I had had misprints only when I didn’t leave the bleach on long enough for the design to stand out from the shirt.
I always do my bleach projects in the kitchen. We have a marble top table that is not affected by bleach, and I have a sink full of cold water to dunk the shirt when I am ready to stop the bleaching. However, I have seen people work outside and pour water over their designs. So I would recommend that you have a plan to stop the bleach before you apply it to the shirt.
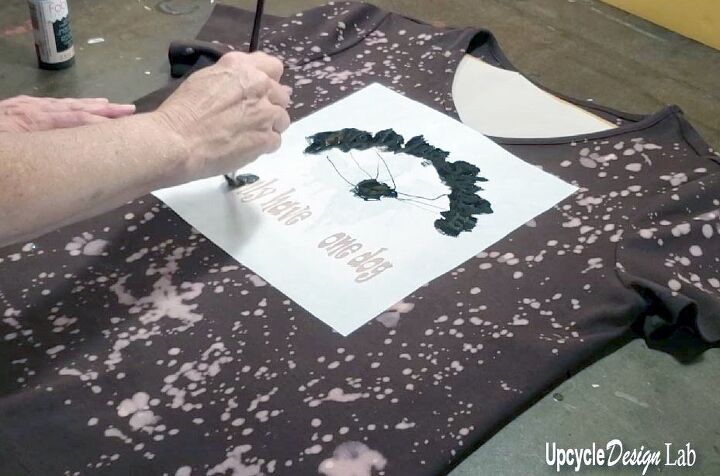
The results of this shirt were a little disappointing, but it is an example of combing several techniques together. If my heat transfer had turned out better, I would have been much happier. Unfortunately, my heat transfer paper was pretty old, and I don’t have the best printer, so my dogs look very faded. I am not going into a lot of detail here other than to encourage you to experiment.
This design combines bleaching, obviously, the iron-on heat transfer, and fabric paint applied using a freezer paper template.
Even though my shirt design was a failure, I encourage you to think outside the box and not be afraid to use more than one technique in your designs.
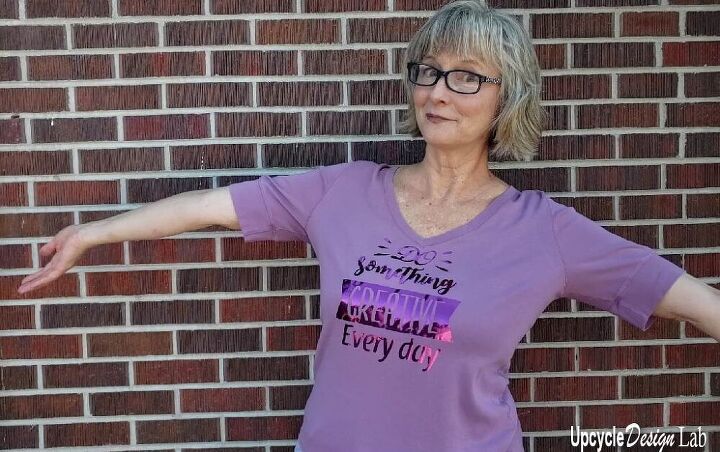
I am putting these two together because I used some black everyday iron-on and some purple foil iron-on. They are pretty similar to use but not entirely the same.

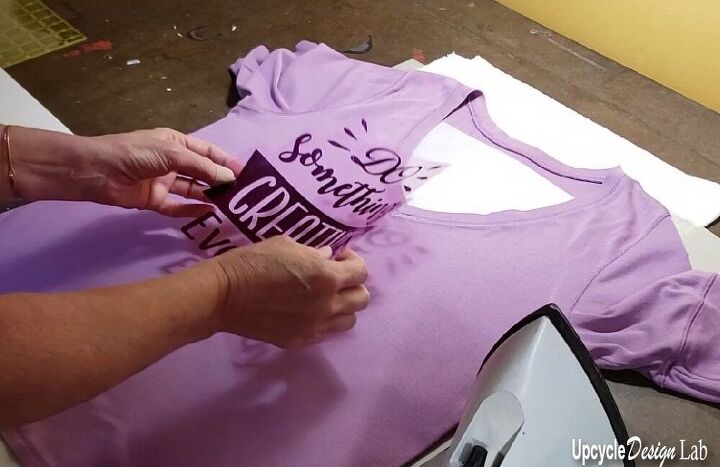
This was my first time using Cricut iron-on. I would be lying if I said I wasn’t a little nervous. The iron-on is quite a bit more expensive than freezer paper, but of course, you do get a more professional-looking garment.
You may already know this, but the first rule of cutting iron-on is to mirror your artwork. The iron-on sheet needs to be placed shiny side down on the cutting mat. Sorry if I am too remedial here, but if all the Cricut materials are a little foreign to you, this may help. You do not need to use transfer tape with iron-on products because they come with their own transfer system. The iron-on side should be facing up when the material is placed in the cutting machine.
When the machine cuts the iron-on material, it only cuts through the iron-on portion but leaves the transparent carrier sheet intact. As I mentioned above, I have had some flaws when cutting freezer paper, but both iron-on products that I used cut perfectly.
Because iron-on has a carrier sheet, you can weed your designs on or off the cutting mat. I have done one each way, and I don’t think it matters. I have heard some people recommend that you always weed on your mat, and it does help hold your art flat, which makes it easier to weed, but it comes down to personal preference. As I mentioned before, the two iron-on products I used were very similar to cut, but the foil iron-on did not want to stick to my cutting mat.
So I used a little bit of tape to hold the edges down. I was worried that it might not cut correctly, but it cut perfectly. I weeded the foil piece after removing it from the cutting mat since it tended to curl away from the mat.
Adhering the design to the shirt is where things get a little bit dicey. If you have a Cricut EasyPress, then the process is quite simple. If, on the other hand, you are like me and have a conventional iron, there is a little more guesswork. Cricut has a heat press help site designed for their EasyPress, but it is also helpful when using a regular iron. The two main differences are the presses are one and done since they are made to cover the entire design. With an iron, you have to cover the design in pieces. The other hurdle with the iron is knowing the actual temperature. With the easy press, you set the temperature much like an oven. So I don’t have any great advice for this one unless you have a fancy iron with actual degree settings.
I can report that my first attempt with everyday iron-on turned out great. Maybe it was beginners’ luck. I used the same settings and process with the foil iron-on, and it turned out pretty well, but I did get some minor puckers in the foil. I am not quite ready to run out and buy an easy press, but you know what they say about using the right tool for the job.
The last step is to remove the carrier sheet from the iron-on slowly and smoothly, checking to ensure the iron-on is secured to the shirt. Then, if you have any places where the iron-on isn’t sticking, you can reheat those areas with the iron before completely removing the carrier sheet.
Overall, I was pretty happy with both shirts, mainly because it was my first attempt, and I could use my iron.
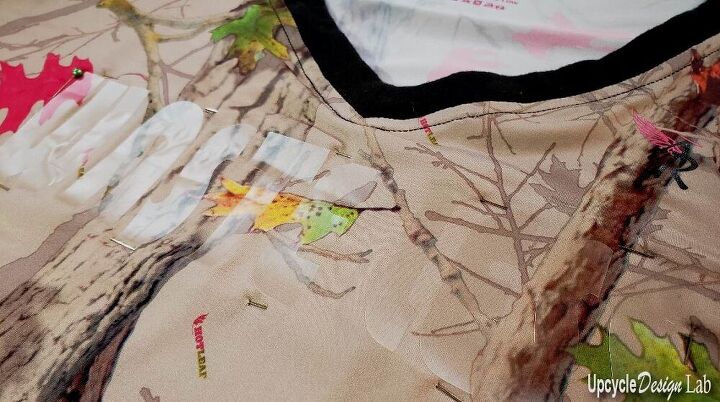
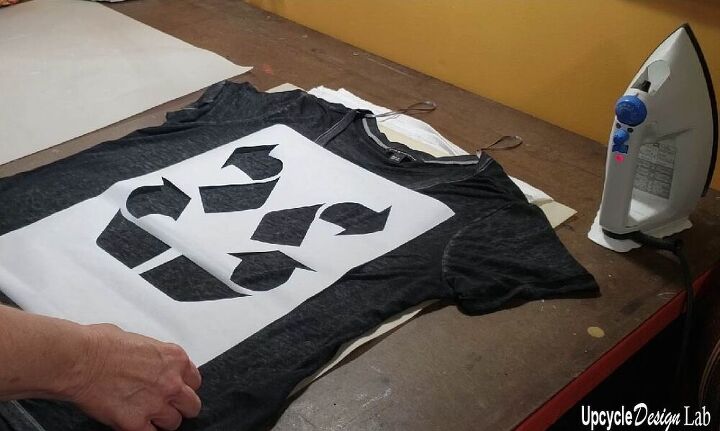
Reverse applique is a fun technique to use on printed garments with a solid color fabric underneath. You want to select a simple design for this method since you will be sewing the design onto the shirt.
For my template, I used contact paper. I cut it using a vinyl setting on the machine, and I left the backing paper on for the cutting process.
I used clear contact paper because that is what I had, but a printed paper would have been easier to see. I could have tried using transfer tape on this design, but it was so simple that I just applied the pieces individually. The contact paper works well because it is pretty tacky and stays on the fabric better than freezer paper. The freezer paper is good if you are not moving the garment around, but I wanted a sticker template since this shirt needed to go through the sewing machine.
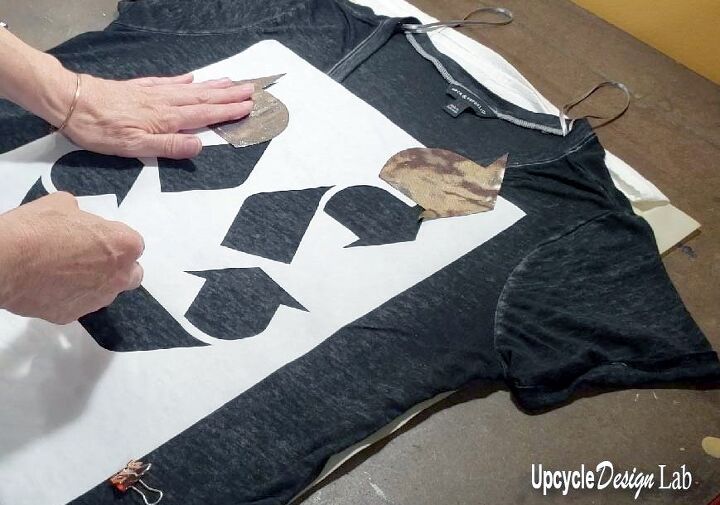
My template was all but impossible to see once it was on the sewing machine, so I had to use a sharpie to mark the edges.
Once the design is in place, you need to cut a backing piece of fabric that is slightly larger than the design. Then, pin the material on the inside of the shirt over the area of your design. The right side of the fabric should be facing toward the garment.
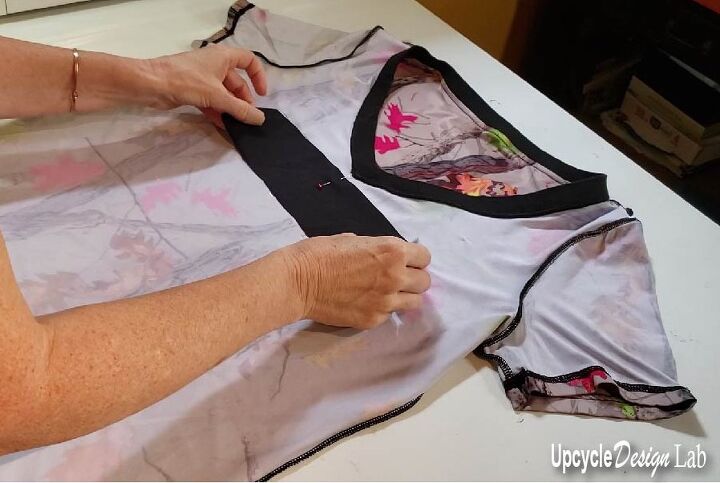
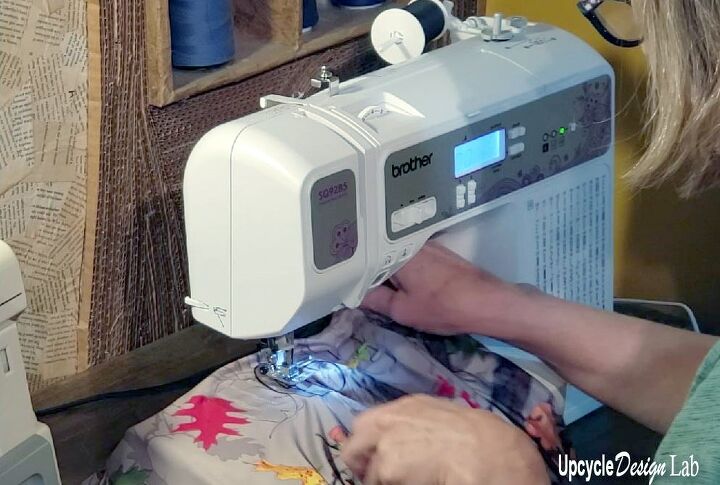
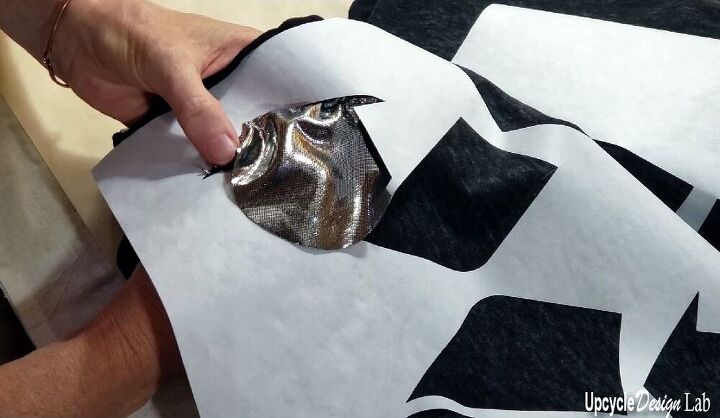
After the piece is attached, turn the garment right side out and use a sewing machine to stitch around the template carefully.
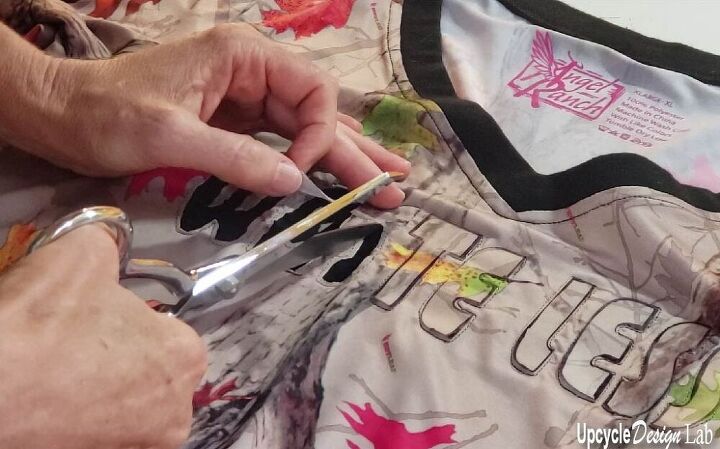
Once you have completed sewing around the entire design, you can remove the contact paper template and carefully cut out the top layer of fabric to reveal your design.
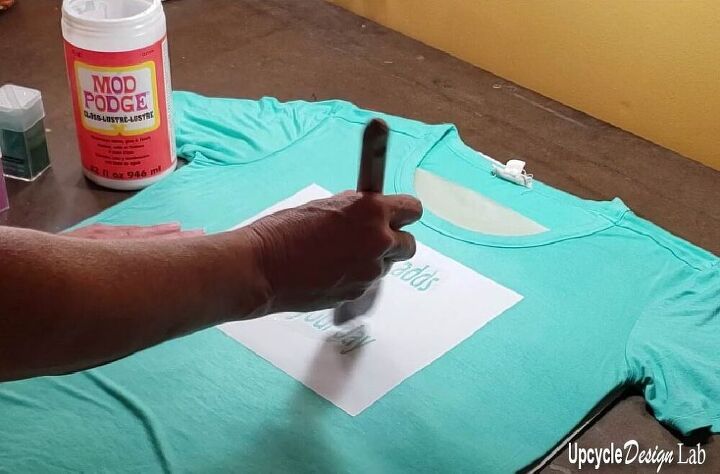
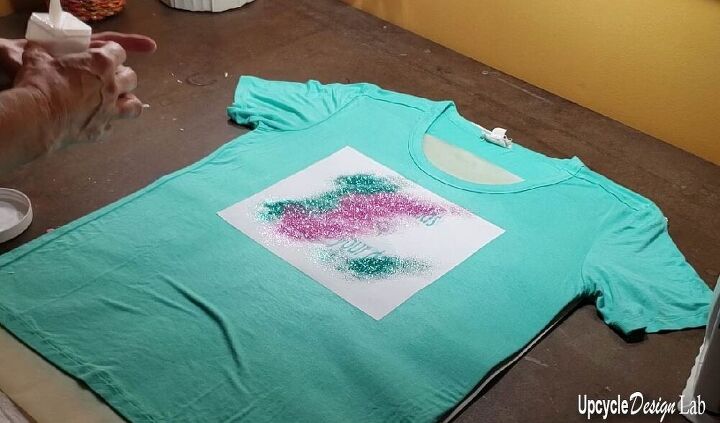
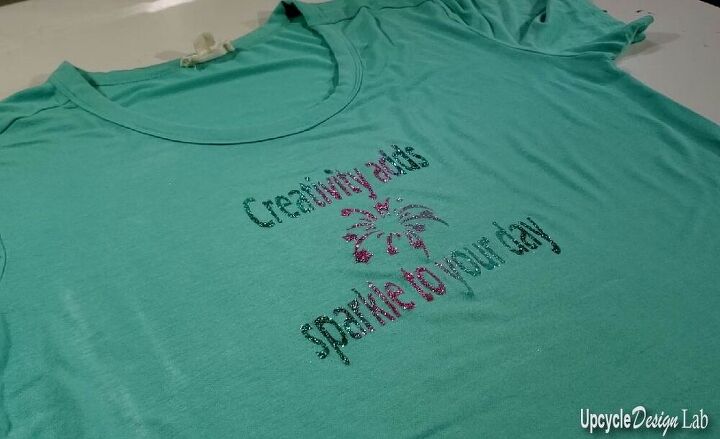
I am not really a glitter person, but this was a fast and fun technique. I made a freezer paper template for this project and ironed it to the shirt the same as I did with the bleach project. Then I brushed on some mod podge and covered the glue with some different colors of glitter. Be prepared to get glitter all over. I tried to pour off the excess into a trash can, but it is impossible not to spill some. 🙂
You want to remove the freezer paper before the mod podge is completely dry. Yes, I learned this the hard way. Leave the shirt flat until the glue is completely dry.
This final technique is a little strange, but I like how it turned out.
Start with a simple design. I printed my template on freezer paper, but the contact paper would have worked better for this technique.
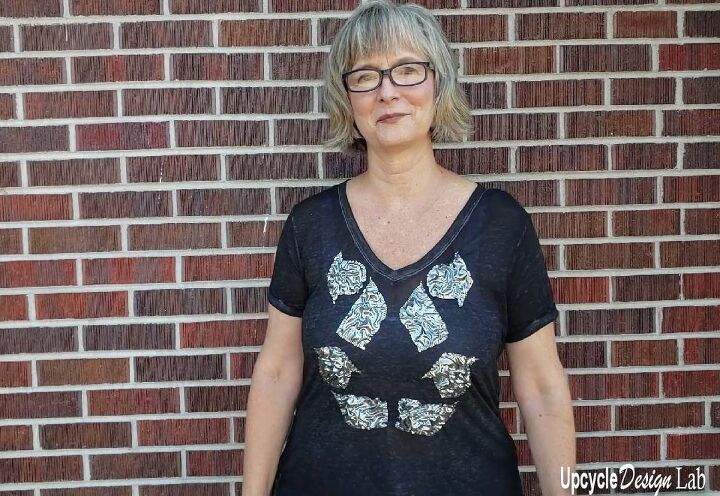
Cut the applique pieces 20% larger than the template artwork. You will want to use a knit fabric or some other fabric that does not fray for the applique pieces. I found this fun shiny silver fabric in my stash.
Next, you need a needle and thread to gather and stitch the applique pieces to the shirt. The applique should be gathered so that it fits inside the template piece. Use small stitches along the edges and throughout the pieces until desired crumple effect is achieved.

Whew, that was a long post! If you are still here, thanks so much for checking out my projects. I hope you have a fabulous week.
Happy Upcycling,
Cindy
Advertising Disclosure: Upcycle Design Lab may be compensated in exchange for featured placement of certain sponsored products and services, or your clicking on links posted on this website.

The author may collect a small share of sales from the links on this page.


Comments
Join the conversation