Awesome Terminator Genisys-inspired Makeup Tutorial for Halloween

Today, I'm going to walk you through a Terminator Genisys-inspired makeup tutorial for Halloween.
It is the perfect mixture of gory and glam. The robot prosthetic makeup is so cool and realistic, I can’t wait to show you so let’s get started.
Tools and materials:
- Glue
- Brown eyeliner
- Foundation
- Beauty blender
- Concealer
- Setting powder
- Eyebrow pencil
- Eye primer
- Eyeshadow
- Makeup brushes
- Illuminator
- Eyelash curler
- Mascara
- Felt tip pen
- Metallic cream makeup
- Fake skin
- Fake blood
- Lipstick
- Nuts and bolts
- Eyelash glue
- Sponge
- Scissors
- LED light
- Double-sided tape
- Paint
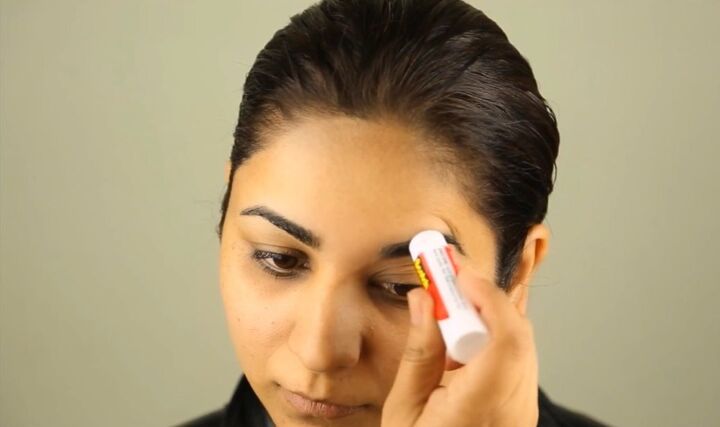
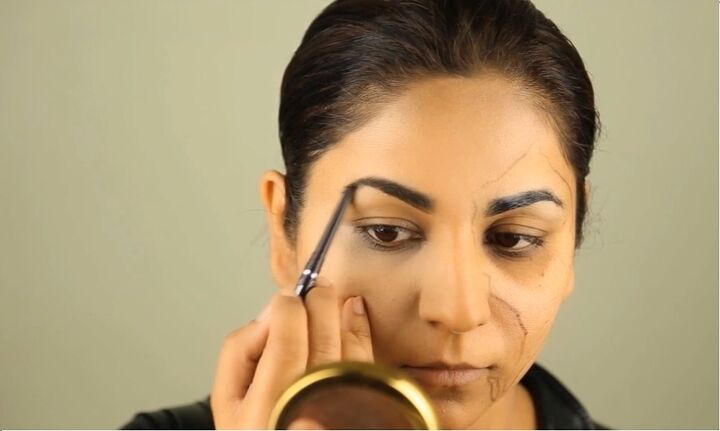
1. Set down eyebrows
Use some non-toxic glue to set your eyebrow on the left side, making it easier to paint over them.
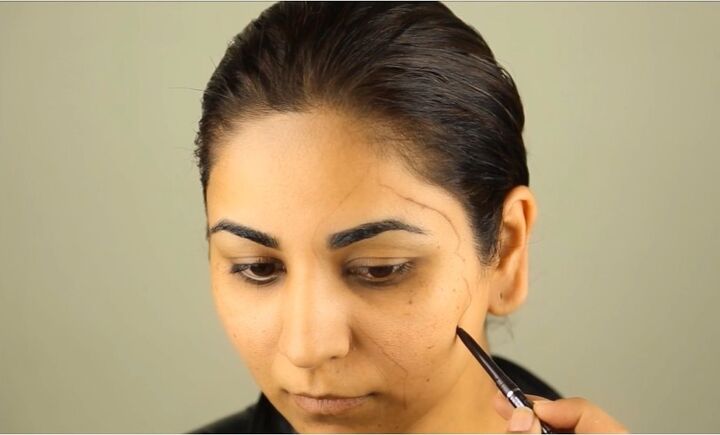
2. Outline half of your face
Outline the area of your face with a brown eyeliner where you want it to be torn.
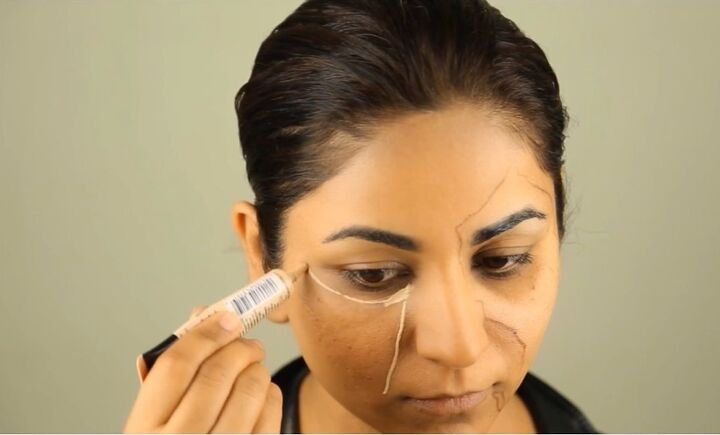
3. Apply foundation and concealer
Use a liquid mousse foundation in the area outside of the border that you just drew first.
First, apply it with your fingers and then set it with a beauty blender. Proceed to use concealer in areas on your “glam” side where you want to highlight.
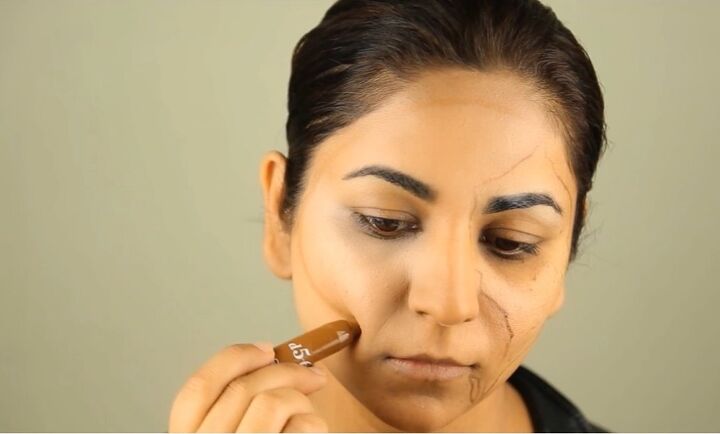
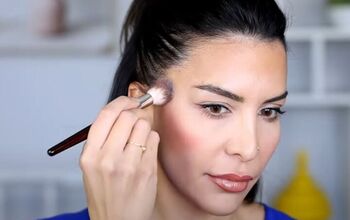
4. Contour face
Contour your face using a concealer in a darker shade.
Make the contouring pretty strong because, as you know, robots like to look strong and have that chiseled look.
Next, apply some setting powder under your eyes.
5. Groom eyebrows
Groom and glam up your eyebrows only on your glam side using an eyebrow pencil.
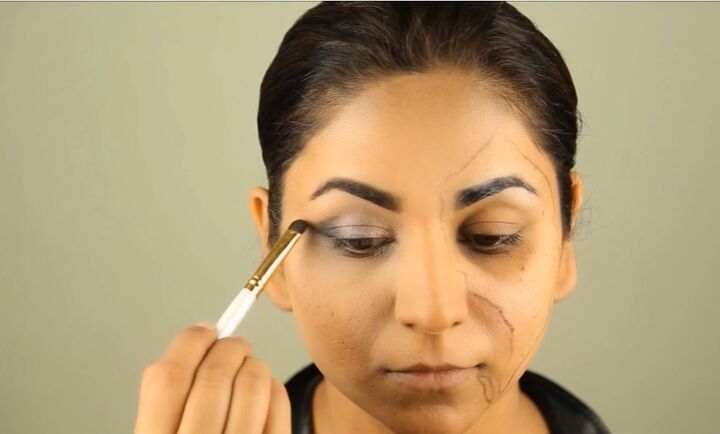
6. Apply eyeshadow
Use an eye primer on your eyelids as a base before applying eye shadow. Paint the inner corners of your lids with silver eyeshadow.
Then, use a light gray shade right in the center of your lids and a darker gray shade in the outer corners. Proceed to intensify the outer V using the dark gray and as you do that, pull out a small wing.
Once done, take a large blending brush and blend out everything and just use the excess color on the outside as a transition color.
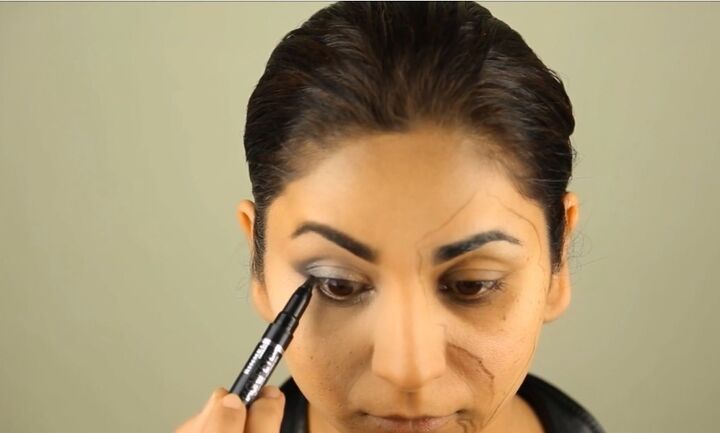
7. Apply eyeliner
Line the waterlines of your eyes and then take this flat shader brush to smudge out the color and intensify the outer V as well as the wing.
Next, go in with a felt tip pen and pull out a small wing on your upper lash line to give that cat-eye look.
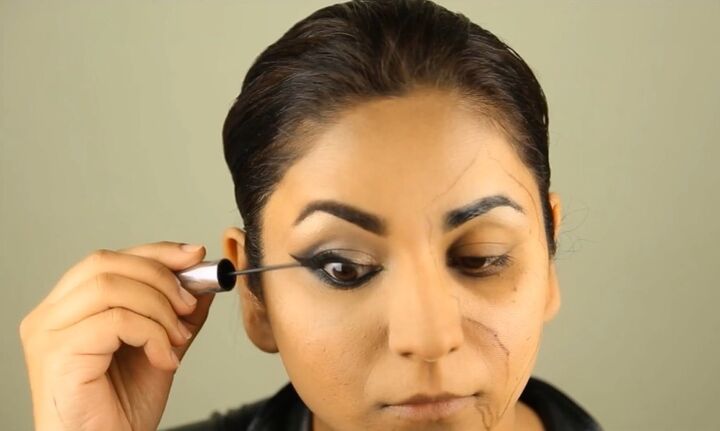
8. Apply illuminator and mascara
Use an illuminator to illuminate your brow bone as well as the inner corner of your eyes. Then curl your lashes and apply some mascara.
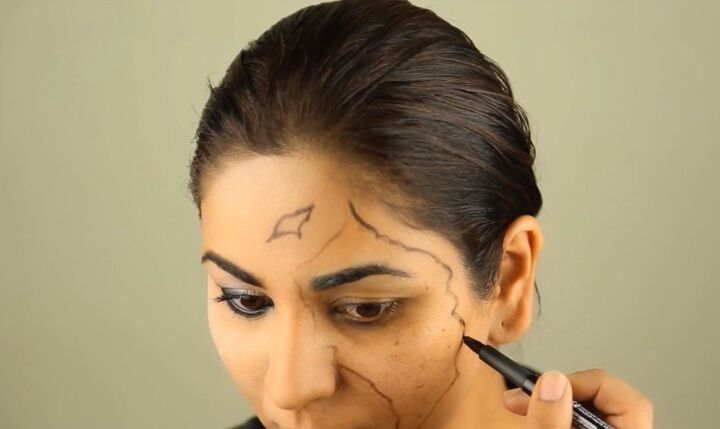
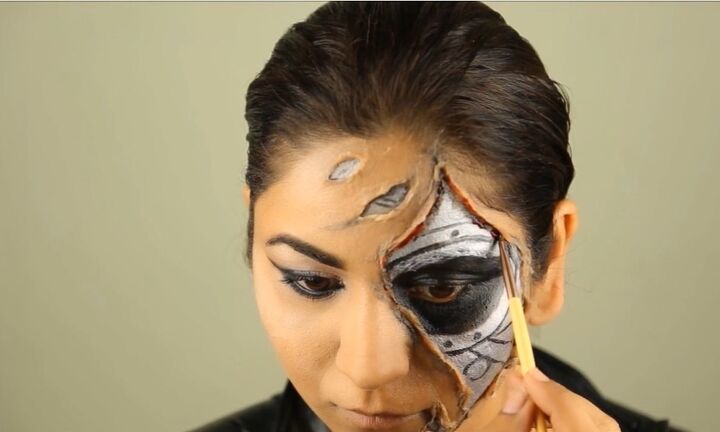
9. Draw around your eye
Moving back to the SFX side of your makeup, intensify the border that you initially drew with a felt tip pen. Also, draw a circle around your eye.
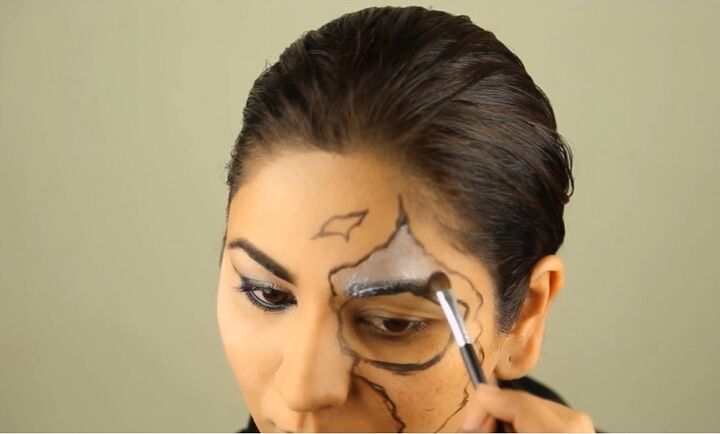
10. Apply silver makeup
Next, apply some metallic cream makeup within the borders to give the illusion of metal skin.
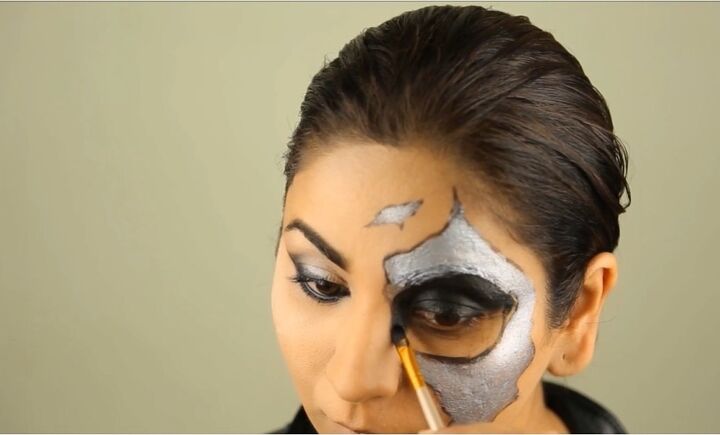
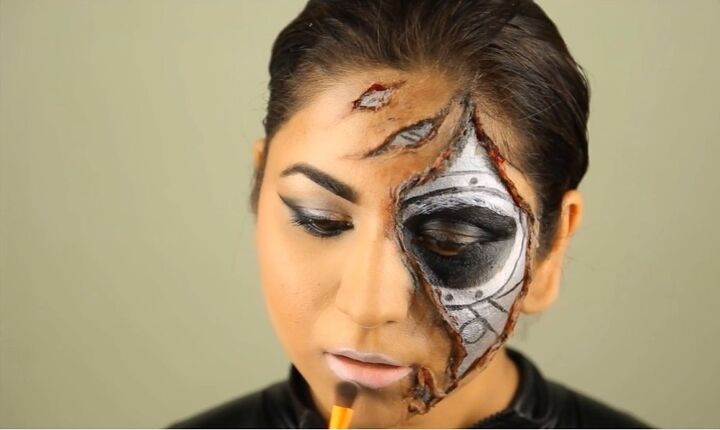
11. Apply black makeup
Use a regular cream gel liner in black within the circle around your eye.
Then, use the leftover black to draw small marks around the rest of your skin. This will give the illusion of skin that has charred or has some soot around it.
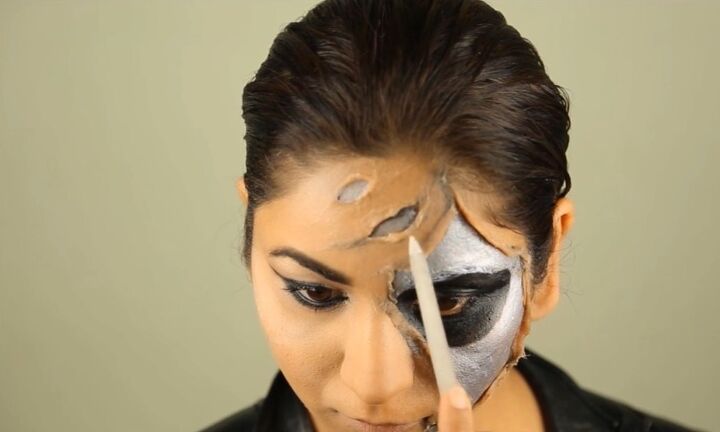
12. Apply fake skin
Apply some flesh fake skin (it is cotton mixed with some latex) around the border of the silver sections.
You can use any blunt tool to set the skin, I'm using a regular manicure tool to blend out the fake skin with my skin as well as to pull it out a bit.
13. Draw detail and add fake blood
Using black eyeliner, draw some lines as well as some nuts and bolts on the silver makeup.
Then, around the outline of the silver part, apply some fake blood. Mix it with a little bit of black gel liner to give the illusion of charred skin.
14. Paint lips
Paint your lips in a nude color and then outline them with a gray glitter color.
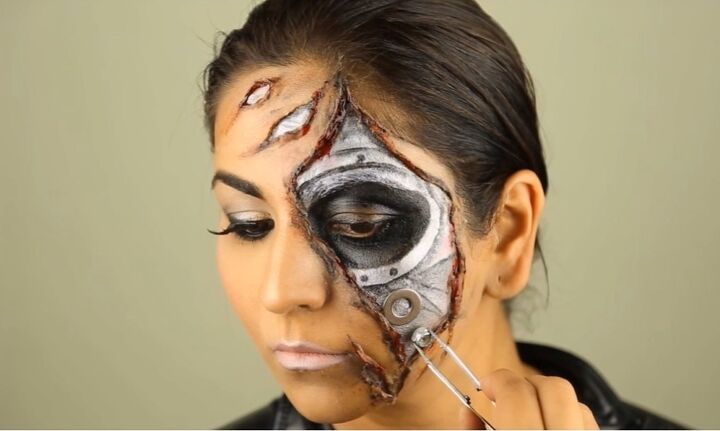
15. Attach nuts and bolts
Now take some nuts and bolts and fix them onto the silver part using some eyelash glue.
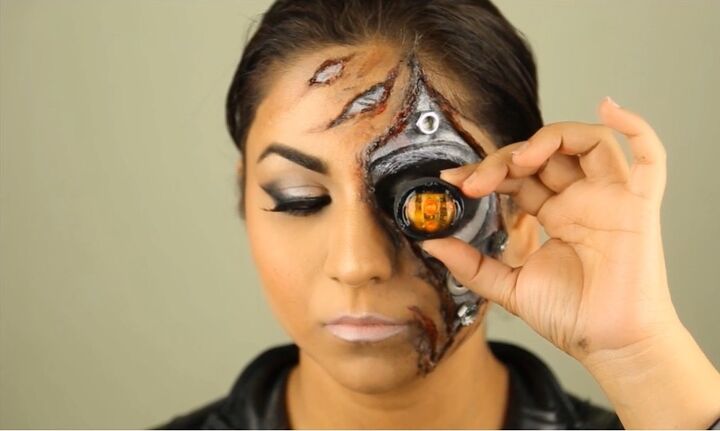
16. Attach fake eye
For your Terminator eyes, cut out a piece of sponge and make a circle right in the middle.
Then, pop an LED light in the middle and add some double-sided tape on the back. Paint the sponge black and now turn on the light and fix it on your eye.
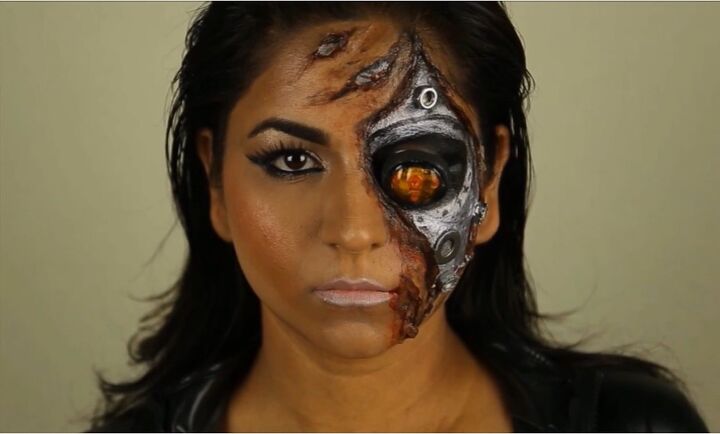
Completed terminator makeup look
Here we have the finished Terminator Genisys look.
I am not a special effects makeup artist and yet I was able to recreate this realistic and authentic robot look. I’m so happy with it and I hope you’ll try it out for yourself!
Products used:
- Maybelline Dream Liquid™ Mousse
- Physicians Formula Bronzer
- Maybelline Face Studio Master Conceal
- Laura Mercier lose setting powder
- Covergirl Tru Blend Fixstick Concealer
- Rubie's Costume Co Silver Cream Make-Up
- Special effects Fake skin and fake blood
- Physicians formula bronzer
- MAC Paint Pot in Soft Ochre
- Maybelline Eye Studio Lasting Drama Gel Eyeliner
- Smashbox cosmetics Full Exposure Palette
- Rimmel London Magnify'eyes Kohl Kajal Shadow Liner
- e.l.f. Cosmetics Waterproof Eyeliner Pen
- Dose of Colours Bare with me
The author may collect a small share of sales from the links on this page.


Comments
Join the conversation
This is SO awesome and amazing! I can't believe you're not a pro! It looks great! Thanx for sharing!
So easy and looks Fab😎💙