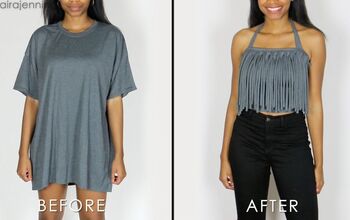
DIY: Fringed Top

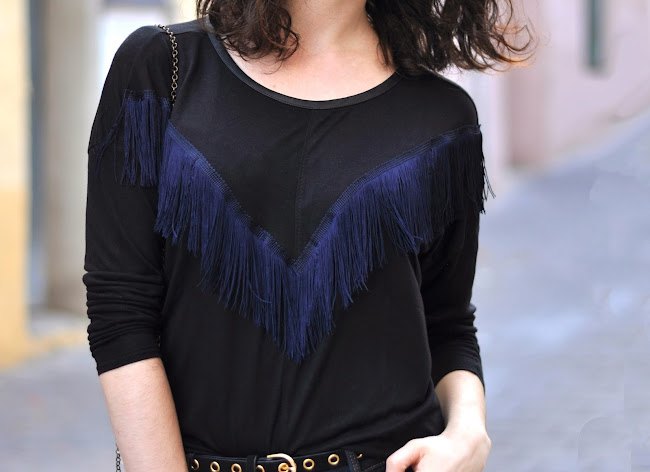
Easy DIYs that have a nice result are the best; you don't need a lot of materials and time and you end up having a lovely new garment to wear. Today's tutorial is one of those easy projects to do in less than half an hour; it just haa 4 simple steps. You saw the result some days ago in this look, and I've been wearing it a lot lately. ¿Are you going to fill your tops with fringes?
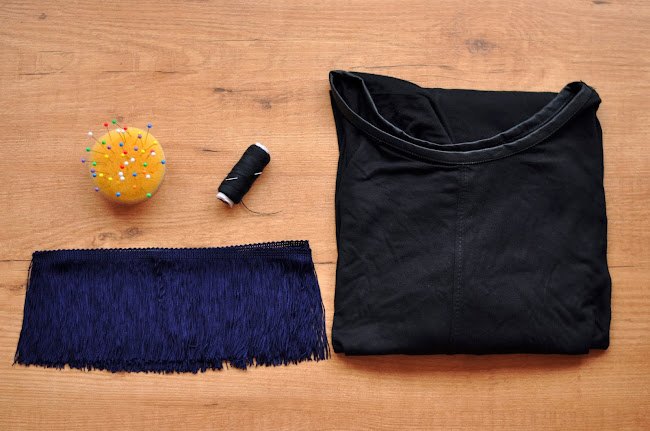
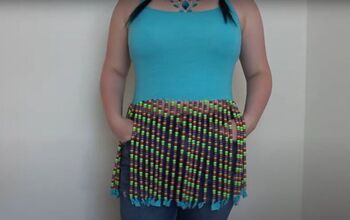
MATERIALS
- Top
- Fringes
- Pins
- Thread and needle
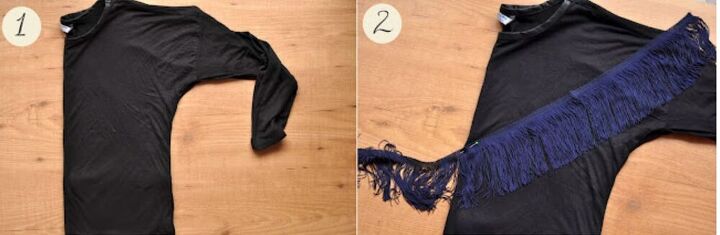
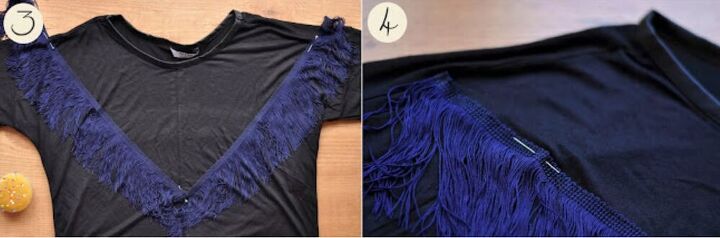
Fold the top vertically in half (picture 1), so you know the place where the peak of the V that we are going to form with the fringes is going to be. Fold the piece of fringes you have in half and fix the middle point of it with a pin to the top in the folded extreme we have created, about 10cm from the neckline (picture 2). Open the top, and create the V-shape on it fixing the fringes to the top with pins (picture 3). Now, to finish, it's time to sew the fringes to the fabric(picture 4). I've done it by hand, but it can be also done with the sewing machine. Be careful with the endings of the fringed ribbon when sewing them; fold them to the inside and sew. Pay attention also to the peak of the V-shape, and fold it carefully to look nice when sewing it.
The author may collect a small share of sales from the links on this page.


Comments
Join the conversation